Removal of Vibration Damper
Old Fogey UK
Expert Adviser
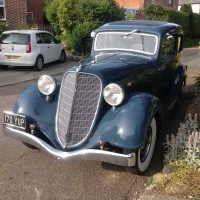
I'm trying to take off the vibration damper without removing the engine from the car on my 1934 8.
The Hudson shop manual says to use a special puller that I haven't got. Because of the proximity of the frame cross-member, I can't get a conventional 2 jaw puller on it.
The ROC shop manual and also Geoff Clark say to knock it off from behind with a big hammer. The only place I can get to it with a hammer is at the bottom but it's very difficult to get a good swing on the hammer because of the oil pan.
I've tried driving wooden wedges behind it in various places and even inserted a steel bar between the damper and the engine block to lever it off.
I've hardly been able to move the darned thing.
What should I try next, please ?
0
Comments
-
I've got a 29 Super 6. In my entire restoration I used a propane torch and PB Blaster Penetrating Catalyst. In the case of the balancer its got a key as I remember and I alternated heating the pully around the shaft but avoiding the shaft then spraying it with the PB Blaster Penetrating Catalyst. Be advised the PB Blaster Penetrating Catalyst will burn nicely but not explosively so you've got be a bit carefull.
Initially I'd heat spray and cool over an hour period then I'd pull the plugs and take it out of gear, drop the flywheel pan and use my 3lb hammer and rotate the pully a few complete turns prodding the pully from the rear. Heat it back up, spray and do a few taps on the front of the pully and repeat heat, back, heat, front. I'll come off in pretty short order.
Jack0 -
How about a length of wooden 2x4 to clear the oil pan to get a better swing at the damper with the hammer. Just a thought.
Gook luck.
Lee O'Dell0 -
Why not remove the front engine mounting bolts and jack the front of the engine up far enough to get a puller on it?0
-
HUDSON MADE A PULLER FOR JUST THIS JOB I BORROWED ONE TO DO THE FIBER GEAR TO ALUM SWITCH IN MY 34 T CV 35 YEARS AGO IT WAS 2 LEGED WITH A SCREW THAT WENT THROUGH THE CRANK HOLE IN THE FRAME AND YOU USED A SCOKET AND RATCHET WITH AN EXTION TO TURN IT FROM IN FRONT OF THE CAR IF YOU HAD 2 ARMS WITH A HOOKS AND A WHEEL PULLER TYPE PULLER IT WOULD BE LIKE IT AND WOULD WORK0
-
I have used the 4x2 piece of timber with success, if you do use this method, keep rotating tne engine so as not to put too much strain on one section .0
-
Thank you very much for your suggestions on this.
The special Hudson puller isn't going to be feasible because they're non-existent over here - that's why the Railton Club shop manual says to use a big hammer.
Penetrating Catalyst sounds great but I don't think it's made it to Ye Olde England yet ! Besides, I'm a bit worried about what heat might do to the damper's rubber disks.
So it seems like it's going to be whacking it from behind with the big hammer and a length of 4x2 or jacking the engine up slightly to get a normal puller on the damper once it's sufficiently clear of the frame cross member.
If I were to go down the jacking the motor route, would I also have to loosen off or remove the rubber mounts at the sides and bottom of the transmission casing as well as removing the front engine mounting bolts ?0 -
Old Fogey-
Yes, do be careful of using excess heat. The rubber wouldn't stand too much of it, and besides, it would stink to high heaven! LOL!
Answer to your question is yes, loosen transmission mount as well, you don't need the excess stress on tranny castings, etc. Puller is the best way to go, even if you end up having to have one fabricated. Safest, surest method. As mentioned before, if you go the wood route, be careful as well. Believe it or not, you can easily end up bending, breaking, destroying more than you accomplish. The front seal could easily be damaged, although if memory serves, it's a rawhide or cotton seal and not the end of the world if you break the seal.
Keep us posted on your progress.0 -
I'll be trying the jacking up the motor/conventional 2 jaw puller method at the weekend. I have a 2 jaw puller that will fit over the damper if I can raise the motor 1 to 1 1/2 inches. I'll borrow a 3 jaw puller before then as that may be easier to use.
I'll communicate how I get on - whether it's smiles or tears !") 0
0 -
Dont hit hammer or bang thats a RAG [Rough AS Guts] way of wrecking the thrust bearing on the crankshaft go get a puller steady steady goes the monkey youve got all the time in the world Rob0
-
[attachment:1]C:\fakepath\DSC02156.JPG[/attachment]
[attachment:2]C:\fakepath\DSC02157.JPG[/attachment]
[attachment:3]C:\fakepath\DSC02158.JPG[/attachment]
[attachment:4]C:\fakepath\DSC02159.JPG[/attachment]
[attachment:5]C:\fakepath\DSC02161.JPG[/attachment]
[attachment:6]C:\fakepath\DSC02162.JPG[/attachment]
[attachment:7]C:\fakepath\DSC02164.JPG[/attachment]
[attachment:8]C:\fakepath\DSC02165.JPG[/attachment]
[attachment:9]C:\fakepath\DSC02166.JPG[/attachment]
Thanks everyone and a special hat tip to Uncle Josh !
I took out the front engine mounting bolts and loosened off the bolts on the transmission mount. That allowed me to jack the engine up so I could get a puller on the damper. With a 2 jaw puller, it came off in under a minute !
What I found inside was interesting (please have a look at the attached pics).
The crankshaft gear has 28 teeth and the aluminum camshaft gear has 56 teeth and there's no damage to the teeth - does this make them a matched pair ?
The 2 bolts behind the camshaft gear are just bolt heads and aren't countersunk.
The back face of the camshaft gear hasn't been damaged by the 2 bolt heads - looking at the pics of the back face, has it been suitably modified ?
The front face of the camshaft gear is scored and seems to have been coming into contact with the timing cover and a I guess this has been the source of the screeching/graunching noise I've been hearing when the engine was running.
So, what's the problem ? Are the gears a matched pair ? Is the canshaft gear mounted too far forward so it catches on the cover ? Are those 2 bolt heads to blame ? Any other suggestions, please ?0 -
Oh dear, I seem to have messed up the attachments. Sorry.
If anyone wants to see them, please email me on -
delythrh@btinternet.com
- and I'll forward them to you direct.0 -
If I remember correctly, there is a bushing that rides between the camshaft and the block, it is made of fibre, and deteriorates over time. It is directly behind the front of the cam, behind the widest part of the cam diameter.
It sounds like it has deteriorated, and is causing the cam to chuck back and forth.0 -
Walt here. Just got on my I-pad in Skagway, Alaska. Did your timing cover have the spring and block that rides against the timing cover inside metal plate? You also need the camshaft fiber spacer between the cam and block. Walt0
-
I have the spring loaded plunger that fits in the middle of the gear. Can't see a fiber washer - do I have to remove the plate behind the gear held on by 2 bolts to see it ? The Procedure Manual diagram is pretty hopeless for trying to identify what's there.0
-
Sorryy to say, but cam must be removed to install the fiber spacer. Some have tried to cut it and slide it over the cam end, but that is a bad idea because the pressure that is on it, can throw it off. Walt.0
-
May be an idea to check the width of the gear, if my memory serves me right, 1934/5 used a 7/8" wide gear the later ones were 1".
If the new one is 1" it may rub against the timing cover, what you may have to do then is used more gaskets on the cover to clear for the wider gear.
Just a thought.
The Railton guys may have made the gear to suit the wider crank gear.!!!0 -
Both the gears are 1 inch wide but Geoff Clark has looked at my pics and says the aluminum gear is the wrong teeth for the steel crankshaft gear and that I should be using a fiber gear with it.
The washer is actually a brass one which I believe is an acceptable replacement.0 -
And yes, Walt, the plunger rod and spring are present.0


This discussion has been closed.
Categories
- 37K All Categories
- 104 Hudson 1916 - 1929
- 19 Upcoming Events
- 91 Essex Super 6
- 28.6K HUDSON
- 559 "How To" - Skills, mechanical and other wise
- 993 Street Rods
- 150 American Motors
- 173 The Flathead Forum
- 49 Manuals, etc,.
- 78 Hudson 8
- 44 FORUM - Instructions and Tips on using the forum
- 2.8K CLASSIFIEDS
- 599 Vehicles
- 2.1K Parts & Pieces
- 77 Literature & Memorabilia
- Hudson 1916 - 1929 Yahoo Groups Archived Photos