rusty frame rails anyone?

Comments
-
So, if you told us before, I don't remember. What year, model and body style is this car?
And OMG, those are the perfect pictures to show prospective first-time Hudson buyers! The rot on the rails is in the most typical spot and exactly the same on both sides. Personally, I think that there are very few design flaws on any step-down, but this area is the most prevalent to collect moisture on the inside of the frame rails.
And, I might add thatsalotta work, right there. Done this before? Might want to check Dan & Rambo's website and a recent post from Rob Fayette's PM convertible. Both have done some serious frame repair in these areas, if you need it. Very helpful to have a donor frame if available, but doable without.
Good Luck and keep us posted. Oddly enough, and I'm sure I'm not alone in this, but enjoy seeing the "befores" just as much as the "afters".
Also, usually we get descriptions, but no pictures. This post seems to have pictures, but no text! Maybe I should have responded just with a shocked look on my face?!:D0 -
I'm gonna guess, 'cause it's late and I'm still awake.
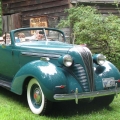
How about '51 Hornet (or Comm.) Coupe? Actually, pretty sure about the coupe part. Big trunk opening and it's not a 'vert. Then again, it might be a HLWYD.
Speaking of HLWYD, that vertical brace that runs from the rear deck to the wheel well (about 1-3/4" wide and 7" long) and 3/16" thick): I thought that was convertible/HLWYD specific? Is that right? Or was that on all big-deck-lid cars?0 -
Well, can't help myself.
More review: Let's see, rear perimeter rails, both sides . . . Entire trunk pan, Rear Floor Pan (excluding hump), and at least the driver floor pan . . . . and some deck lid lip looks a little iffey.
Yep, it's gonna take a lotta love!!:D0 -
Yes it is a great deal of work, but it was also a real pain to get the 51 pacemaker this far along. I thought about donor frame rails , but figured anything worth doing isn't going to be easy, and well why ruin a car with good frame rails...if you can find one? but shes coming along, I'm planning on building a road racer, something that I can stomp Ivan in during next years Carrera (joking Ivan) Hudson powered also. I'll keep you guys posted, I've got a ton of pics and video, so you guys dreaming about Hudsons take a look at what you need to look out for, then jump in with both feet.0
-
love and money0
-
Shoot man, I was kidding around mostly. I love it! Have you seen my project, lately?
And you are right! Anything worth doing is going to take a while and take a big commitment. If it was easy, it wouldn't be a big deal.
Yes, keep us posted! And save another HUDSON!0 -
rdmontez wrote:love and money
LOL ROFL!!:D YUP! Been there, doin' that!0 -
commitment is right, I'm living in the shop now so I can spend more time working on it, from disassembly to what you see there took about three days steady work, Believe it or not I think it looks better now than it did when I purchased it. Every time I walk by it I think " man, she's almost done now"0
-
The repair of this type of damage is daunting, but can be completed with patience and a bit of metal shaping.
Check this link for a HOW to DO with pictures
http://hudsonrestoration1948-54.com/PDFFiles/Restoring%20the%20frame%20on%20a%20Stepdown%20Hudson.pdf0 -
Rust never sleeps!:mad:
I feel your pain.......The deeper I dive into the restoration of my coupe the more I realize that I took on a project that many buyers walked away from.
But this forum and the Hudson club members always offer encouragement, and it keeps me going. AFter a year I still have my eye on the prize.0 -
rdmontez wrote:Yes it is a great deal of work, but it was also a real pain to get the 51 pacemaker this far along. I thought about donor frame rails , but figured anything worth doing isn't going to be easy, and well why ruin a car with good frame rails...if you can find one? but shes coming along, I'm planning on building a road racer, something that I can stomp Ivan in during next years Carrera (joking Ivan) Hudson powered also. I'll keep you guys posted, I've got a ton of pics and video, so you guys dreaming about Hudsons take a look at what you need to look out for, then jump in with both feet.
Ouch - looks all too familiar to my 49! But my frame rails weren't so bad") If you had a 4 dr I'd say go find a donor and send this one back to the field!
If you had a 4 dr I'd say go find a donor and send this one back to the field!
Sorry - looks like they broke the image embedding, the link should work though...
[IMG][/img]http://www.49c8.com/images/work/Trunk/TrunkRepair_4med.jpg
I didn't do a restoration, so took some poetic license with the trunk pan - If you haven't spent any time on my website you really owe it to yourself to!
http://www.49c8.com/ -> Custom How To -> Trunk Pan
And there's also tons of pictures under the Restoration links.0 -
RD, good of you to publish these photos. They very graphically explain to the "newbie" where the Achilles Heel of our StepDowns lie. (And, they show where and what to look for when shopping for a Hudson).
It's a shame that some enterprising Hudsonite who's handy with fabrication, couldn't offer to supply these frame rails ready-made (like a patch panel for sheetmetal). I could envision a frame or buck being made, the heavy-gage metal being purchased, and then any portion of the rear frame rails being welded up and shipped on demand.
Of course, easy enough for ME to suggest, since I can't fathom how one would go about doing this!0 -
trust me guys I've dealt with worse then this before, and to be honest it was a nice surprise to find out they looked this good, I will also be taking a little license,
not a restoration either, so I'm excited to get this going, and yes it would be nice if someone would re-pop these but then you might as well drive a chevy. I've been pretty fortunate where others havent in this economy and I've got some cash to play with, that and having you guys to pest with questions helps out a ton.0 -
I wonder how many cars for sale described as an easy fix, are in reality one of these?
Lee0 -
Hope this helps! I took 2 flat pieces of sheet metal that I made them into channels of the correct dimemsions and curves using a cardboard template I had made. Making templates help a lot. The outer channel would nest into the inner channel when attached to the car. One channel I curved outward and the other channel I curved inward. I then welded the first piece (outer fitting channel) to the car's body and then welded the other channel into the first channel to form a box. Very strong!
Peace,
Chaz0 -
Chaz-
What kind of machine did you use to fab those pieces? Could it be done with one of those hand-operated rigs from Eastwood? Never have tried my hand at this stuff, but would be fun to try after I retire, if it didn't cost a mint to tool up for it.
I hear ya on the cardboard templates. I put a 283 Chev V8 in a '36 Chev pickup when I was in high school (circa 1966)- needed motor mounts, didn't have any welding equipment, so made them up in cardboard and took them to an old machinist. Figured he'd give me a bunch of guff about how crude they were, but he looked at them and said "I often make cardboard templates first, and these are as good as any I make. They'll be fine." He made me some very nice motor mounts from them, that fit perfectly.
BTW, he was a Hudson guy, and tried to sell me my choice of two very solid (and running) '37 Terraplace coupes for $200 each. Knowing a bad deal when I saw it, I was smart enough to pass. :rolleyes:
Mike0 -
Chaz
Another super solution to a vexing problem!
Bravo0 -
Oh man! You wouldn't believe how much of the original frame I had to replace on this car building each section from scratch. On the other hand if you are building a Hudson you probably would know.

I used a stretcher and shrinker with a home made stand for both. I don't like switching back and forth. Uses up too much time. If you are doing any kind of sheet metal work they really come in handy.
I marked both edges of the "C" channel in 1 inch increments so I could alternate back and forth with my stretching/shrinking. Example: press down to apply change to metal and go to the opposite side and do the same procedure. By alternating back and forth it minimizes any warping. Is that clear? Sorry no video!
BTW, the pic shows one of the fenders I am making for my Radio Flyer wagon.
Peace,
Chaz0 -
Hudson308
I am interested in your donor car I sent you a pm0 -
My 52 was not anywhere near that bad. I stripped it down and cut out the outer pannel from the back hump around the back and up the other side. I reinforced a few bad spots then used two sections of metal and welded them into place. Sealed, painted and reinstalled the fenders. Nothing like what you are doing.
I have saved the hard work for rebuilding the body and frame on the 39 Martzz.....:D:D0 -
More patching! Much more to go!0
-
What thickness is the rear frame metal?? Good work, very interesting and a real nice job. thanks, Bob0
-
Wyoming frame rust ,notice some of the paint is gone !0
-
Bob,
I used 14 Ga. (.075) paint grip sheet metal on my frame. I guess 16 ga. could also be used which is a little thinner. I purchased this from my local sheet metal fabrication shop. The "paint grip" is like a primer/sealer. CRS can be used but it is not coated and rusts like crazy around this area. They can also make it into the channel shape for you if you give them the dimensions.
Safety Note: Do not under any circumstances use galvanized metal for safety reason. The fumes from welding galvanized metal can permanently damage your lungs.
Peace,
Chaz0 -
good thread guys!!!0
-
Please keep the info and pics coming. I just aquired a 1950 Hudson Super Six with rusted frame behind the front wheels. I really need the repair info and just knowing that these can be fixed helps me a lot !0
-
1950 Super Six was left behind and I got it for free. Just tow it off and apply for a lien sale title. I love the car and the challenge of getting her back on the road. To be able to drive her with pride is my goal. I am New to this site. I am in Southern California, Victorville area. Now to see how to upload photos to this site. ?? hummmm ?0
-
This Super Six was last registered in Calif in 1960. Lots of rust, water pump, fuel pump, radiator, inner fender, head lights and tail lights are not with the car any longer, maybe sold for parts in the past.
It will be a challenge I know. The frame behind the front wheels in rusted out on driver and passenger side. The rear tub seems to be good underneath. The drivers floor pan is rusted out. I have purchased a new floor pan for it. Lots of work to do here.0 -
Well guys, What do you think ? Is she too far gone or ?? I believe this car is fixable, like it has been said... like eating an elephant... one bite at a time. I guess I will know more when I start taking the fenders and panels off to see how the perimeter frame is or isn't.0
-
Jim Guinn could start you off with a way better body. Save you a ton of work. You could be moving parts over instead of welding....0


This discussion has been closed.
Categories
- 37.1K All Categories
- 121 Hudson 1916 - 1929
- 21 Upcoming Events
- 100 Essex Super 6
- 28.7K HUDSON
- 595 "How To" - Skills, mechanical and other wise
- 995 Street Rods
- 151 American Motors
- 185 The Flathead Forum
- 49 Manuals, etc,.
- 79 Hudson 8
- 45 FORUM - Instructions and Tips on using the forum
- 2.9K CLASSIFIEDS
- 612 Vehicles
- 2.2K Parts & Pieces
- 78 Literature & Memorabilia
- Hudson 1916 - 1929 Yahoo Groups Archived Photos