Plastic door handle and window crank escutcheons

railknight
Expert Adviser
I've been looking for some time now for replacement window crank and door handle green plastic escutcheons for my '53 Super Wasp sedan. Best I could do was find warped ones at Hudson swap meets that were not much better than the ones on my car. Thankfully, Eshelman Molding & Casting has now reproduced these sought after items in green, blue, red and ivory colors. They're a little pricey at $10.00 each, but considering the relatively small market for these Hudson escutcheons, that's not a bad price.
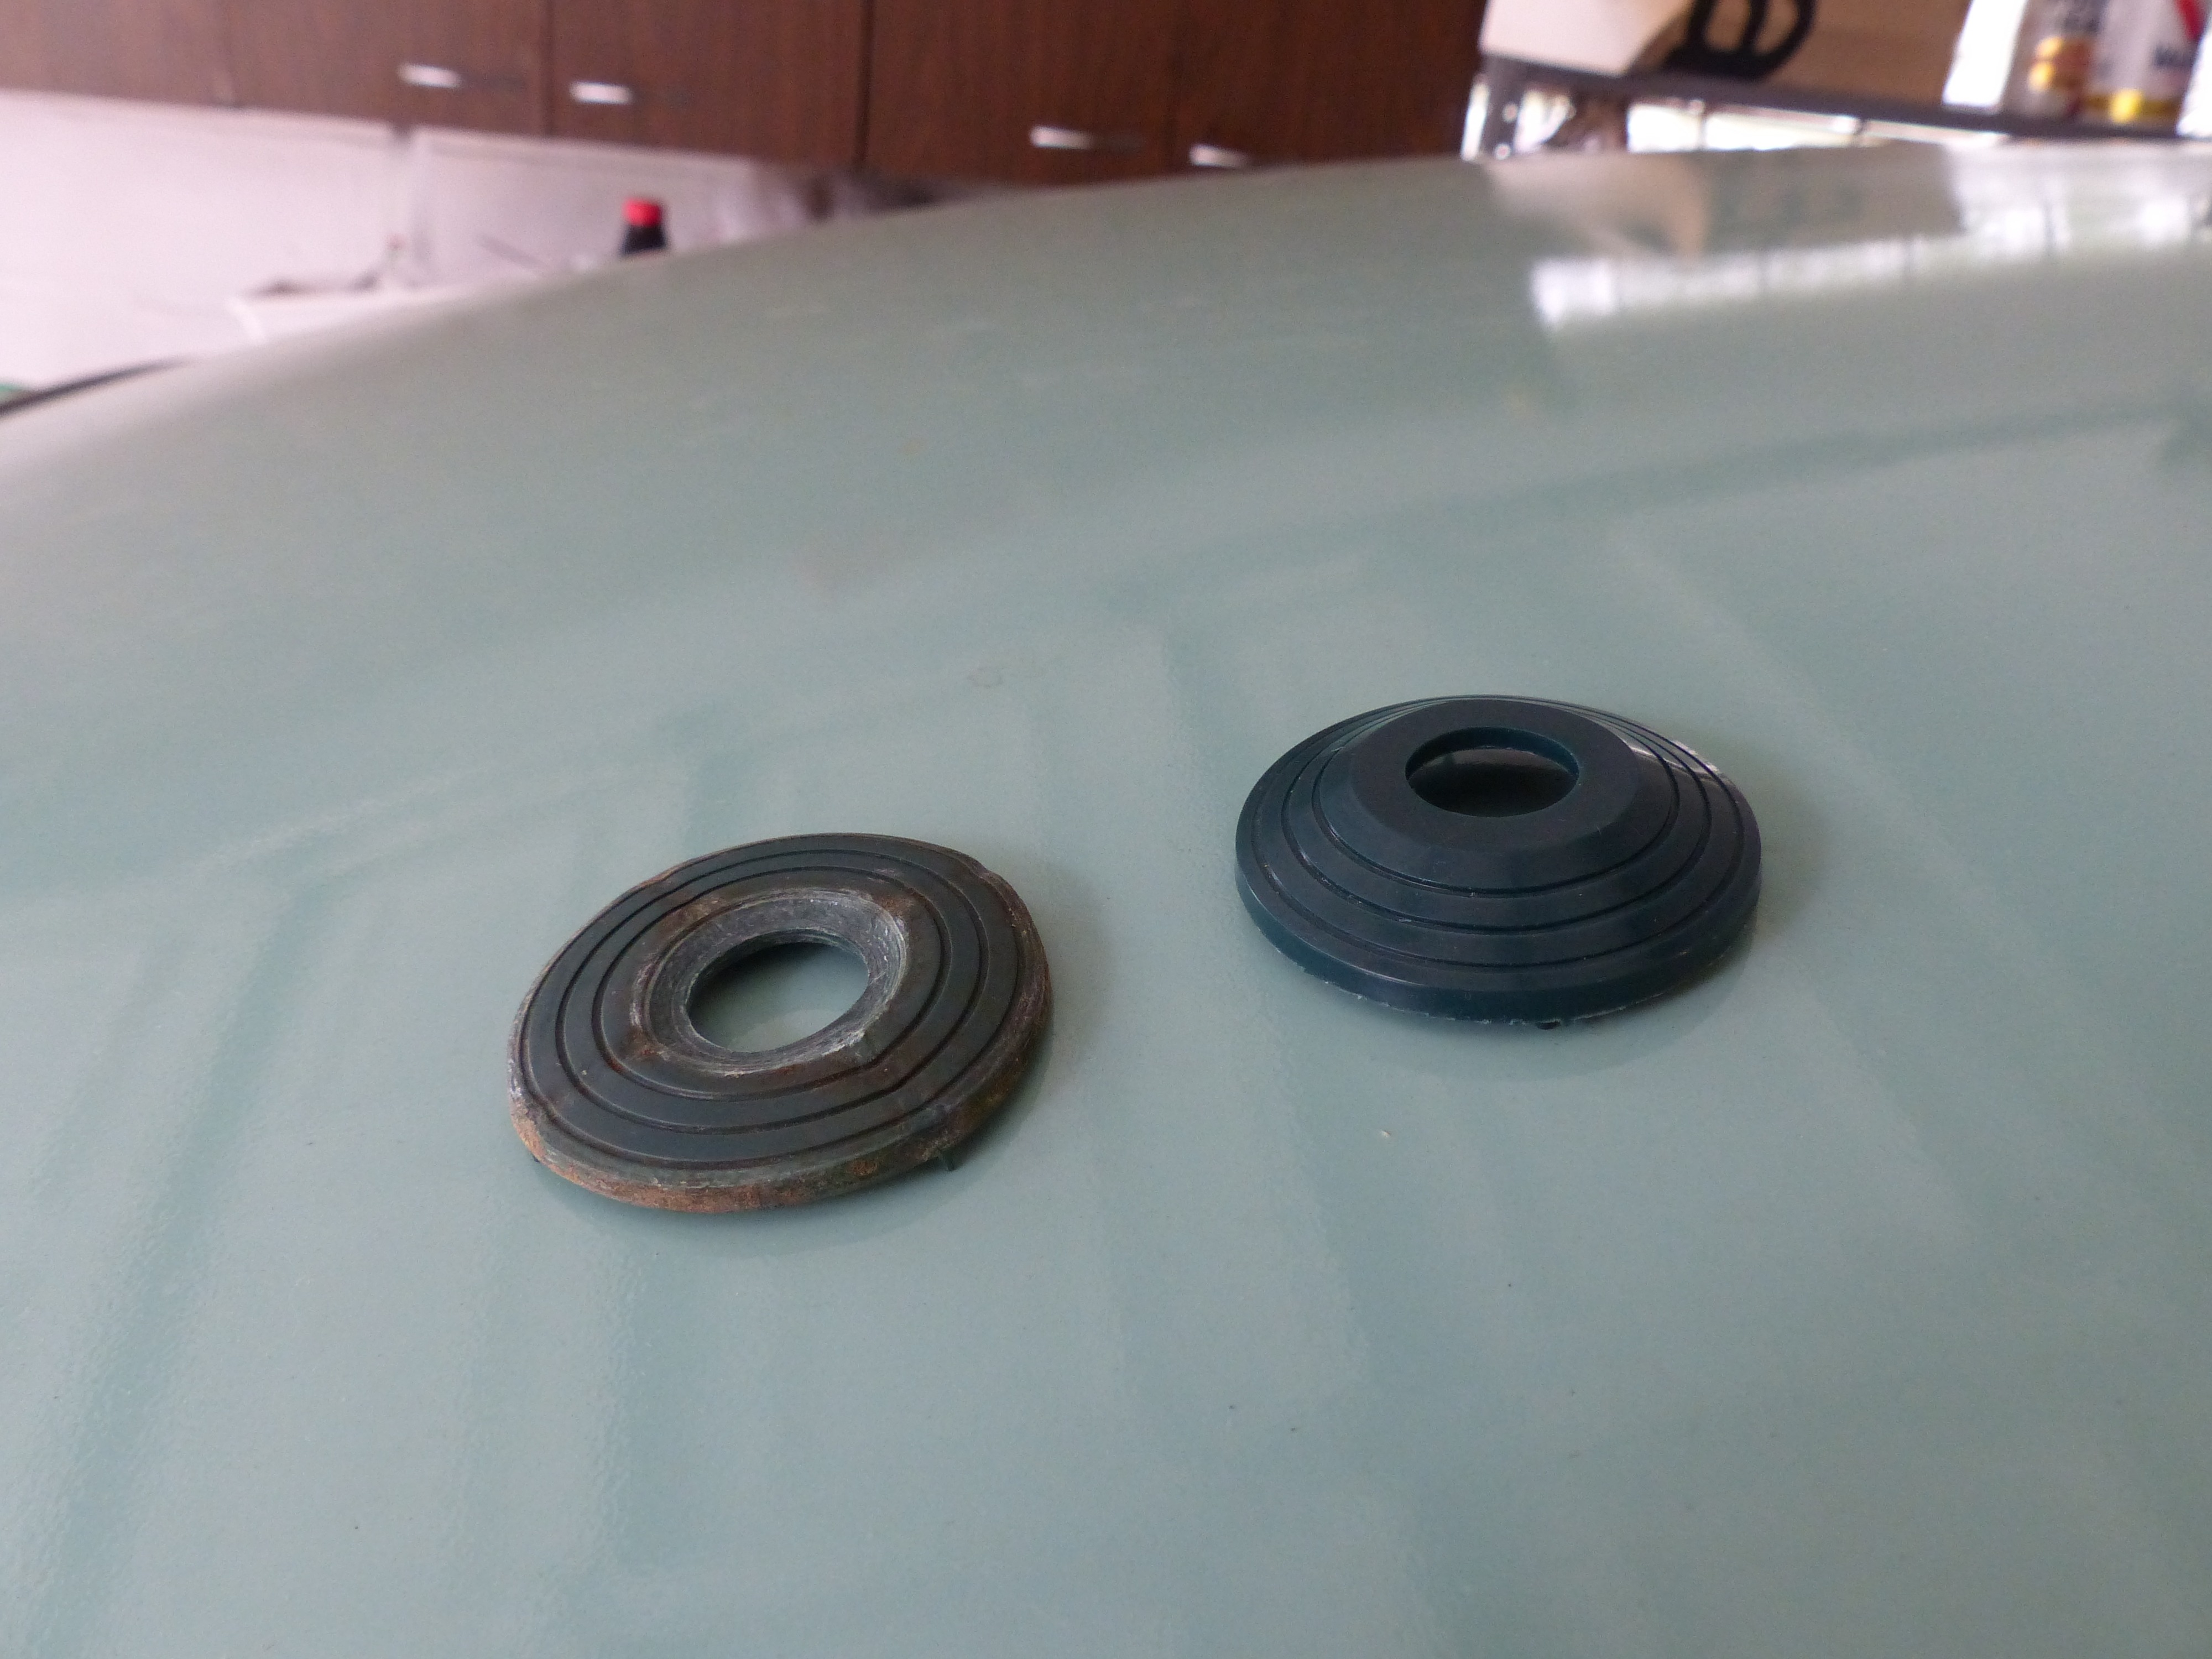
I started out by purchasing four green ones for the left and right front doors. I received them in the mail in about a week. Examining them individually showed them to be well molded with just a little flash that had to be trimmed from the edge using a single edge razor blade (an X-acto knife would be better). There is also a small spot that has to be removed where each escutcheon edge had attached to the molding tree (one had a small hole on the edge, but this wasn't an issue as I just faced it down where the hole will never be seen). After taking off the old, faded and flattened out escutcheons from my door handles and window cranks, I was pleasantly surprised at how well the new ones fit onto the handles and cranks. They just slipped right on with little to no snugness. Each escutcheon has four pins on the backside located 90 degrees apart just like the old ones and this keeps them from rotating against the inner door fabric. Replacing each one took about two minutes per escutcheon from pushing out the metal pin that holds in the handle and crank to driving it back in to finish the job (suggest placing something like a white sheet or cloth of some sort beneath the door you're working on just in case you drop the metal pin as it is rather small).
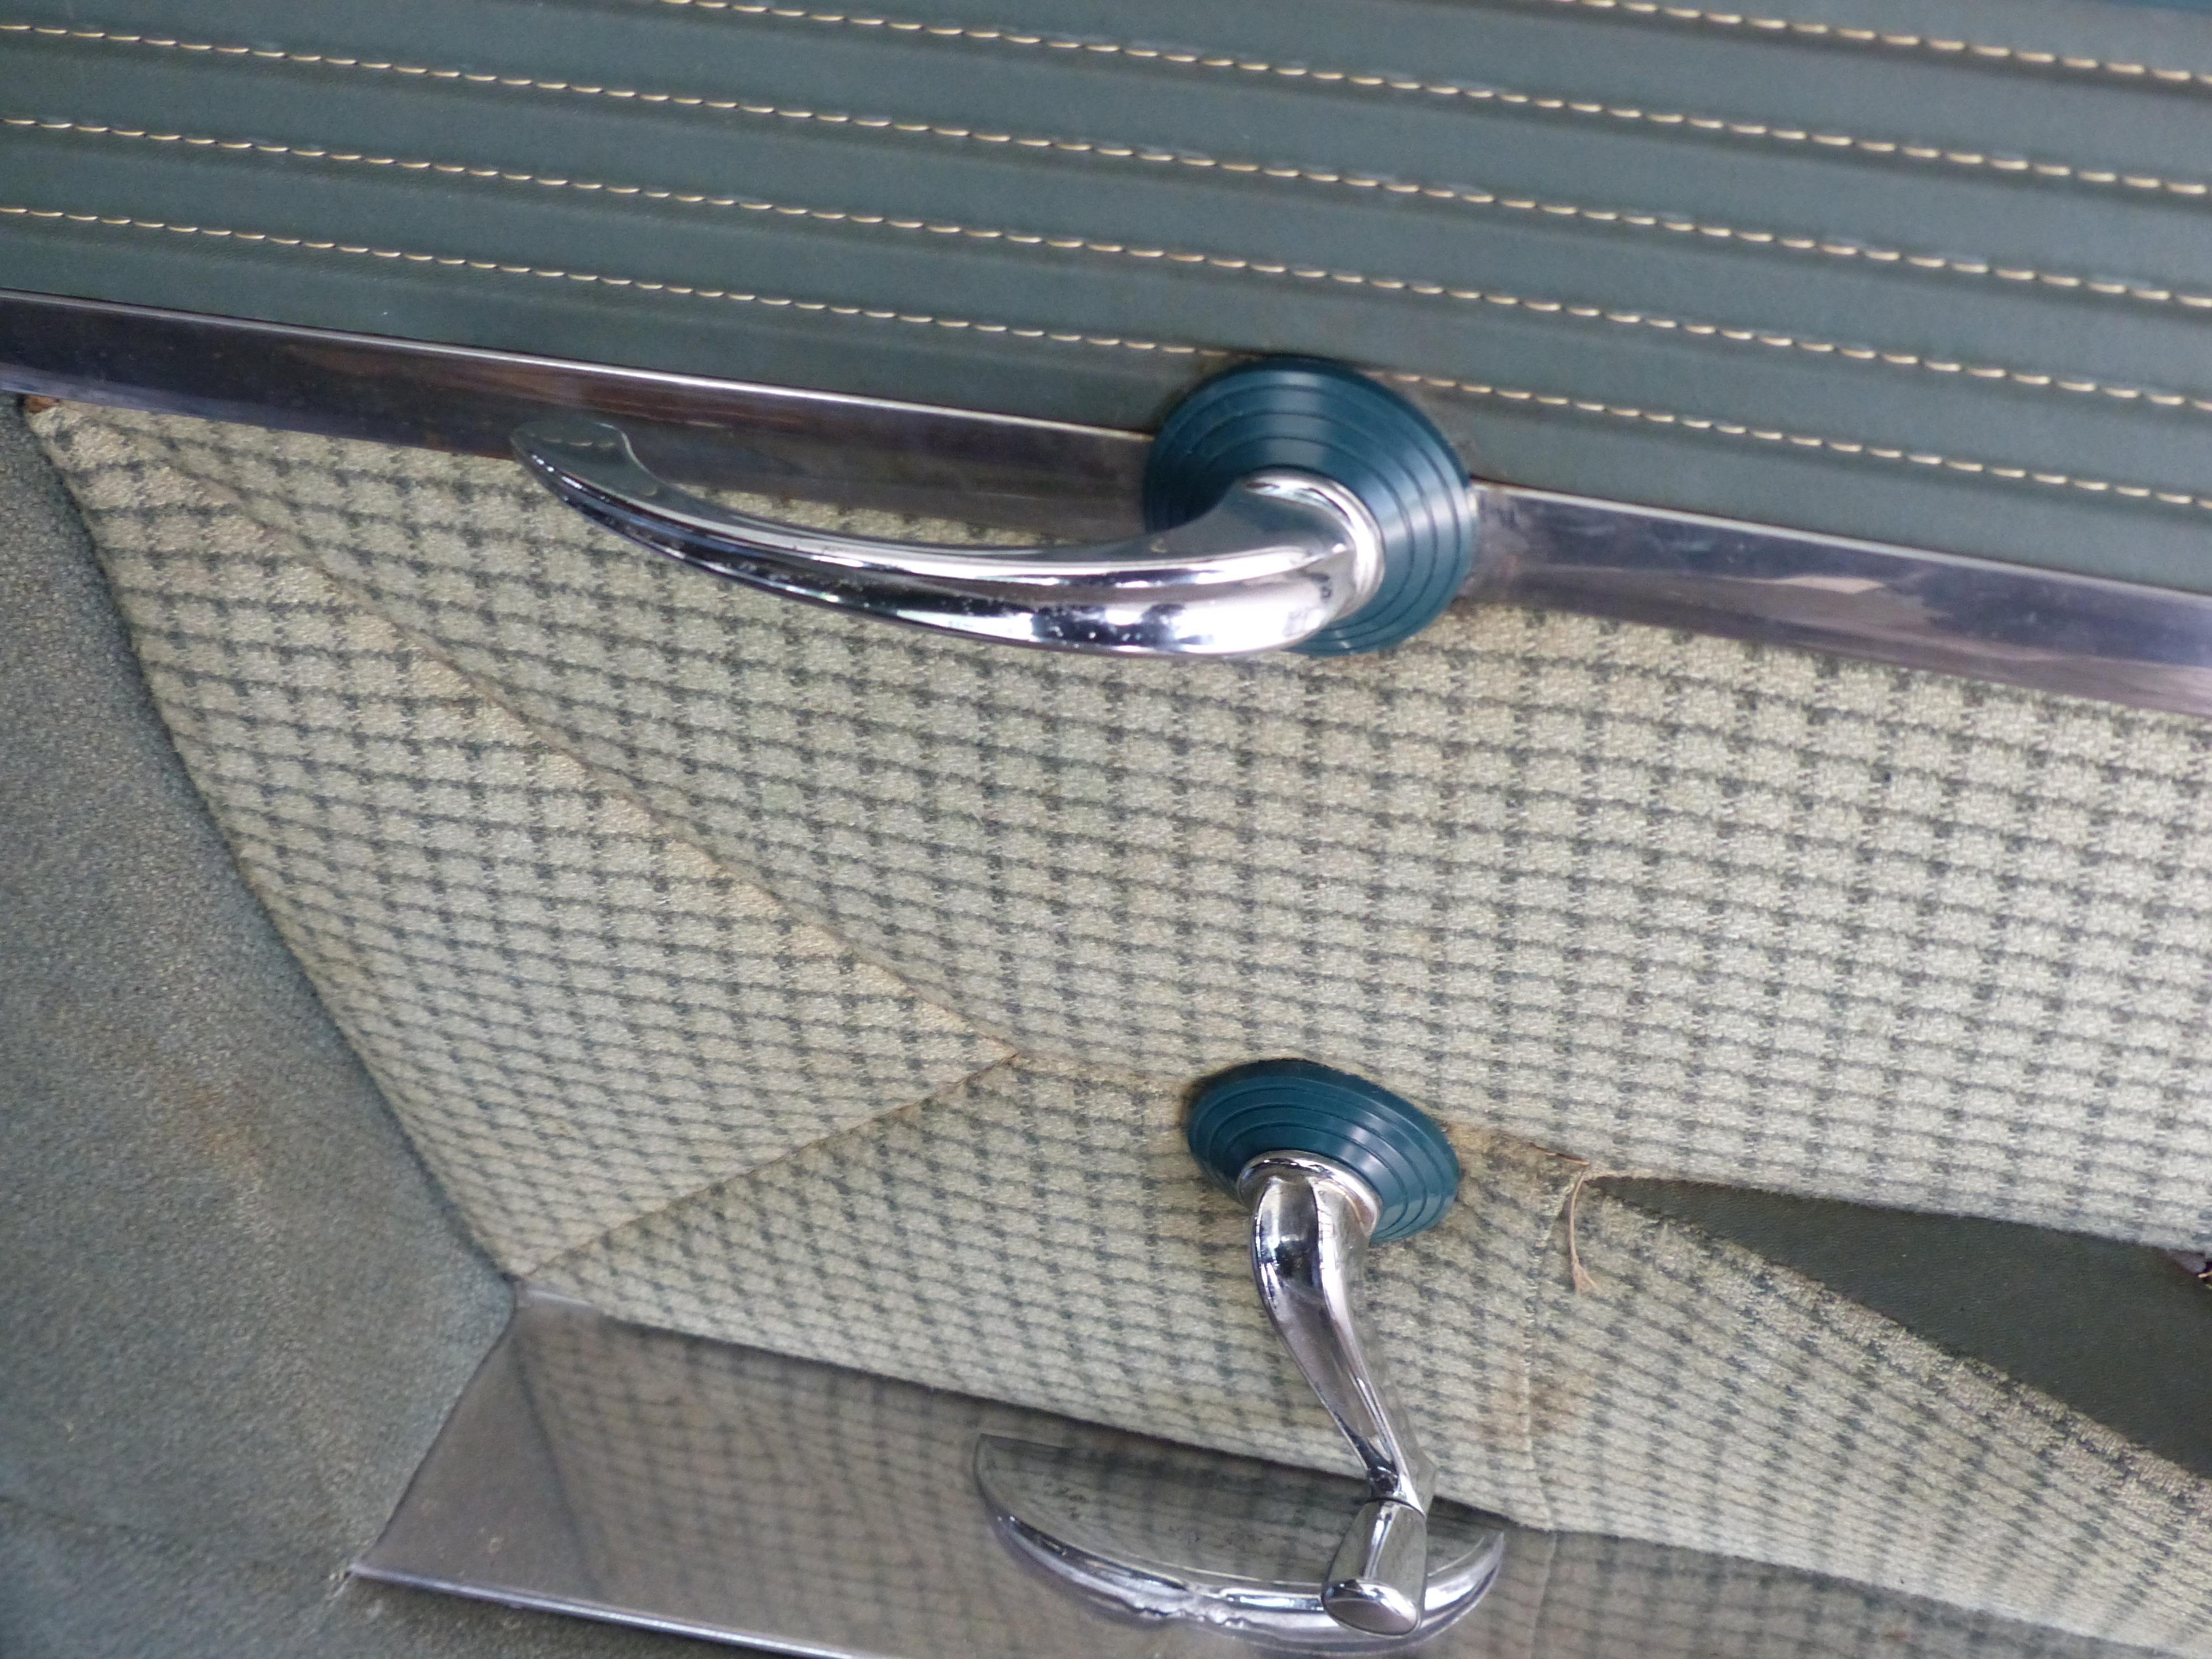
I then purchased the remaining four escutcheons for the back doors. The window crank escutcheons went in as easily as the front doors, but the door handle ones were a little difficult because of the horizontal metal trim and vinyl plastic that the upper portion of the escutcheons fit against. This required pushing against the escutcheon a bit harder to access the metal pin and then the same to replace it. There was no issue with the old one coming out as it was already broken, but replacing with the new one showed that the two upper pins on the backside of the escutcheon were pressing against the vinyl and could eventually scratch or tear into it. Examining the old ones I could see that the two upper pins had been removed before installation at the factory back in 1953 (90 degrees apart). So, I removed the new escutcheon for the door handle and cut the pins off and then pushed it into place to access replacing the pin. While doing this, I pushed a bit too hard and it cracked. So, exercise caution when replacing the escutcheons for the back door handles. The other one went in just fine. In conclusion, the new ones look great and are highly recommended. Photos are of an old one next to a new one and what they look like when replaced in the back door.


0
Categories
- 37K All Categories
- 117 Hudson 1916 - 1929
- 21 Upcoming Events
- 96 Essex Super 6
- 28.6K HUDSON
- 576 "How To" - Skills, mechanical and other wise
- 995 Street Rods
- 151 American Motors
- 181 The Flathead Forum
- 49 Manuals, etc,.
- 78 Hudson 8
- 44 FORUM - Instructions and Tips on using the forum
- 2.8K CLASSIFIEDS
- 609 Vehicles
- 2.2K Parts & Pieces
- 78 Literature & Memorabilia
- Hudson 1916 - 1929 Yahoo Groups Archived Photos