1951 Hudson Hornet 308 Charging System - Details
Alright, so I wanted to document what I did to get my charging system connected and updated. I was new to this before I did it and gathered information from all over to put it all together. Hopefully someone new will find this a little easier/central to reference. I used several posts from this very forum, as well as documents around the web .
Alternator
I've done a couple of alternator swaps in the past, so I just grabbed one I'm familiar with. I bought a GM style 12SI 78amp alternator from RockAuto. It was on closeout for $30. You can get any flavor you want though. The newer CS series are nice because they have internal fans, but to each his own. It's internally regulated, so I used one of the plethora of wiring diagrams on the web to wire it up.
Pulley
The alternator came with a smaller width belt pulley. I asked around on here and found some options. I got mine from Jegs. It was a Powermaster 1137 Generator Pulley.
Mounting
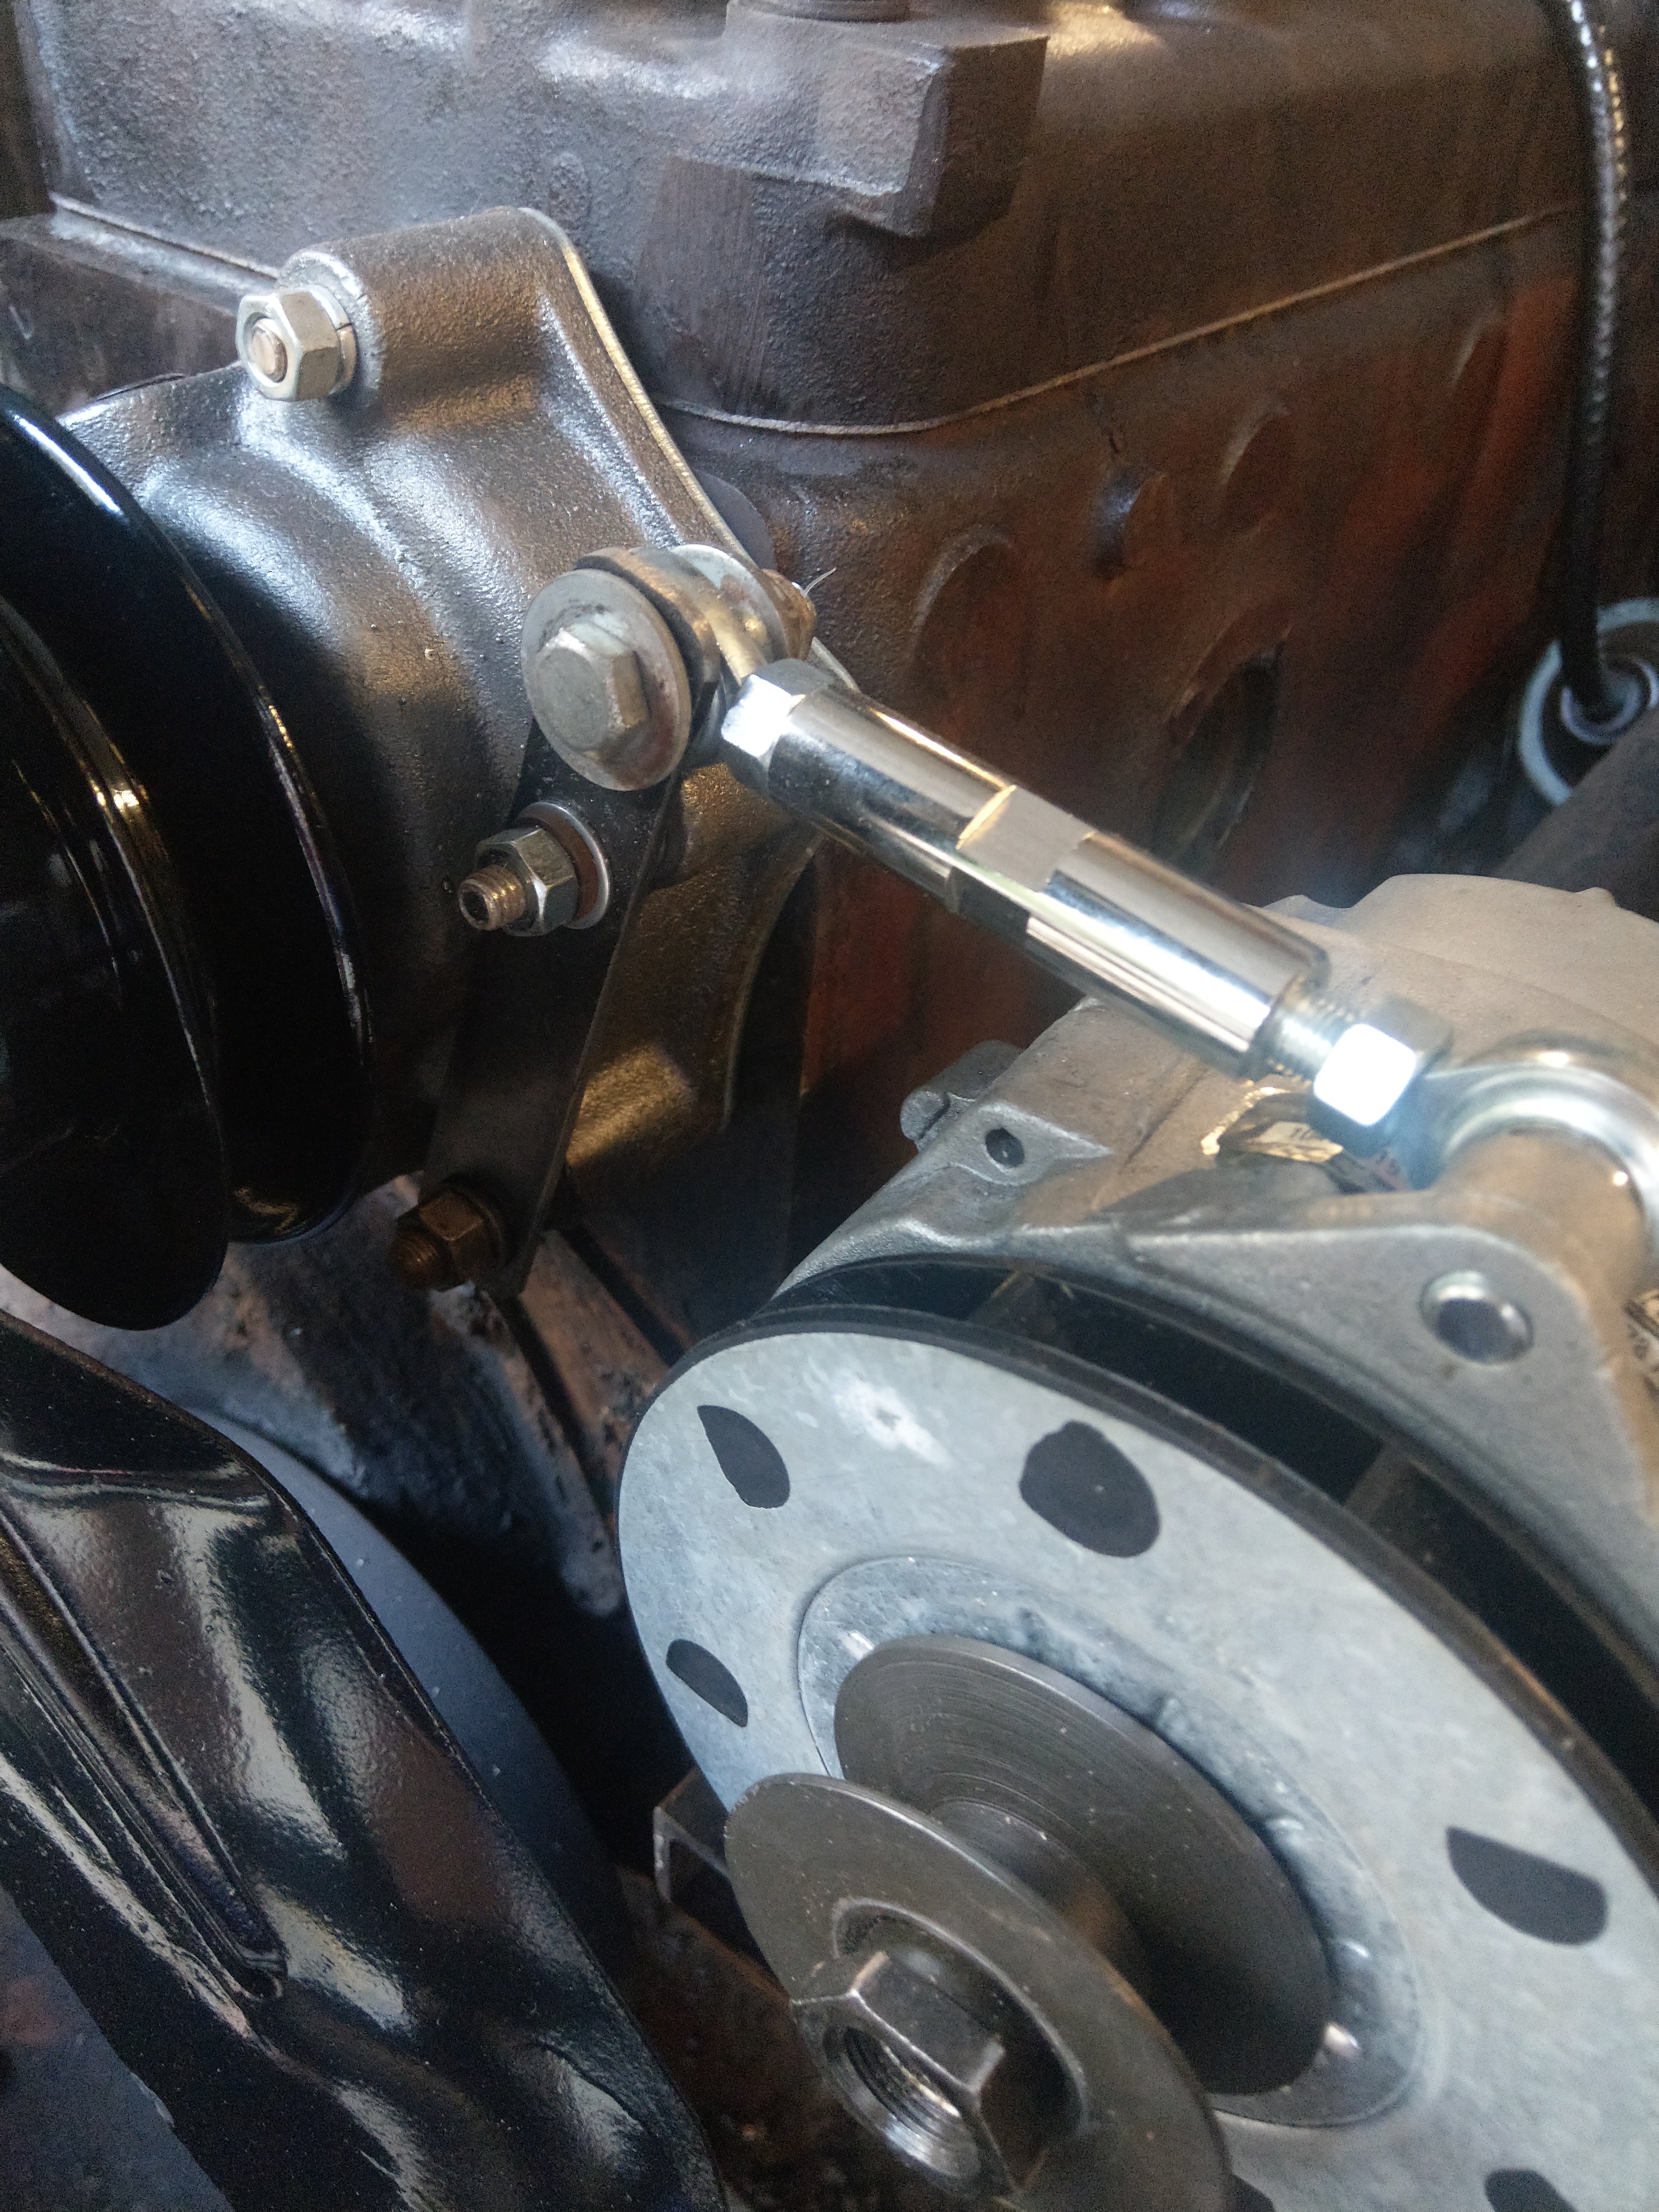
This was stressful. I didn't have any brackets from the generator, so I got the privilege of making them from scratch! I used some angle iron that I mounted to the block, and then bought a universal alternator mount to bolt to that. I used some straightedges, clamps, and good ol' eyeballs to line up the pulley. The adjuster was a bit of an issue here. The factory adjuster just didn't reach without mounting the alternator in a really weird position. I suppose I could have gotten an alternator with the tab clocked different, but I didn't know at the time. What I did was fairly simple. I took a piece of flat steel, drilled a hole for the existing adjuster bolt on the water pump. I drilled another hole for the next bolt up on the water pump. This let me install the steel as a solid, immobile piece. I drilled a third hole and installed a heim joint adjuster between this new piece and the alternator. I did have to tap the alternator tab in order to install the bolt.
Here's a good shot of the adjuster system.

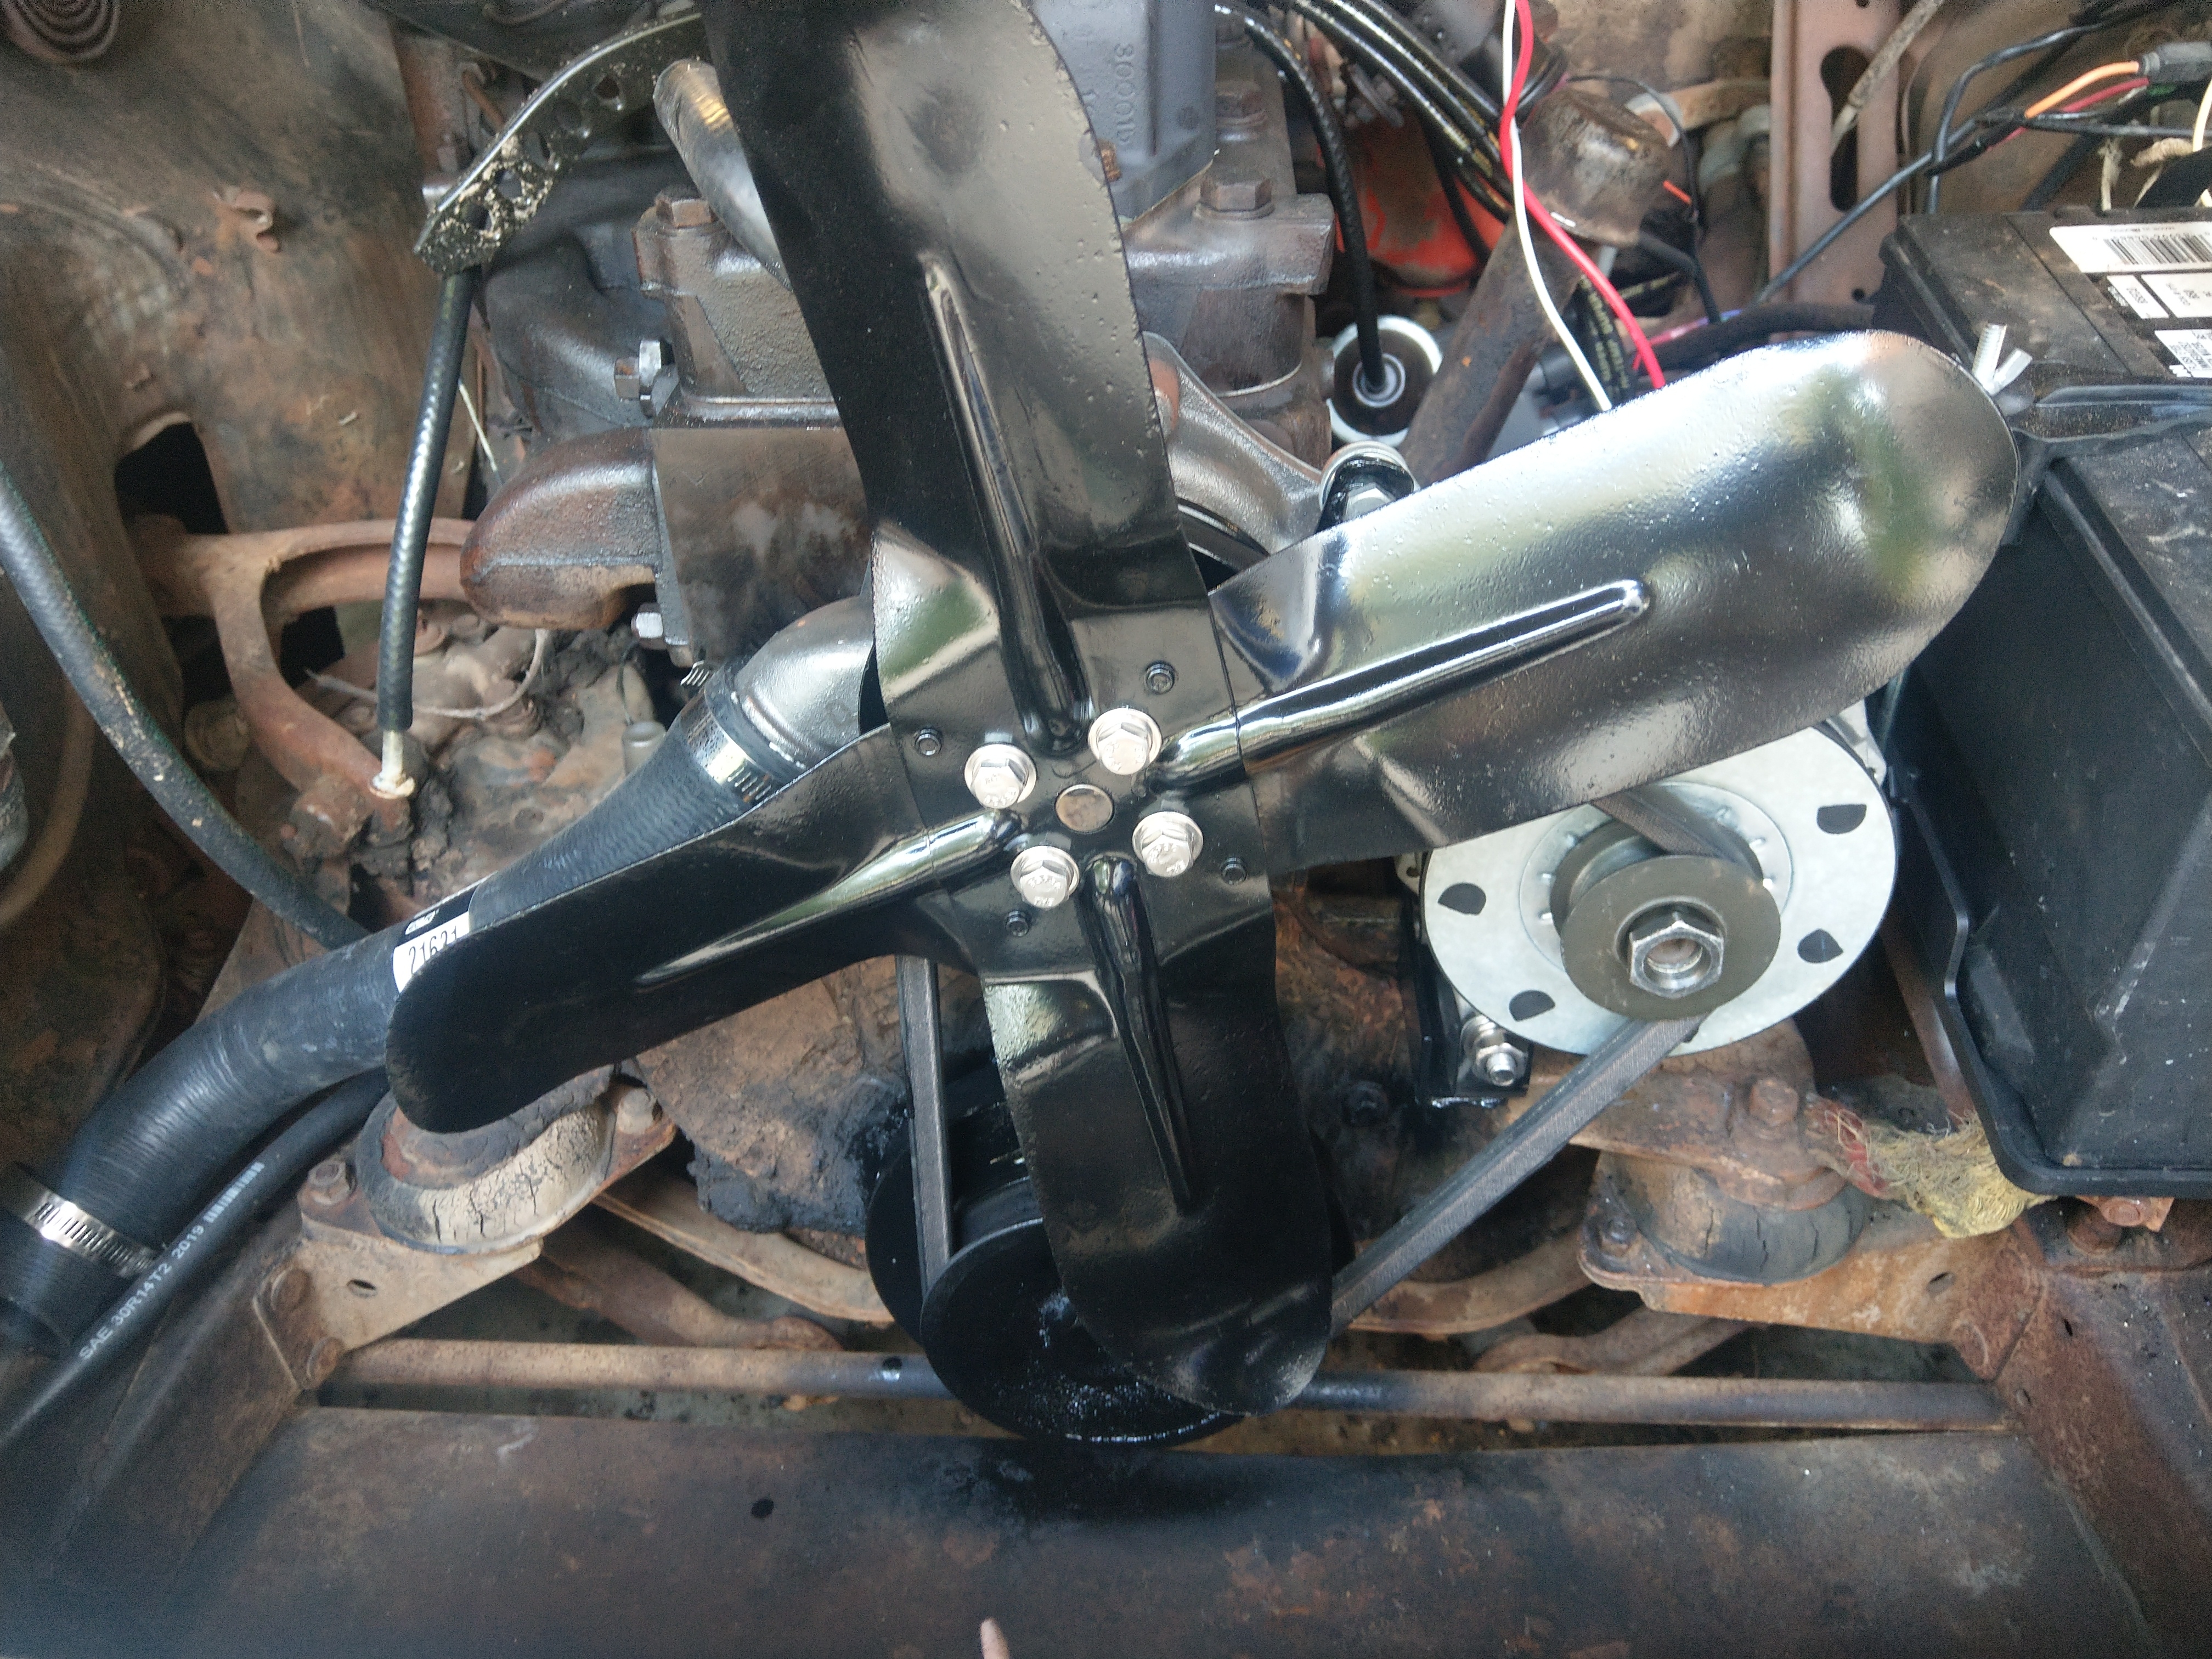
If you look close, you can see the mounting bracket on top of the angle iron.

Belt
This took some trial and error. Since I had a custom setup, I couldn't use the factory belt size, and apparently I suck at measuring for a belt! I did find that the B/BX series belts fit the pulley width. Mine ended up being a B38 which is a solid belt. The BX38 is the one that looks toothed. I'm not sure if there is a big difference, 20min is long enough to call it good, right?
Wiring
Mine is very basic and crude at the moment. I have a 10ga from the alternator to the battery, a 14ga from the regulator to KeyOn power, and a 14ga from the regulator to the battery feed (a jumper, essentially). Aside from the starting system, that is the only thing connected at the moment. I will eventually loom and wire everything properly, I just haven't made it that far yet.
I hope this helps anyone looking for some info on what can be done. Obviously this means I'm converting to 12v, but just in case it's not...I'm converting everything to 12v.
I suck at taking pictures while I'm working. I get kind of caught up in the task and forget until afterwards. If anyone wants to see anything specific or has any questions, just let me know!
Alternator
I've done a couple of alternator swaps in the past, so I just grabbed one I'm familiar with. I bought a GM style 12SI 78amp alternator from RockAuto. It was on closeout for $30. You can get any flavor you want though. The newer CS series are nice because they have internal fans, but to each his own. It's internally regulated, so I used one of the plethora of wiring diagrams on the web to wire it up.
Pulley
The alternator came with a smaller width belt pulley. I asked around on here and found some options. I got mine from Jegs. It was a Powermaster 1137 Generator Pulley.
Mounting
This was stressful. I didn't have any brackets from the generator, so I got the privilege of making them from scratch! I used some angle iron that I mounted to the block, and then bought a universal alternator mount to bolt to that. I used some straightedges, clamps, and good ol' eyeballs to line up the pulley. The adjuster was a bit of an issue here. The factory adjuster just didn't reach without mounting the alternator in a really weird position. I suppose I could have gotten an alternator with the tab clocked different, but I didn't know at the time. What I did was fairly simple. I took a piece of flat steel, drilled a hole for the existing adjuster bolt on the water pump. I drilled another hole for the next bolt up on the water pump. This let me install the steel as a solid, immobile piece. I drilled a third hole and installed a heim joint adjuster between this new piece and the alternator. I did have to tap the alternator tab in order to install the bolt.
Here's a good shot of the adjuster system.

If you look close, you can see the mounting bracket on top of the angle iron.

Belt
This took some trial and error. Since I had a custom setup, I couldn't use the factory belt size, and apparently I suck at measuring for a belt! I did find that the B/BX series belts fit the pulley width. Mine ended up being a B38 which is a solid belt. The BX38 is the one that looks toothed. I'm not sure if there is a big difference, 20min is long enough to call it good, right?
Wiring
Mine is very basic and crude at the moment. I have a 10ga from the alternator to the battery, a 14ga from the regulator to KeyOn power, and a 14ga from the regulator to the battery feed (a jumper, essentially). Aside from the starting system, that is the only thing connected at the moment. I will eventually loom and wire everything properly, I just haven't made it that far yet.
I hope this helps anyone looking for some info on what can be done. Obviously this means I'm converting to 12v, but just in case it's not...I'm converting everything to 12v.
I suck at taking pictures while I'm working. I get kind of caught up in the task and forget until afterwards. If anyone wants to see anything specific or has any questions, just let me know!
0
Comments
-
Great info. Thanks for sharing.
0 -
Nice job! Great idea on the adjuster as well.
Thanks!
Jeff
0 -
Thanks! I just hope it helps someone... Even if it is me 20yrs from now, lol
Ryan0
Categories
- 37K All Categories
- 115 Hudson 1916 - 1929
- 21 Upcoming Events
- 94 Essex Super 6
- 28.6K HUDSON
- 576 "How To" - Skills, mechanical and other wise
- 995 Street Rods
- 151 American Motors
- 180 The Flathead Forum
- 49 Manuals, etc,.
- 78 Hudson 8
- 44 FORUM - Instructions and Tips on using the forum
- 2.8K CLASSIFIEDS
- 609 Vehicles
- 2.2K Parts & Pieces
- 77 Literature & Memorabilia
- Hudson 1916 - 1929 Yahoo Groups Archived Photos

