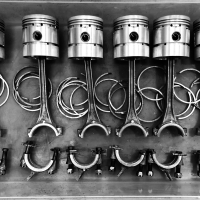
Piston Height to Block Deck
Does anyone know where the (1937) 212’s engine piston is at in relationships to the block deck?
I didn’t take any measurements before I disassembled the rods/pistons from the crank & removed them from the block. I remember the piston top was close to the deck but since I was recently looking at the impact quench has on an engine’s performance, I thought I’d ask.
I didn’t take any measurements before I disassembled the rods/pistons from the crank & removed them from the block. I remember the piston top was close to the deck but since I was recently looking at the impact quench has on an engine’s performance, I thought I’d ask.
0
Comments
-
It should be exactly level with the deck on t.d.c.0
-
If upon re-assembly I found it wasn’t exactly level with the deck height at T.D.C., what could be the cause(s)? Are there any relatively easy fixes if one found variances? How much variance would have been considered normal for the engine in 1937? Thanks!
0 -
There are several things that affect deck height.Piston compression heightConnecting rod center to center lengthCrankshaft stroke length (distance from crankshaft centerline, to rod journal centerline)Block deck heightThe rods usually get a few thousandths shorter, when resizing the big end. The block can get shorter from resurfacing. The stroke can change if the rod journals are reground off center. The pistons could be replaced with some that have a different compression height, or could be machined wrong.I would hope it would be within .005" when new.There probably isn't anything noticeable to be gained by making minor changes to piston deck height on an engine like this. But any of the parts mentioned above can be replaced, or re machined, to fix any problems.0
-
Ideally having all the pistons coming up to the same height, let’s say exactly even with the deck, would then allow one to have uniform quench area as well as combustion chamber size. Equalizing each cylinder to have similar power output & achieving a smoother running engine.
Sir Ricardo was a brilliant man and developed the idea of quench or squish along with the Turbulent Cylinder Head during the winter of 1918 - 1919. His combustion head design (which Hudson used in their engines) increased the power of side-valve engines and went on to be incorporated into many vehicle makers’ designs from the 1920’s through the 1950’s. His work on turbulence & quench are still key components in engine design even today.
While Ricardo was on the correct track with turbulence & quench, the size of the quench area wasn’t realized until much later. Today the ideal quench for a street engine is between 0.035 to 0.045 inch. So my splasher Hudson 6 engine would need a custom made head gasket since nothing is available to get to the ideal quench size.
0 -
What is your current quench measurement?0
-
Excellent question, but that’s where I’m not sure yet. I didn’t measure it before I pulled the pistons out and probably won’t measure / know where things are at until I put it back together. I am only honing cylinders & new rings along with all the valve train work I’ve been doing. Ultimately trying to avoid a full rebuild unless needed.
0 -
You could calculate it if you know the piston deck height and head gasket crushed thickness measurements, given that the squish part of the combustion chamber is flat with the head surface.
0 -
That’s true. I’ve been told that the piston should be right at level with the deck, see above. I figure I’ll end up installing the rods & pistons then measure each piston at TDC to see where it’s at vs the deck. Hopefully there isn’t too much variance from piston to piston but one never knows.
0 -
Sorry I forgot you'd pulled out the piston assembly! What did you decide about that big-end that showed a little damage?BigSky said:That’s true. I’ve been told that the piston should be right at level with the deck, see above. I figure I’ll end up installing the rods & pistons then measure each piston at TDC to see where it’s at vs the deck. Hopefully there isn’t too much variance from piston to piston but one never knows.
0 -
stick a rod and piston back in and measure it, it's not hard to do, you don't need rings on the piston.0
-
I wouldn’t be surprised if that tiny delamination has been there for decades, if not since new. It’s a pretty small spot & everything around it is solid when I picked at it, so I most likely will just use it as is. I really don’t want to get into having to get babbitting done, that’s pretty dang expensive.
Thanks for the tip, I’ll have to drop one in the cylinder & see where it’s at. Does one need to put the nuts & bolts on and torque Everything back together around the journal? Or can I get a decent reading without doing that?
0
Categories
- 37K All Categories
- 117 Hudson 1916 - 1929
- 21 Upcoming Events
- 96 Essex Super 6
- 28.6K HUDSON
- 576 "How To" - Skills, mechanical and other wise
- 995 Street Rods
- 151 American Motors
- 181 The Flathead Forum
- 49 Manuals, etc,.
- 78 Hudson 8
- 44 FORUM - Instructions and Tips on using the forum
- 2.8K CLASSIFIEDS
- 609 Vehicles
- 2.2K Parts & Pieces
- 78 Literature & Memorabilia
- Hudson 1916 - 1929 Yahoo Groups Archived Photos


