Palmy's Winter Project
Hello Hudsonites,
As winter is coming in my place, along with the end of the antique car riding season, it is time for me to give my Hudson Super Wasp that I named Molly a rest.
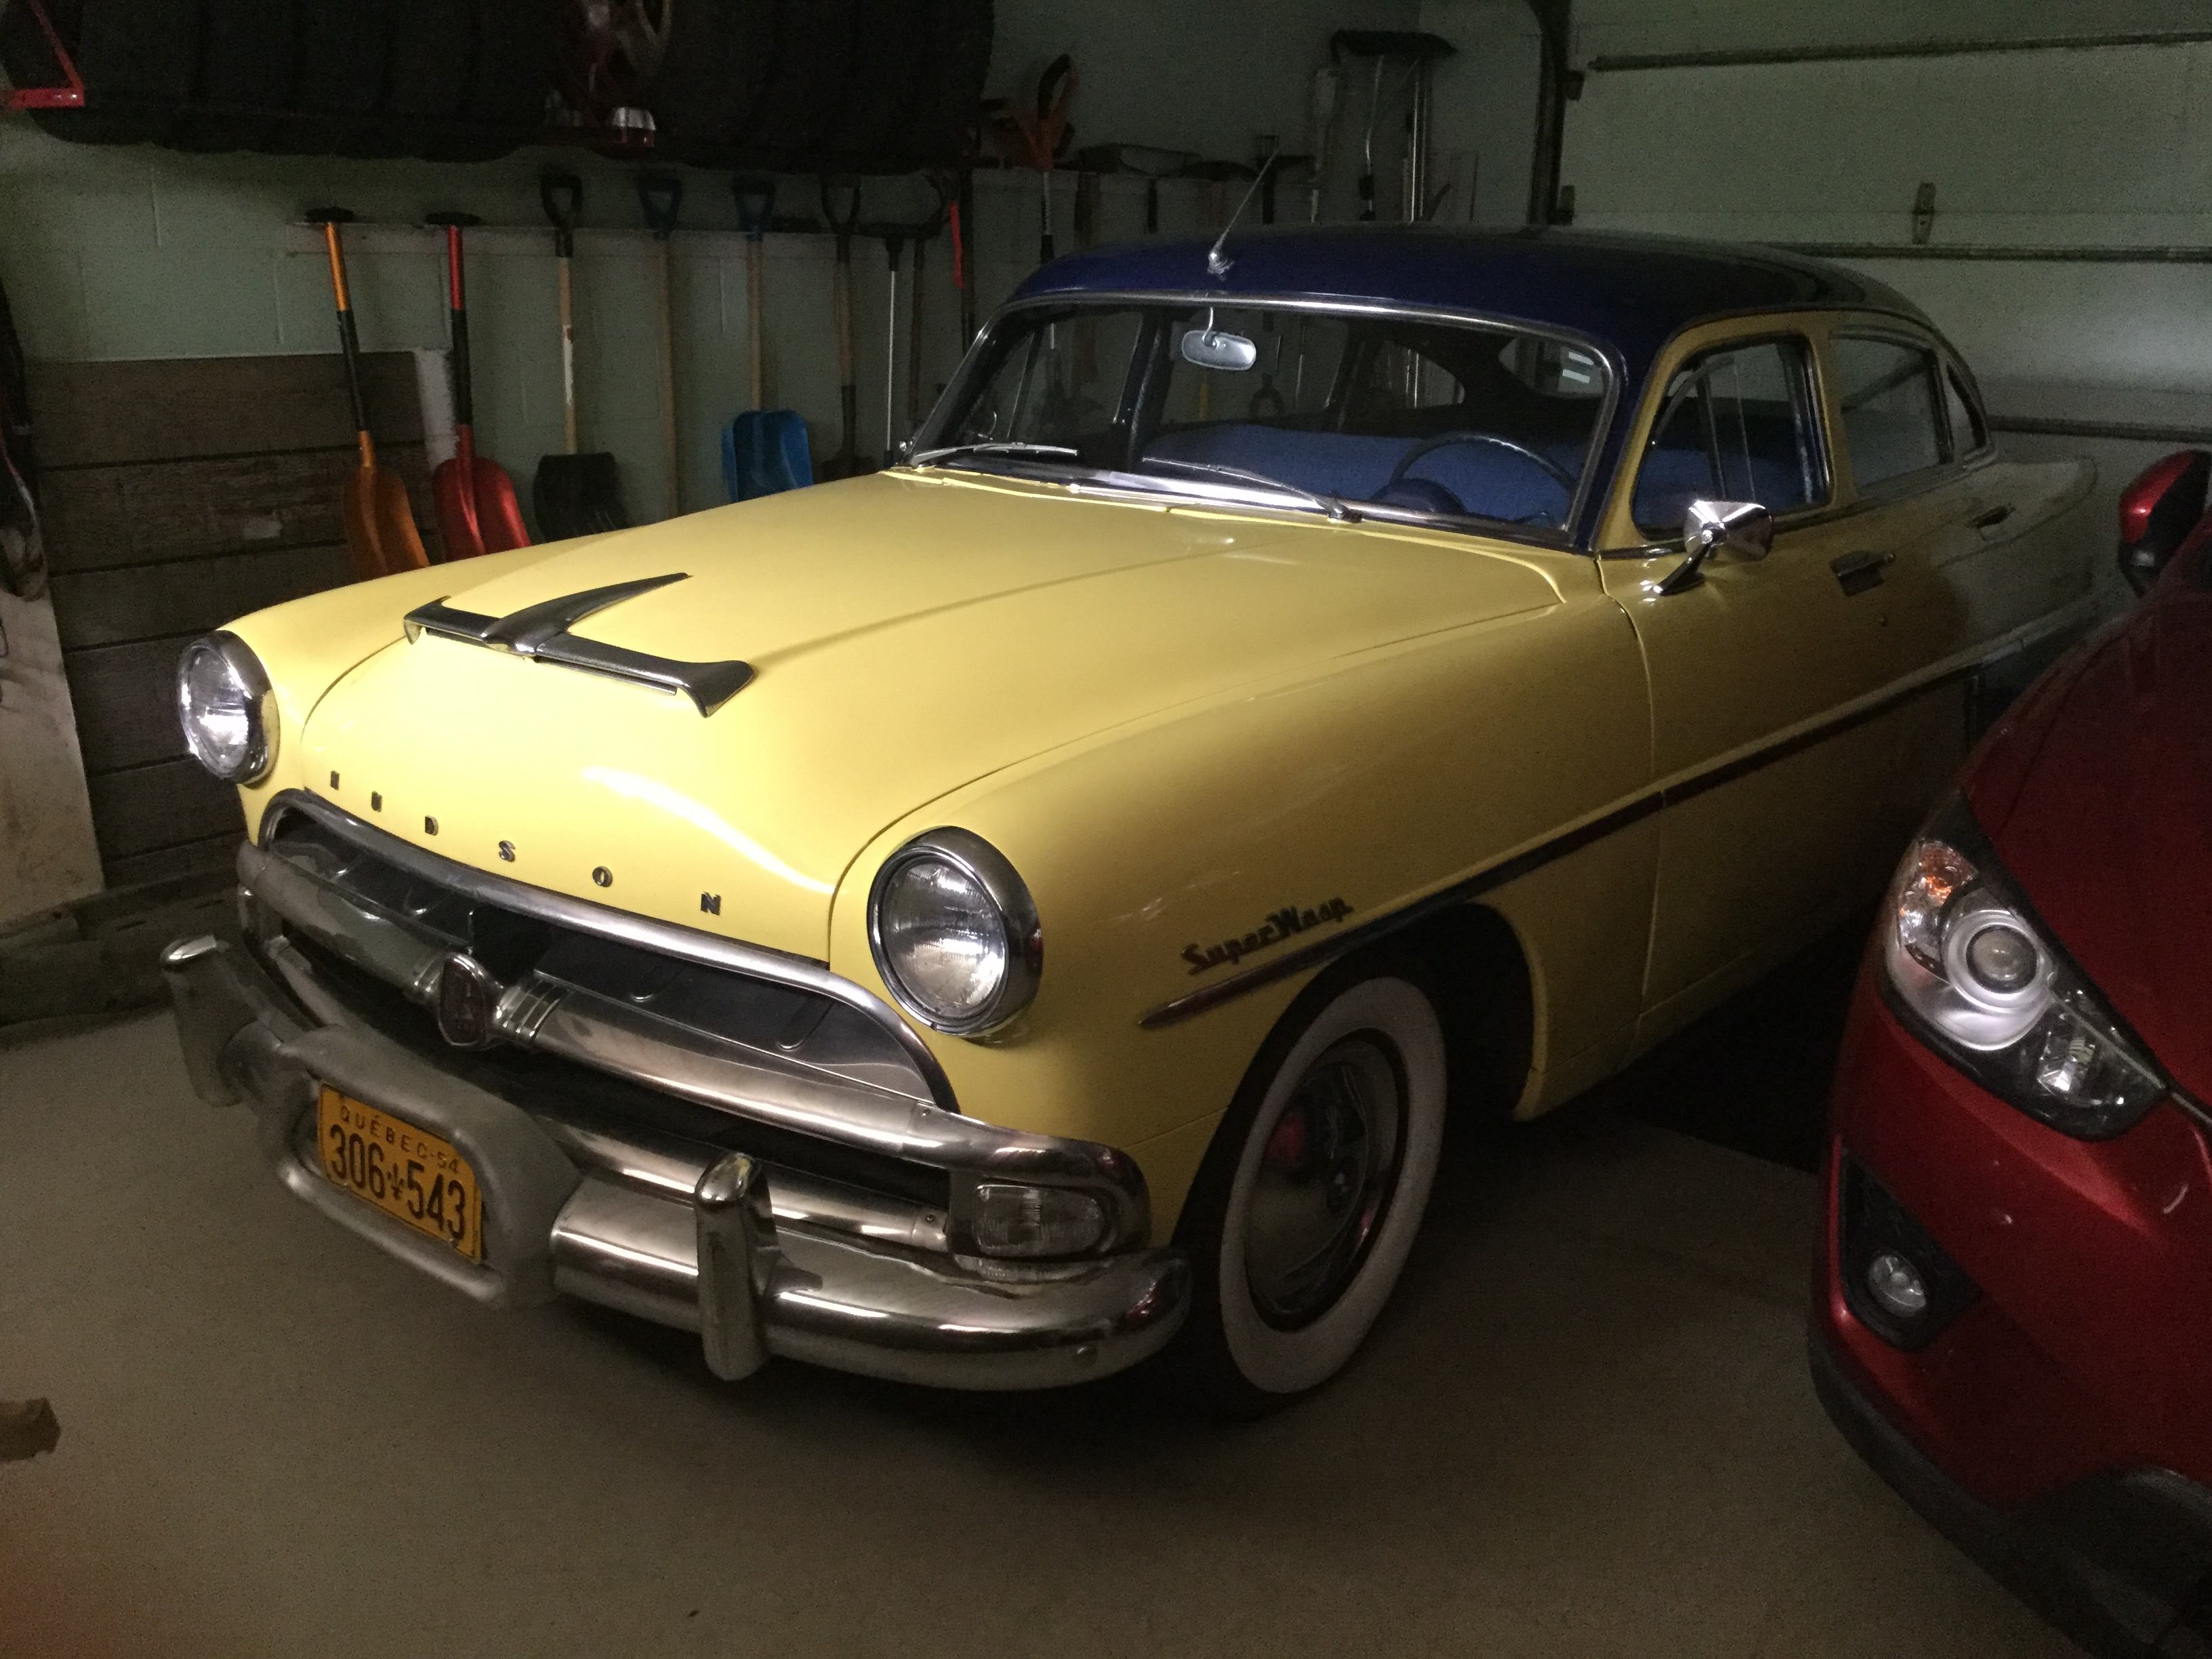
While she'll be safely stored in the garage for winter ( Darn you Calcium!!! ), it will be a good time to do maintenance and repairs on her : She has known abandon in a container, yet she's still kickin' dust like a champ.
For this winter there is a big repair to do regarding the transmission and some small and aesthetic enhancement. As I want to attend the next regional meet of the H.E.T. Club at Burlington, I do have a little dealine on those projects.
First, the big repair;
As many might already know from my previous posts, I have a leaking issue on the 3 band Borg Warner DG-200 automatic transmission and recently, while riding the car, the tranny has gotten hot enough to smoke alot, even refusin to shift to the last gear. Fortunately, I was still able to drive it back home, but the issue is severe and is needed to be fixed.
For now, I have 3 options :
1. Fixing the actual tranny will be by far the easiest option of them all, though I am fully aware that a transmission job isn't an easy one to do. The thing is that I need to pinpoint the leak problem while improving the transmission's cooling system wich is by air alone. " Oh you Studebaker, you that created the DG 3 banders, I shall need your help and wisdom for the needed parts ."
2. Swapping the DG for the Hydramatic, the original tranny used for Hudson. Don't get me wrong, the DG-200 works fine while making the car more economic gas wise, but if I'm somehow unlucky with the DG parts research, the Hydra can be a go. What scares me the most is I'll need more than just the transmission, as I'll also need the related parts and the subframe that was used to hold it. So far, this option can be a nightmare if I'm not well equiped and prepared.
3. This one is more of a question as while it seems tempting at first, I still need more informations about it:
Is it possible to change the auto. tranmsission for a standard transmission with an overdrive ? If so, will this be a bit easier or harder than changing a DG for a Hydra ?
To make things clear, the standard transmission has to be the original transmission that was put in the car in 1954. Advices from the Hudson mechanical experts are warmly welcome to clarify this option.
There will be other jobs on the car, mainly maintenance and aesthetic add on, like lighting emprovements such as adding highlight/ fog lamps in front, back up lights in the rear and so on. I will be trying to add some updates and pictures along the way so you can see the progress maybe contribute in a way through ideas or advices.
DISCLAIMER
I don't really know if there's a proper place for the thread to be, but if any admin knows a suitable place for it, feel free to move it.
As winter is coming in my place, along with the end of the antique car riding season, it is time for me to give my Hudson Super Wasp that I named Molly a rest.

While she'll be safely stored in the garage for winter ( Darn you Calcium!!! ), it will be a good time to do maintenance and repairs on her : She has known abandon in a container, yet she's still kickin' dust like a champ.
For this winter there is a big repair to do regarding the transmission and some small and aesthetic enhancement. As I want to attend the next regional meet of the H.E.T. Club at Burlington, I do have a little dealine on those projects.
First, the big repair;
As many might already know from my previous posts, I have a leaking issue on the 3 band Borg Warner DG-200 automatic transmission and recently, while riding the car, the tranny has gotten hot enough to smoke alot, even refusin to shift to the last gear. Fortunately, I was still able to drive it back home, but the issue is severe and is needed to be fixed.

For now, I have 3 options :
1. Fixing the actual tranny will be by far the easiest option of them all, though I am fully aware that a transmission job isn't an easy one to do. The thing is that I need to pinpoint the leak problem while improving the transmission's cooling system wich is by air alone. " Oh you Studebaker, you that created the DG 3 banders, I shall need your help and wisdom for the needed parts ."
2. Swapping the DG for the Hydramatic, the original tranny used for Hudson. Don't get me wrong, the DG-200 works fine while making the car more economic gas wise, but if I'm somehow unlucky with the DG parts research, the Hydra can be a go. What scares me the most is I'll need more than just the transmission, as I'll also need the related parts and the subframe that was used to hold it. So far, this option can be a nightmare if I'm not well equiped and prepared.
3. This one is more of a question as while it seems tempting at first, I still need more informations about it:
Is it possible to change the auto. tranmsission for a standard transmission with an overdrive ? If so, will this be a bit easier or harder than changing a DG for a Hydra ?
To make things clear, the standard transmission has to be the original transmission that was put in the car in 1954. Advices from the Hudson mechanical experts are warmly welcome to clarify this option.
There will be other jobs on the car, mainly maintenance and aesthetic add on, like lighting emprovements such as adding highlight/ fog lamps in front, back up lights in the rear and so on. I will be trying to add some updates and pictures along the way so you can see the progress maybe contribute in a way through ideas or advices.
DISCLAIMER
I don't really know if there's a proper place for the thread to be, but if any admin knows a suitable place for it, feel free to move it.
0
Comments
-
The conversion of a 1954 from BorgWarner auto to Hydramatic is a bolt in exercise. A document detailing the process is located on my website https://hudsonrestoration1948-54.com/ Go to the website select “transmissions”. The conversion document link on that page is named ...Converting 1954 Hudson automatic transmission .pdf
Converting to Standard or STD/0D will require more than parts swapping. My buddy converted his Hornet Coupe from Single range Hydramatic to 3 Spd/OD to do so he purchased a parts car to gain the parts and measurements to complete the conversion.
Rebuilding the transmission would be my suggestion.
Good Luck0 -
My 54 Hornet Special Coupe came from the factory with a three on the tree. In the early 60's the third owner had the standard replaced with the Hydro (built by Ike Smith). George *(3rd owner) was buying up old 54 Hudson racing cars. When I got the car the linkage had not yet been installed-or had been removed for another project (sketchy details). Anyway, back on the road now and shifting good....
0 -
Palmy's Winter Project : Update 1
After reading the past suggestions ( thanks you Ken Crates and Browniepetersen ) and long hours of thinking regarding the transmission, I'll go for the first and easiest option with is repairing / rebuilding it. Knowing that it'll be a big job, I'll take my time to fix it while learning more about it.
While I'll be looking the needed parts and instructions through Studebaker's forum and their part shop " they are the Fathers of the 3 band DG after all ", I've started another small project : Lighting improvement.
During the past weeks before the tranny's issues one of the headlamp bulb has died on me and from here I've decided to improve Molly's lighting.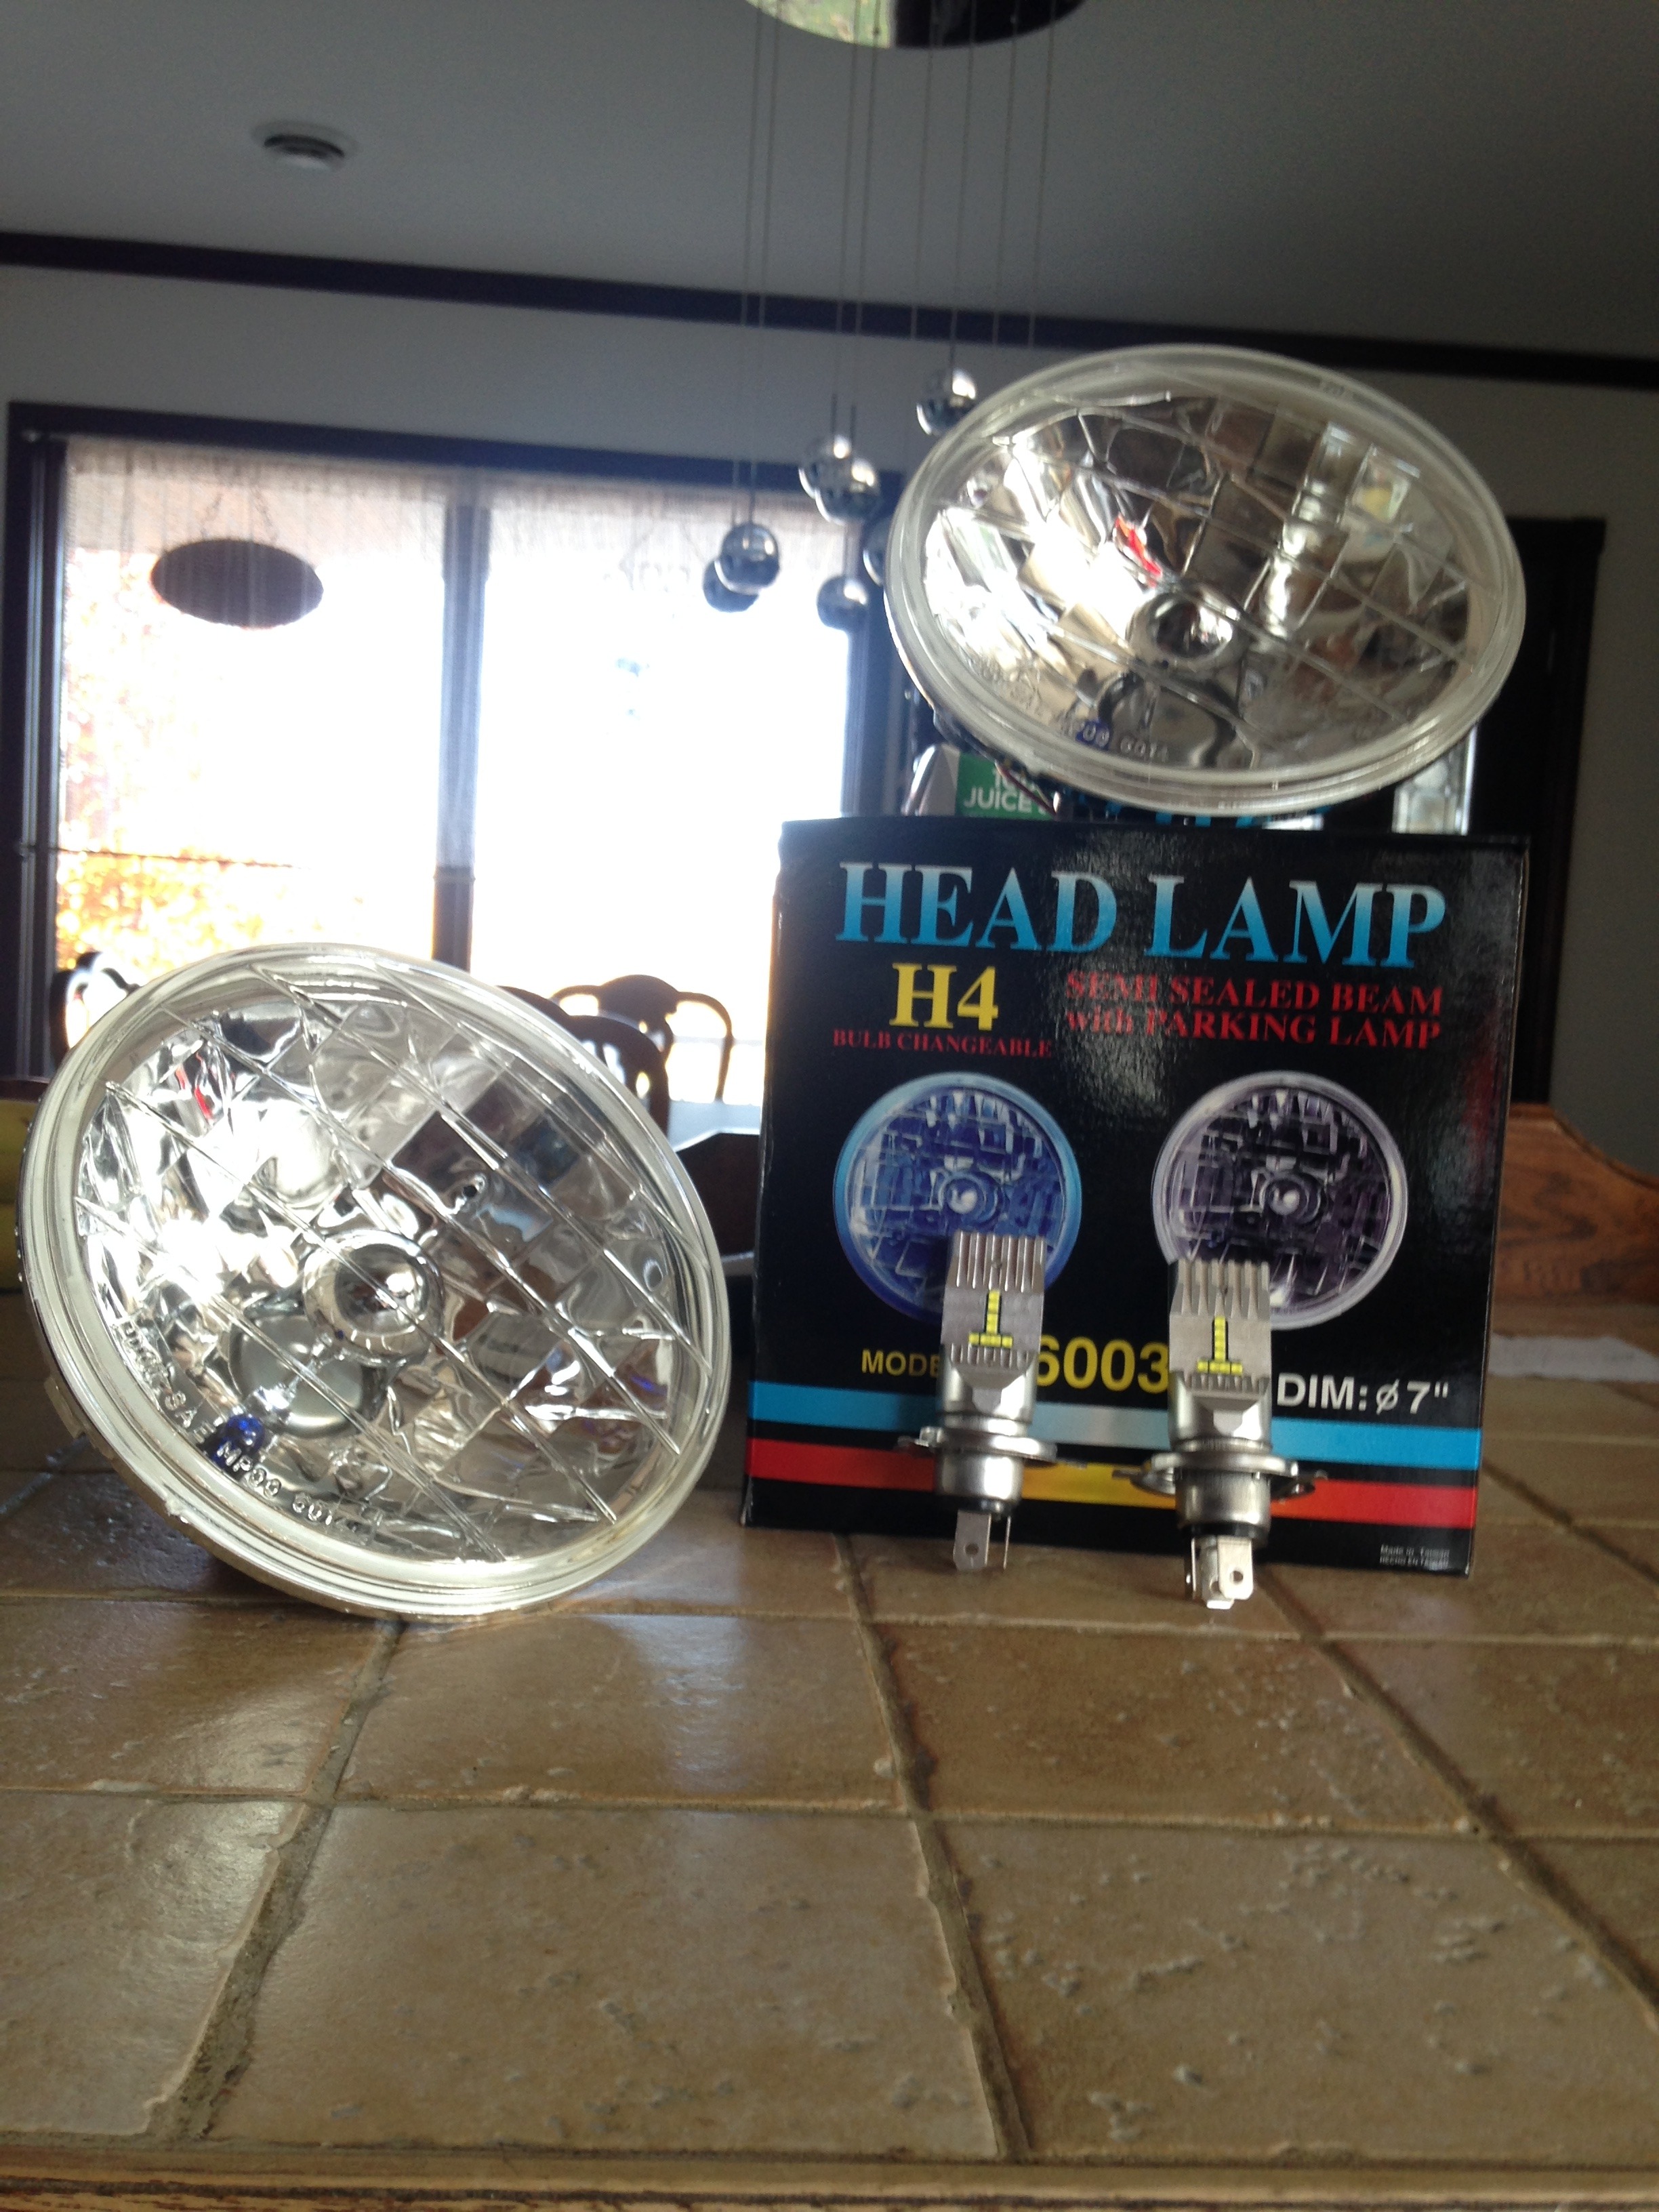
What you see here are a set of semi-sealed headlamps and a pair of LED headlamp bulb, bought to LEDlight.com, specially designed for 6 volts, positive ground electrical system that I've decided to give a try. The headlamps does have a diameter of 7 inches, just like the original ones on Molly, wich is great as it as as easy as swaping them with the others.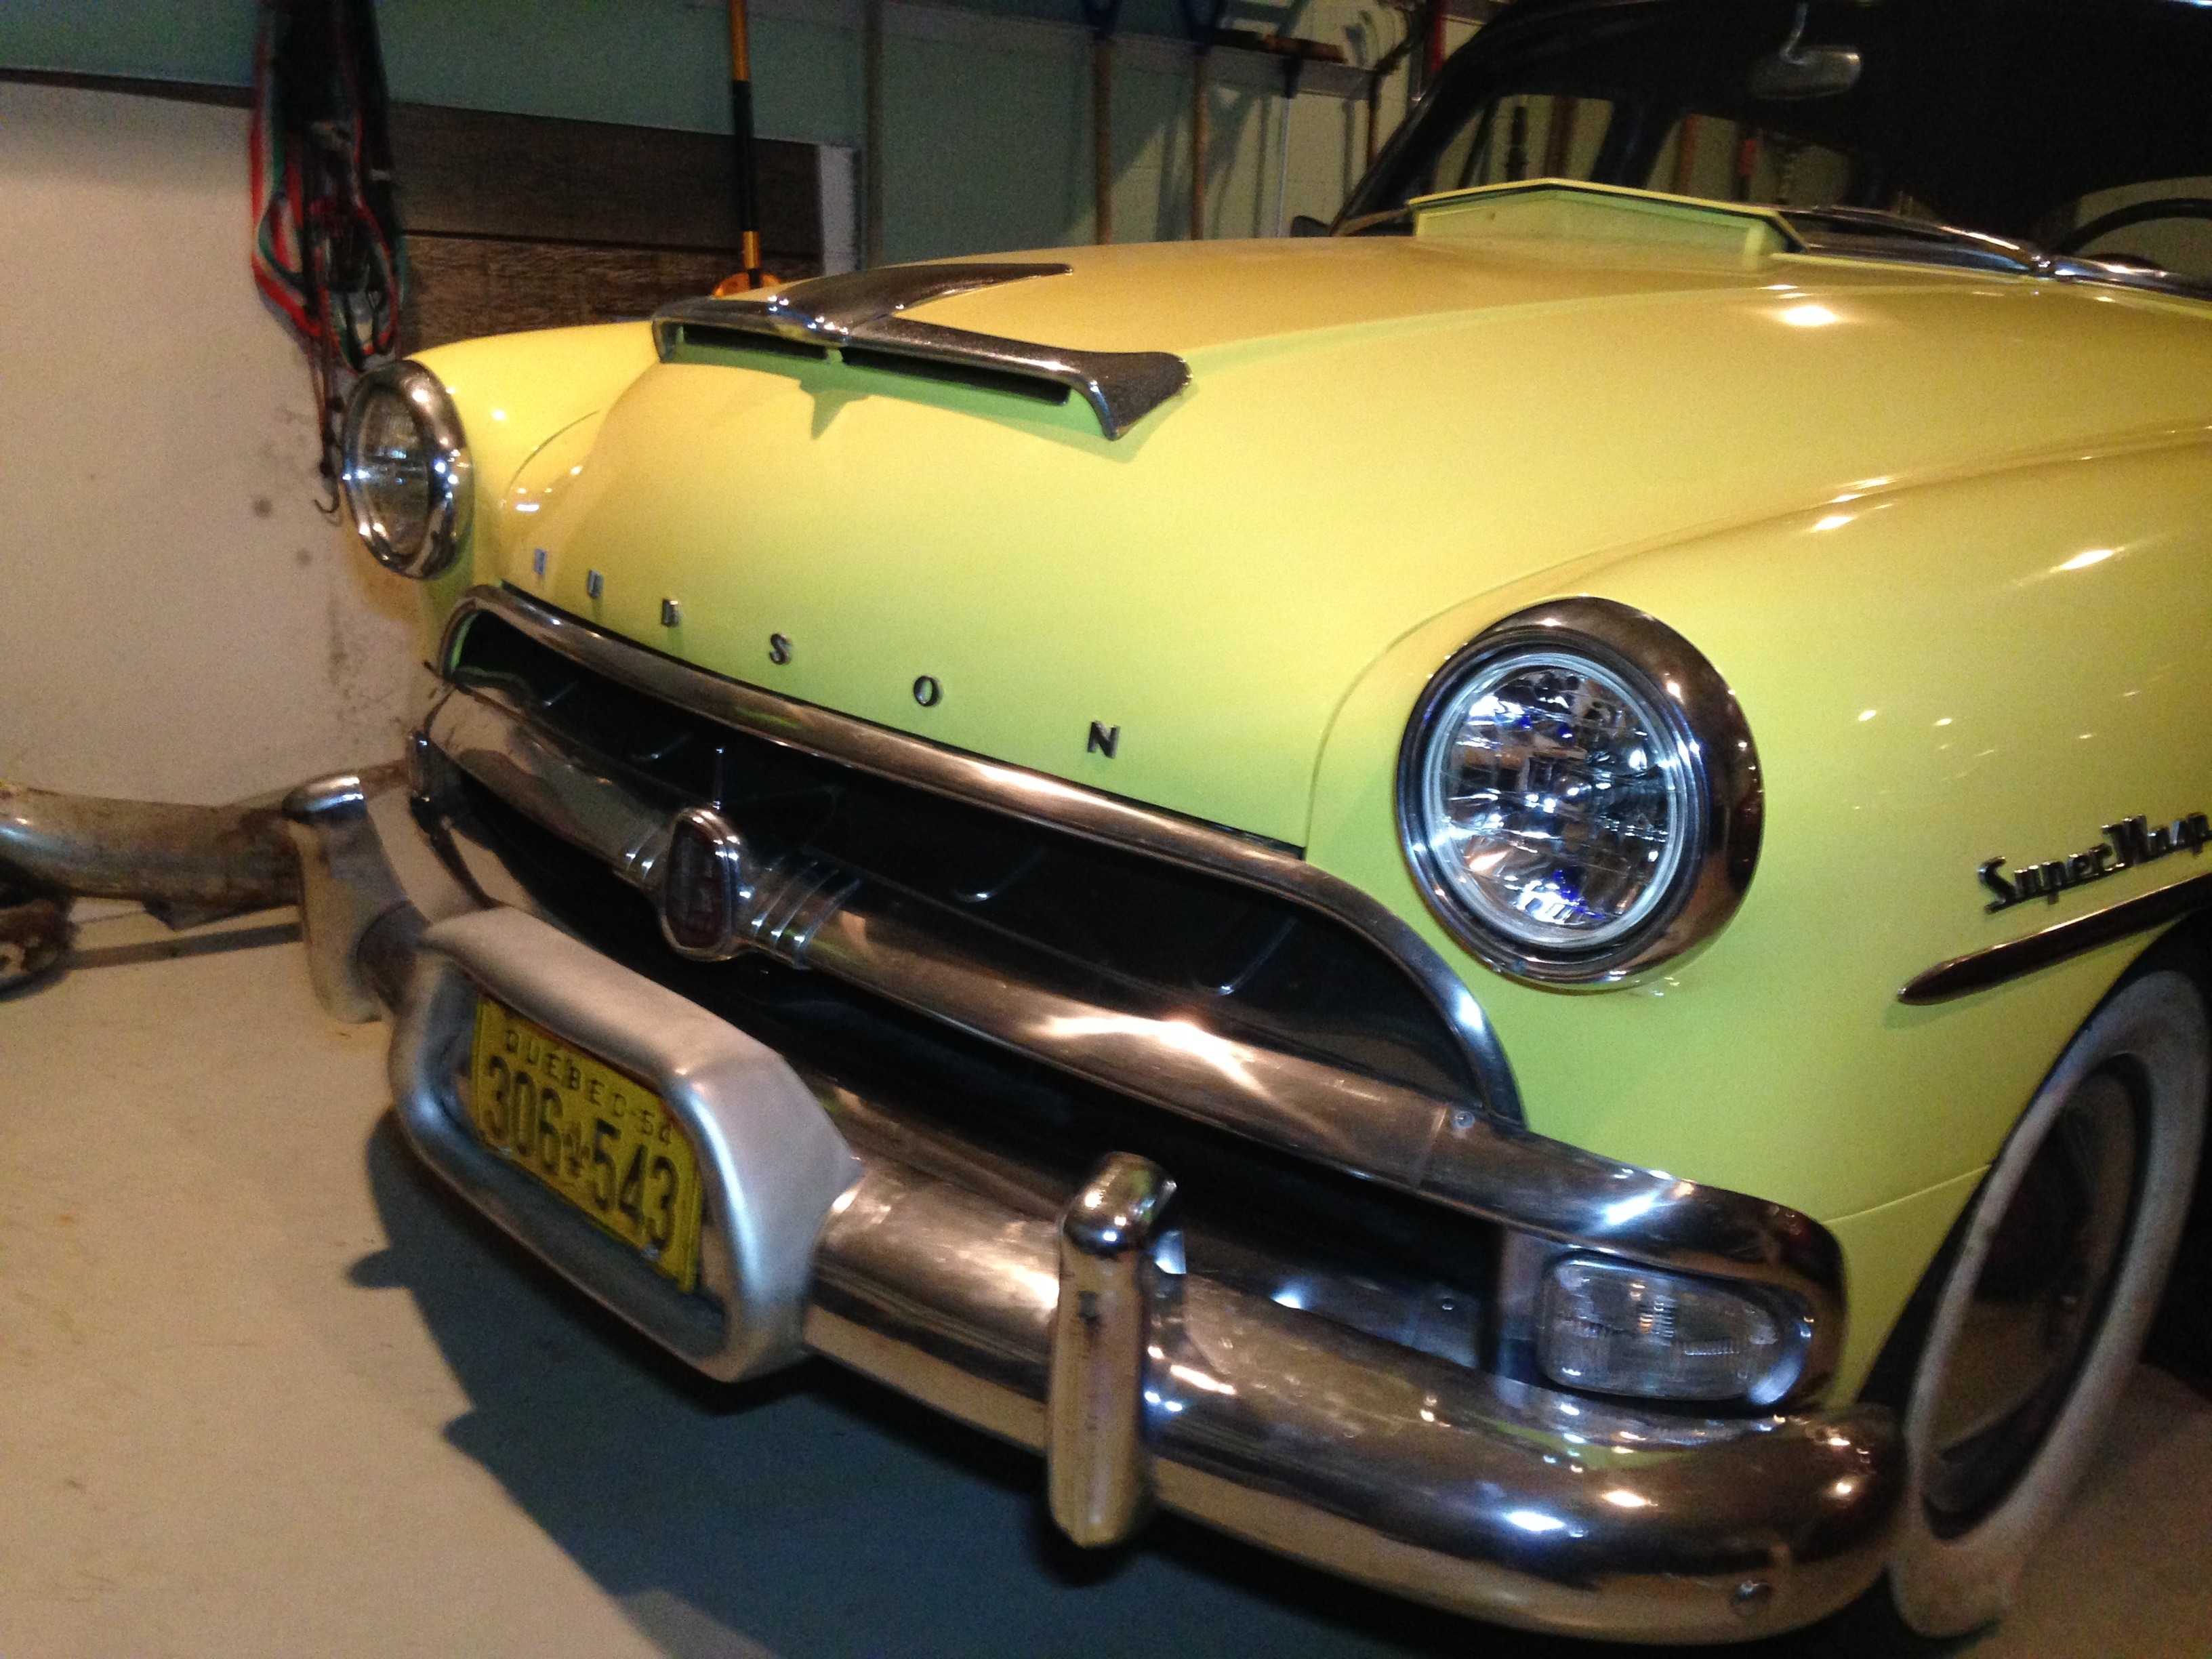
As you can see on the picture above, the new headlamp ( the one located on the driver's side) fits nicely, while giving it a good look too.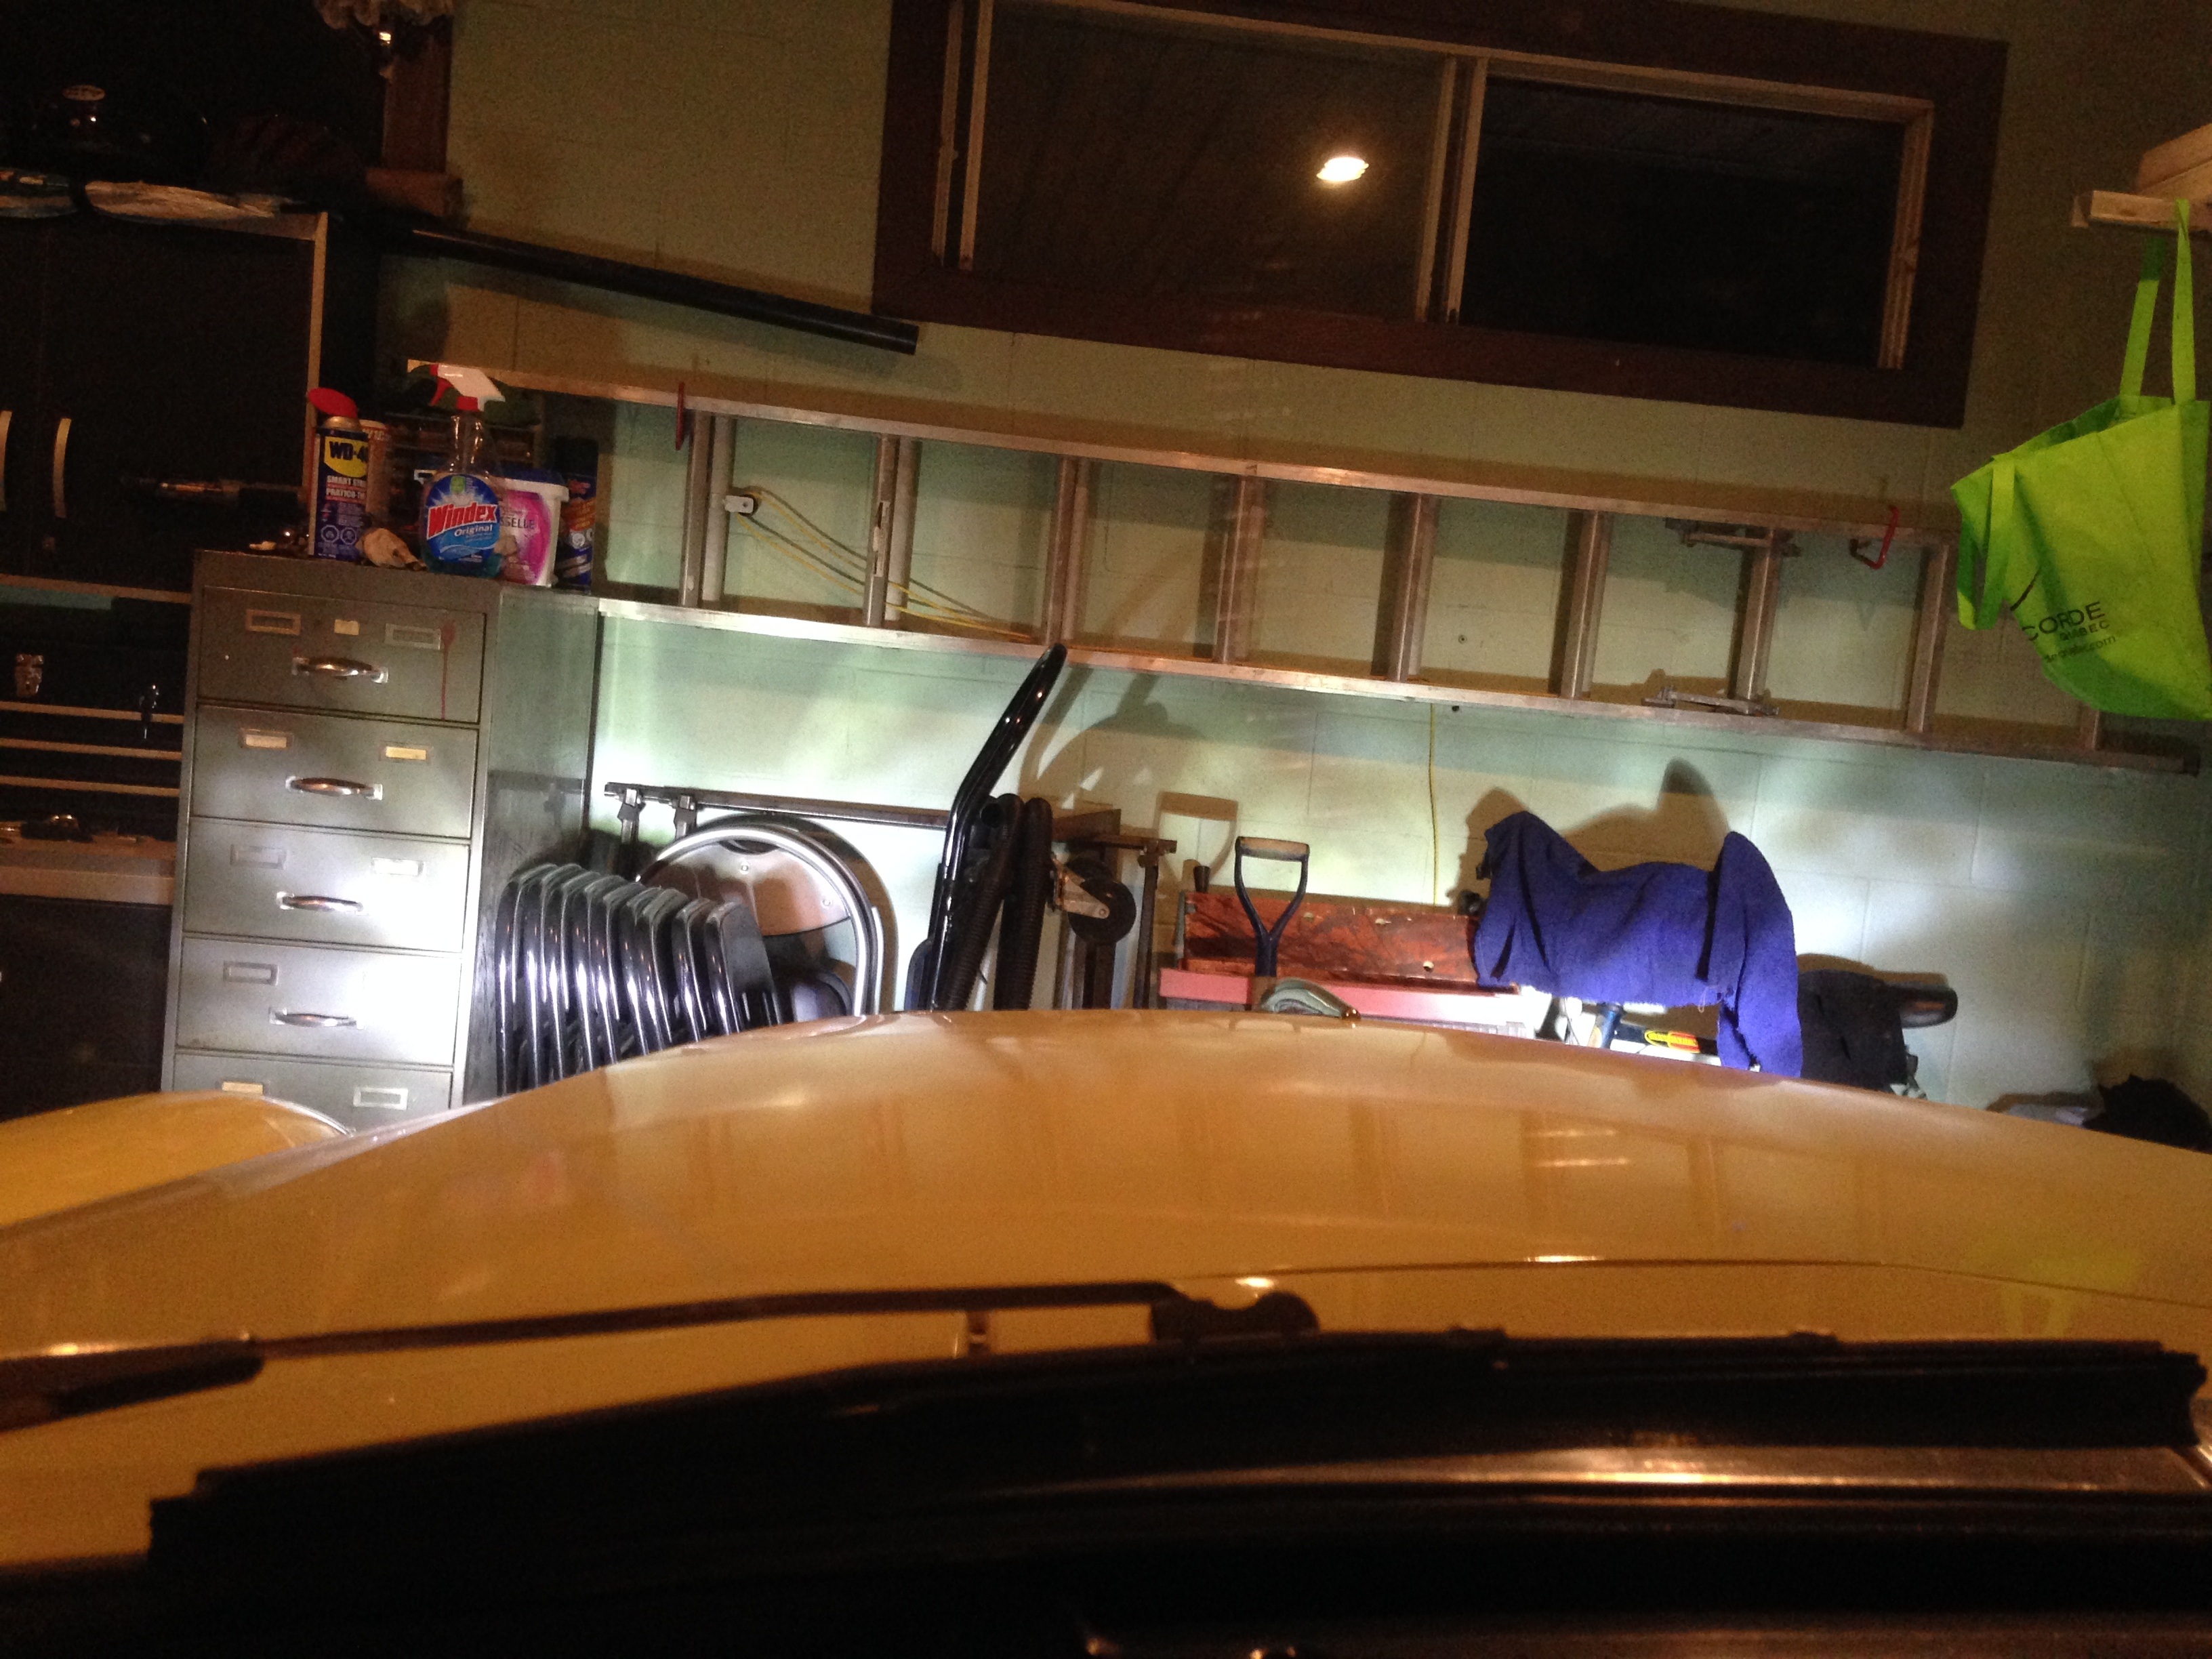
With the LED bulb installed, we can see a good emprovement, but as I was testing them, I've observed that the LED didn't do the switch between high to low beam. A small problem that can be easily fixed by adding a LED headlight load equalizer that I'll get from LEDlight along with the rest of the LED bulbs and the needed electric parts for the turn signals.
So far I'm happy with the results, as it gives a good vision while keeping the good look of Molly. If you're looking for some lighting improvements, you can try with LEDlight.com for your Stepdown. There's also other shops that gives the same products if I do remember correctly.
I'll be giving you more updates for the upcoming winter projects as soon as possible. Feel free to give ideas or good critisism regarding the lighting improvements.
Max
0 -
Right on! Making the effort to fix your own stuff is the glue that keeps us attached to HET vehicles0
-
Update of Nov. 4 2019
Molly is lifted, ready to pass the winter and the cares that she deserved.
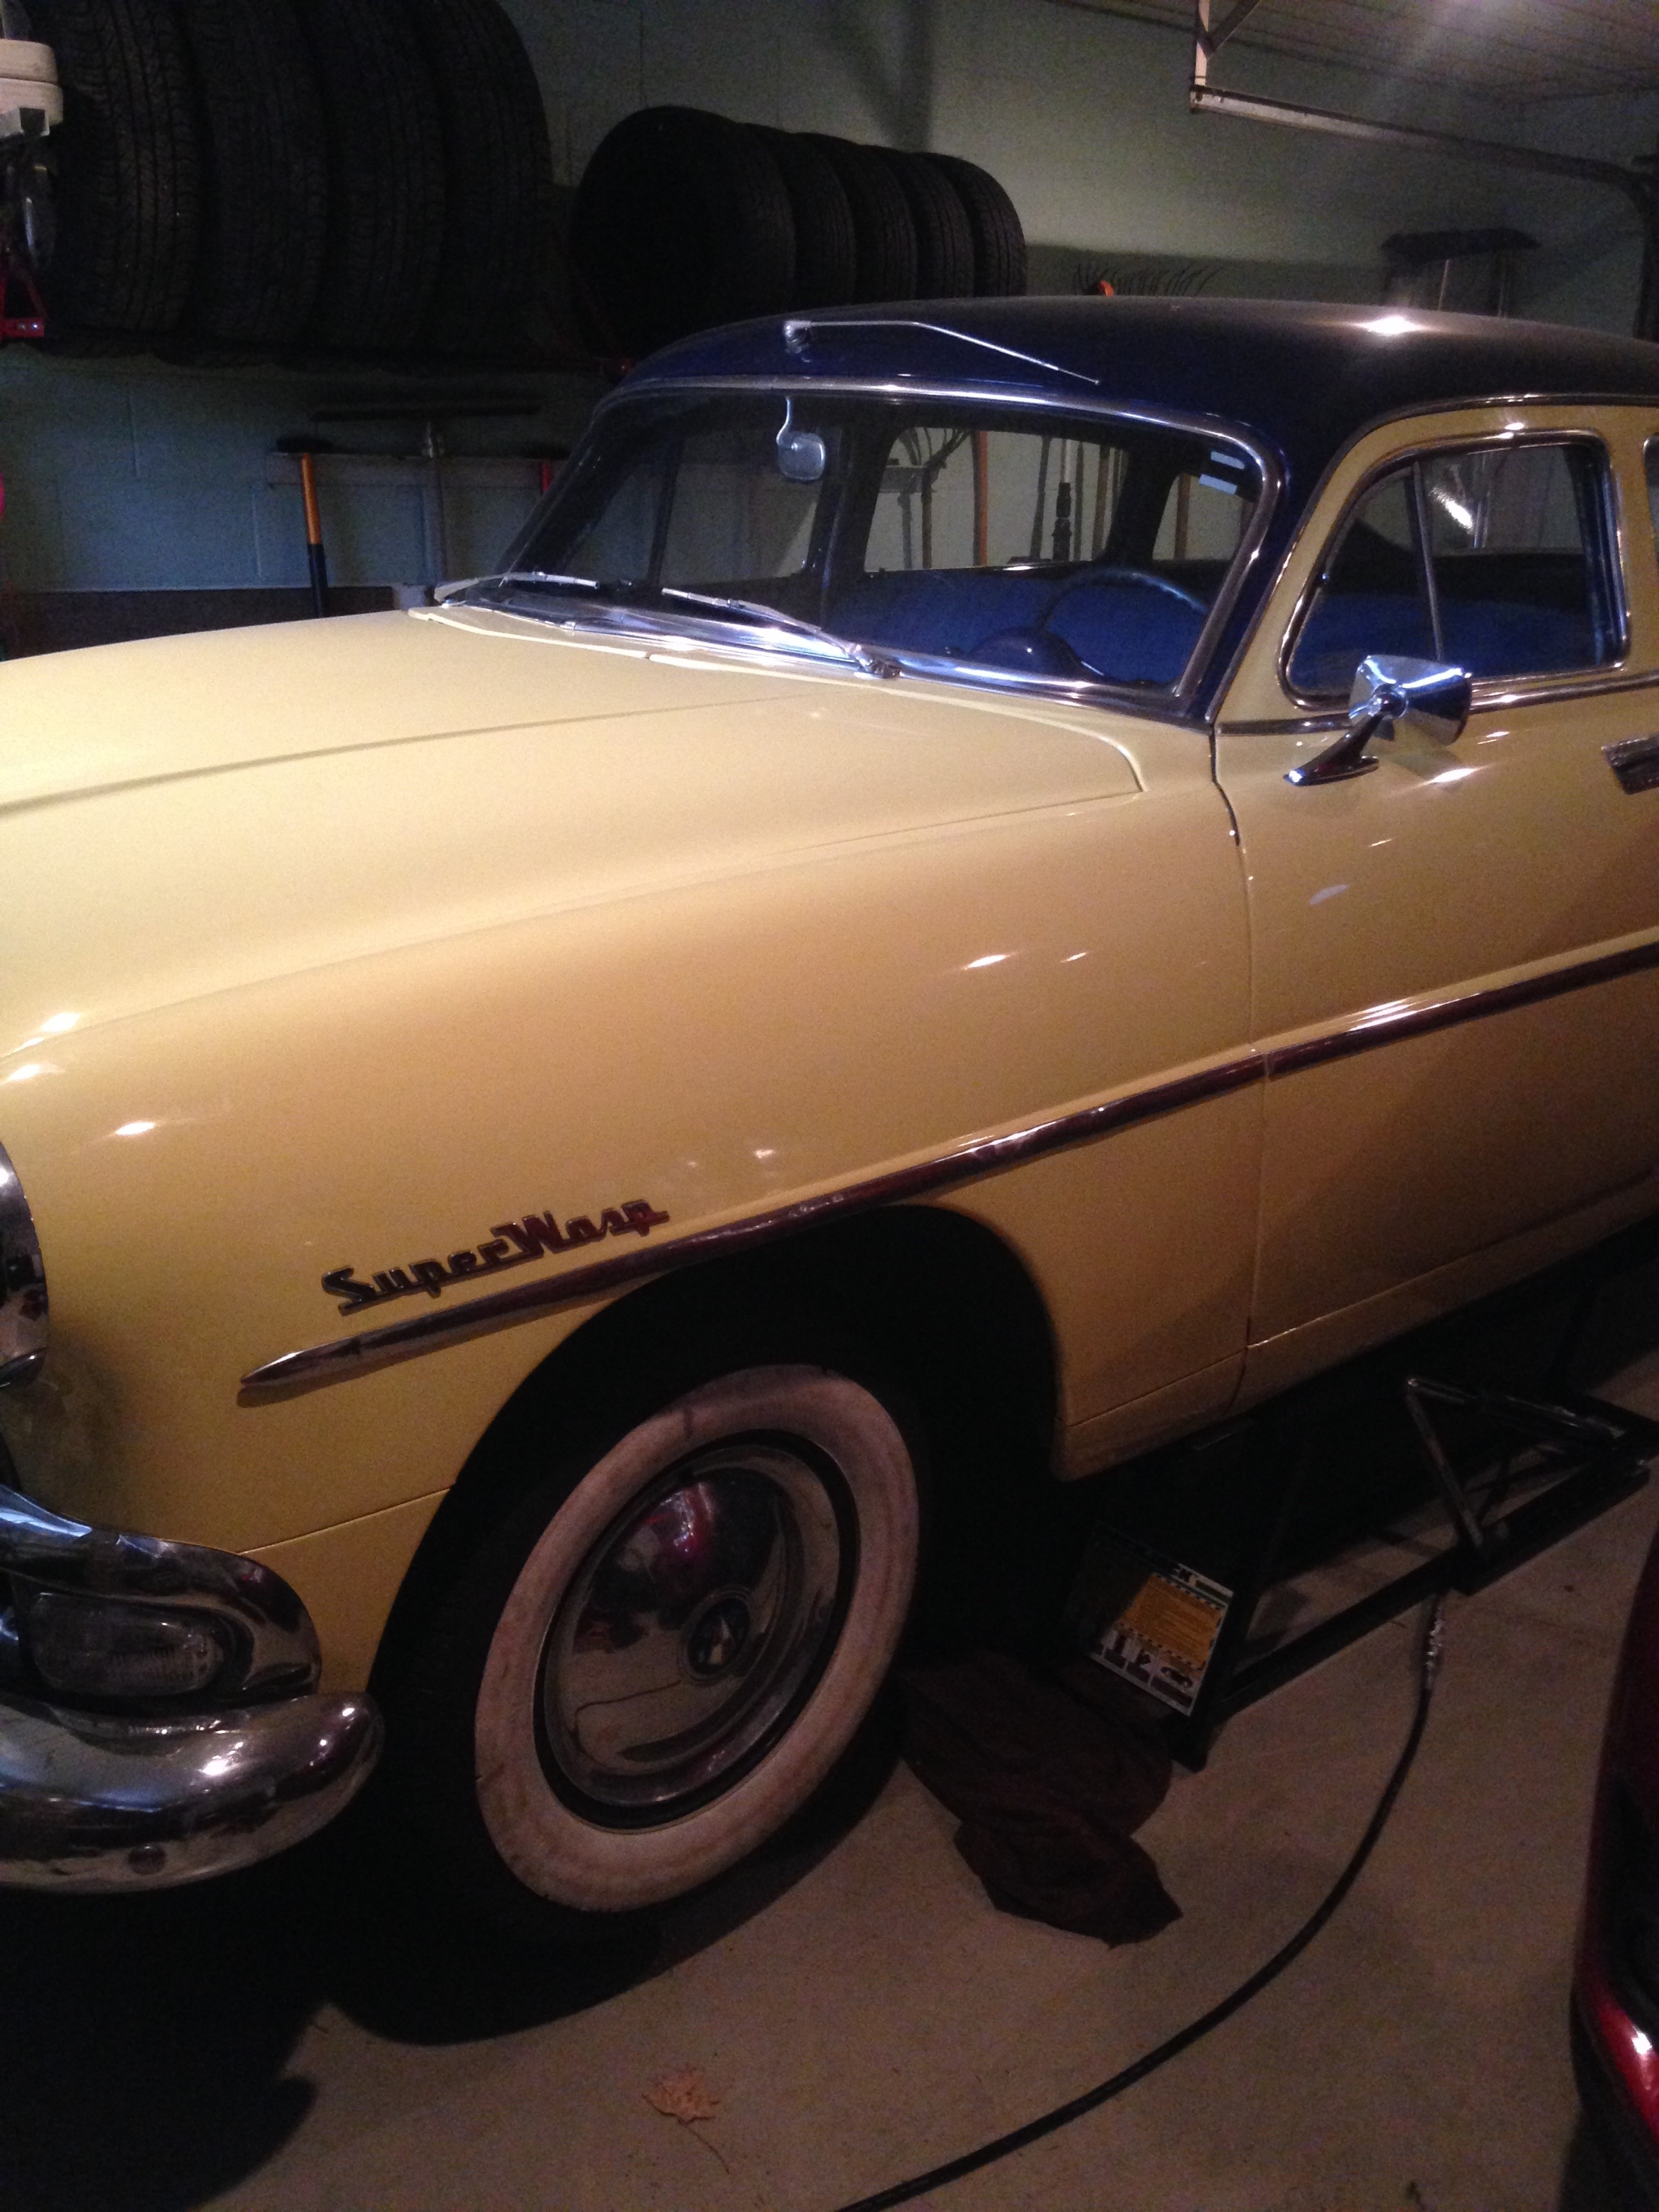
It's also the time for me to slowly tackle the big job the Transmission leaking issue.
"A tranny is leaking mysteriously ? Inspector Palmy is on the case."
I will be taking my time to carefuly remove the parts in the way and the transmission itself so I don't break things by mistake. With my shop manual in hand, I shall find out the source of the leak and hopefully fix it. As it is one of the biggest job on Molly, I do want to take my time while doing it.
While she was jacked up, I've also decided to remove the wheels and take a closer look on the white wall.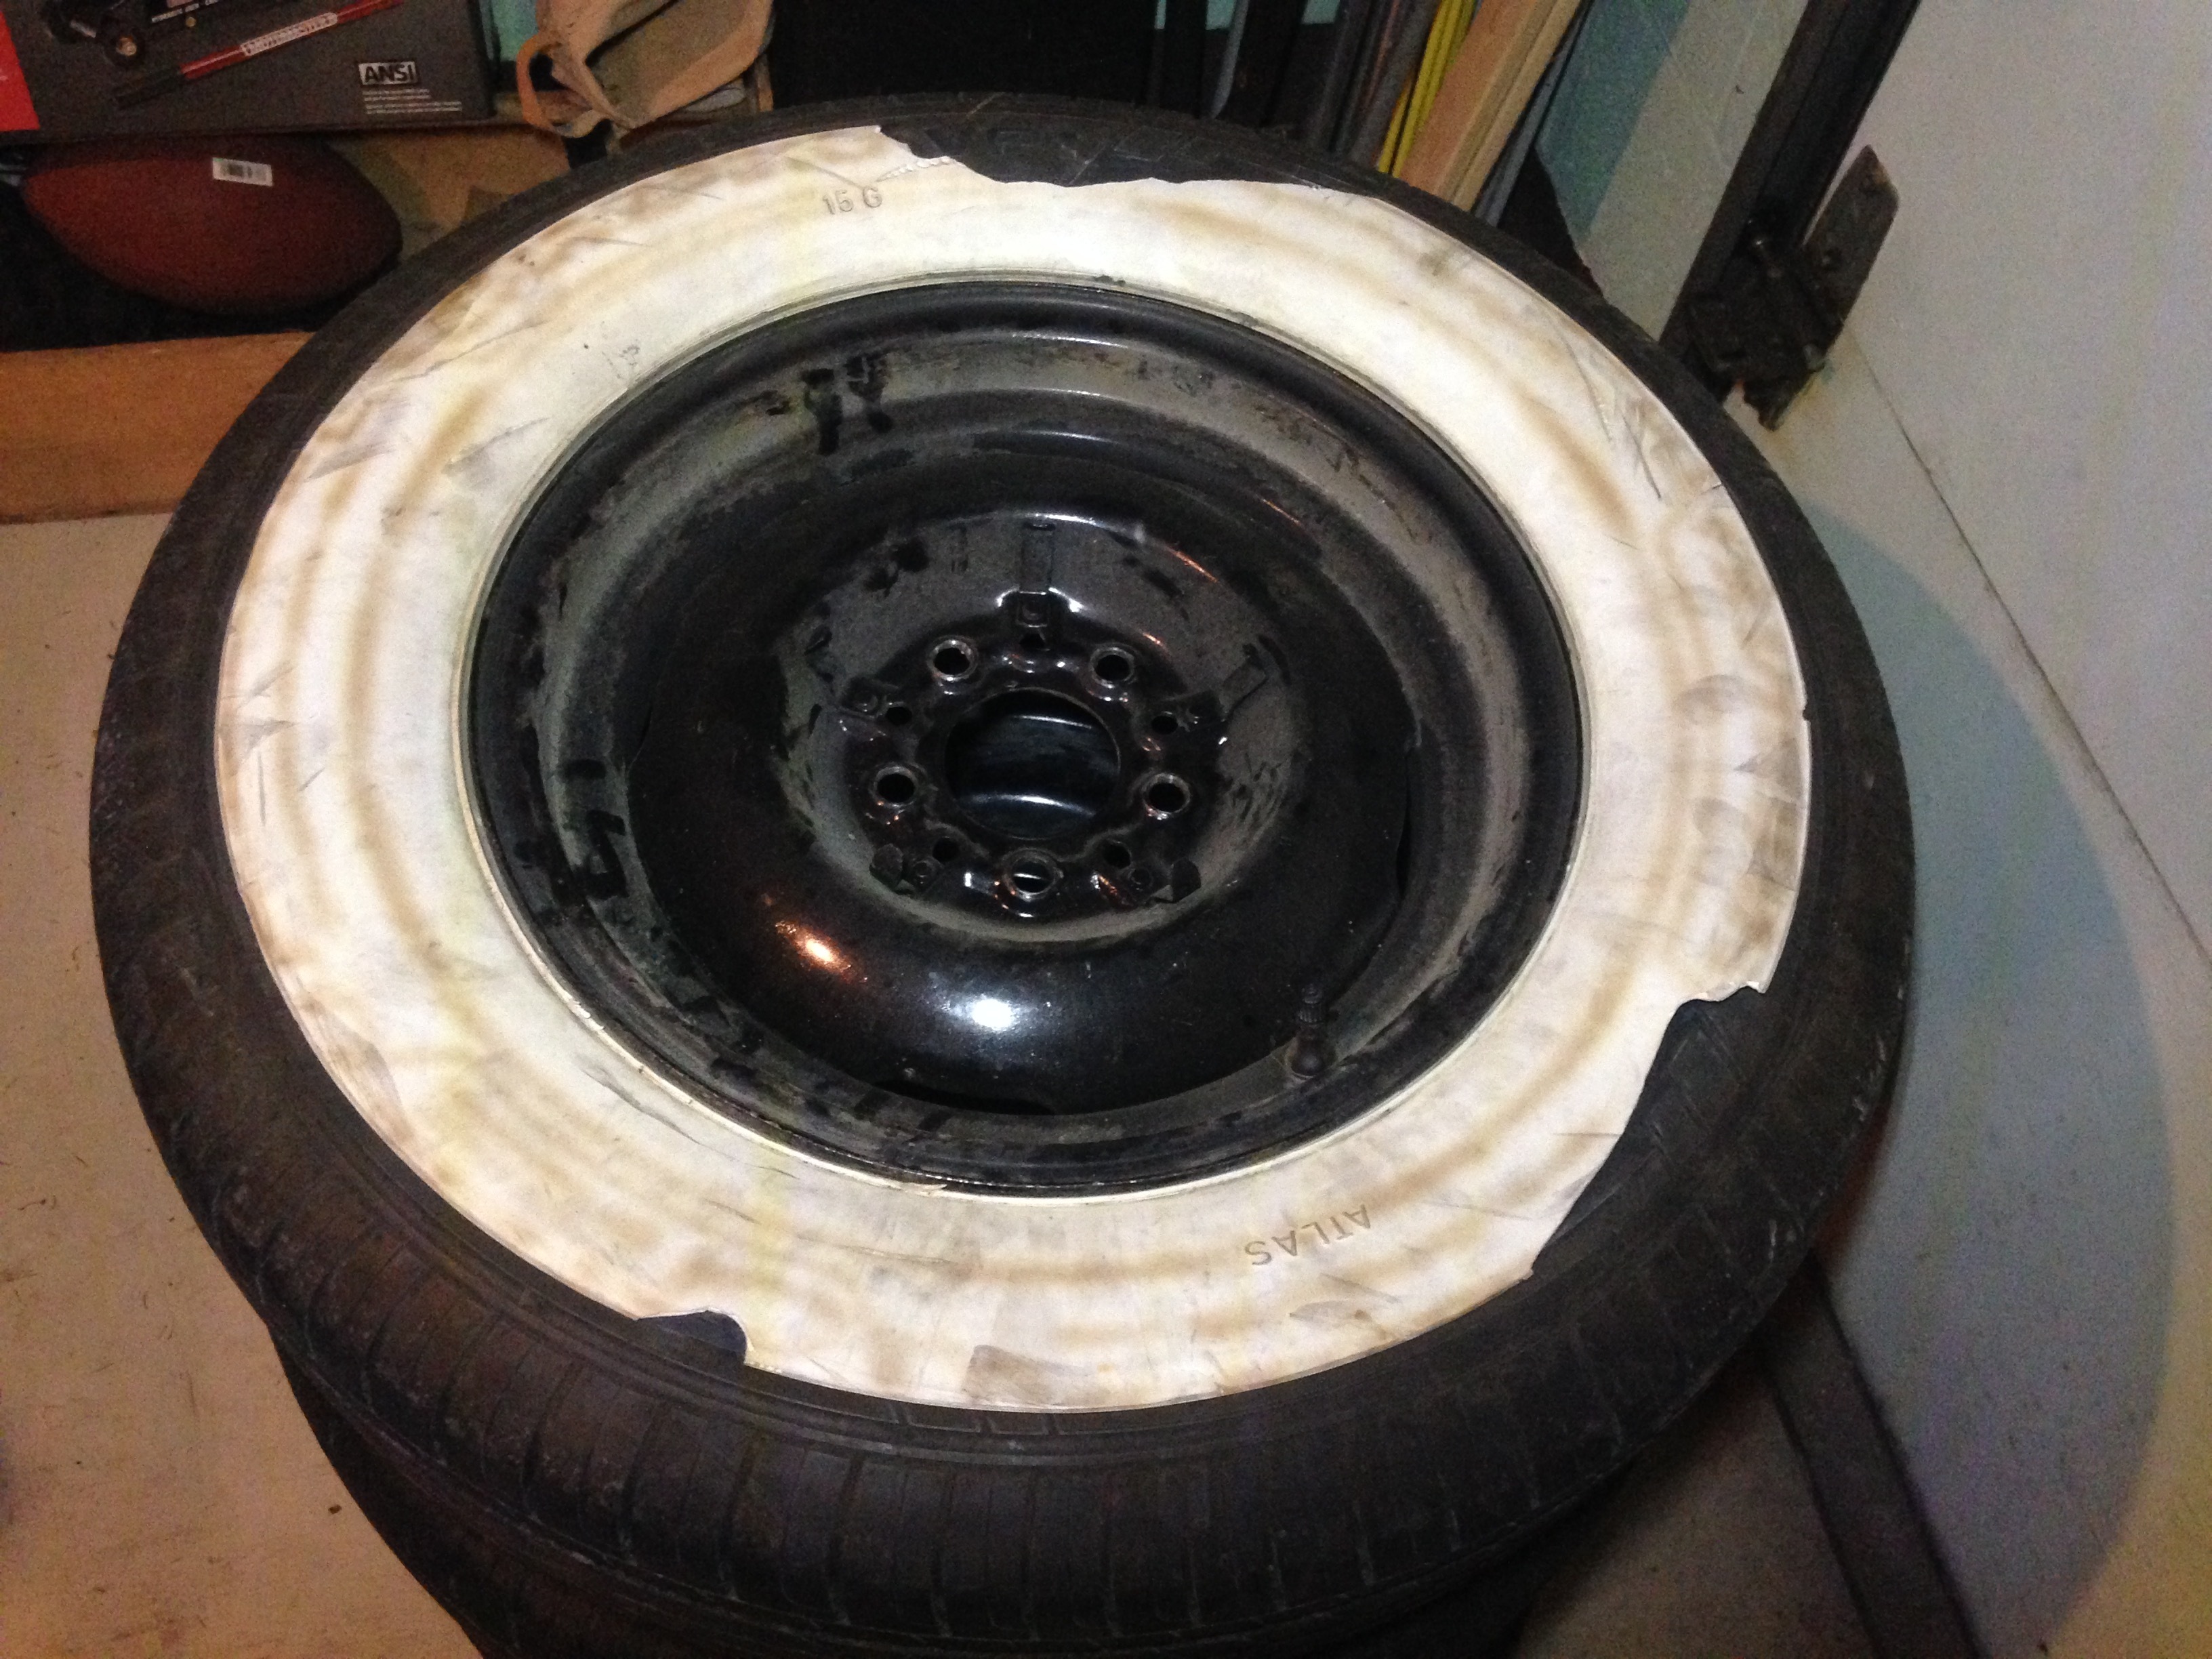
These tires are modern radial ones with a wide white wall that can be fitted on them when inflating the tires to squeeze them in place. It's a good and cheaper option for those who can't afford proper white wall tires yet, but as seen on the pictures, they can deteriorate quickly when traveling with a car, and I traveled a fair amount during the last months.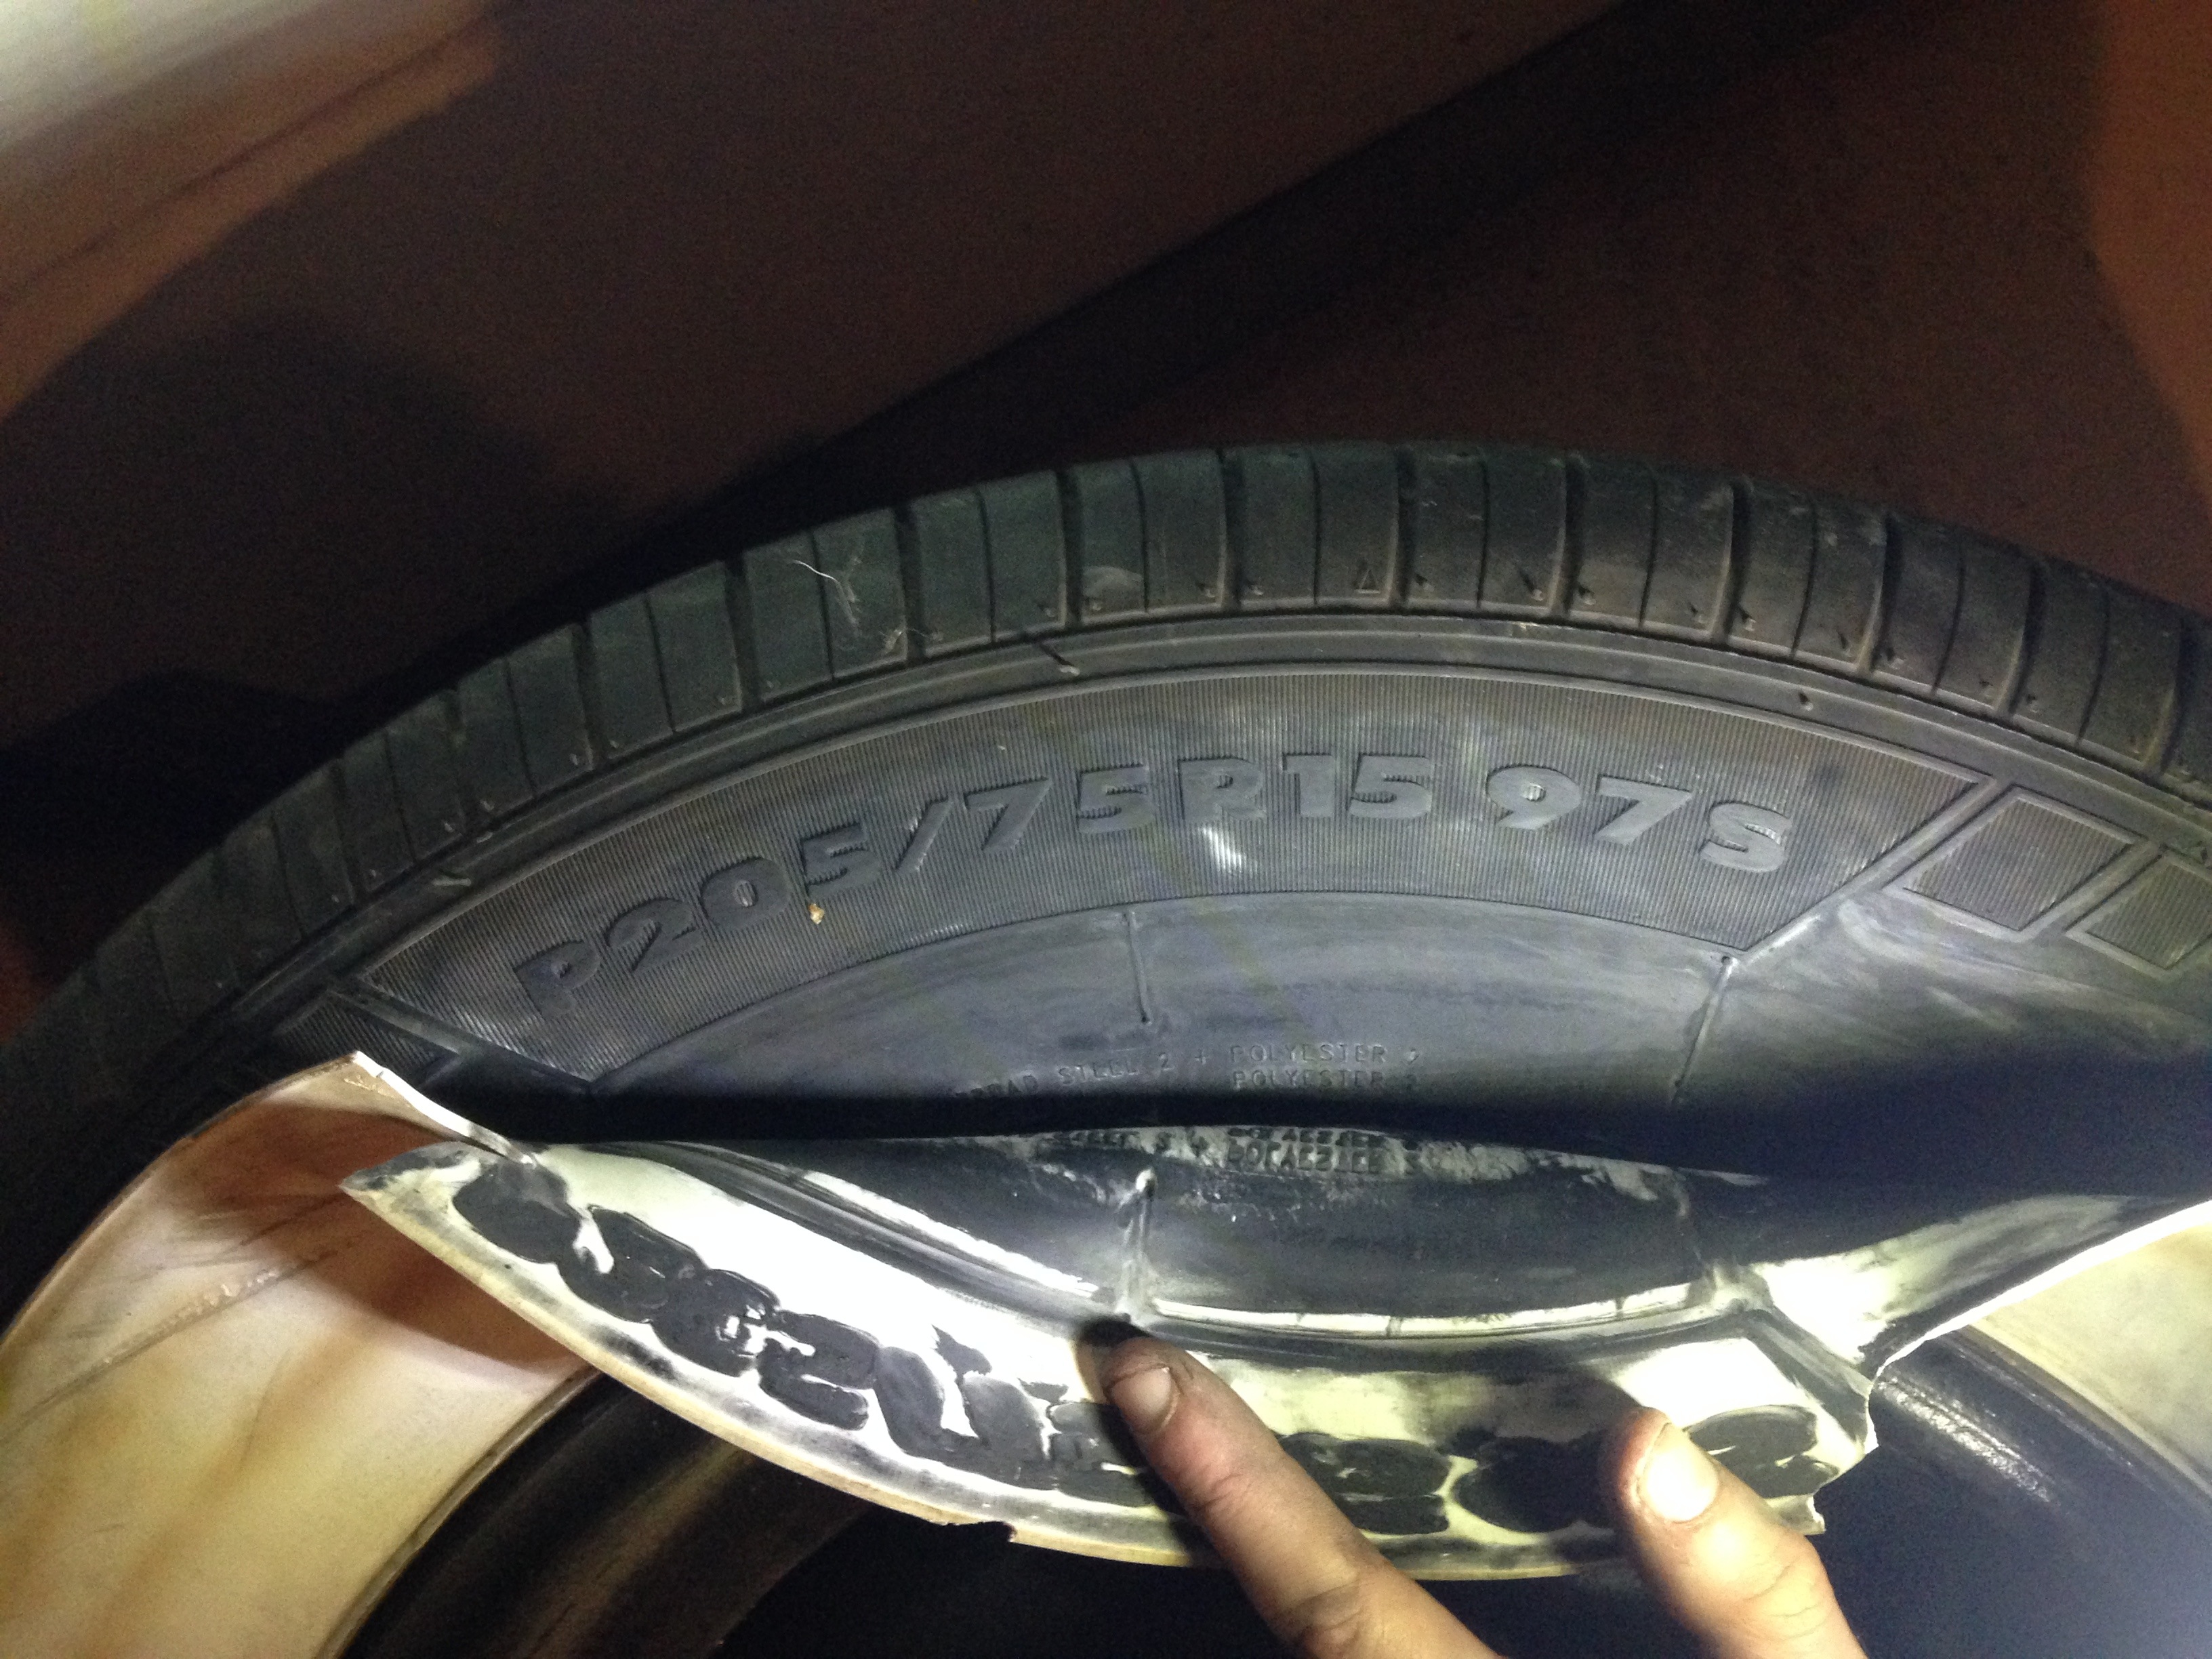
since they are worn out, I will be removing them and keep the tire walls black for the sake of maintenance ease and a bit of lack of funds to put wide white wall tires on Molly for now. Maybe one day, I'll be looking to put that pretty touch on the car.
If anyone has ideas, suggestions or advices to give me during those projects, feel free to type it down; I'll be open to your feedbacks. Also, the remaining LED lights and related parts will be soon at my door and I'll give an update on this very soon.
Yours truly,
Max
0 -
Curbing the tires also caused tearing and removing chunks from the fake white walls0
-
Update of Nov. 6th
I've recieved the remaing LED lights and parts for Molly, thus nearly close to finish the light improvement.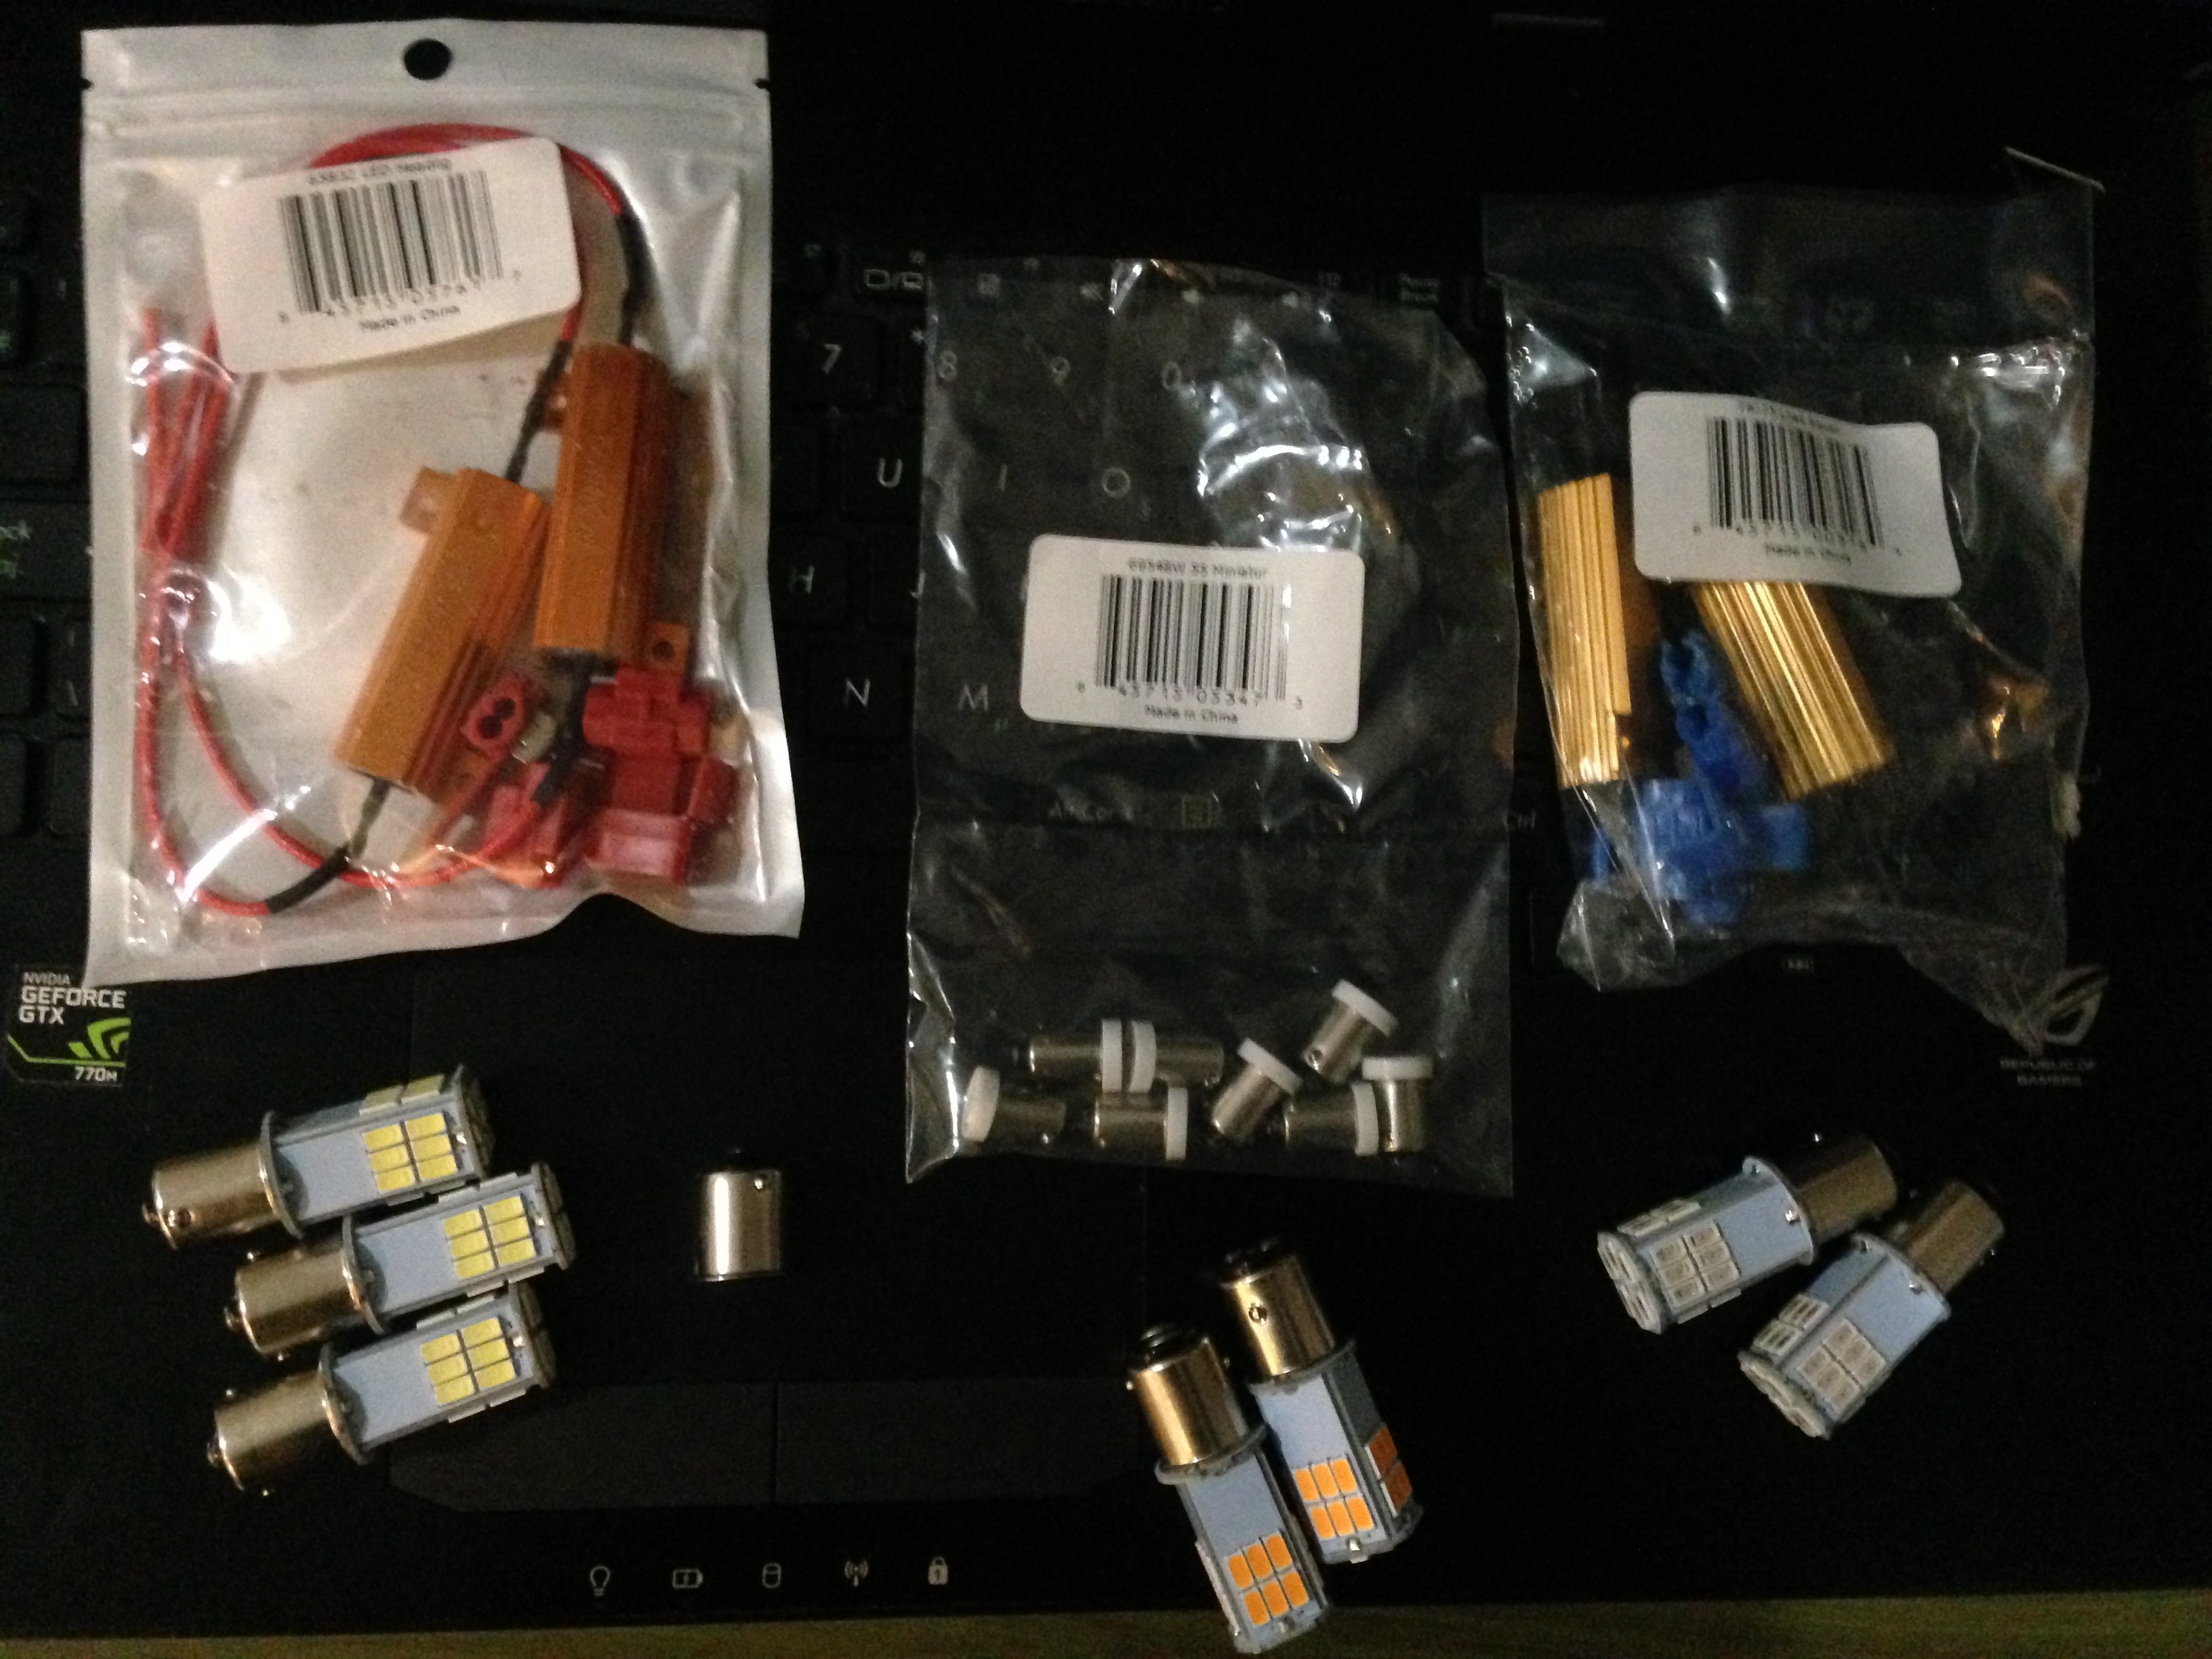
With all those parts in hand, all I need is to install them and I have to say, it is indeed bighter in every place of the car.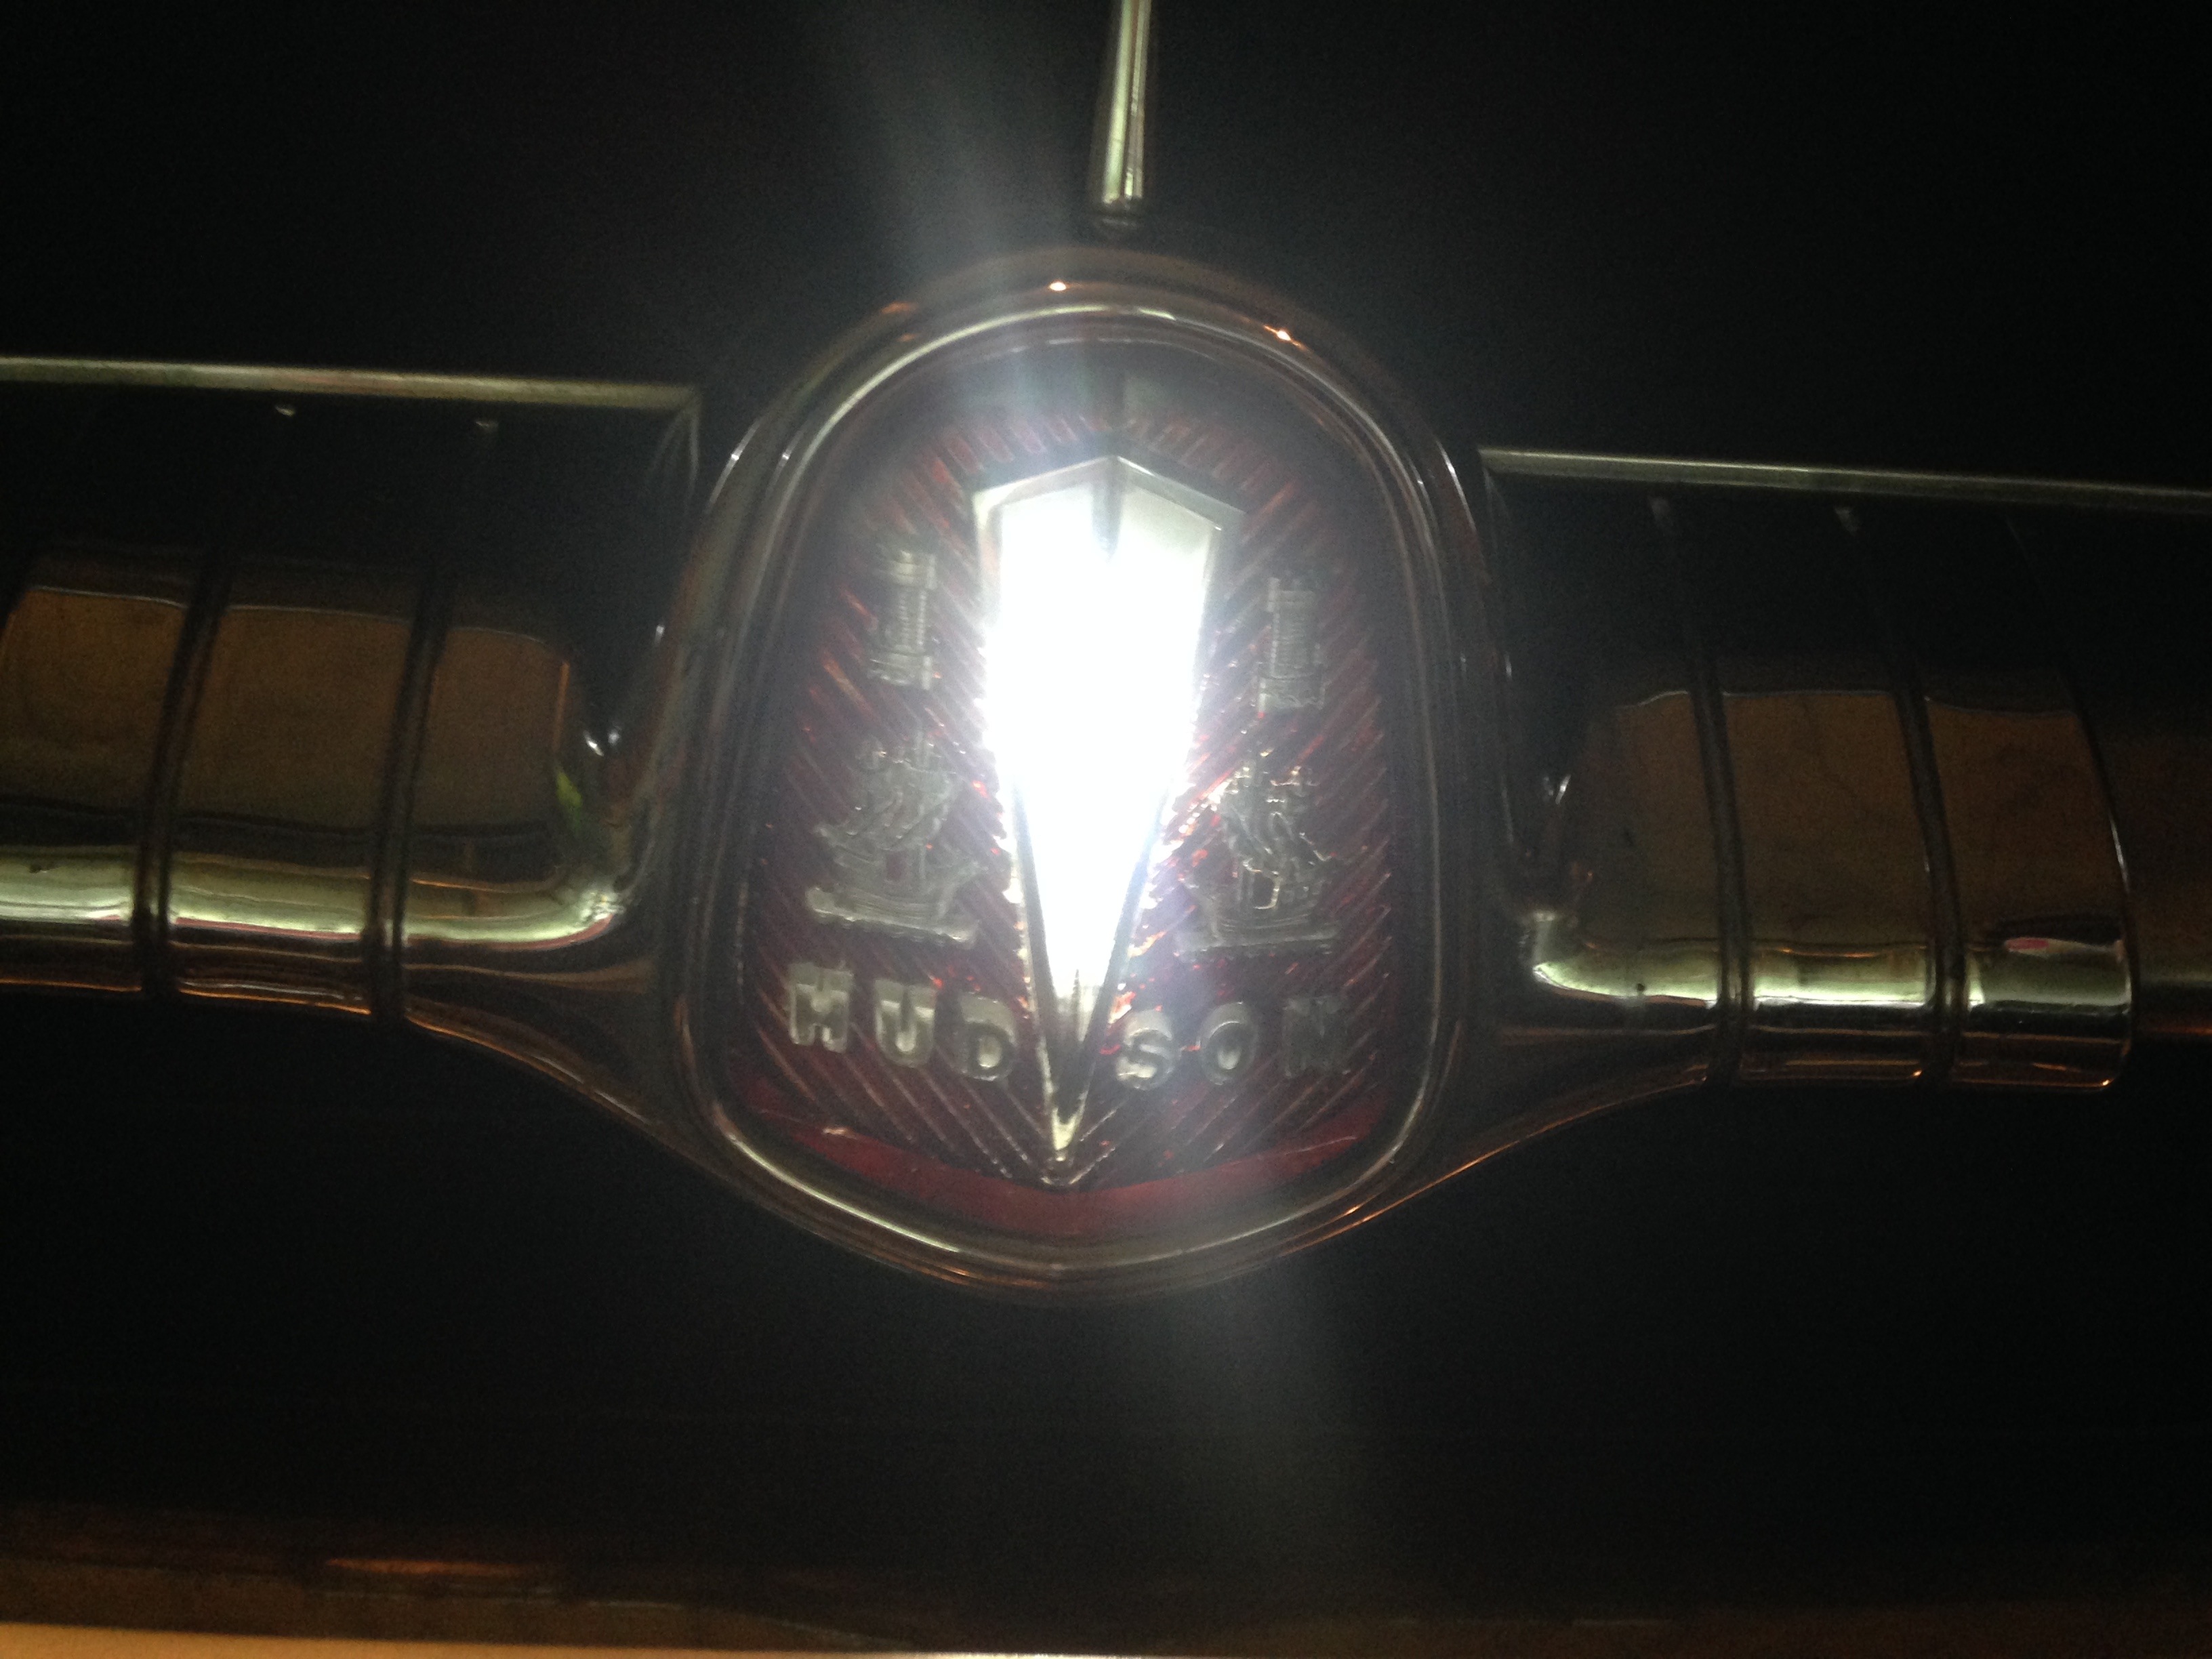
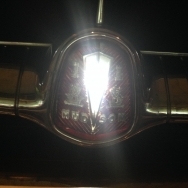
Even the crest in the front has gotten more distinctive with the LED in it.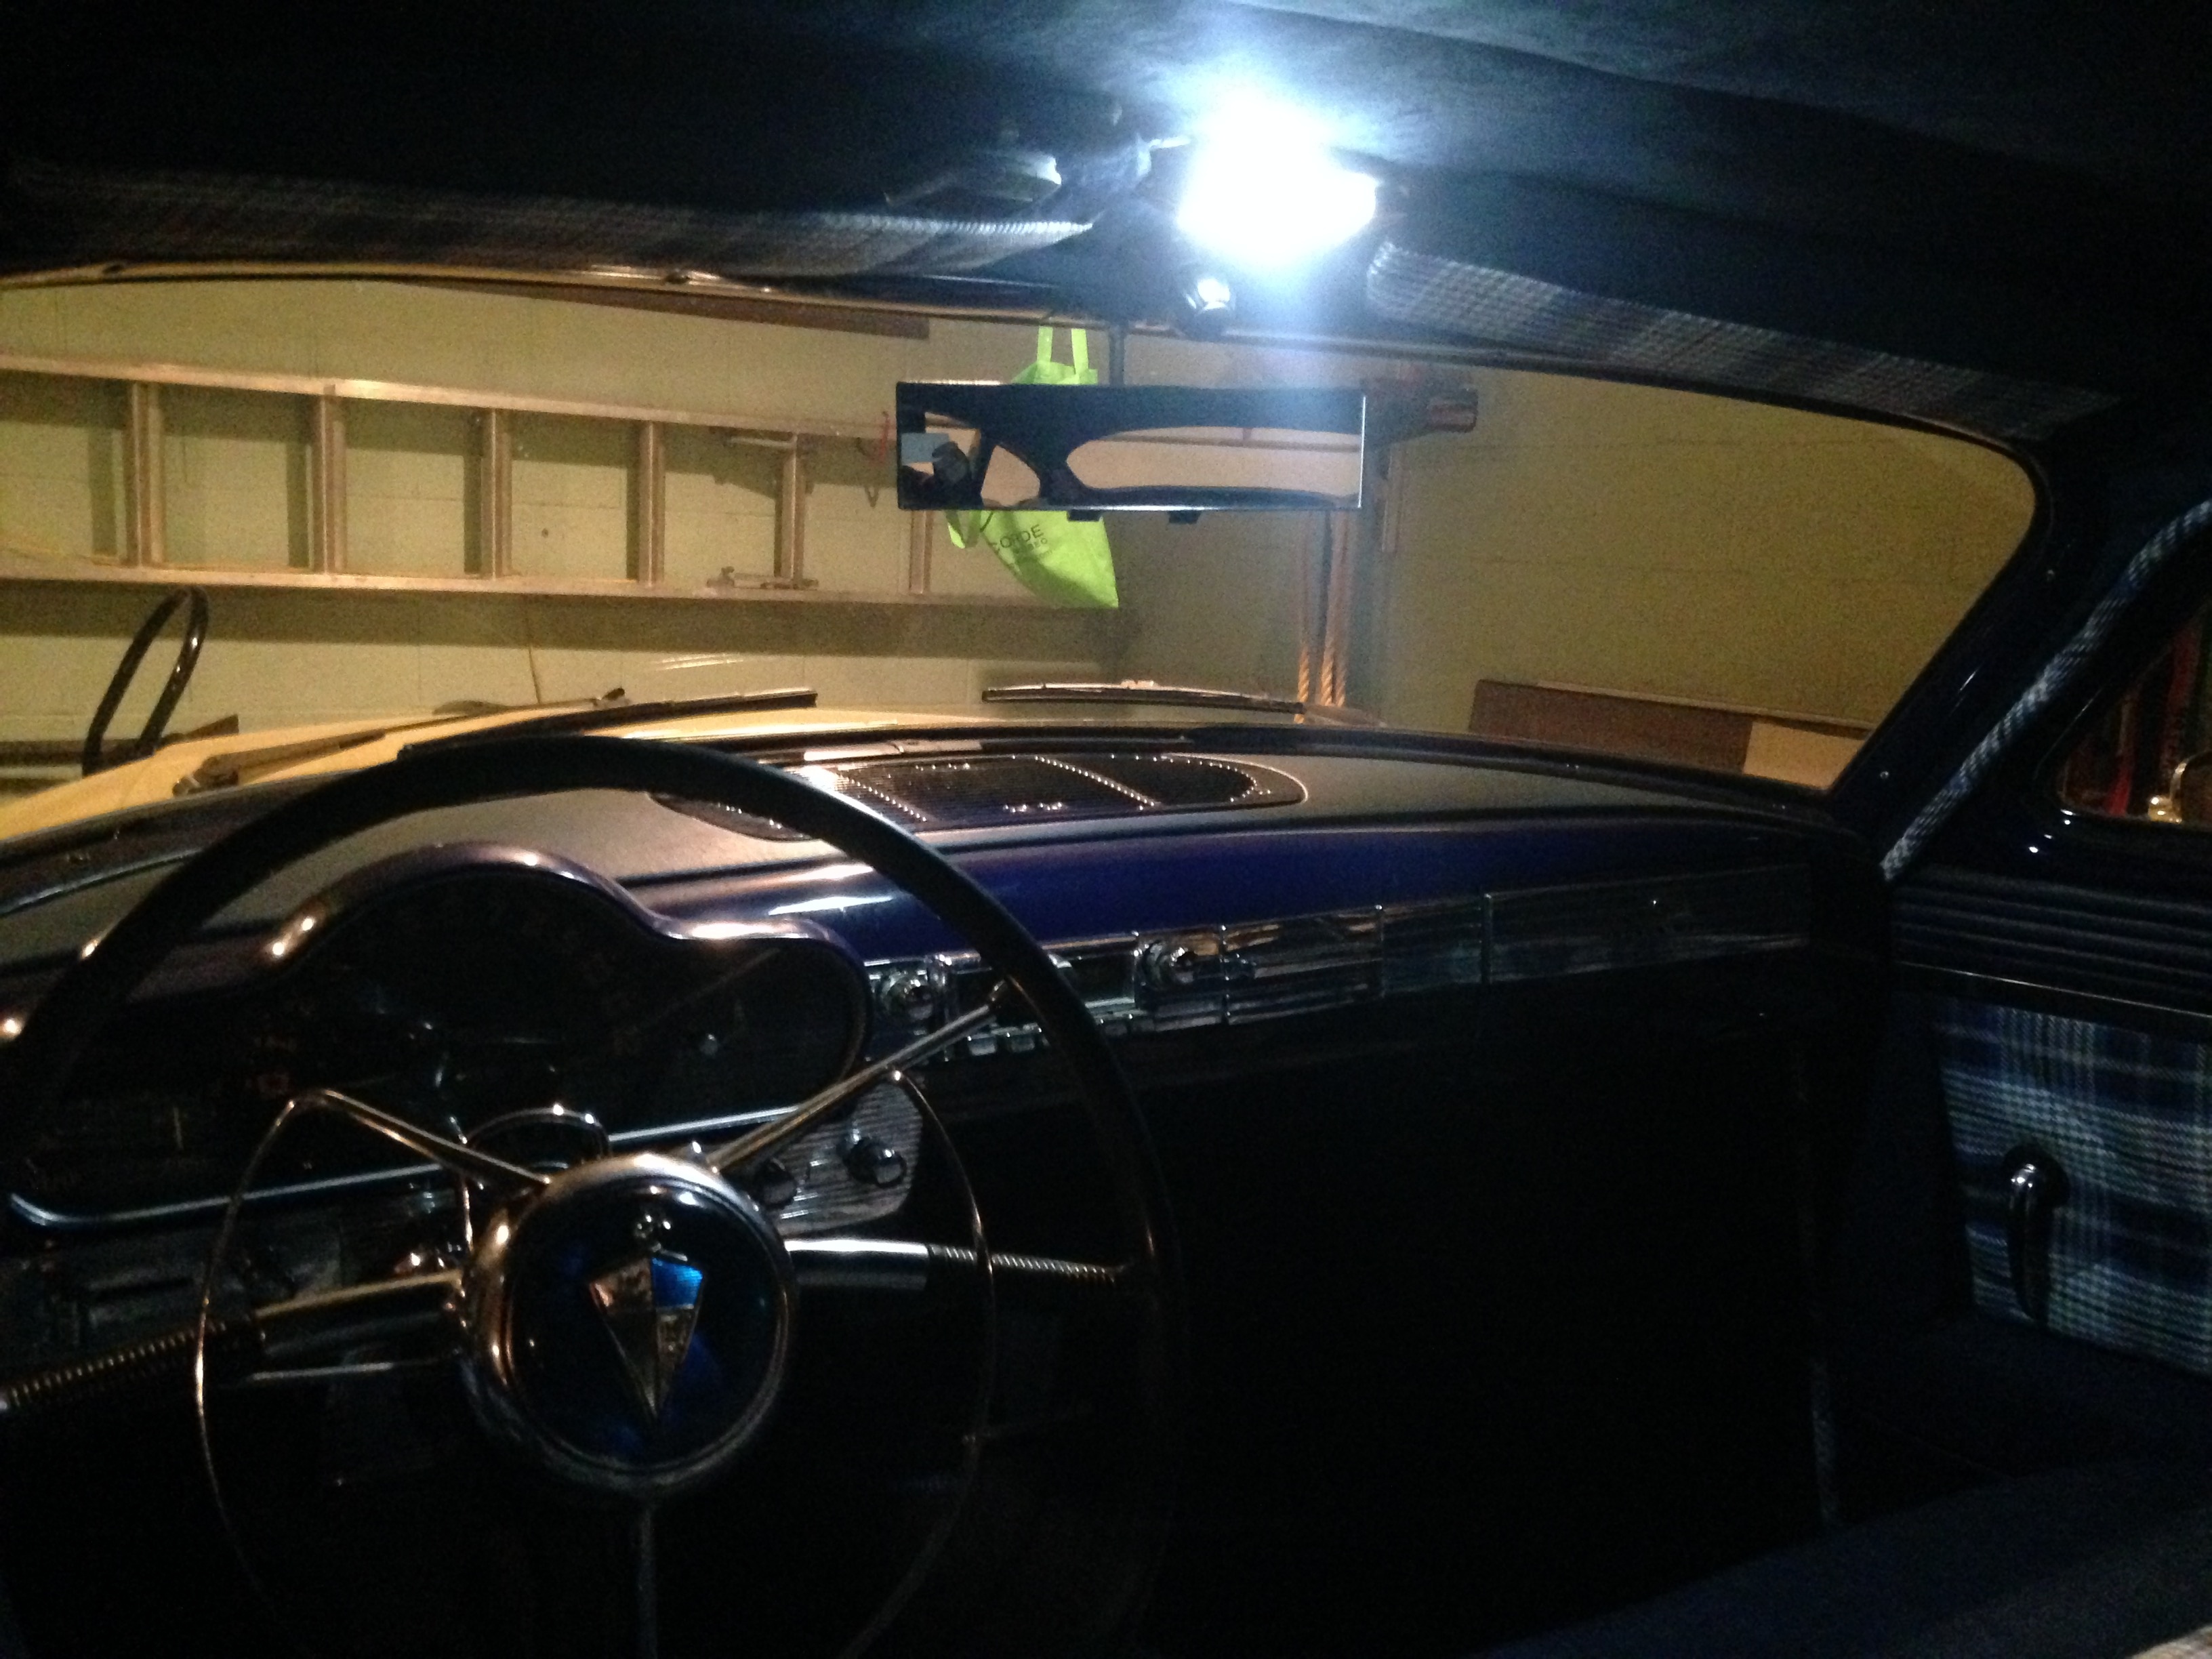
I even changed the interior lights, bringing more light inside. There's still the equalizers for the turn signals, but I'll have to do a dive in the shop manual and read the wiring diagram for them. I've also installed some load equalizers for the headlights, but unfortunately the problem has remained.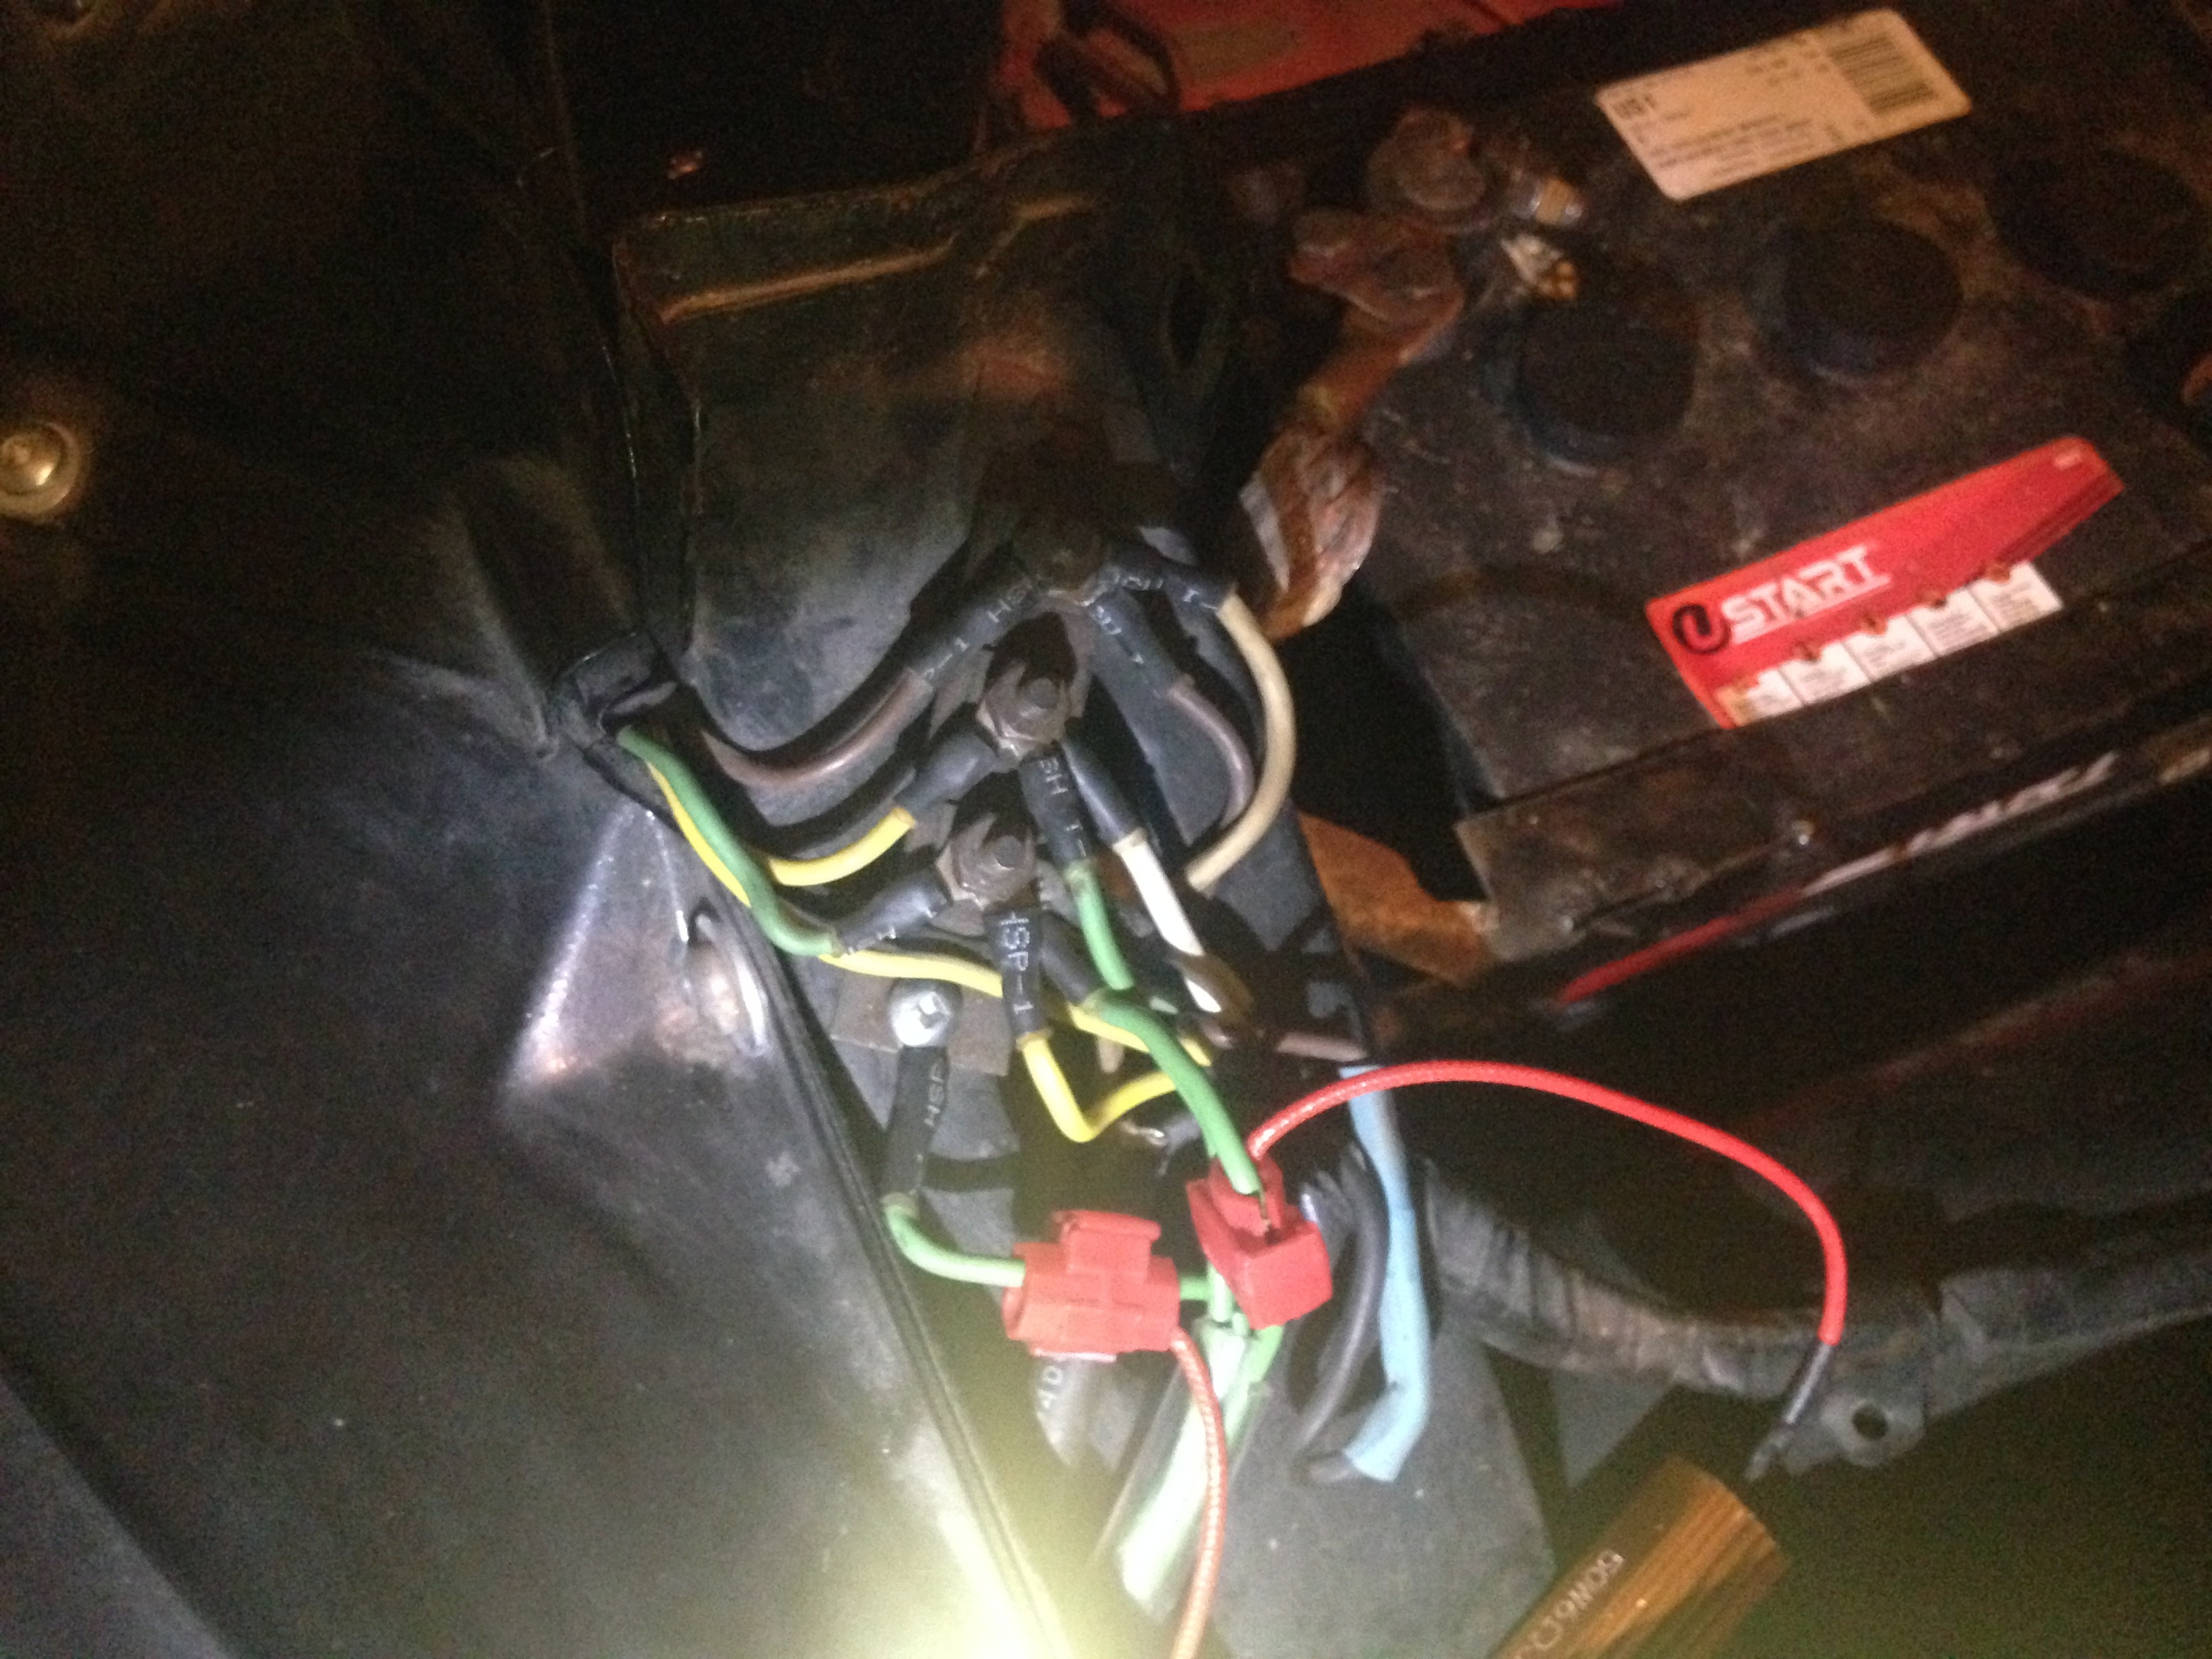
This picture shows one of the headlight junction box in the front side where the headlight wires are connected. Once the equalizers installed ( one per side ), the high and low beams should be working, but for me, it didn't worked so far. I don't know if I've plugged them on the wrong wires ( shouldn't be the case, but you never know with my luck...) or if the problem comes somewhere else. Ideas or advices from any Hudson electical saavy are welcome to help with the headlights.
While plunging myself into the car's shop manual for the wiring diagrams, I've also drowsed on the automatic transmission for the upcomming big job and I found a possible clue.
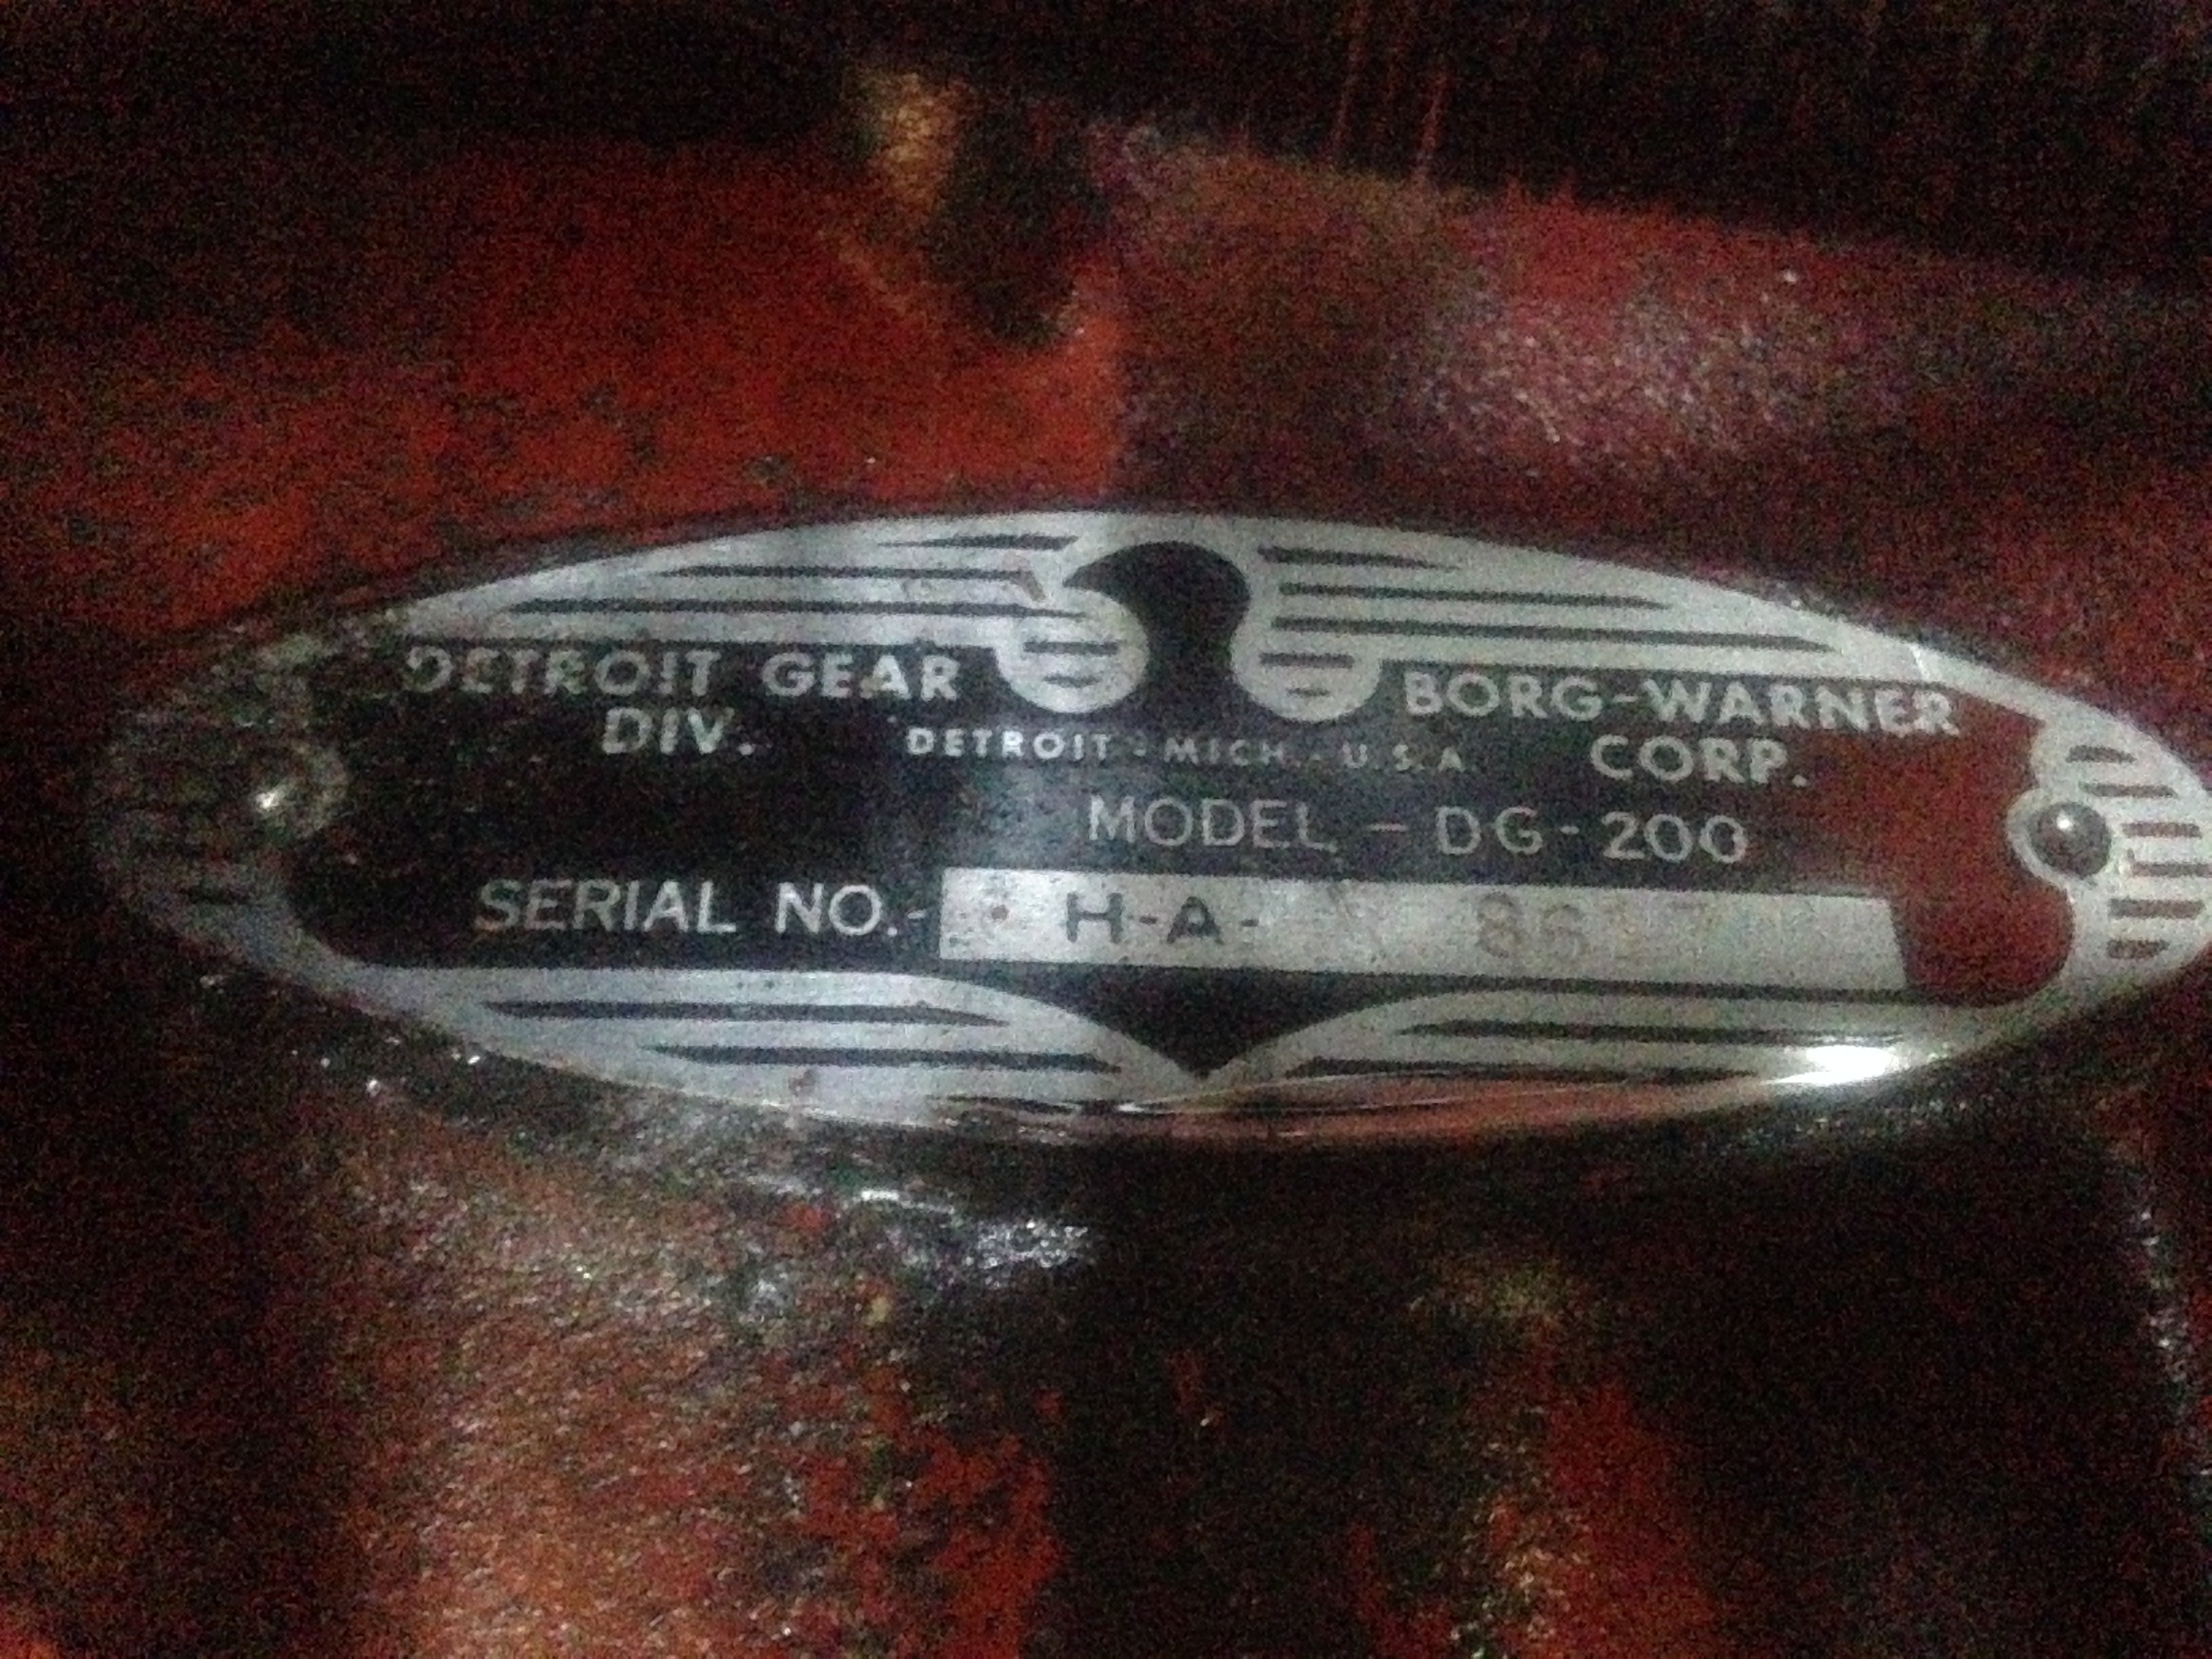
According to the Manual Supplement for 1953-1954 models, the Borg Warner trannys have received a new valve block incorporating the front and rear pump relief valve in order to reduce front pump pressure. Those that were built prior the transmission serial number HA-7118 has been identified with a letter " V " after the number.
It did rung me a bell in my head and returned under the car to take a close look on the serial number.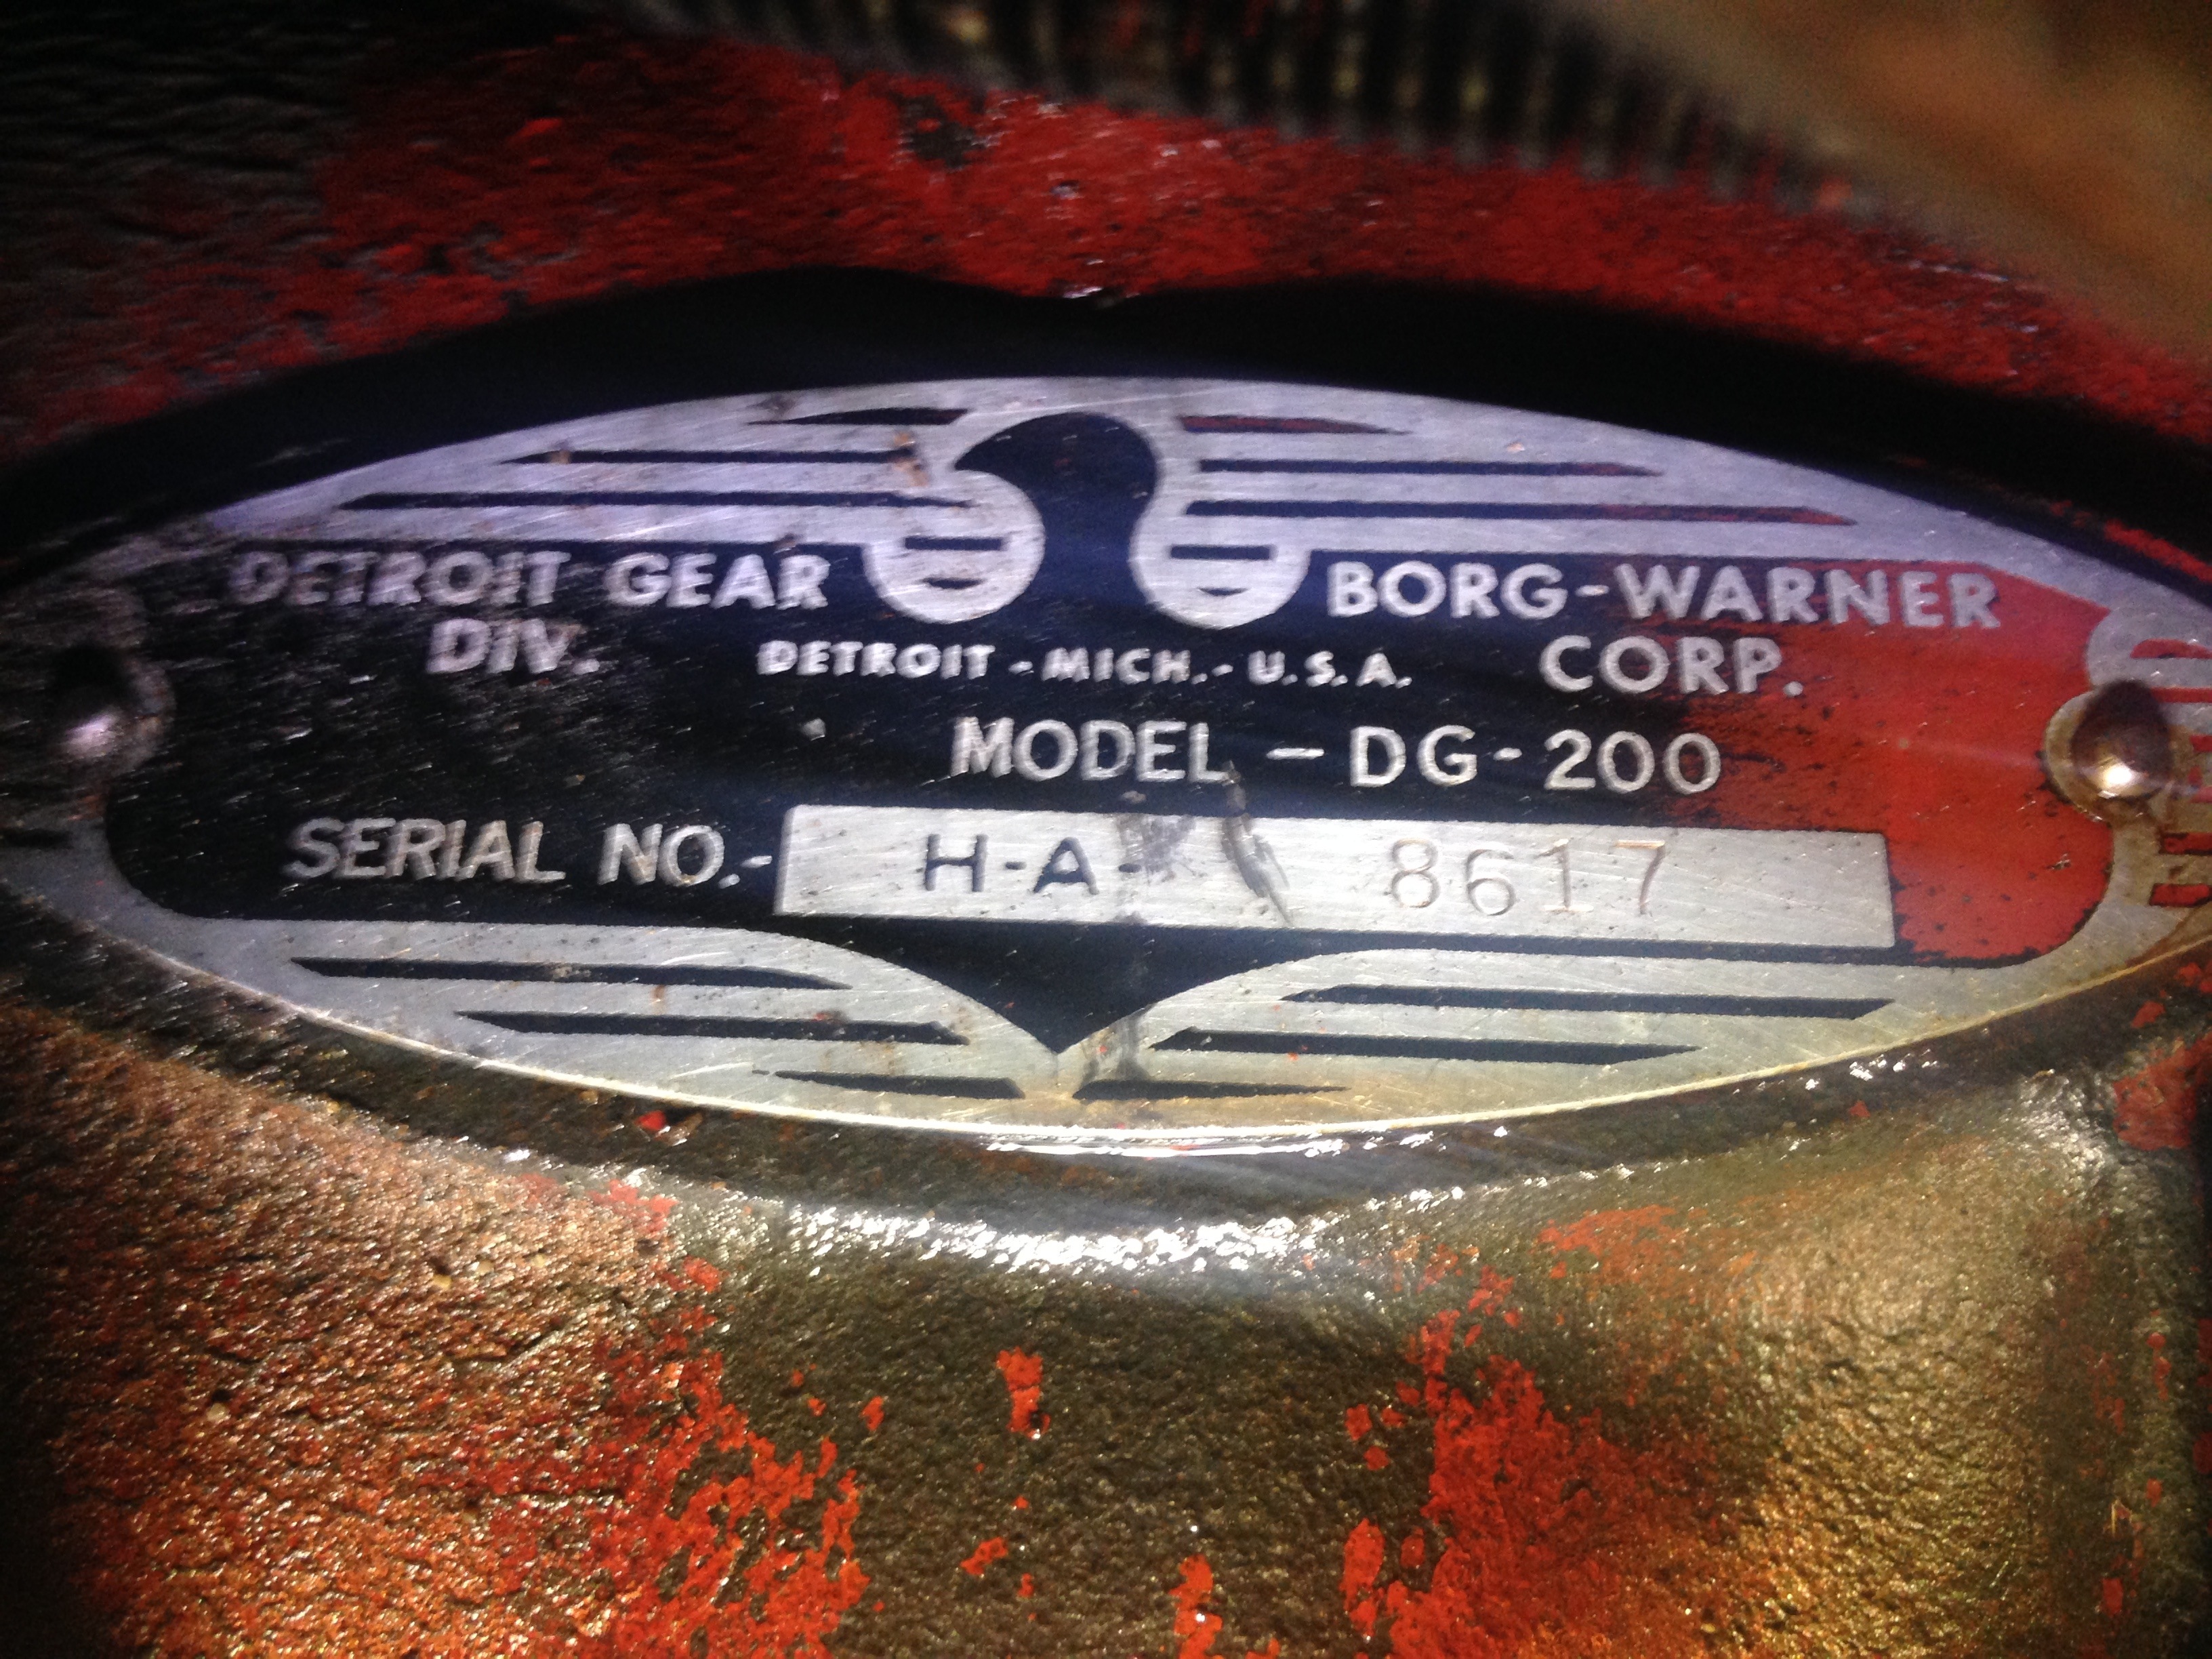
As seen here, my tranny serial number is HA-8617, but no V letter at the end.
" Watson, be got something interesting here for sure. "
Right now I'm wondering if the lack of a front and rear ralief valves can cause the leak as there is nothing to reduce front pump pressure, wich also brings me a question:
Does the V letter at the end the tranny number indicates that the new valve block has been installed ? If not, what does indicates it ?
I'll continue the investigation with this clue in mind. If someone knows more about this modification on the DG-200, let me know.
Max
0 -
Update of November 11th
after some days of reading in the transmission's shop manual, it is finally time to start the investigation of the leaking tranny.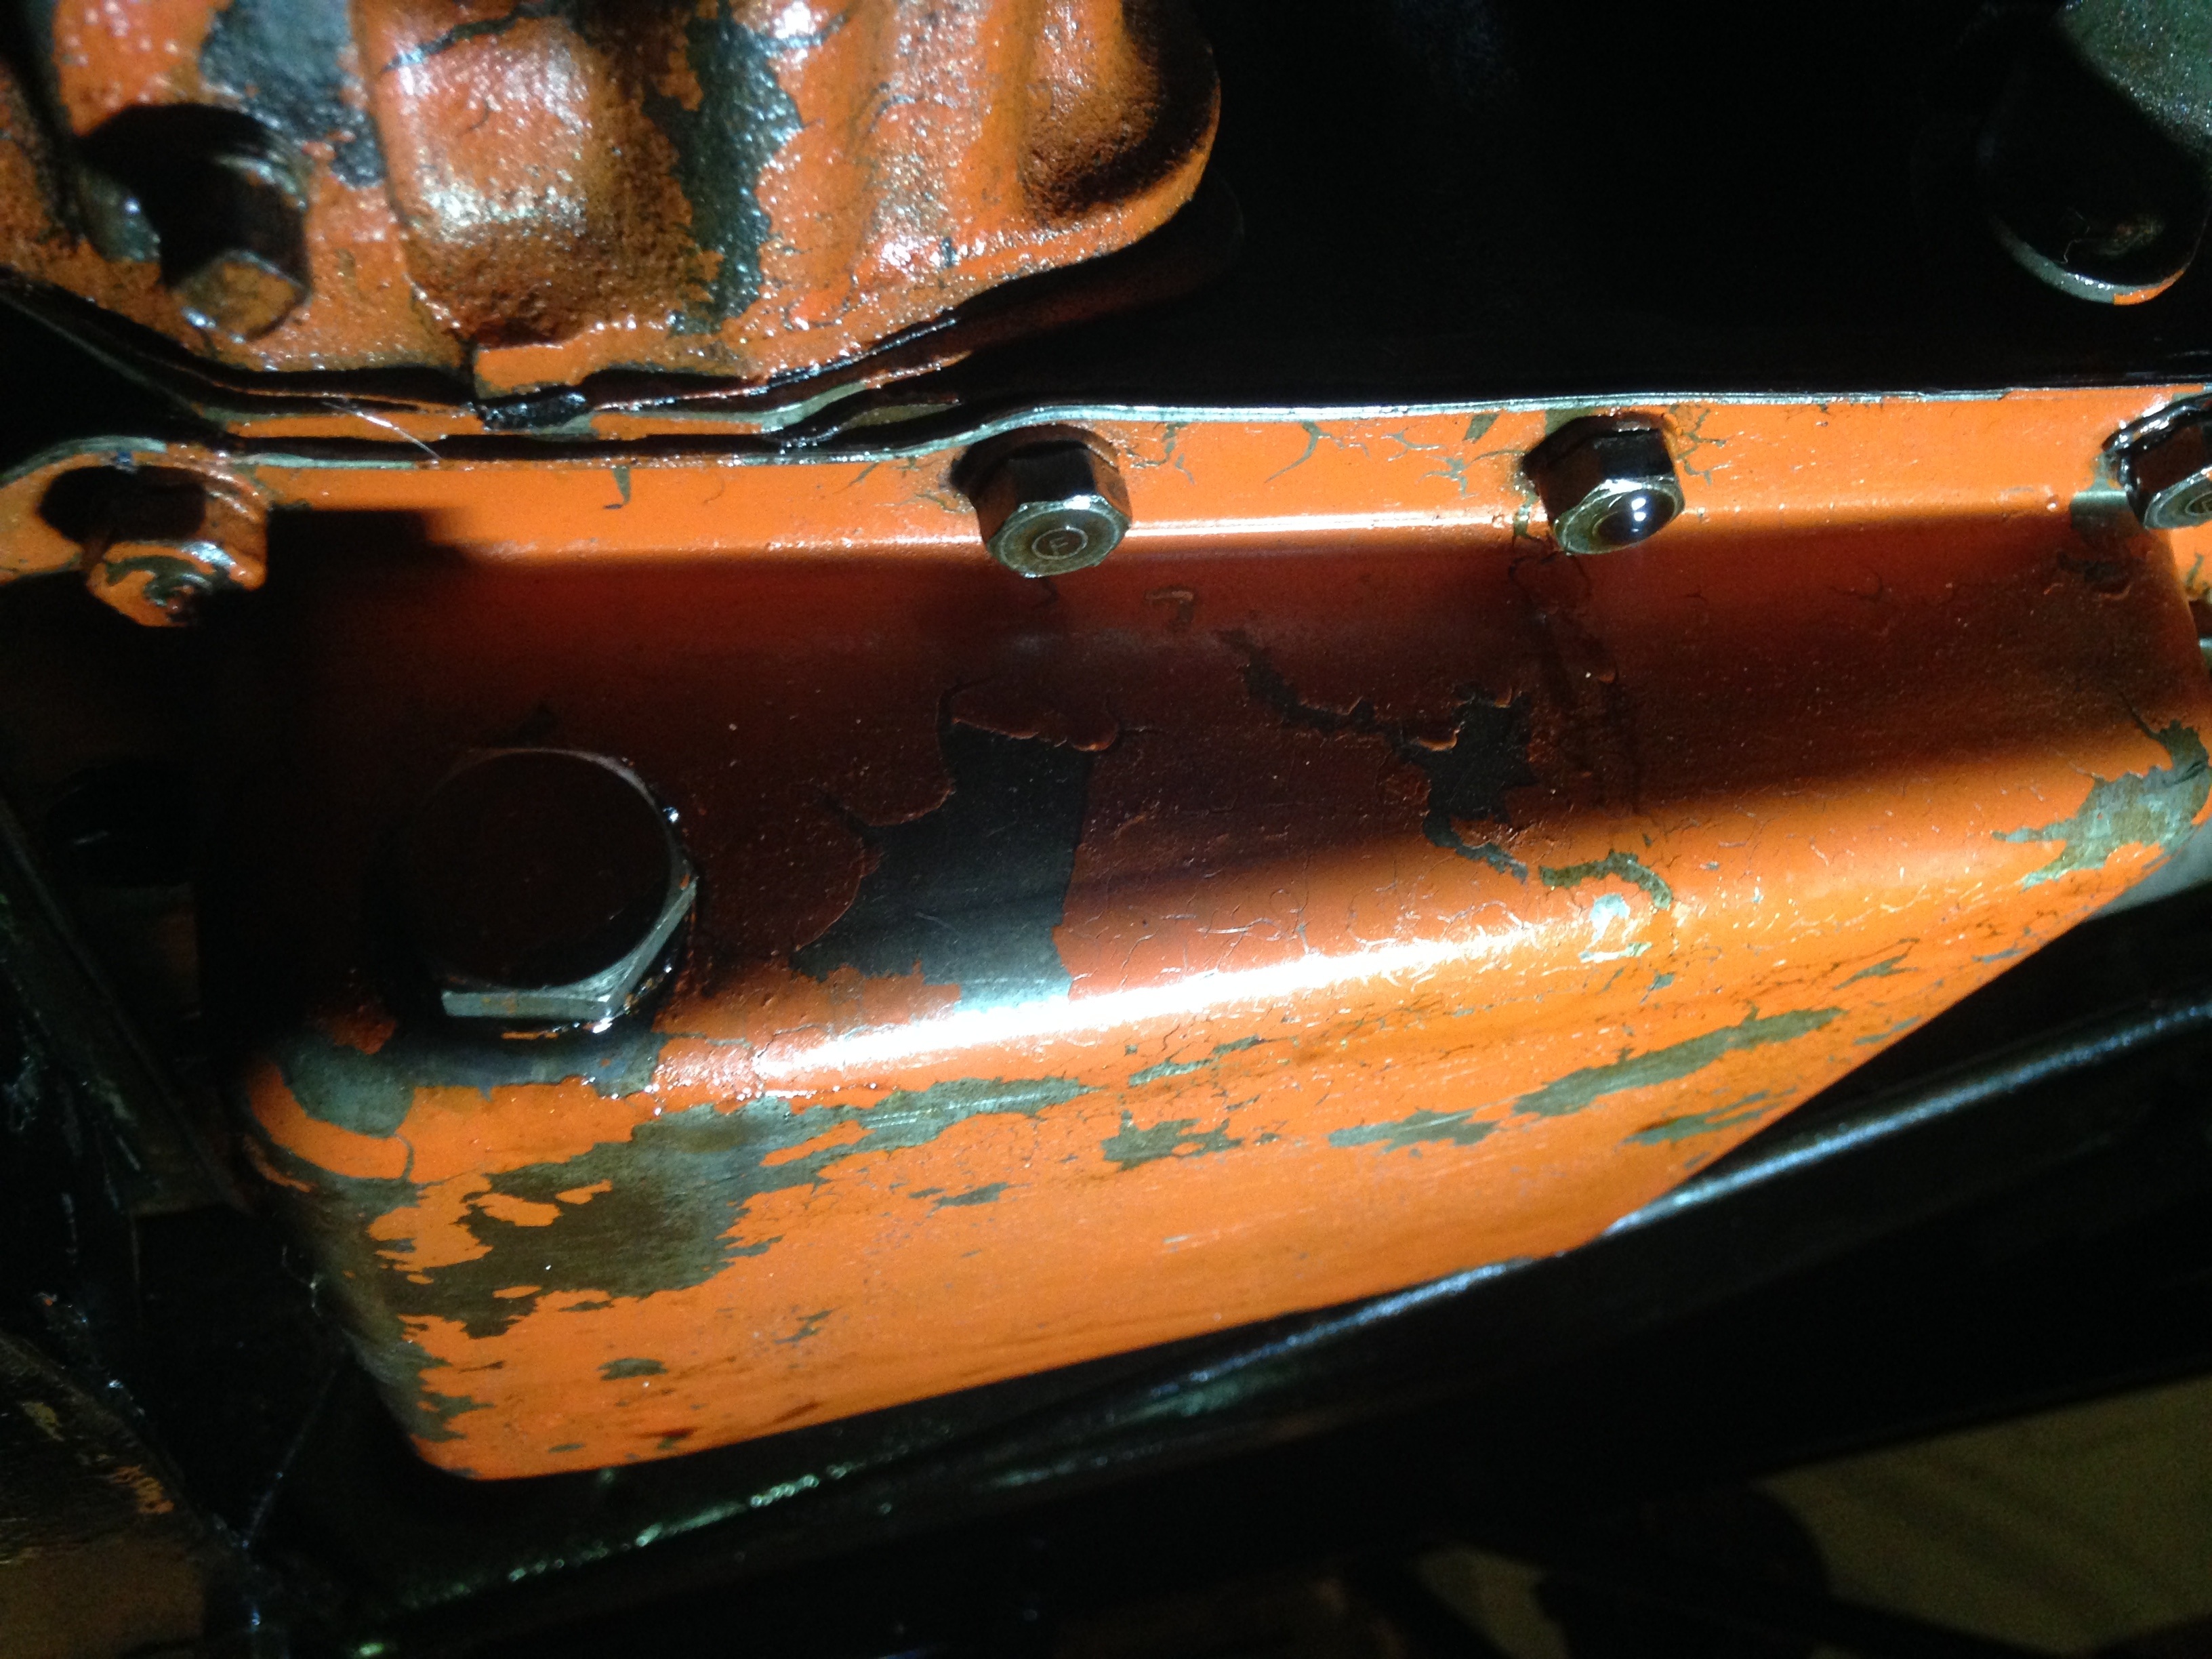
The first place I wanted to check is the tranny's oil pan and having a glimpse of the valve block. Draining out the fliud was a logical but also necessary as the transmission fluid was brown, along with the horrible smell of it. The smell was so strong that I needed to take a shower and put my clothes to get washed ofter the job done.
From now on I shall remember the horrid stench of burnt transmission fluid
Then the next step was to remove the pan screws and carefully bring it down, uncovering the tranny oil screen and the onimous valve block.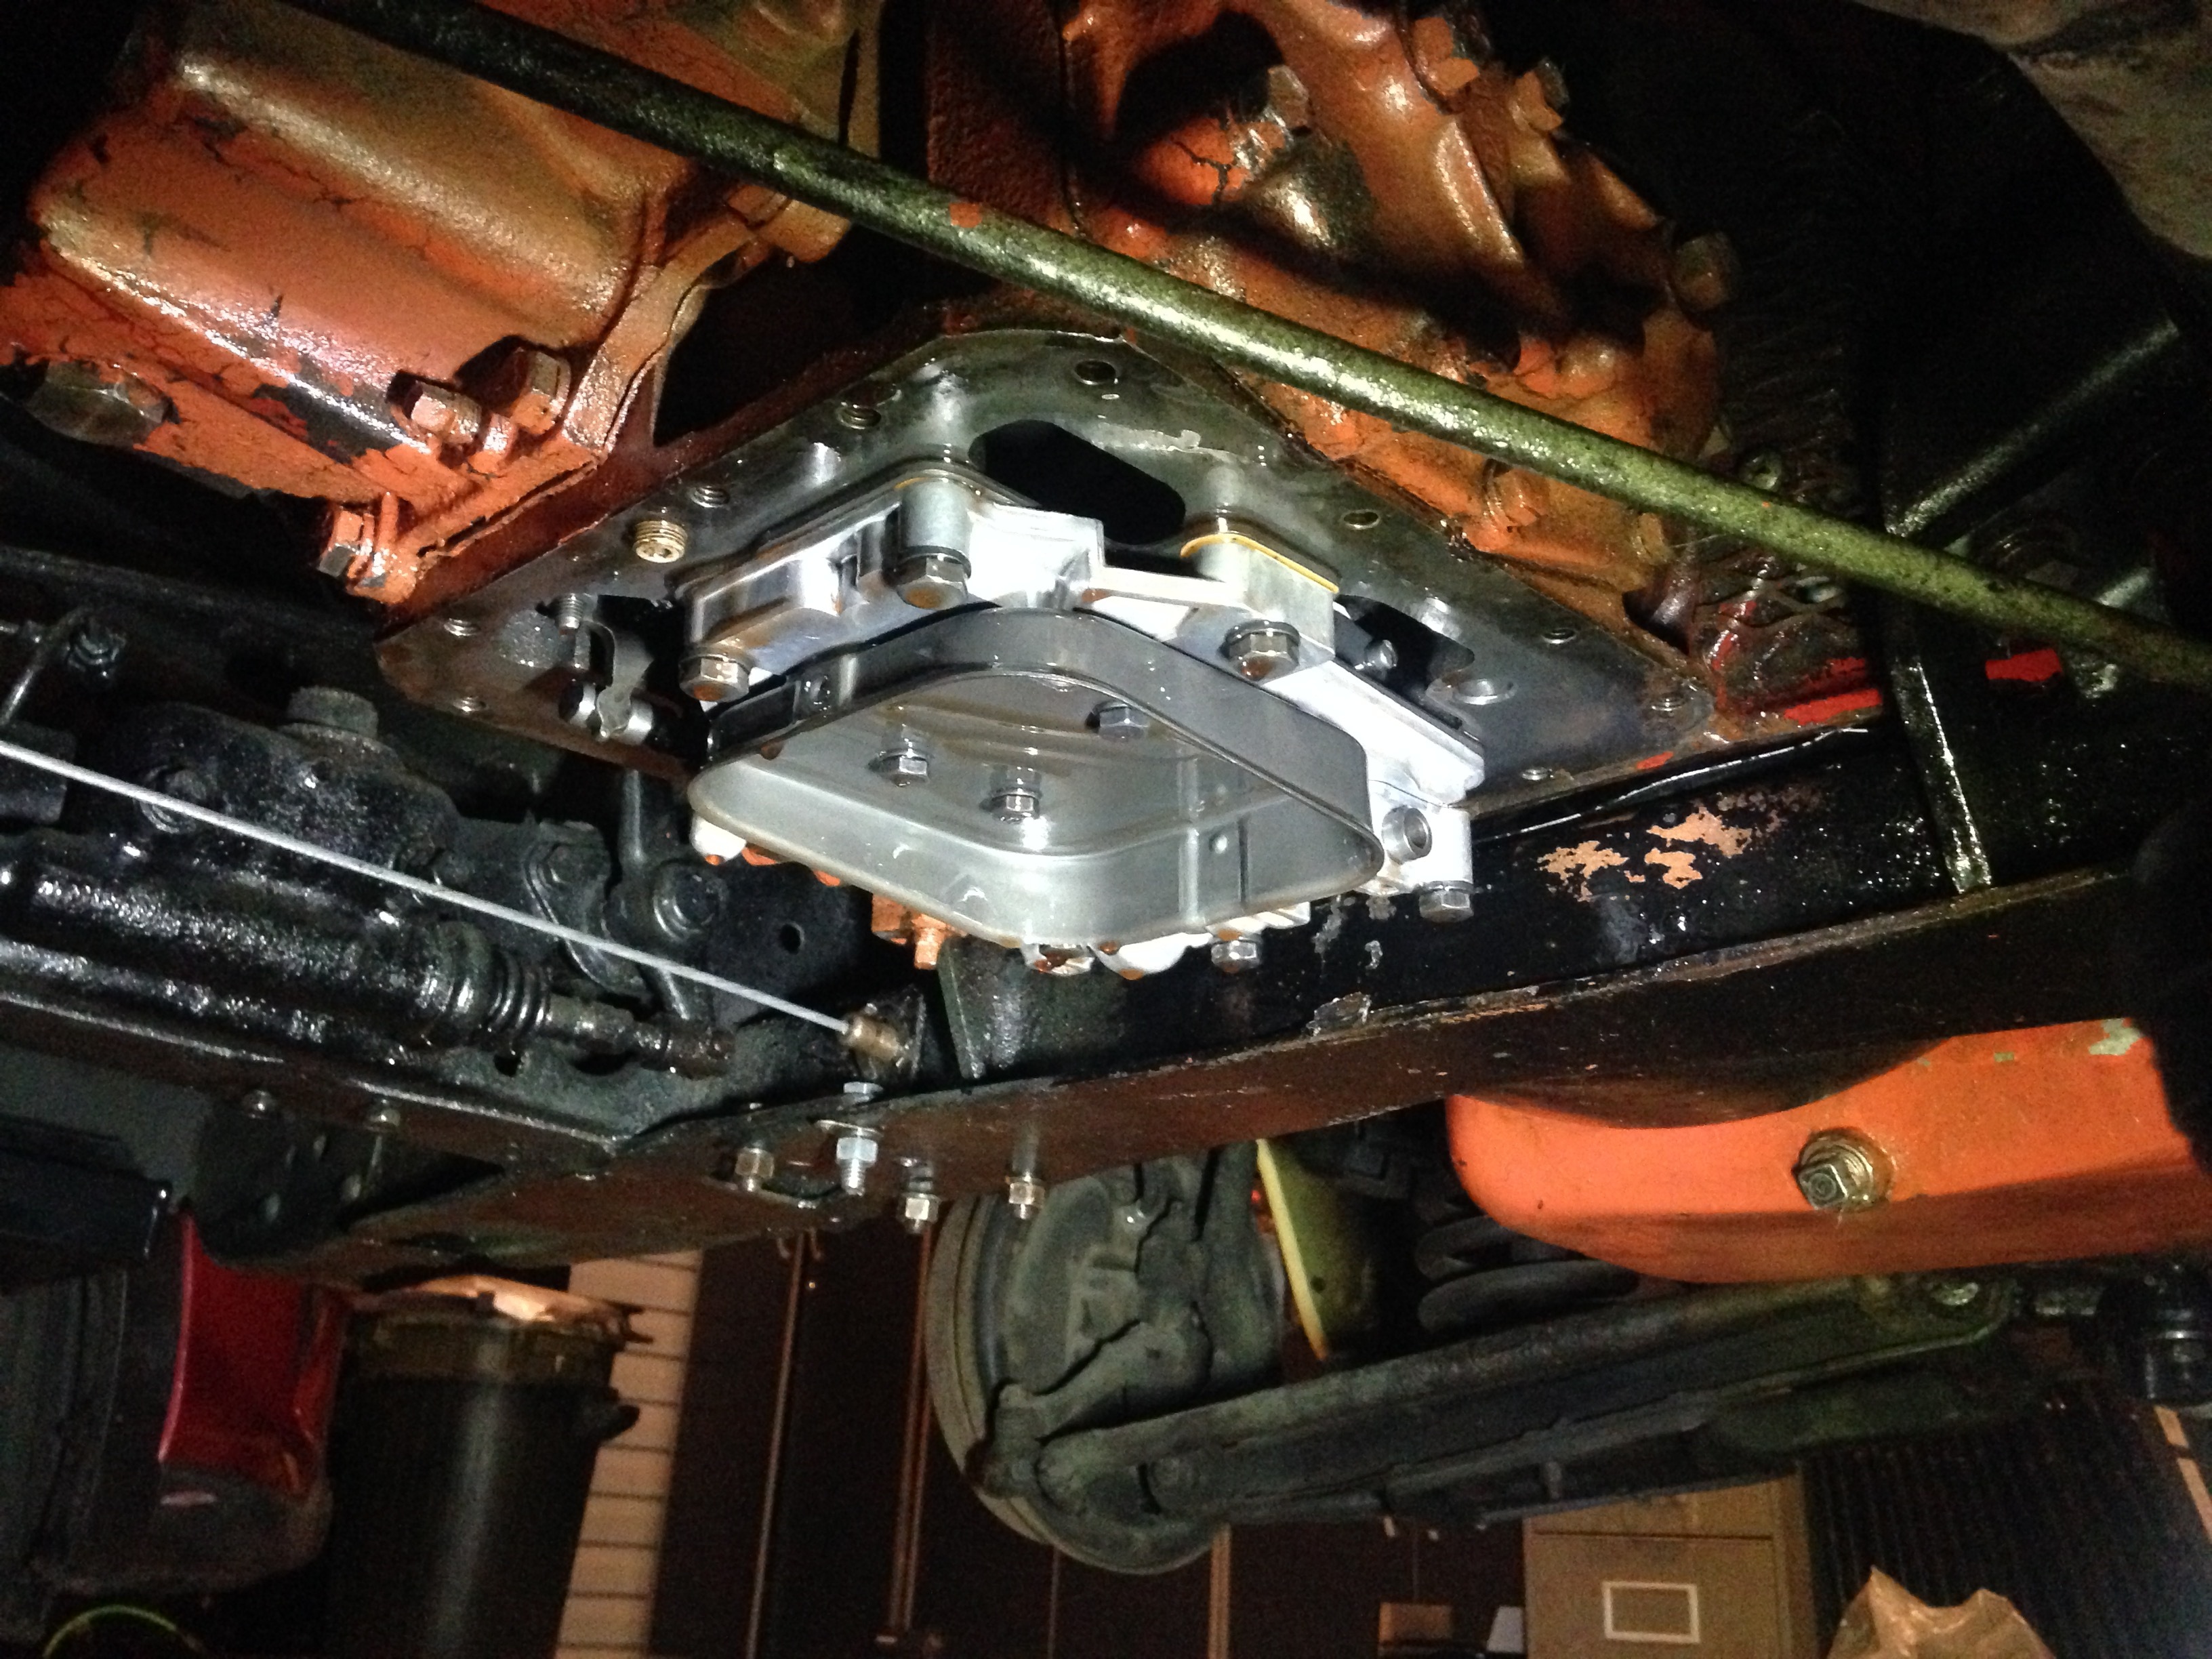
From this picture, the valve block looks like new , for a 65 years old car. Next to the shroud ( though we can't see it well on the picture ), lies the front and rear pump relief valve. I'll let it as it is untill I know how to do a proper inspection on it.
As for the screen...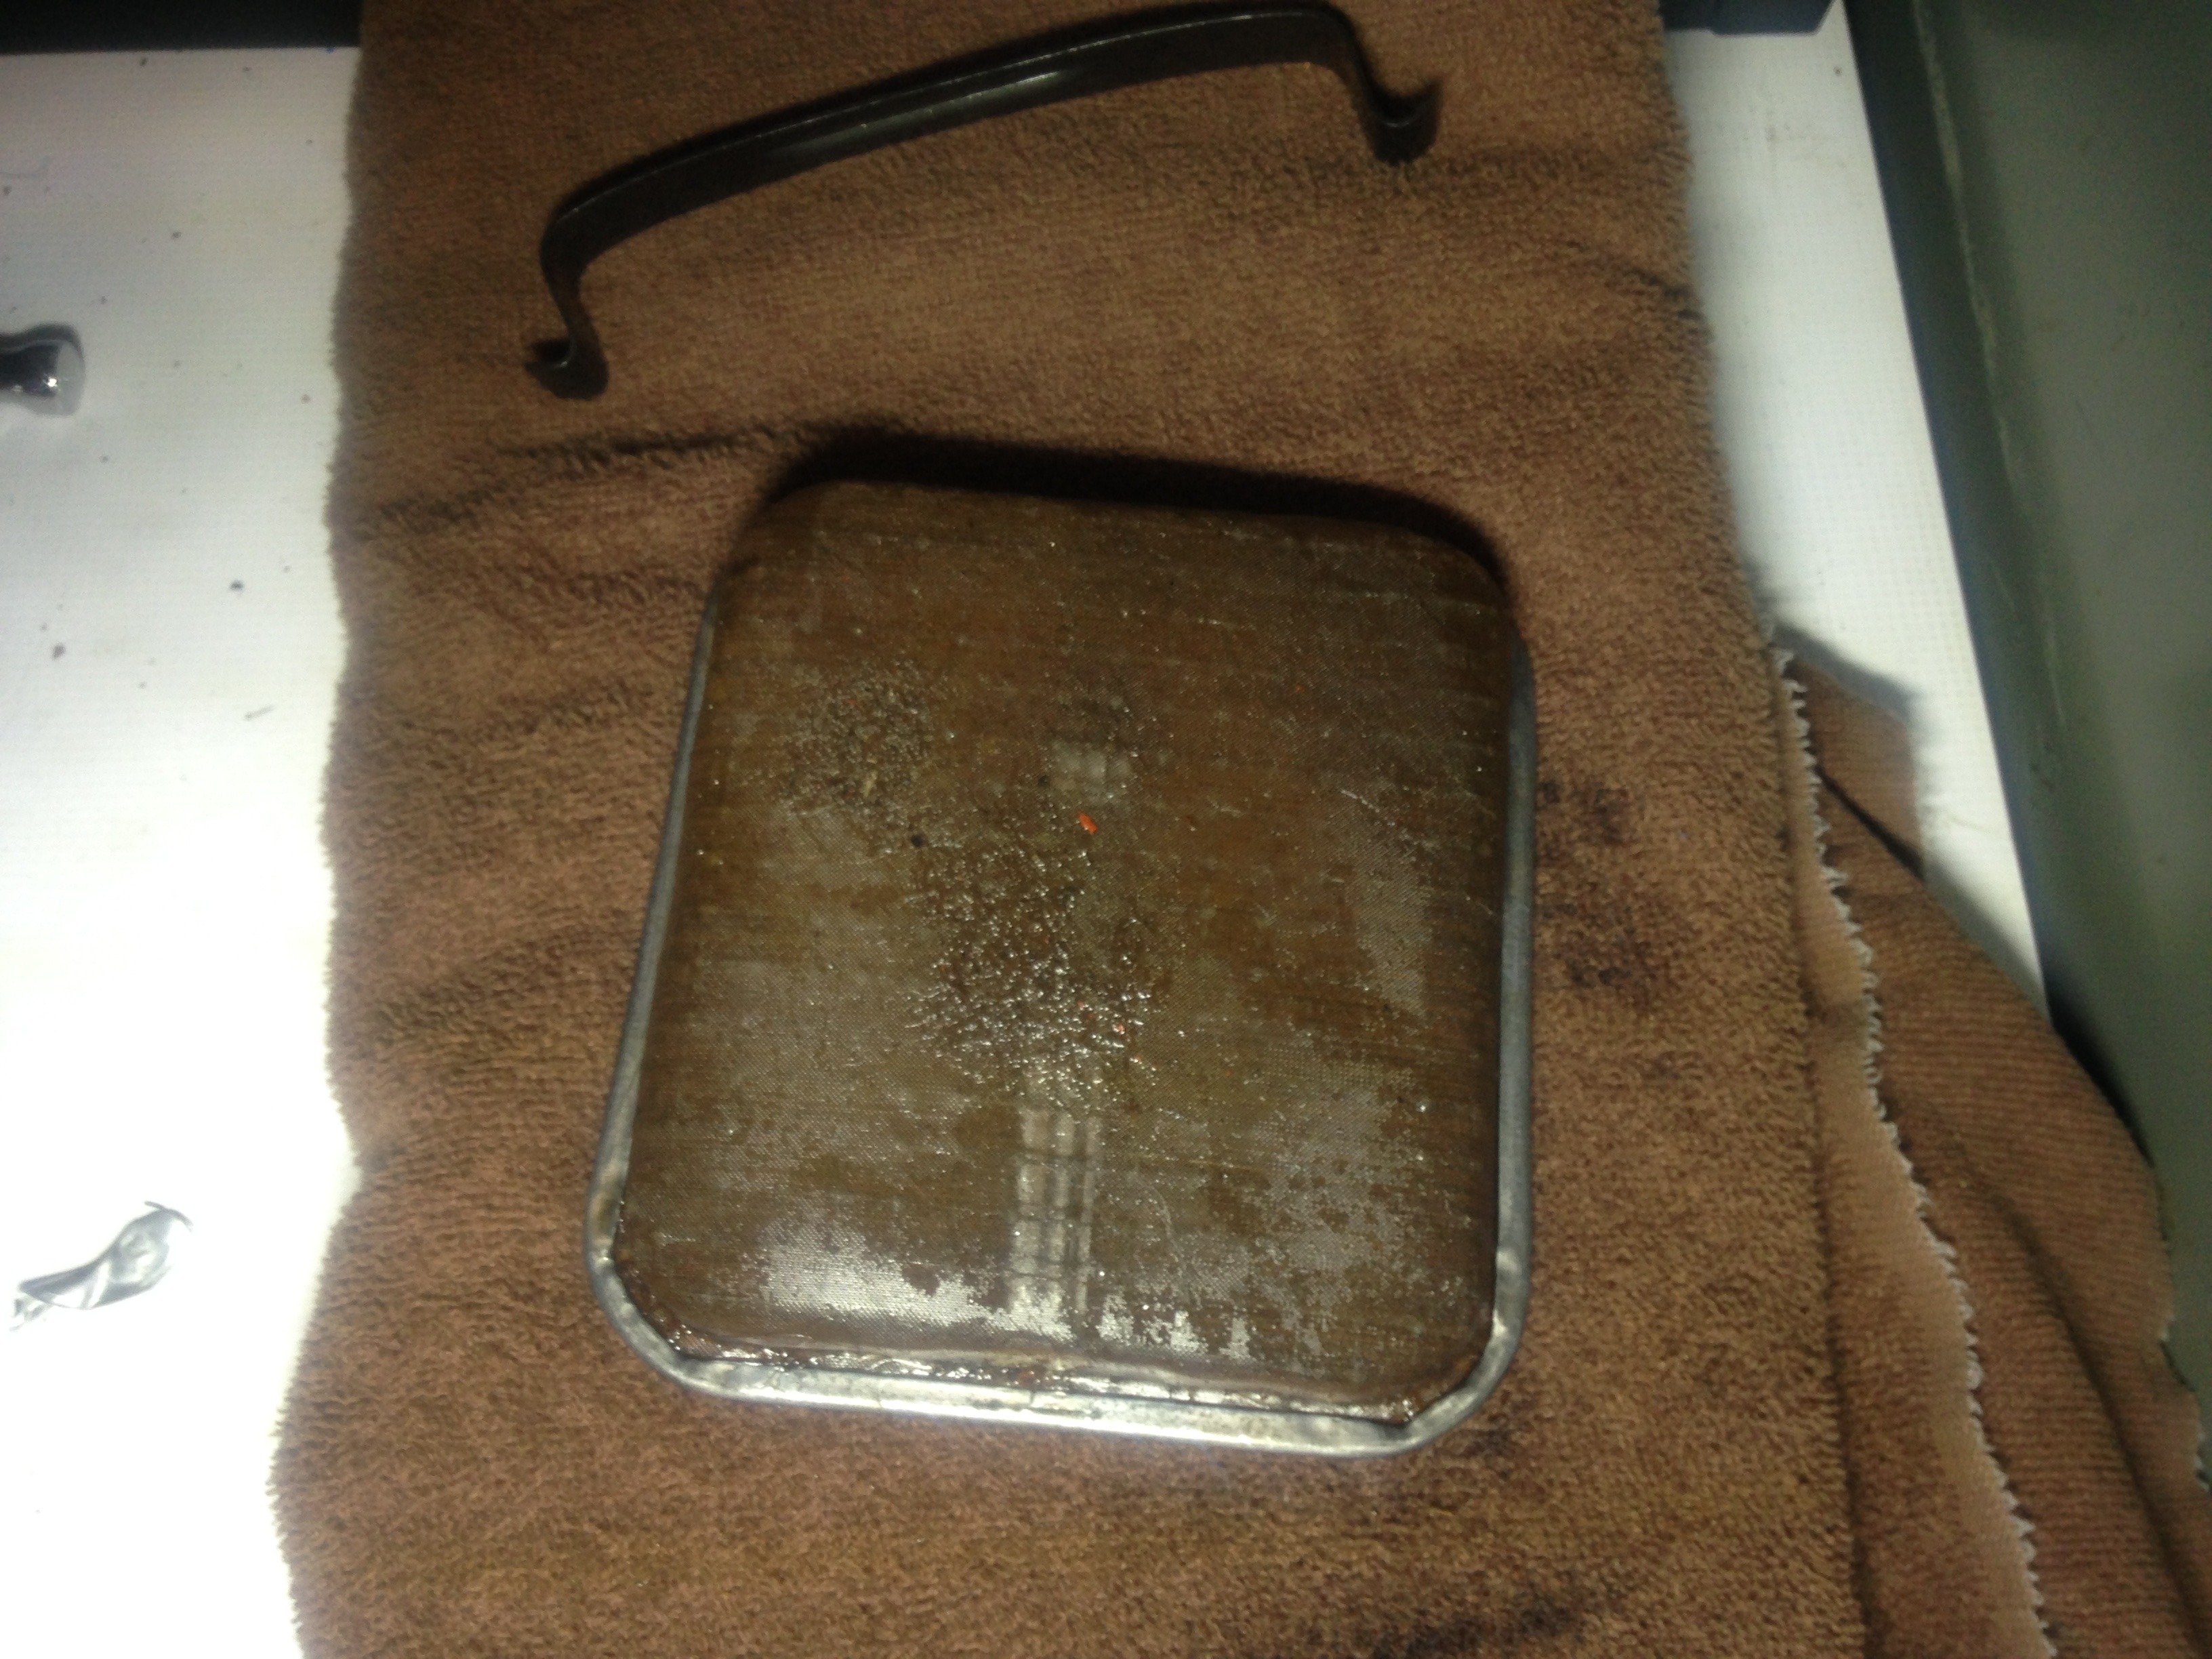
Well let's say it is doing his job well so far. I'll give it a good clean up before putting it back, that's for sure.
While I did have the transmission oil pan down I also took a close look on it.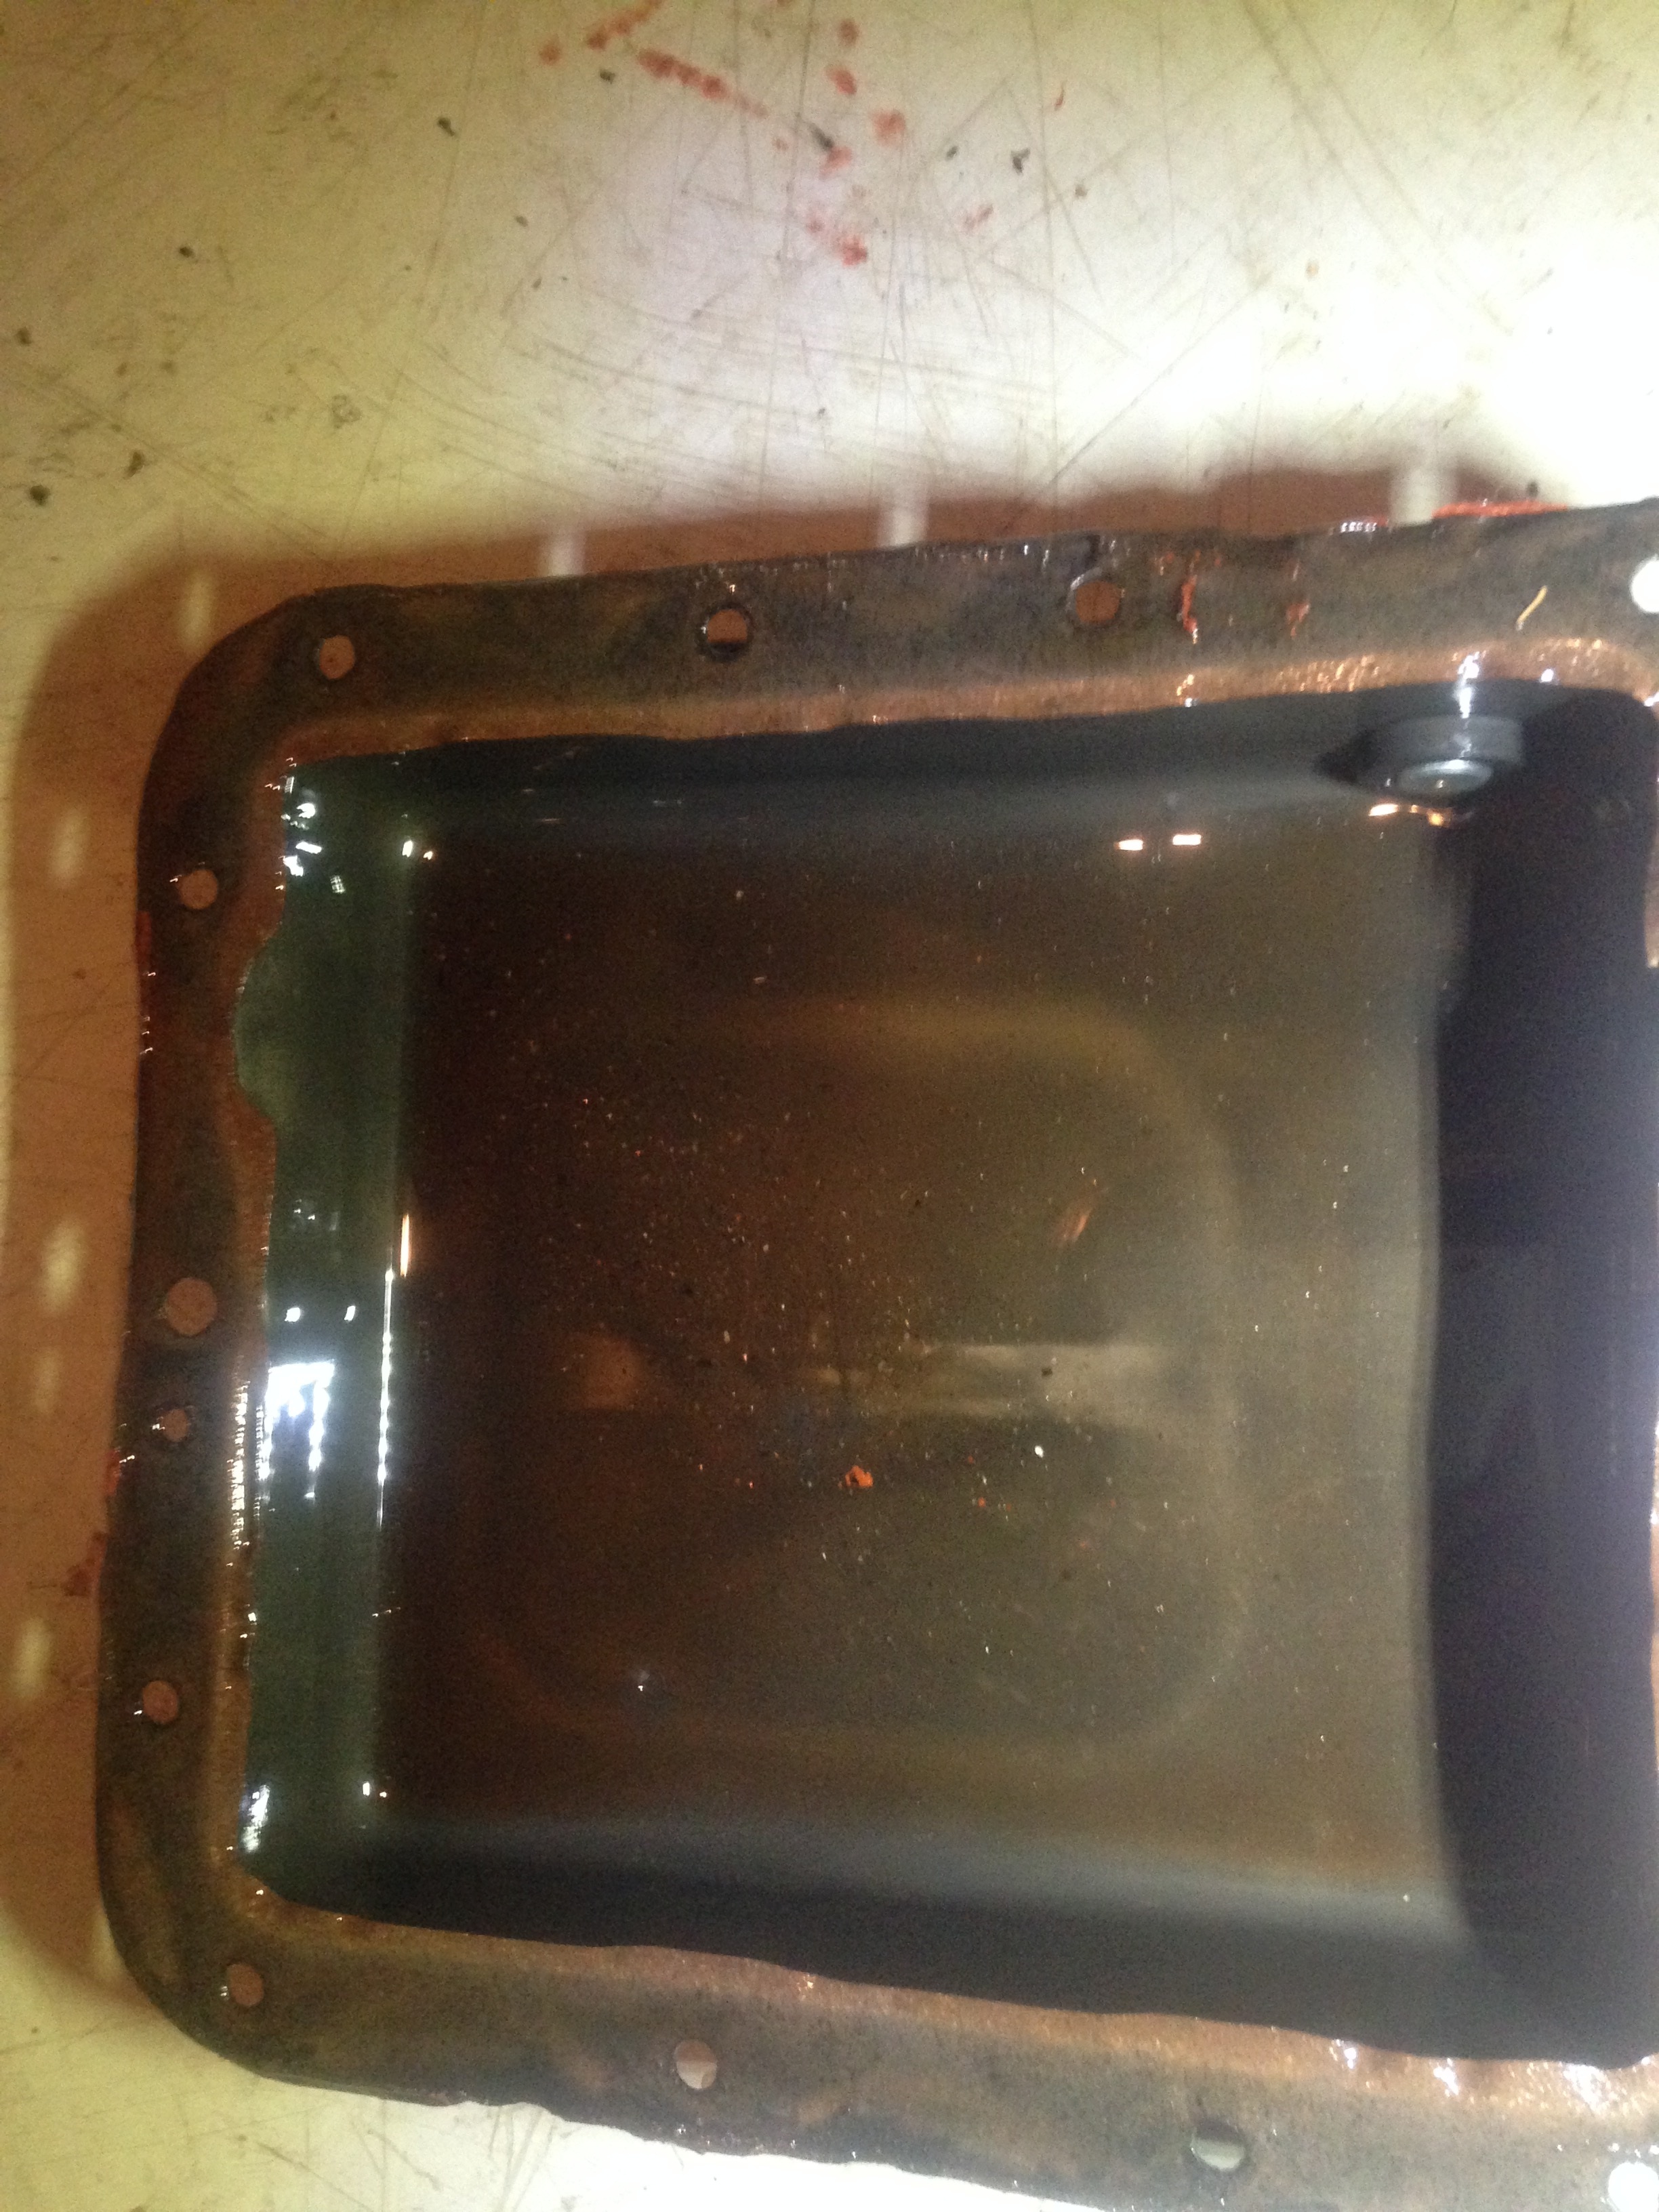
As seen here, there's metal particles at the bottom of the pan. I do know that some metal particles in the pan is normal, but too much of it is a sign of a deteriorating part inside of the tranny, wich bring me to ask this question to any member of the club:
Is this amount of metal particle is normal or a sign of a more serious internal problem for the transmission ? Having the advices of the experts would be good.
As for me, I'll continue the inspections while slowly removing the part under the car so I can eventually remove the entire tranny from the car. As said before, any ideas or advices are warmly welcome, as I want to learn more on this old lady that is my 54 Super Wasp named Molly.0 -
Update of November 17 th
My weekend was pretty full for me as I've started removing bigger pieces in preparation for the transmission removal of the car while finishing some smaller jobs around Molly.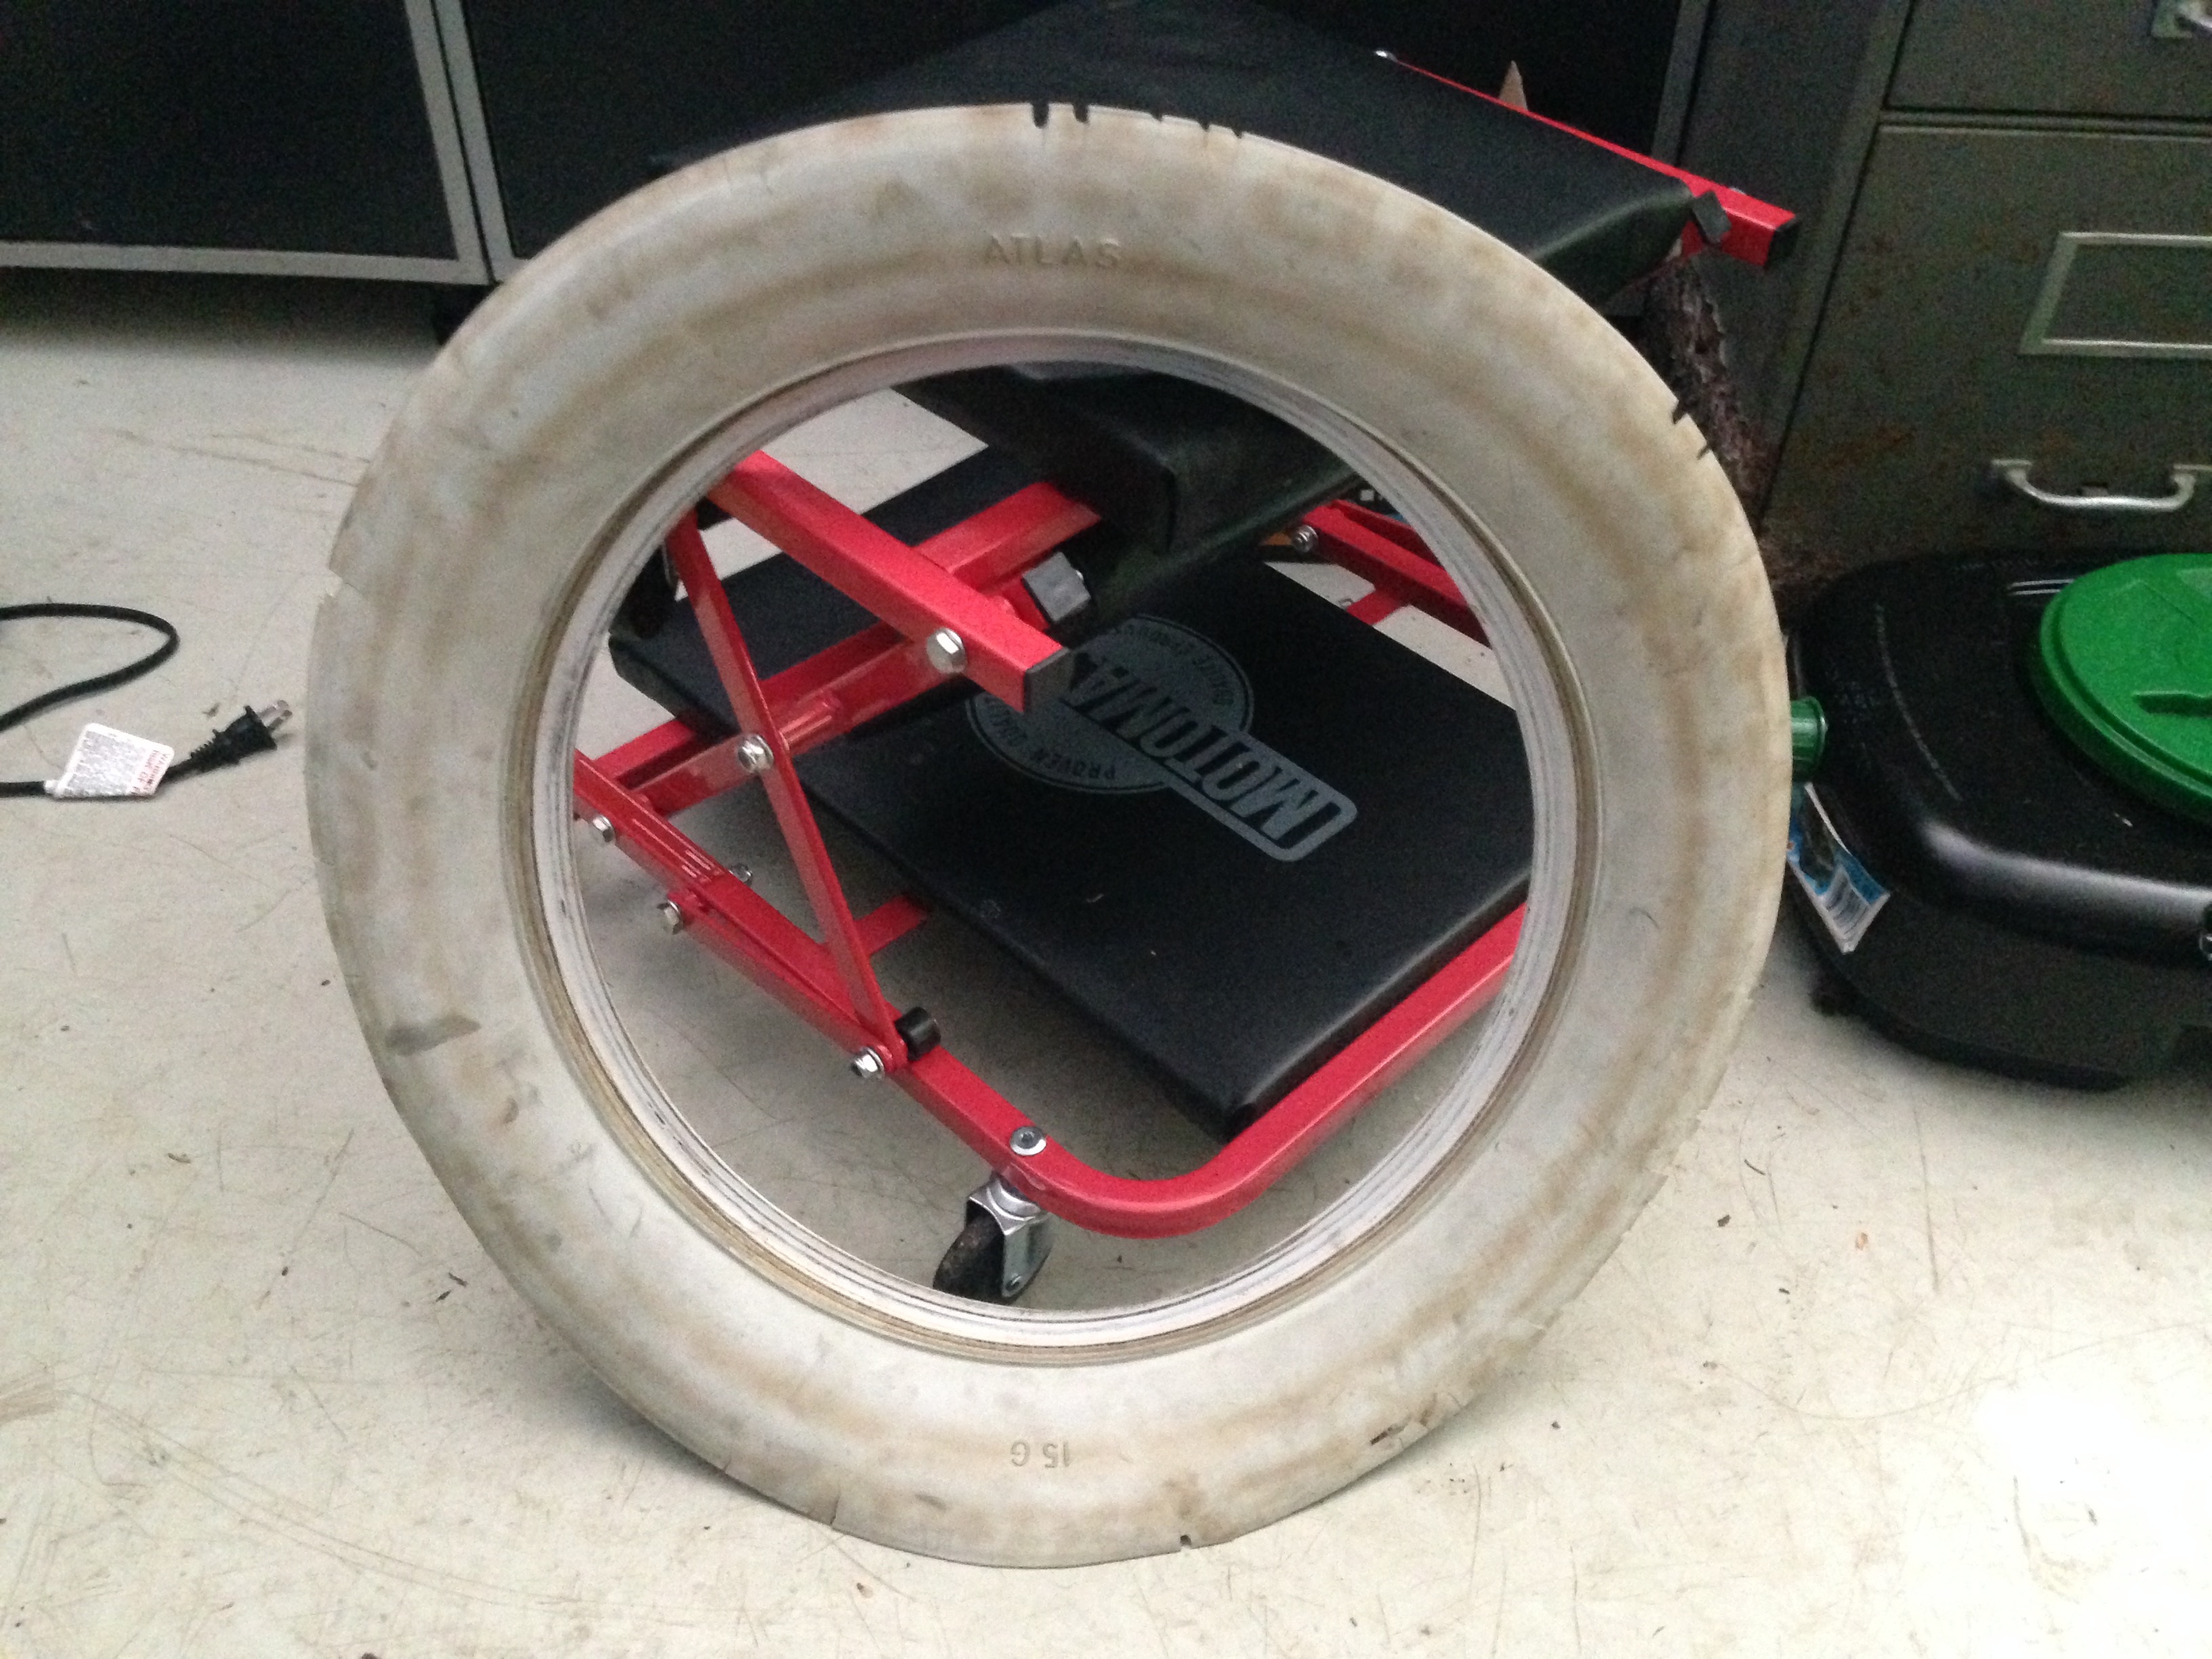
As seen here, I finally got rid of the Portawalls on the tires. Though I understand that having wide white walls makes the car even more beautiful, removing them was necessary as they were getting damaged since they were on modern radial tires, and it will simplify the maintenace around the wheels a bit for now. Until I have money to put on proper wide white wall tires, the walls will remain black.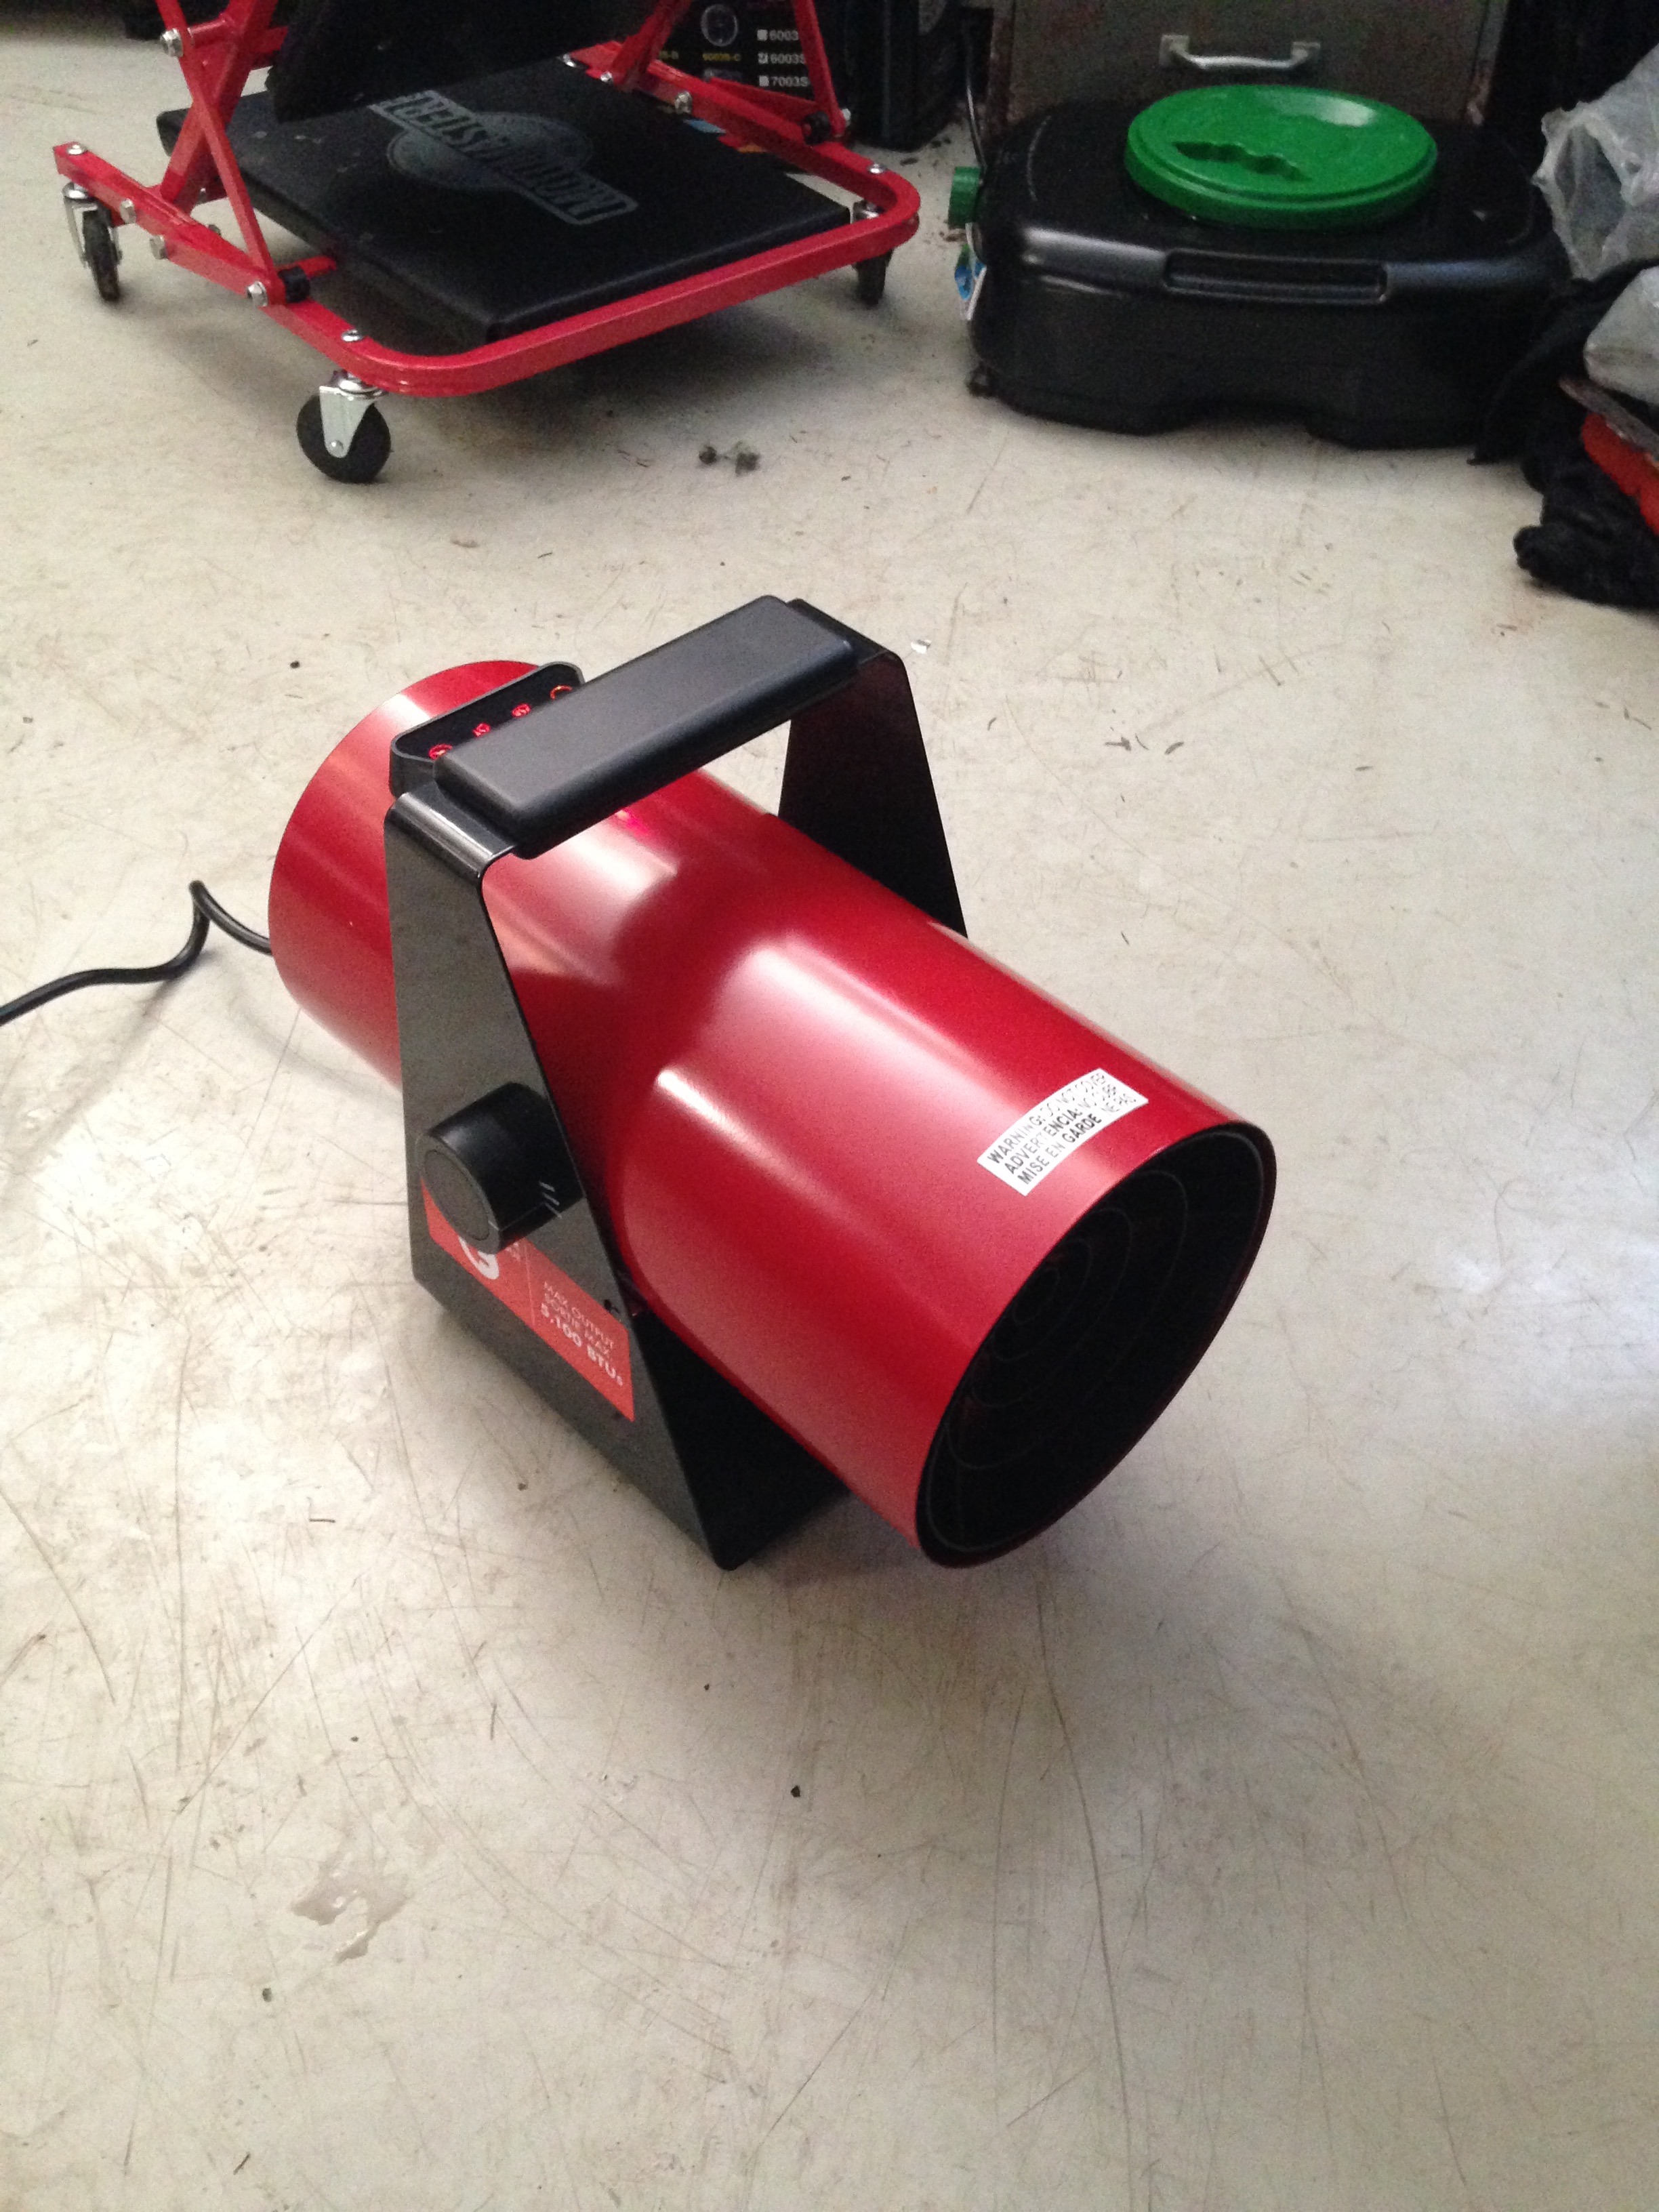
I also bought a heater for me as the garage isn't heated nor isolated. Since it is now winter, it is getting cold and when your living in a northern countries/regions like here in Quebec ( Canada ), it's getting really cold. It might not look much, but it'll make the jobs in the garage a bit more enjoyable.
Speaking of jobs...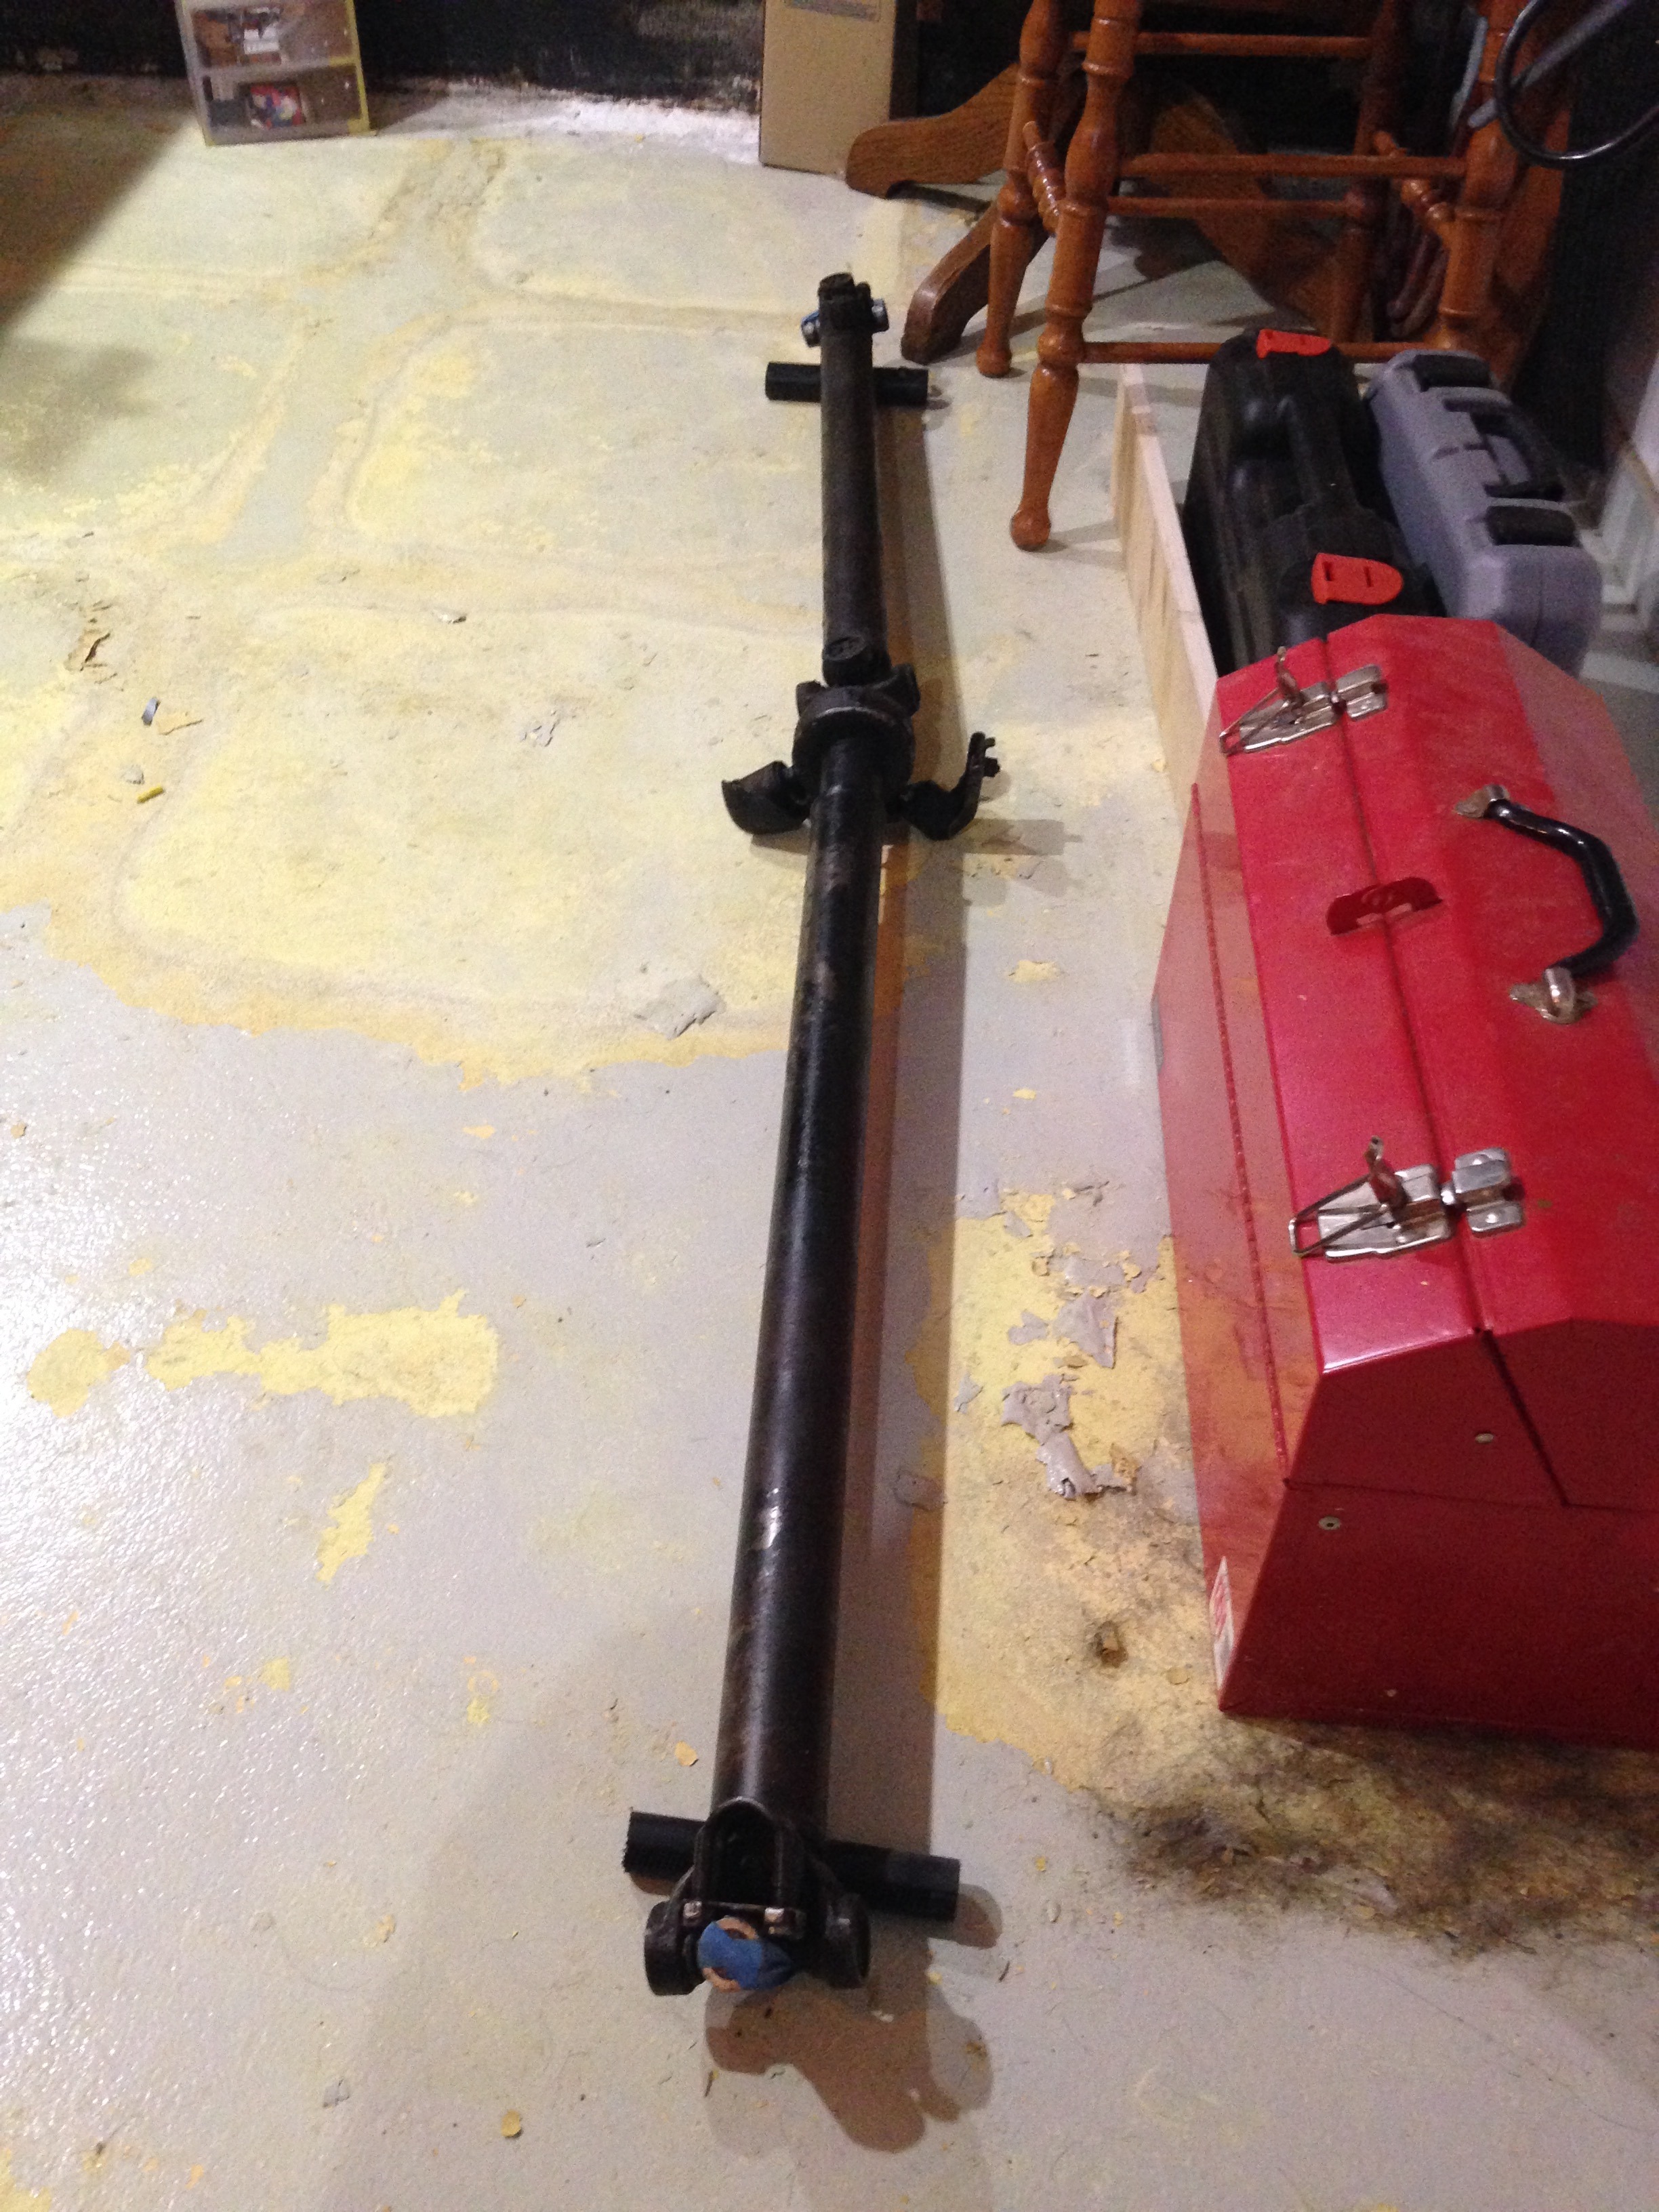
I've got the propeller shaft as the first big part of Molly removed, making space for the bigger project that is removing the tranny. I've safely stored it inside of the house as it will take some space in the garage, space that I have just enough to work around the vehicule. I'll maybe conduct an inspection on it while it is stored.
As I were under the car, I've took some closer pictures of the valves that are next to the transmission's shroud.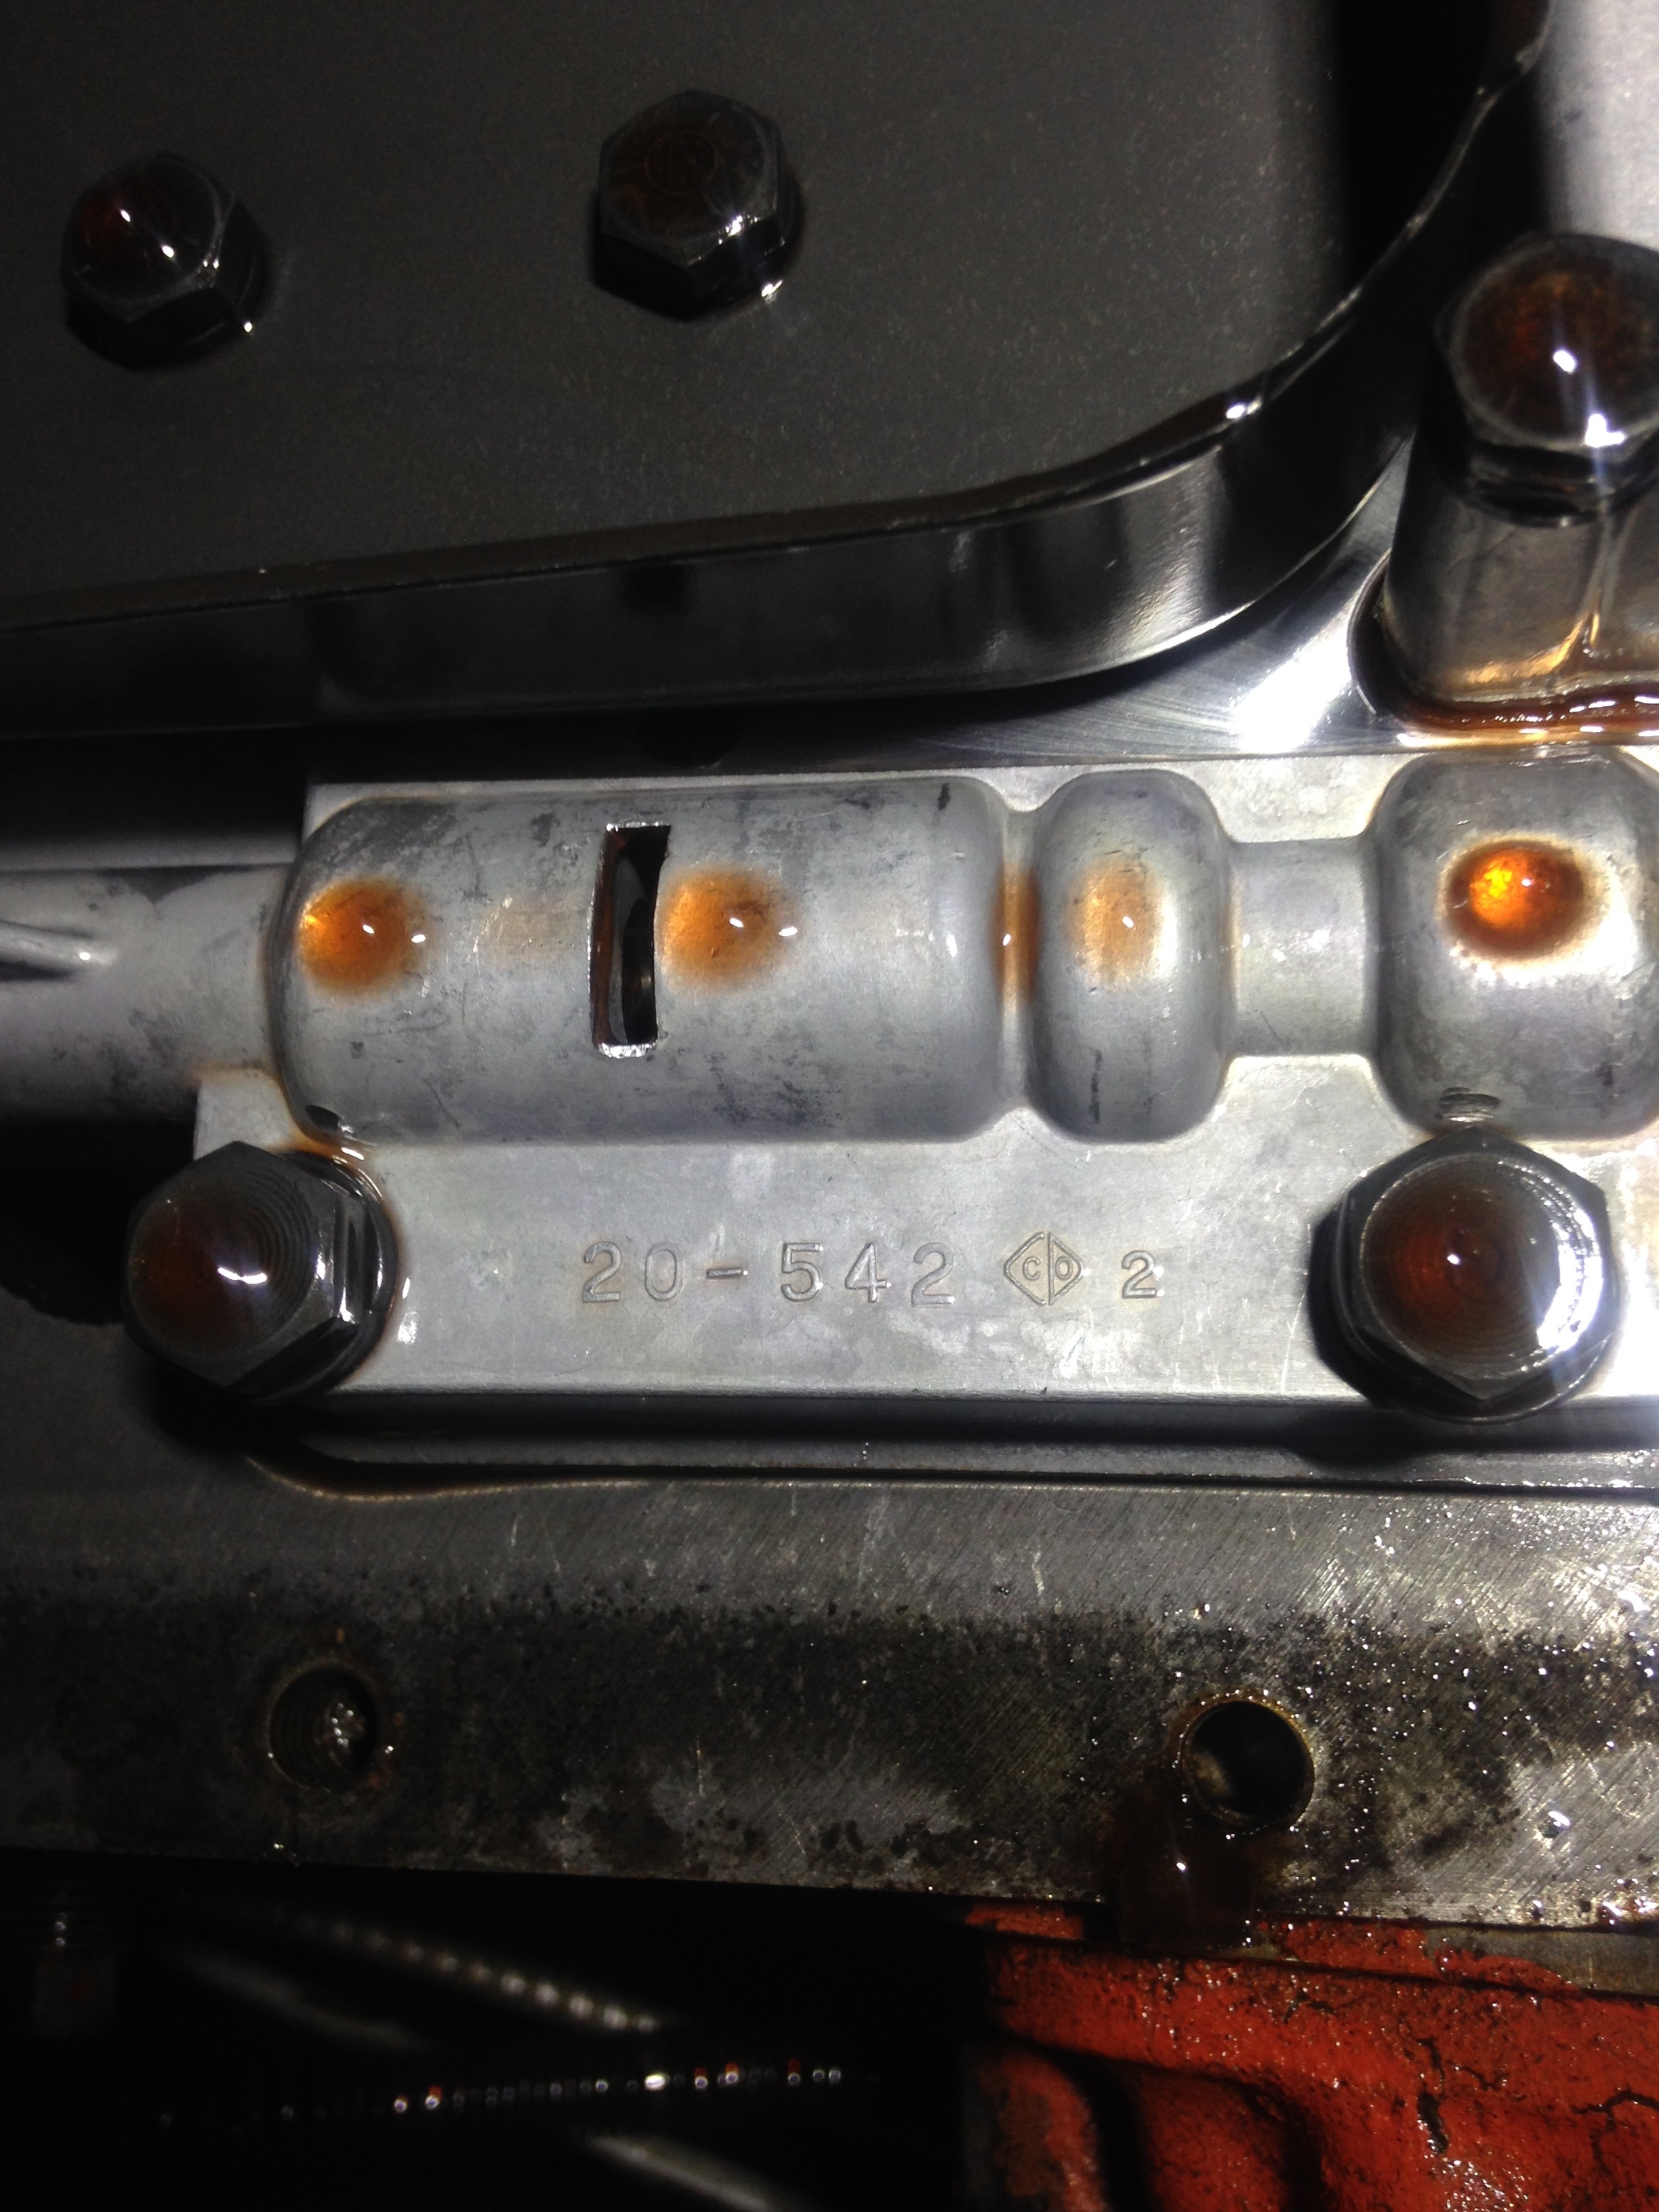
This valve here is located alongside the shroud,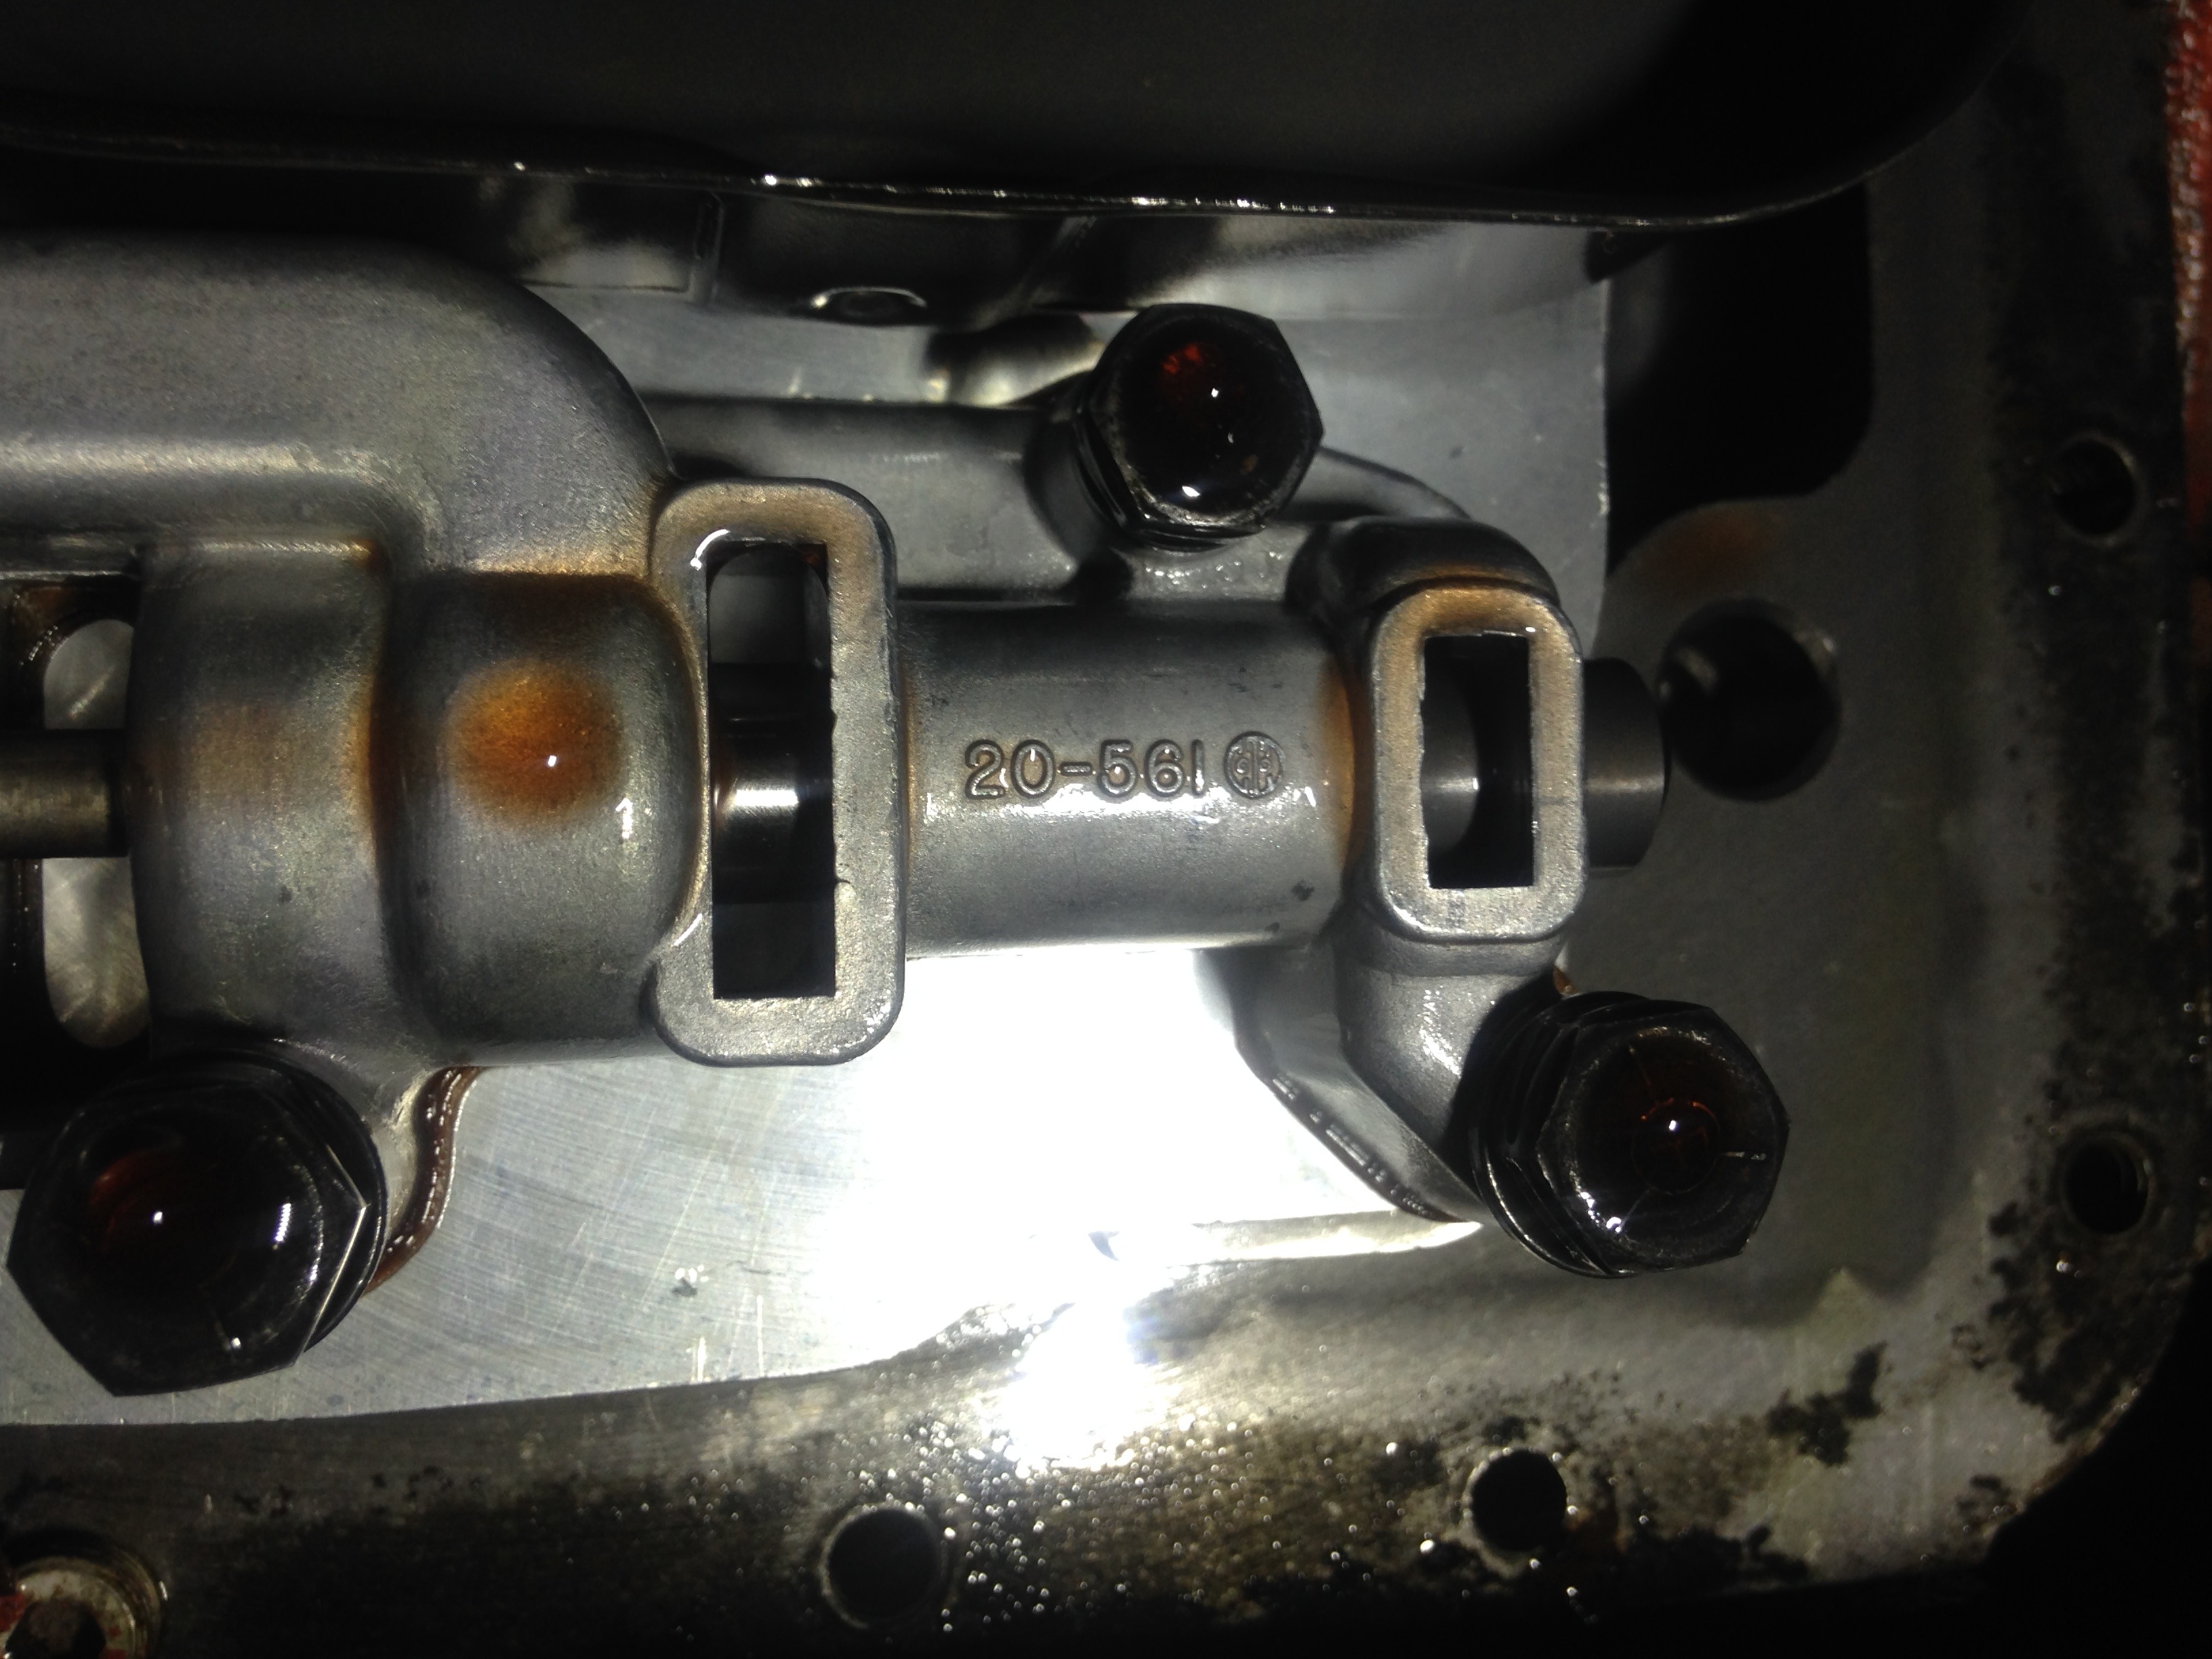
and that one is at the front side of the said shroud.
Regarding those two, I'm asking the experts if there is something to do with them as they seem to be in good shape at first glance, yet the transmission fluid had burned. Could those valves have suffered from the lack of fluid and of overheat too ? Since I don't have any alot of tools for now, I don't know if removing them for inspection will be a good idea. Any advices on this would be great.
Since the propeller as been stored away, the next big part to remove might be a crossmember that also acts as an engine/ transmission mount. I'll take a dive in the shop manual first to see it necessary.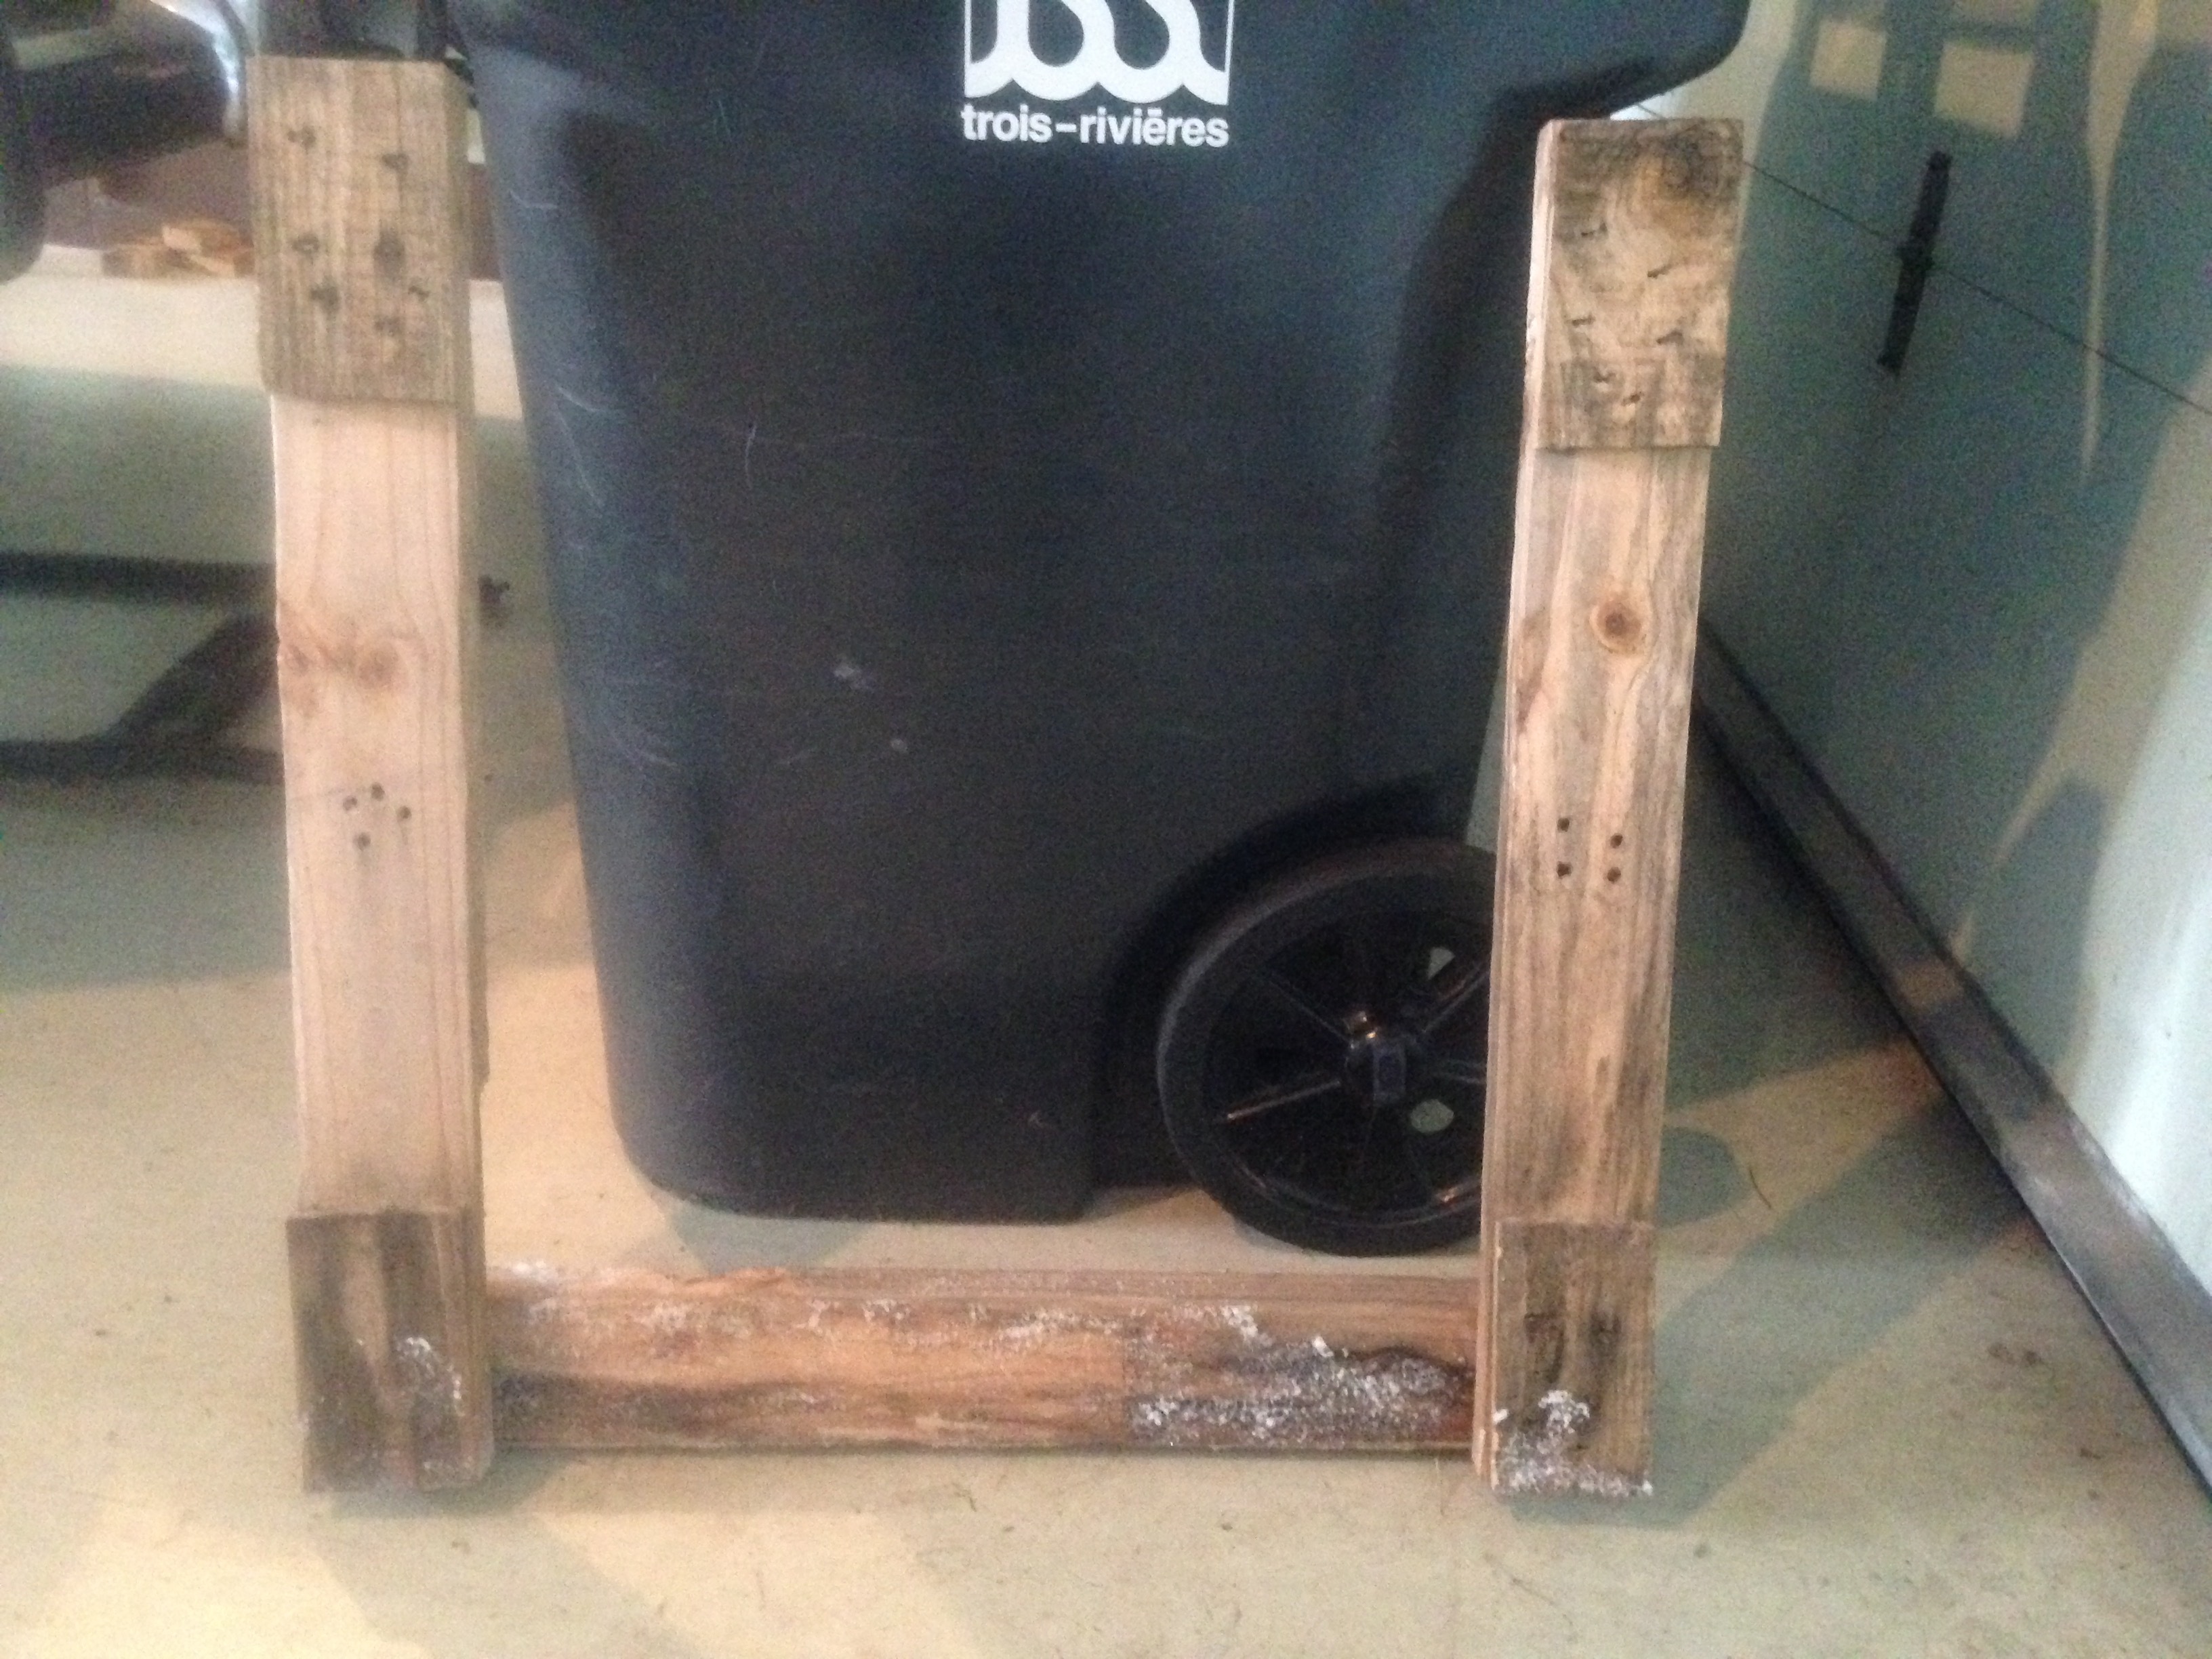
If I have to remove it, those pieces of wood might do the trick to keep the engine in place.
While I was starting to not feel my fingers due to the temperatures getting colder as the sun fades away, I've done some cleanup on the tranny's screen and oil pan.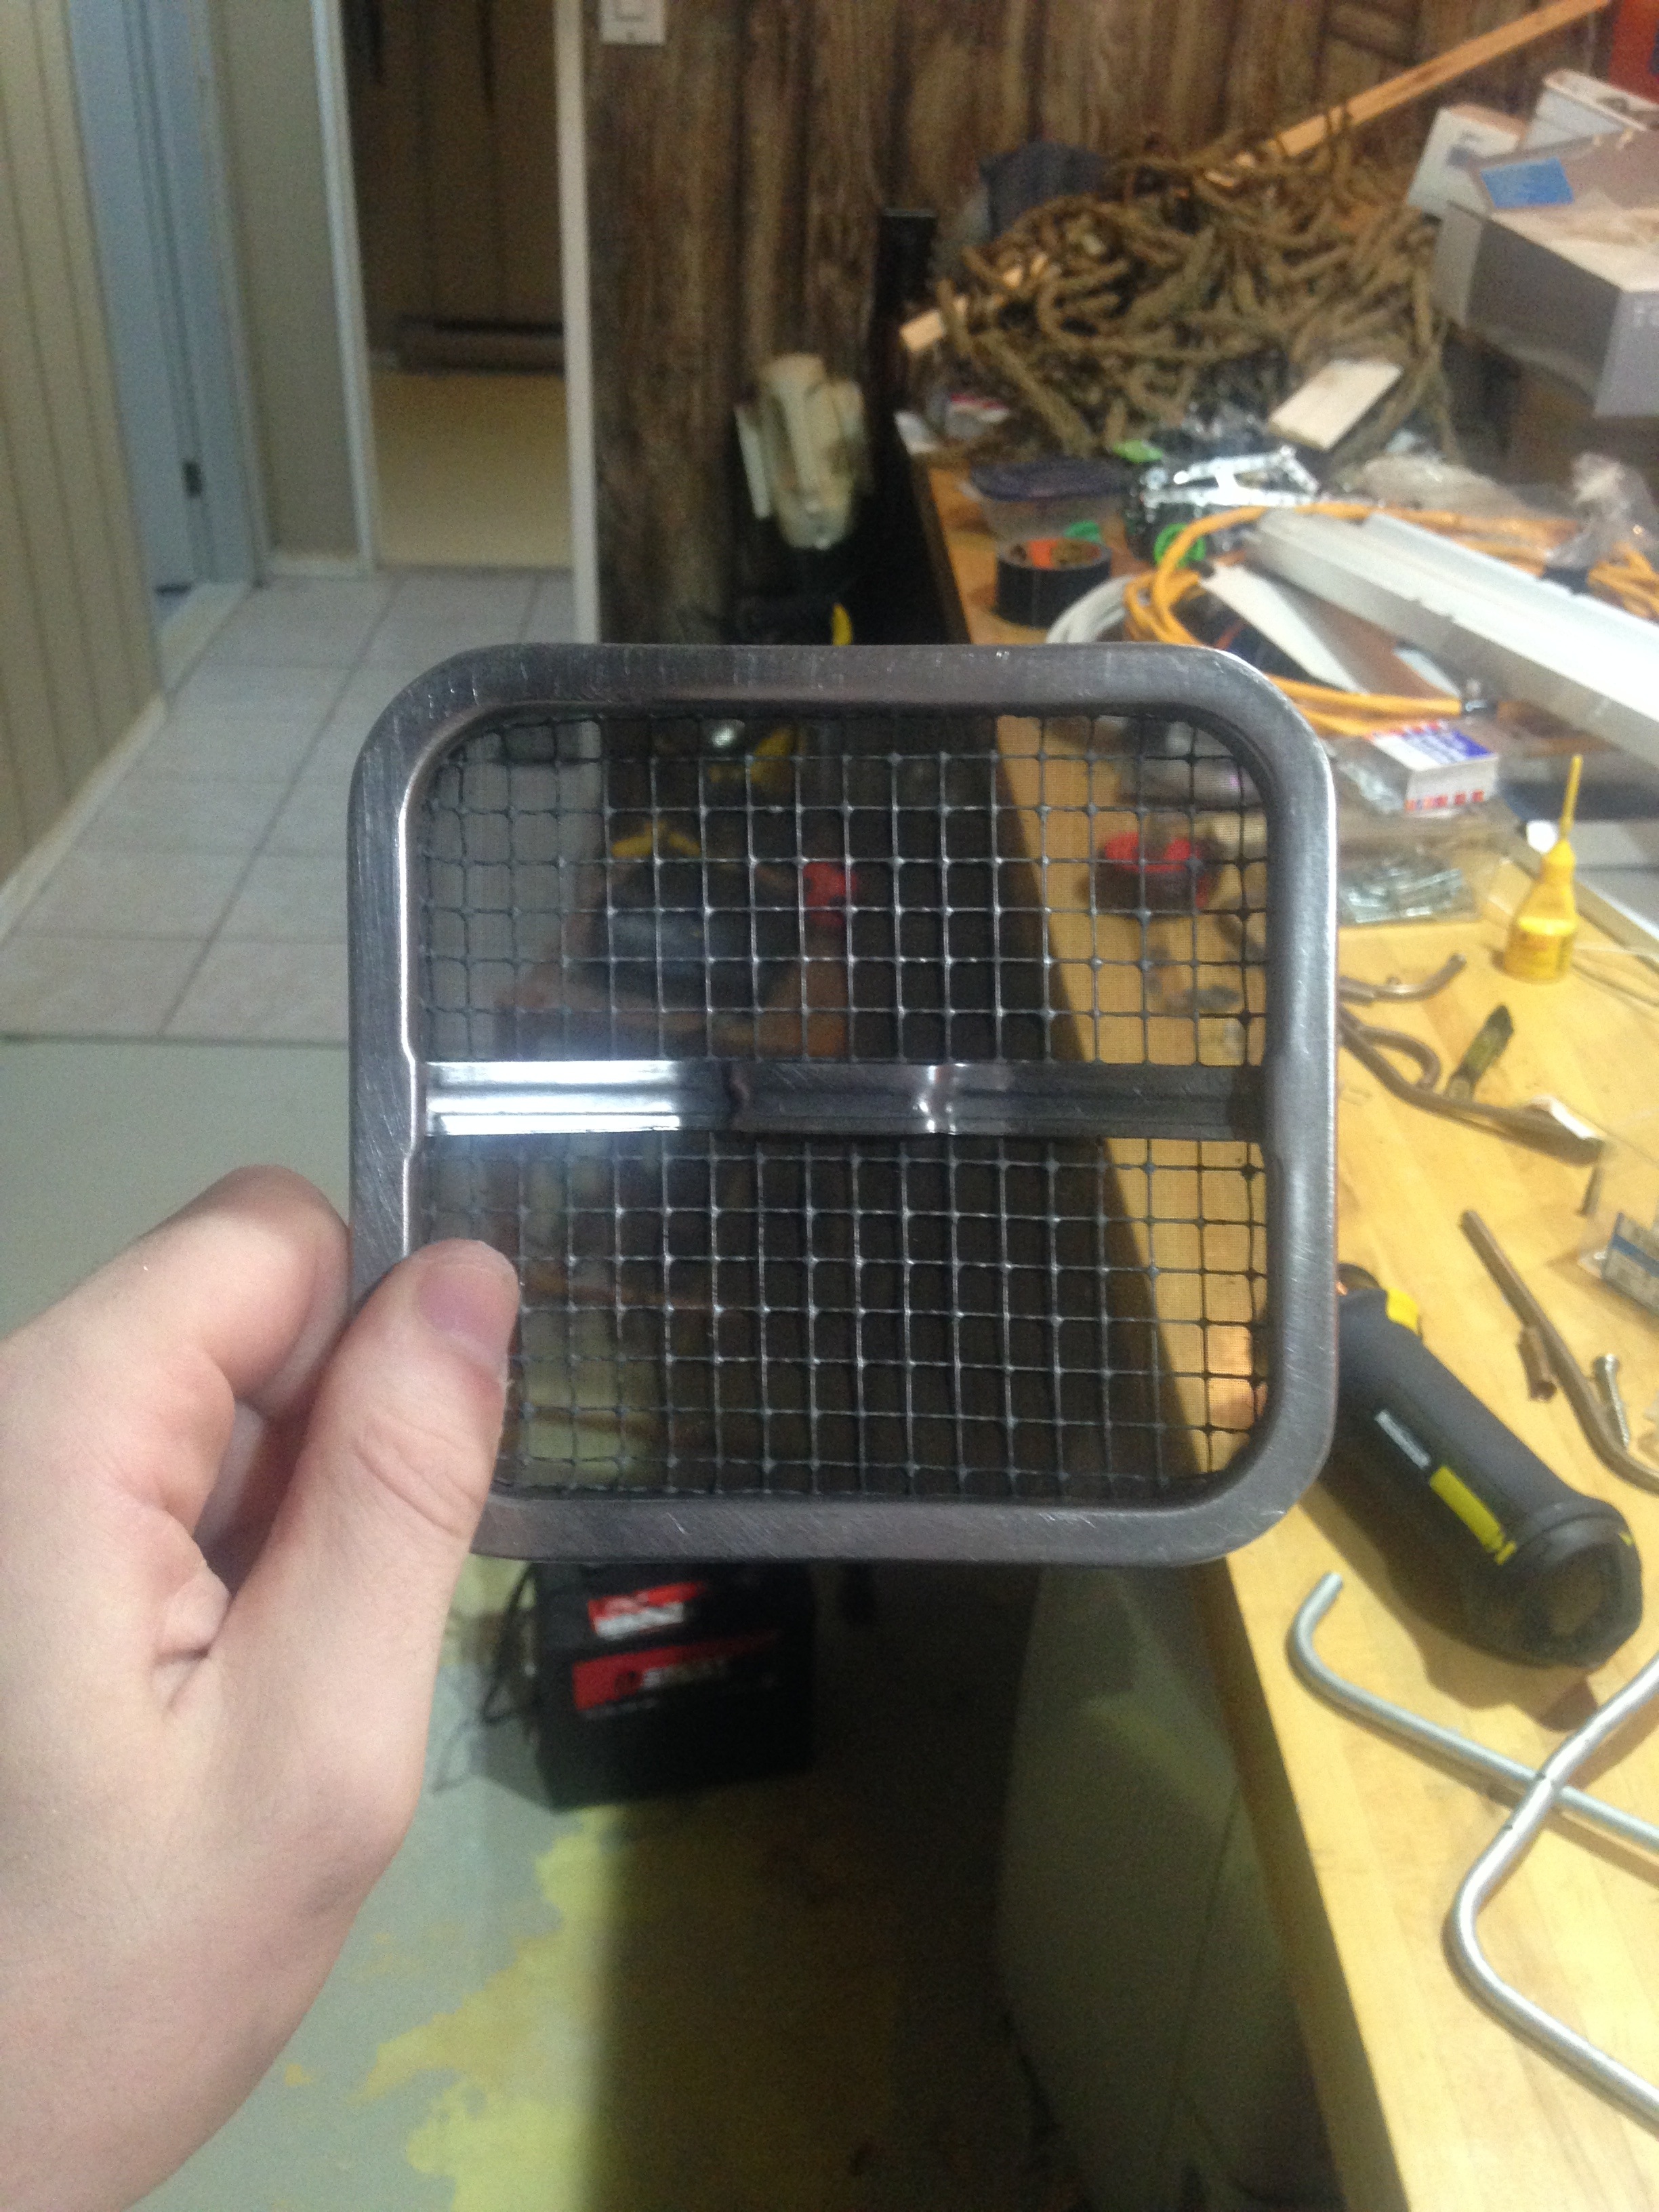
After a couple of scrubbing, the screen looks surprisingly like a new one.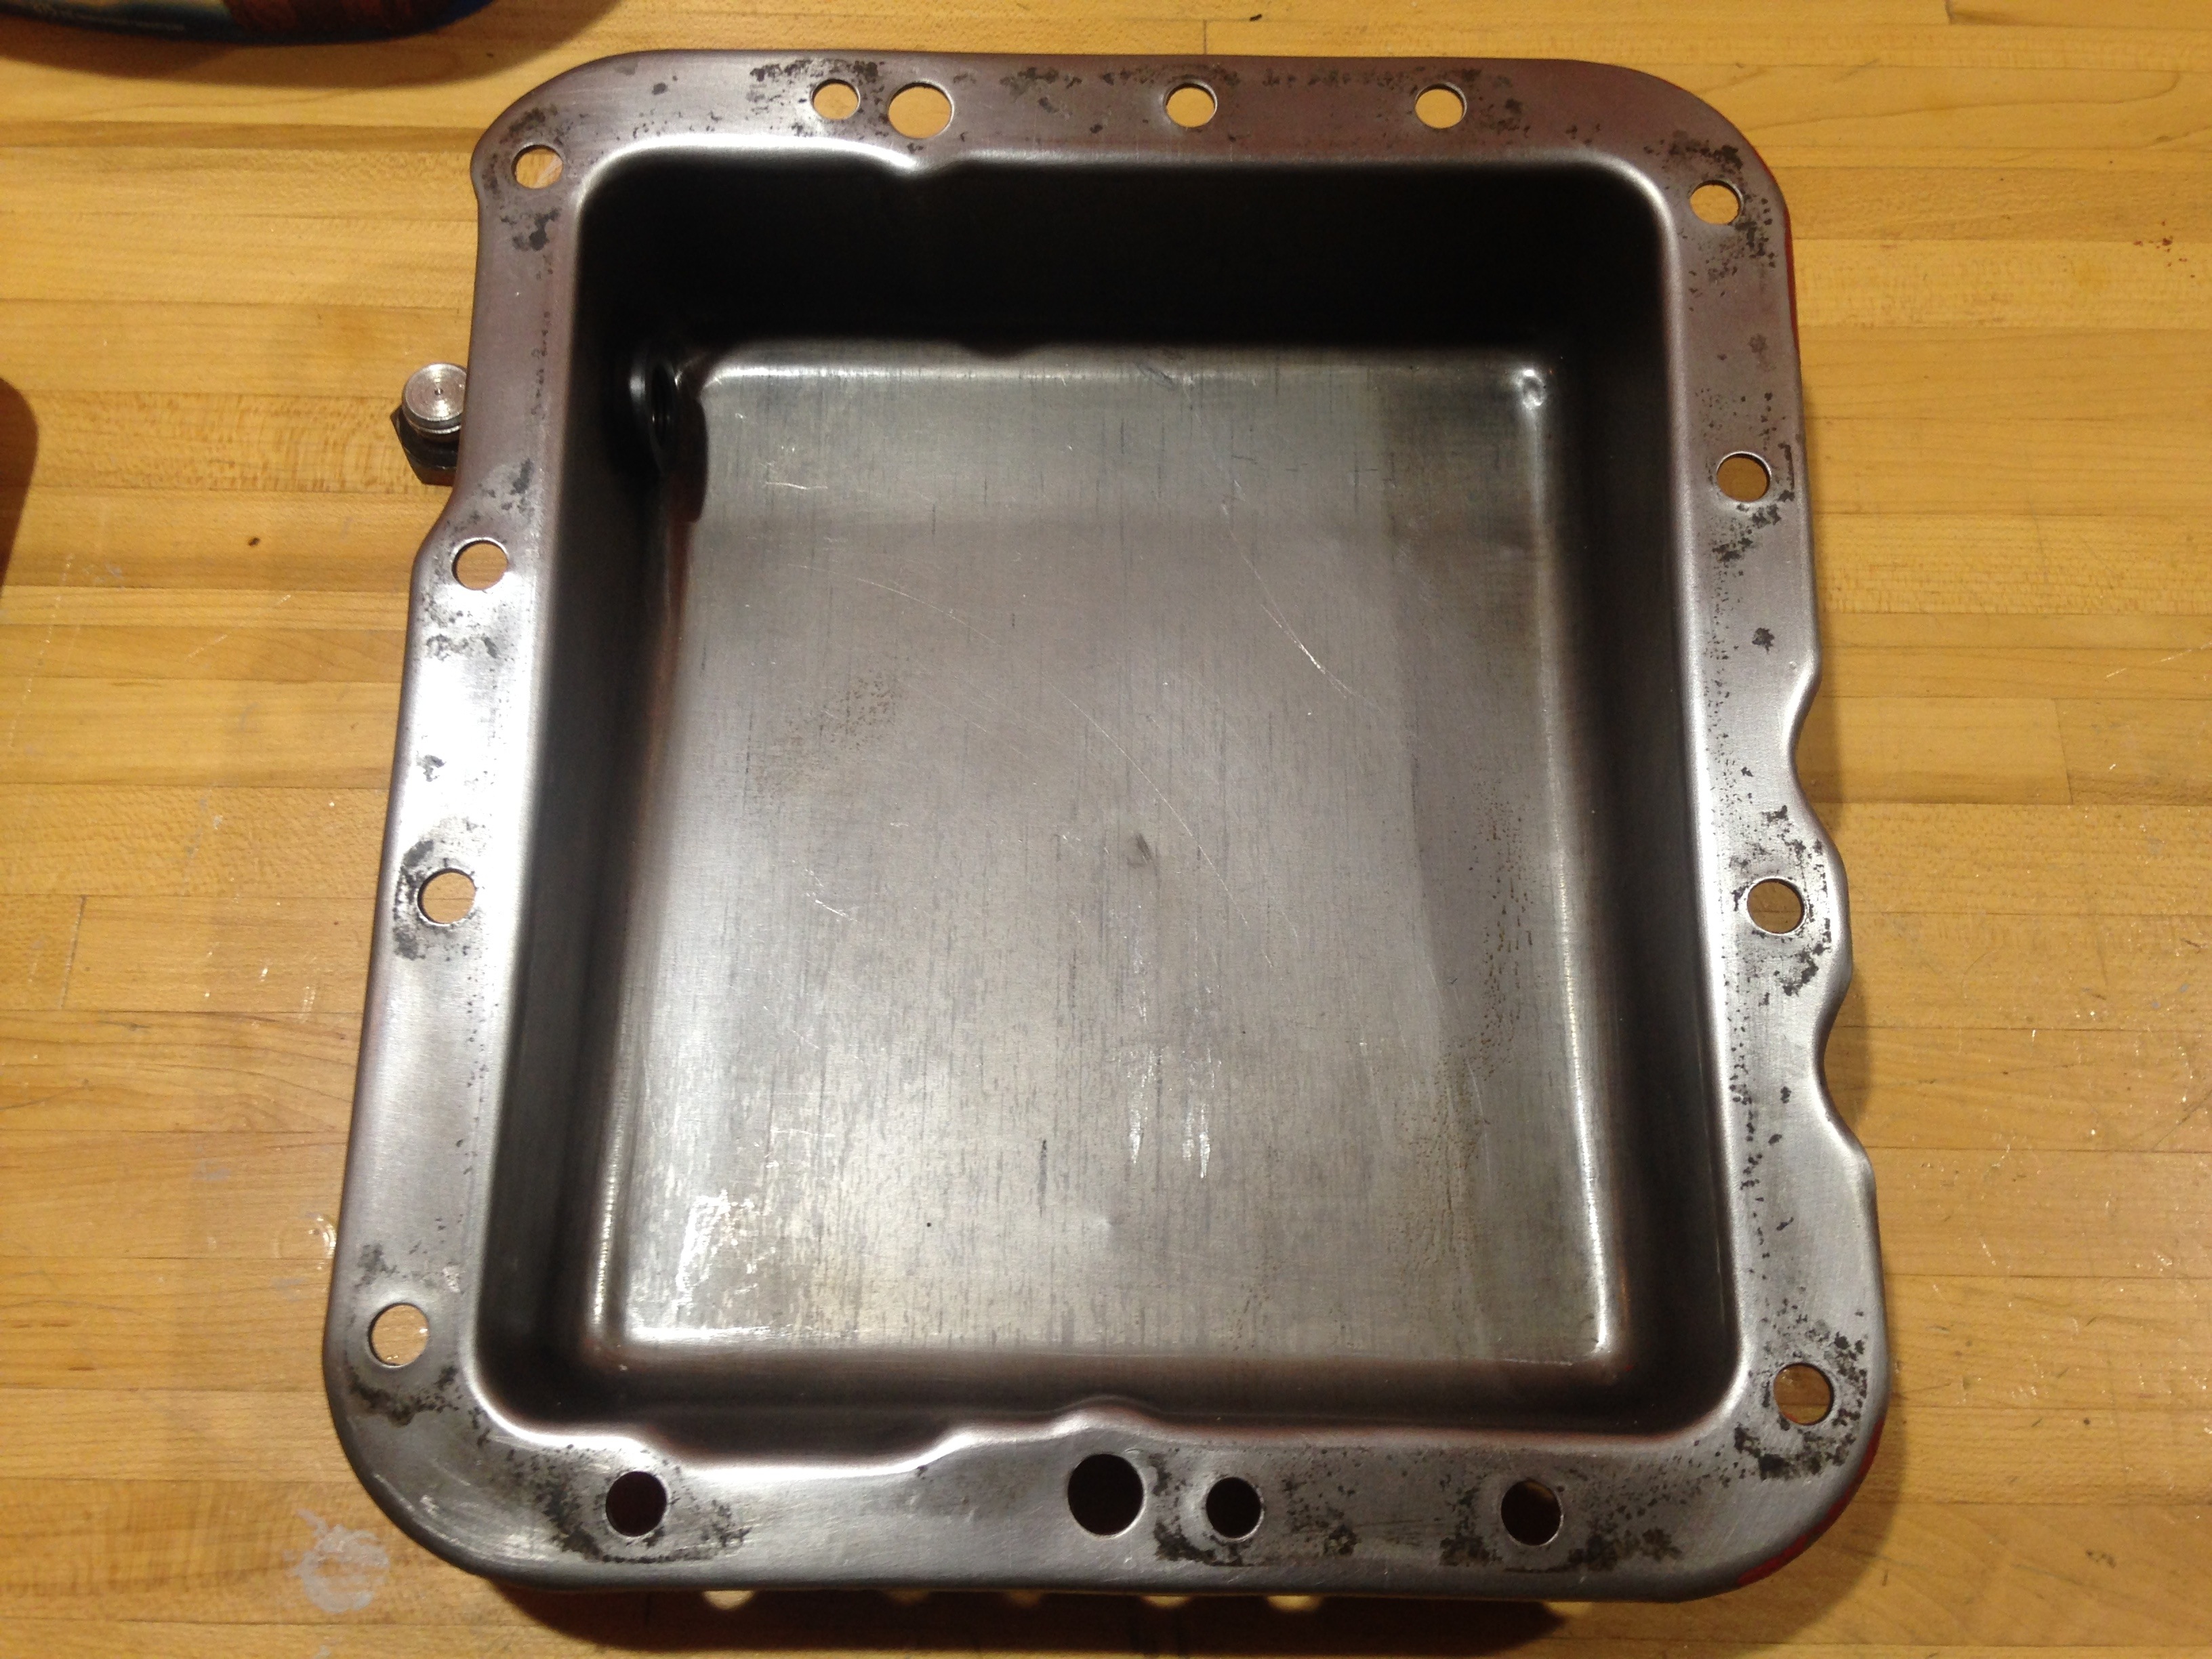
The tranny 's oil pan needed a bit more work, but it now clean and ready to be put back, but not before having a new gasket.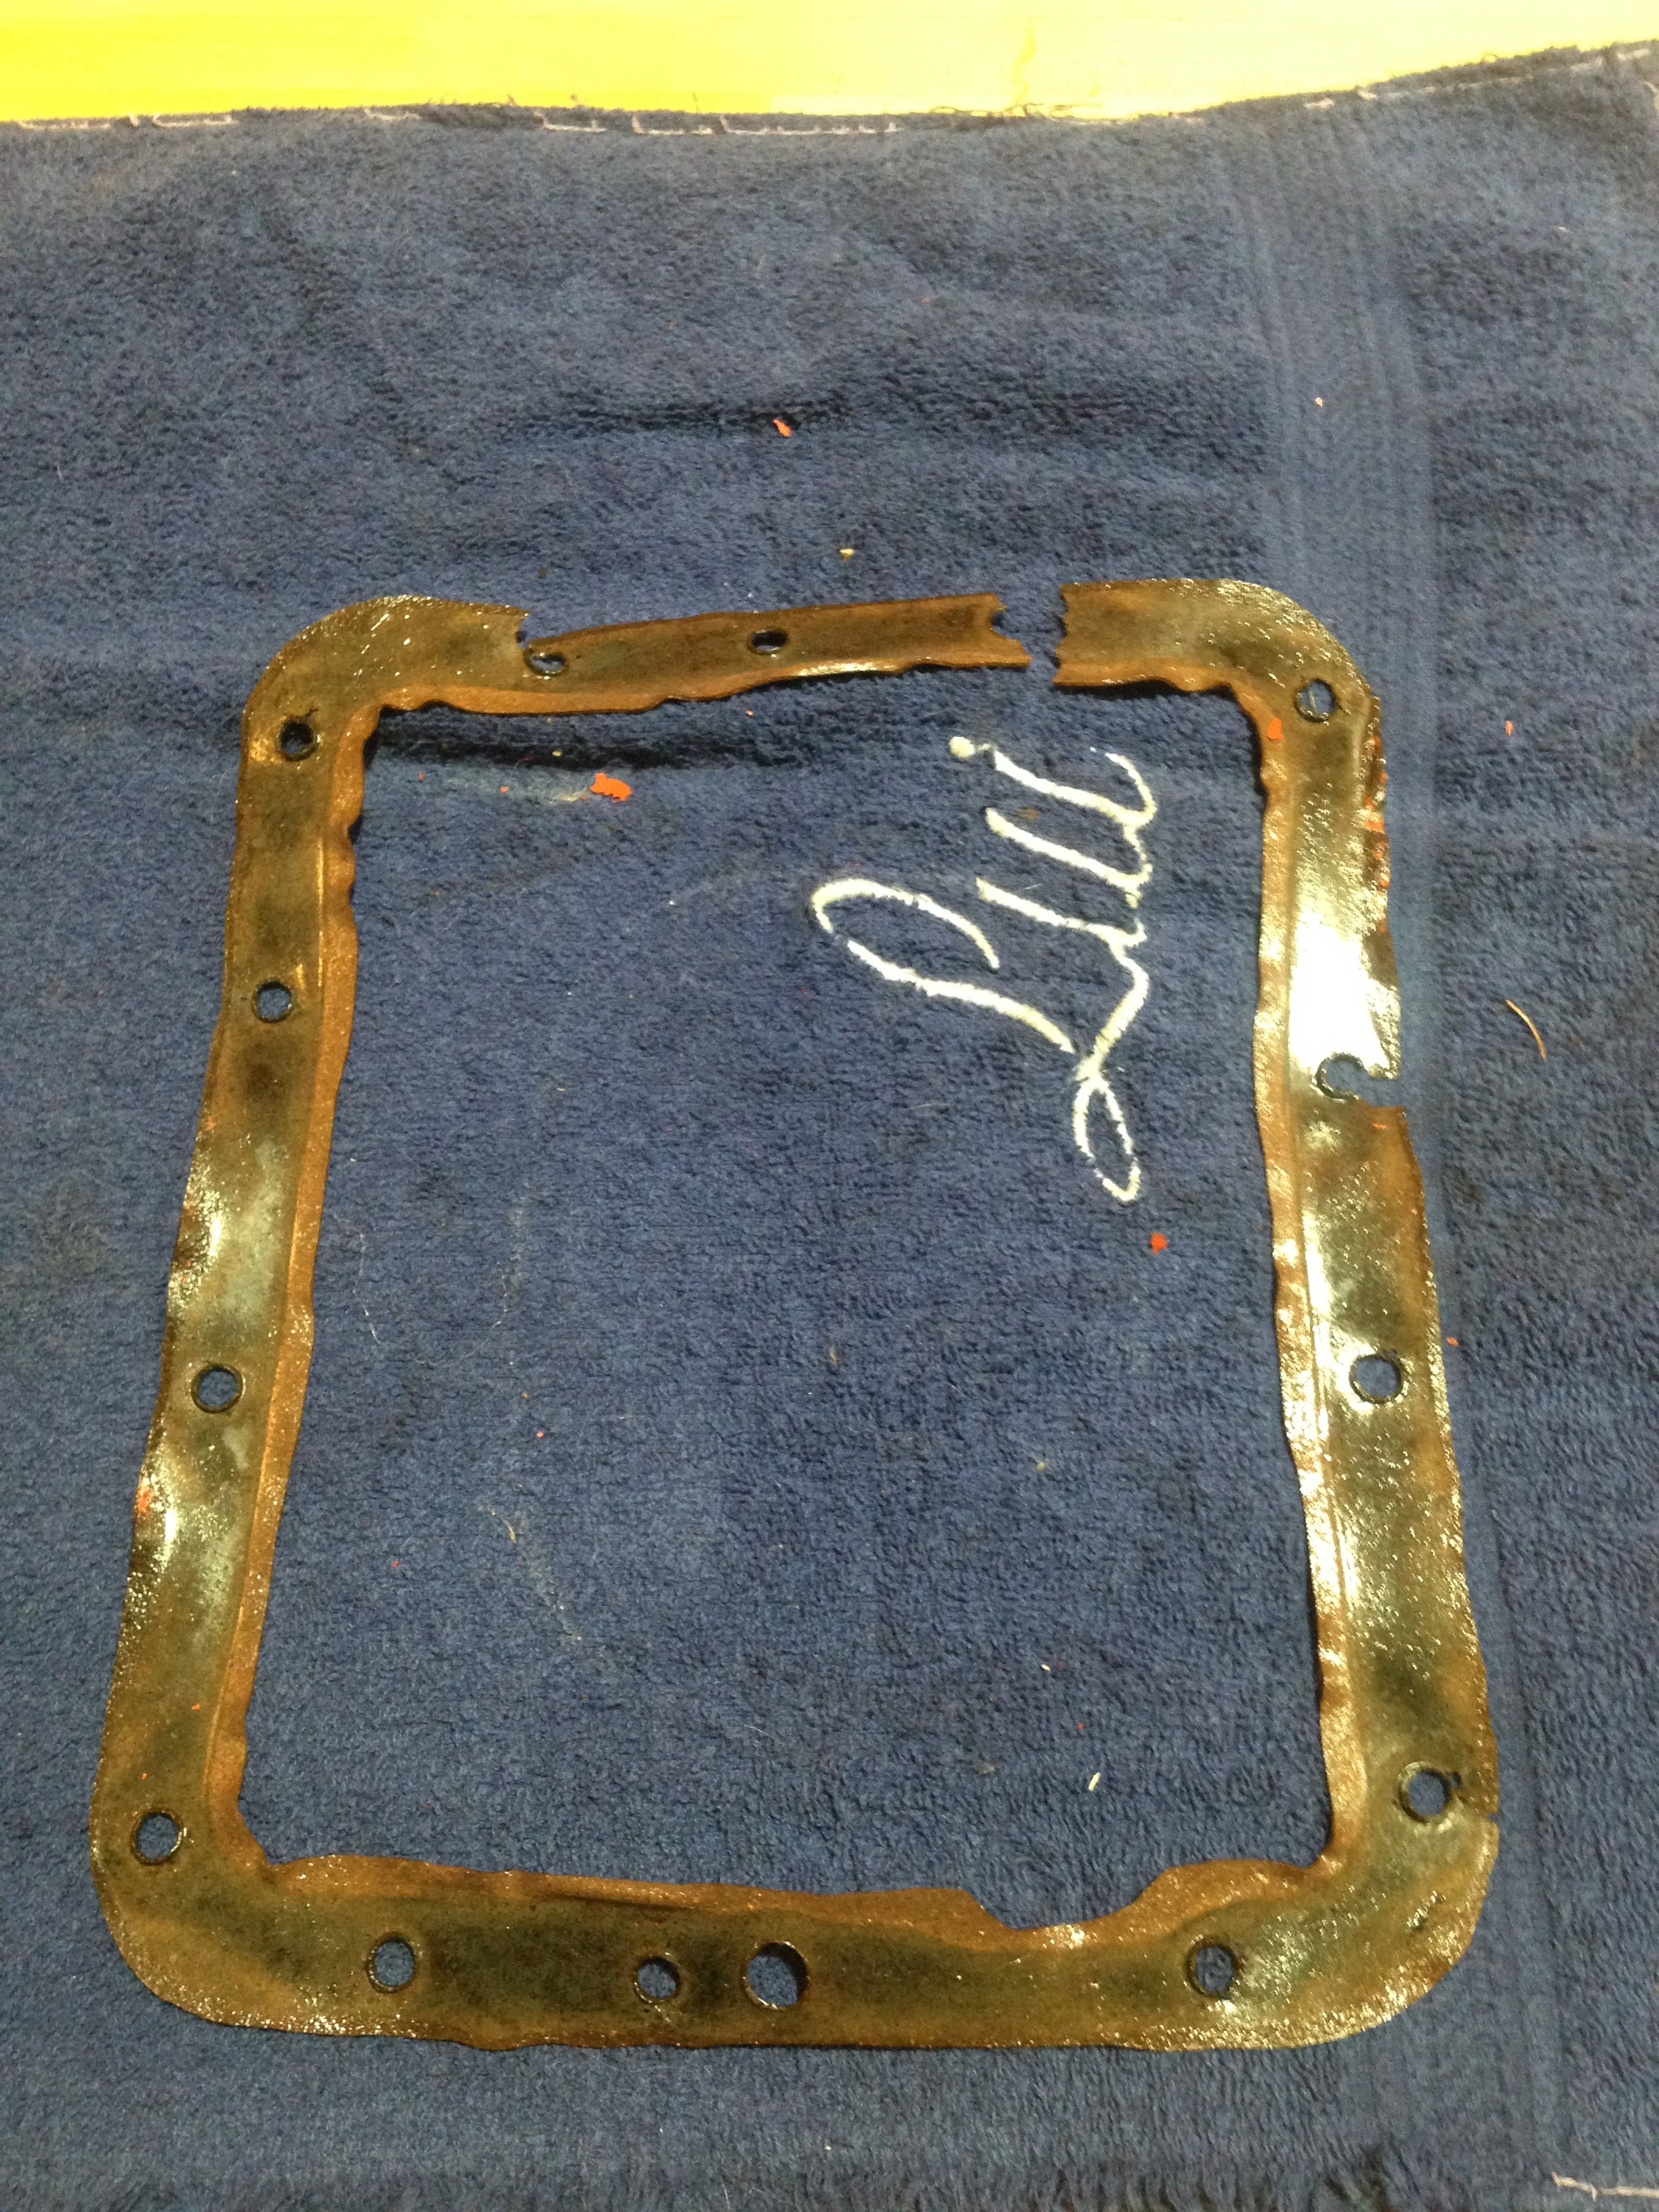
As you can see, the old gasket, though it has done his job well, needs to be changed for a new one. I'll be on the lookout for one.
While I was in the little room in the house basement, I've done a cleanup of it too.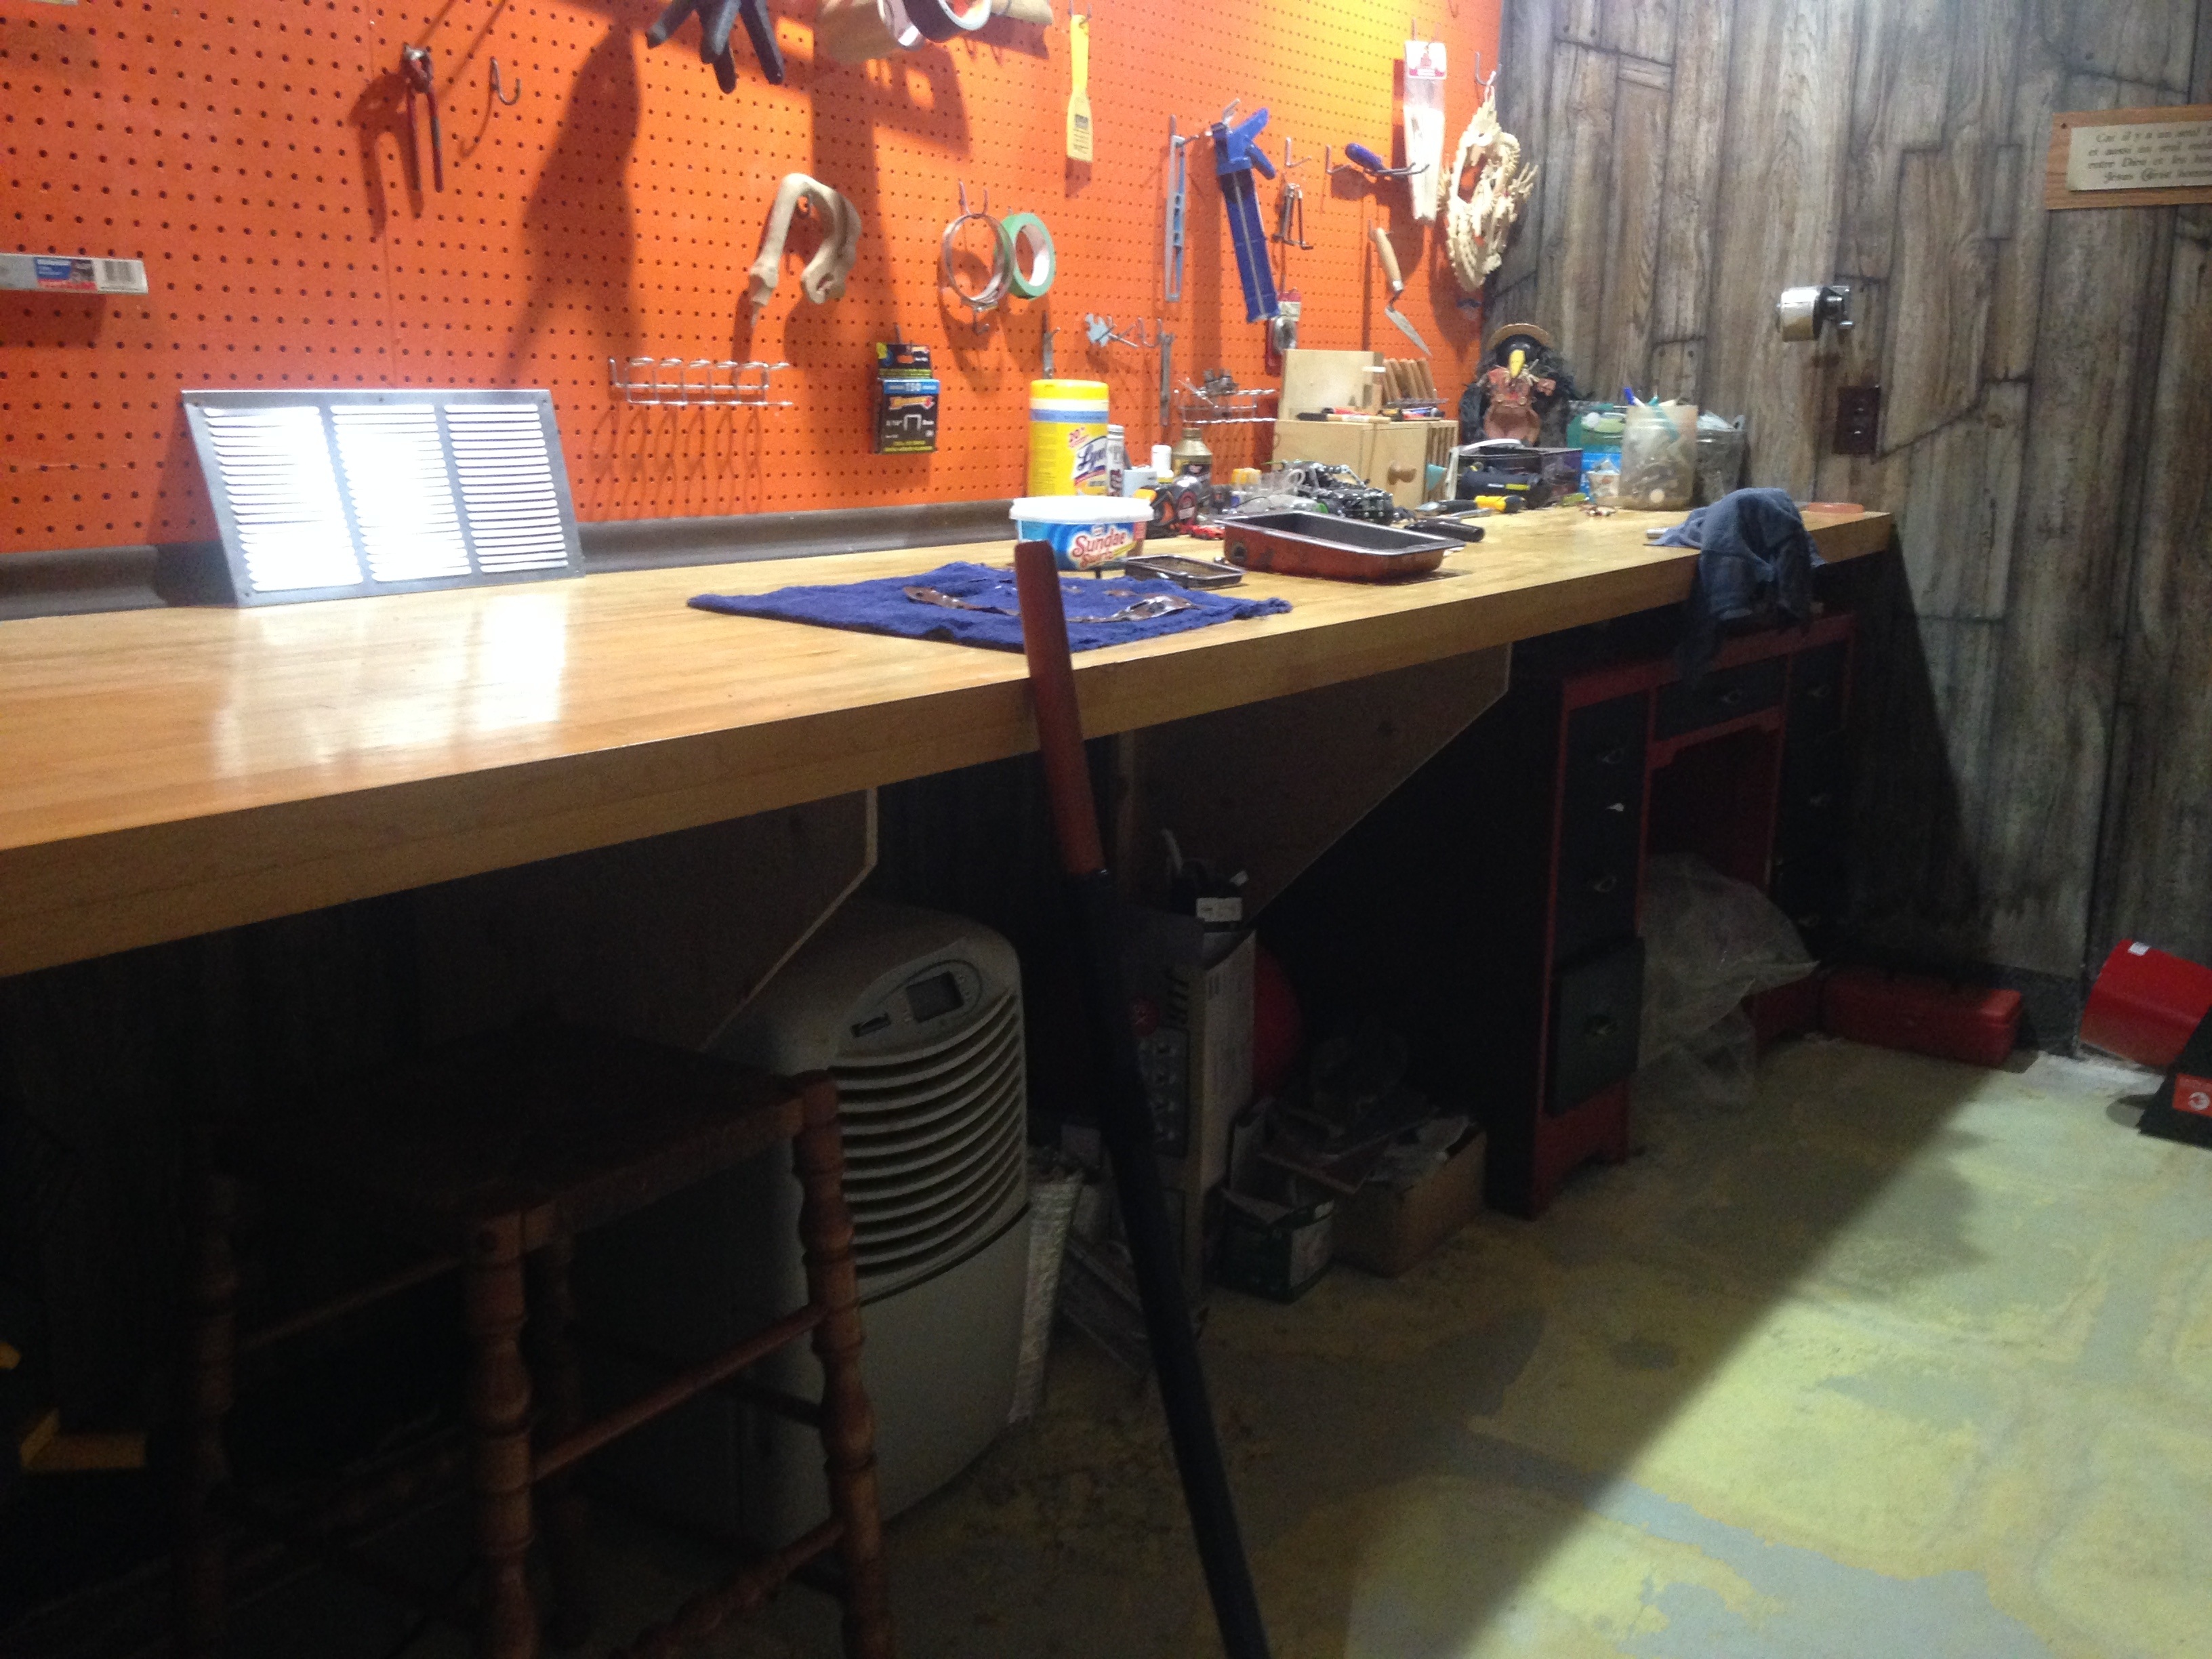
When the transmission will be removed, I'll bring it here where I can inspect it in a warmer and comfy place.
The last thing on this update is a mystery to me. Allow me to explain :
As you guys know, I've done some light improvement on Molly by switching the incandescents for LED and the last things to improve are the turn signals. I did try with load equalizers ( resistors ), but it didn't worked. the other option is to replace the original flasher with a numerical one that works on the 6 Volts system. But for the life of me, I am unable to find the flasher.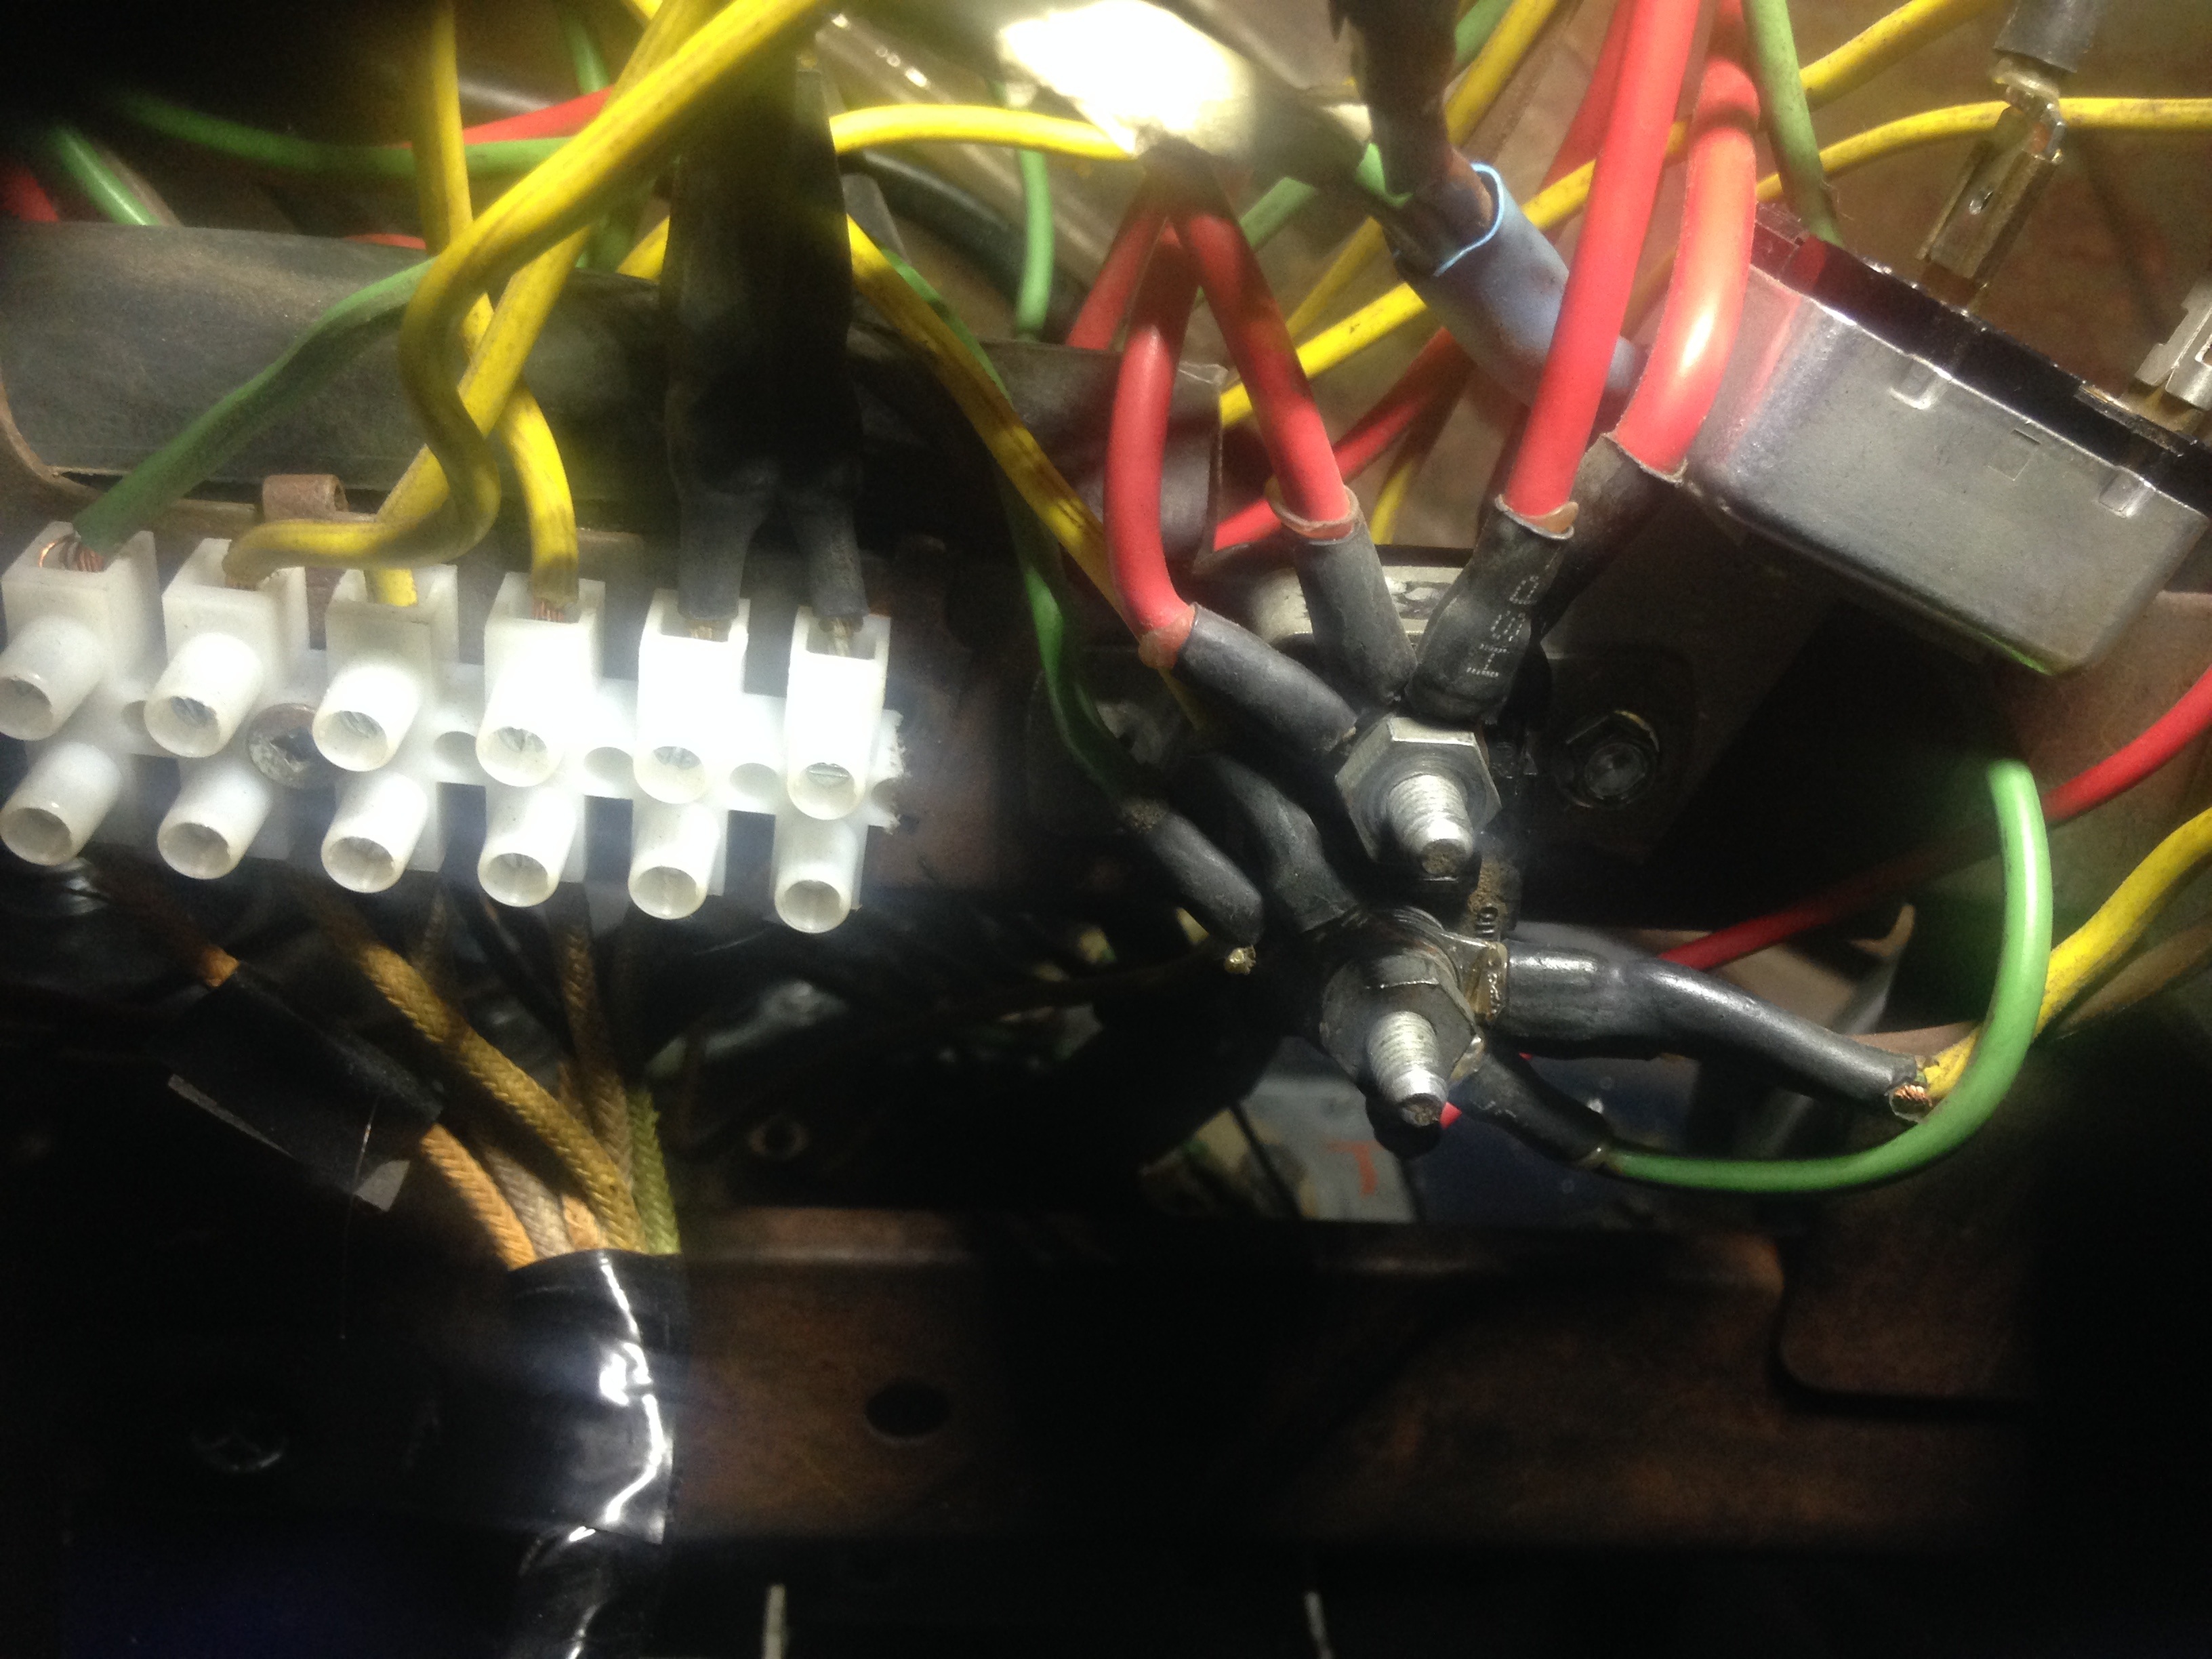
I've looked behing and under the instrument cluster were it should be like the shop manual does indicate on the front pillar cross brace, but all I saw are those electric parts. I've also looked some pictures of the said flasher in order for me to know what to look for, but no luck so far.
I need some indications to where to look to find it. If someone knows the proper location of the flasher on a 1954 Super Wasp, please feel free to share as it could come handy for anyone that might have same issue as me.
See you soon on the next update.
Your Autistic Hudsoneer,
Max
0 -
I Converted my 46 pickup to 12 volts and added LED tail lights. The flashers wouldn’t work correctly even with the electronic flasher. I added two tiny pilot lights and they work fine now.
I don’t think the LED’s draw enough current to trip the flasher. Adding the two pilot lights fixed it.0 -
Update of November 26th
It was another weekend full of good work, inching closer to having the tranny out. I just can't wait to have a proper inspection of it and learn more.
But first, some flash news: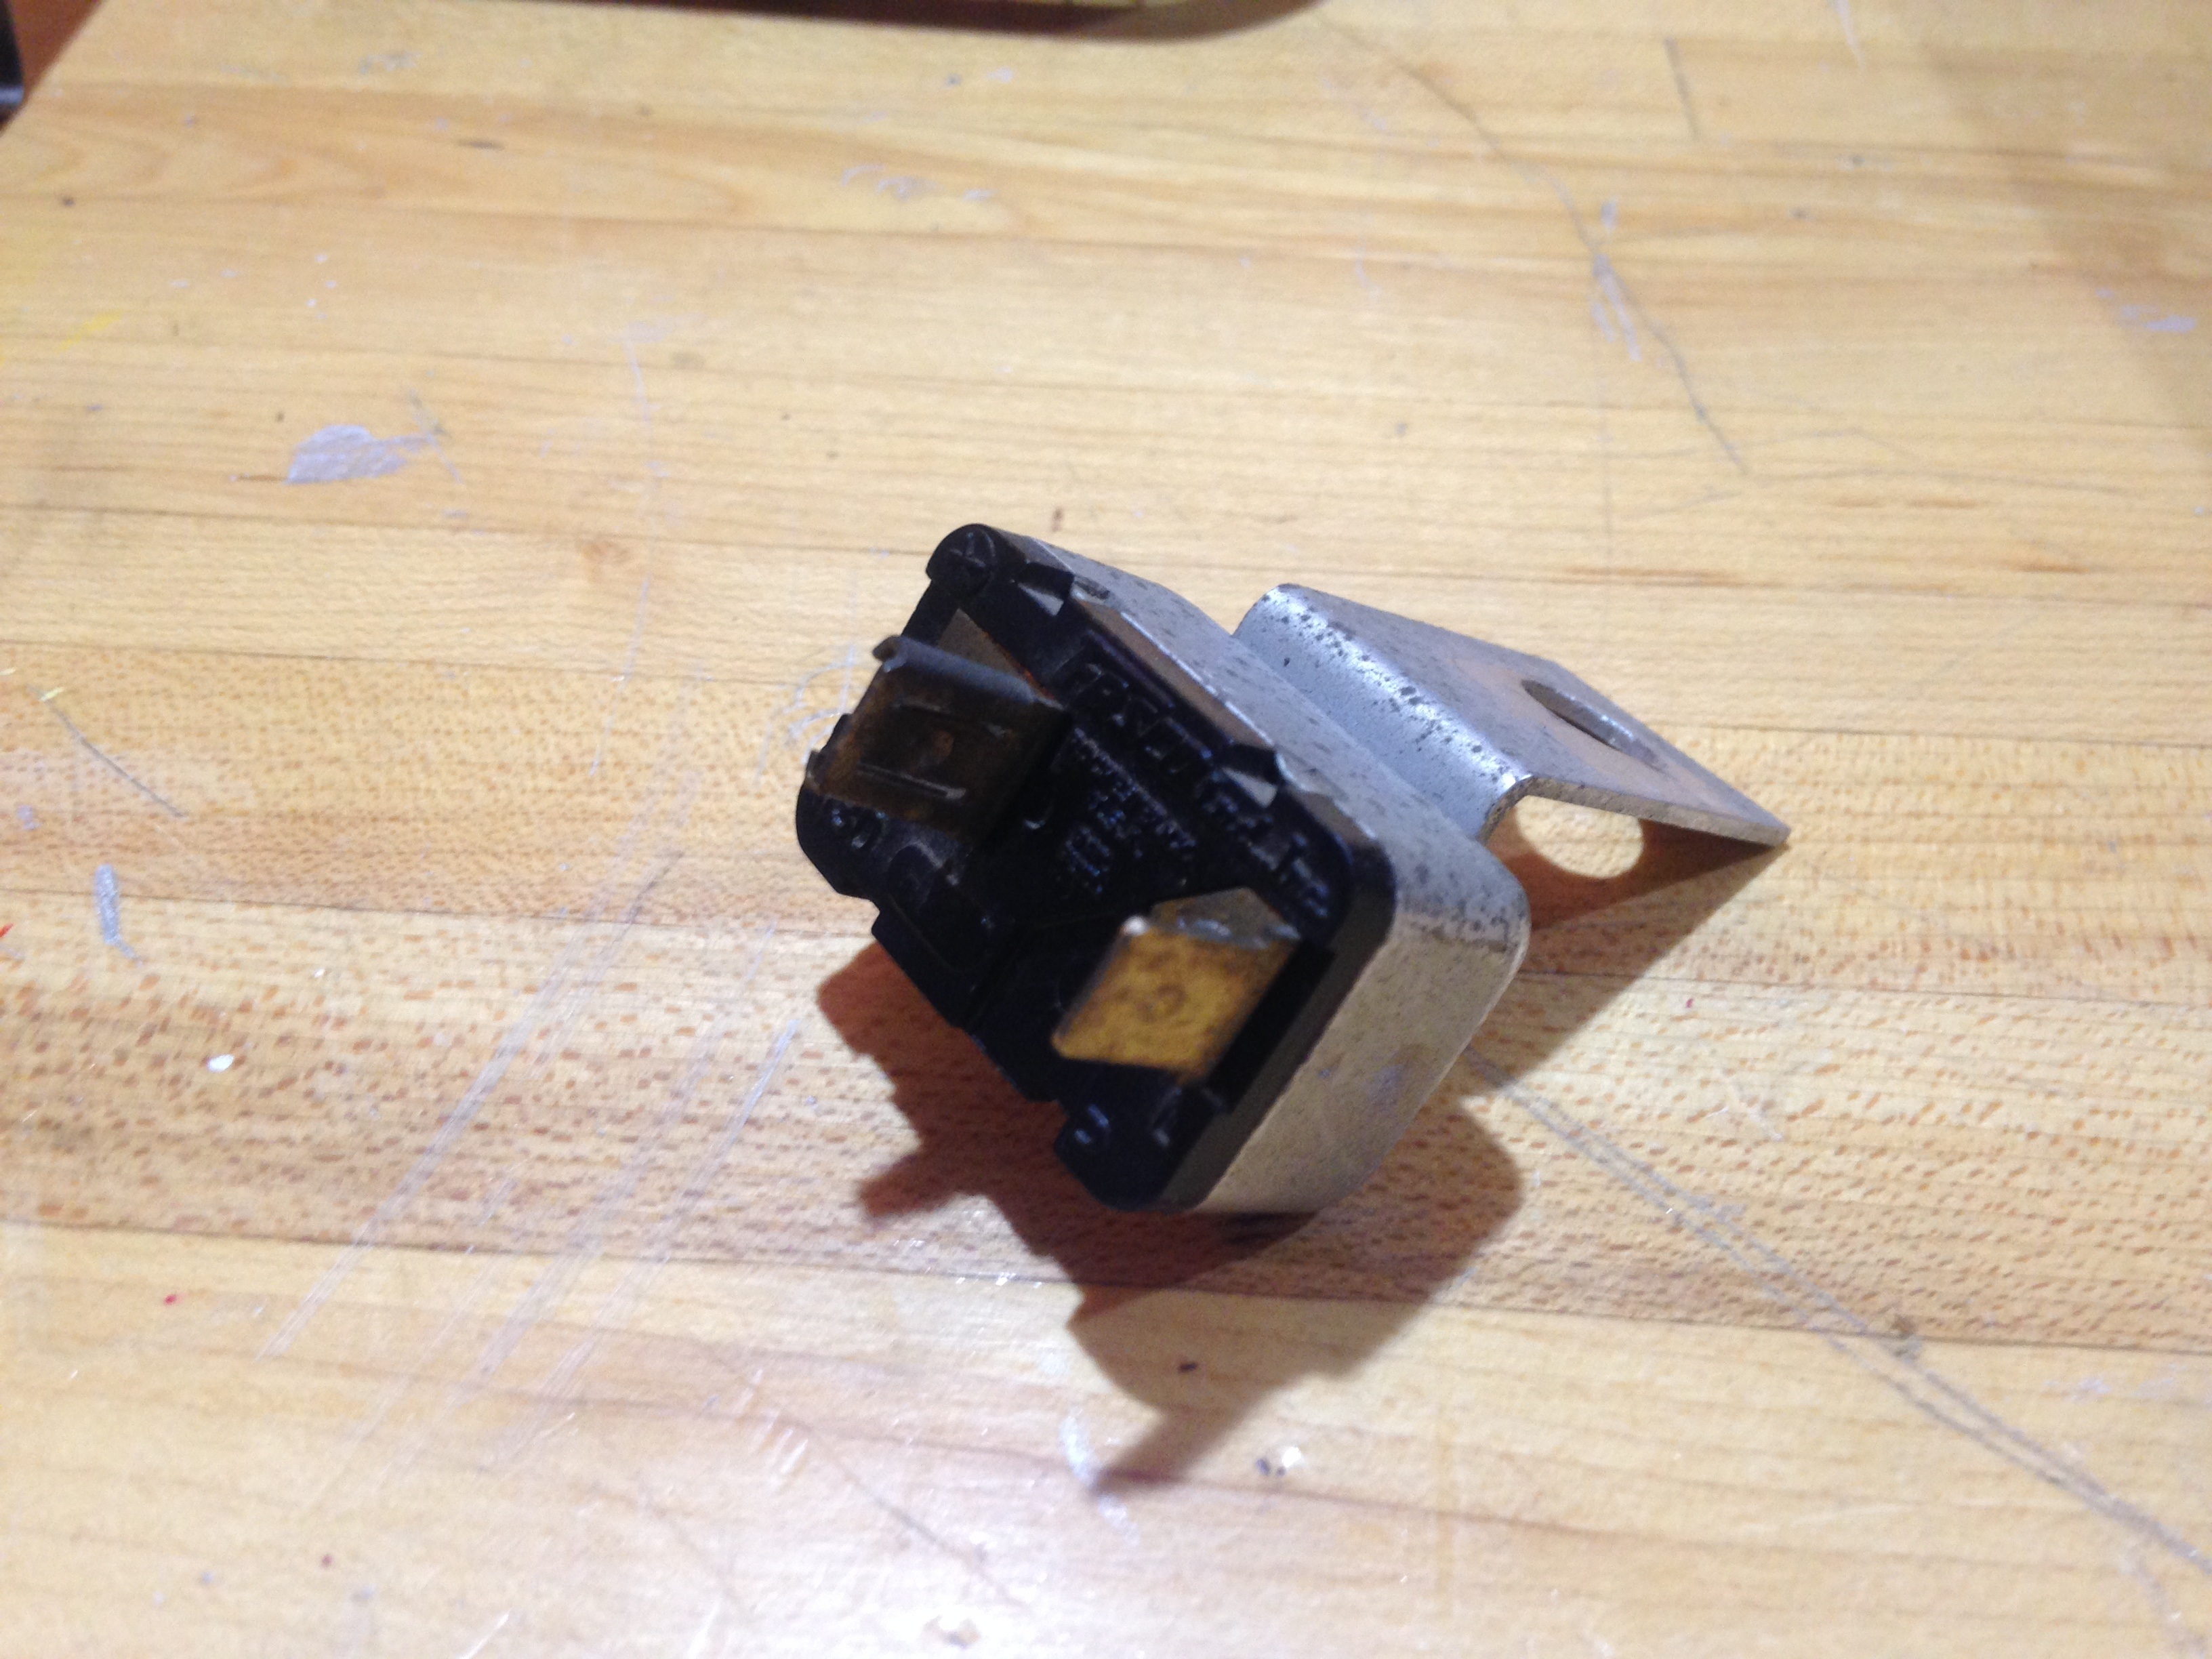
Some of you may have already heard it from Facebook, I finally found the darn flasher !
I was determined to find it and ended up reinstalling the old light bulb that I've wisely kept and make the turn signals work in order to find it from the blinking sound.
After a couple of minutes, I found it happily making its blinking sound under the dashboard, as it should be .
" Got you good now, darn Blinker ! "
Though I was happy to find it, I was a bit mad to myself as I was looking for a round three prong flasher instead of a square two prong one. I did looked on the shop manual and also found out that this flasher was used on 54 Hudsons. From here, I've ordered an electronical flasher made to work with 6 Volts LED lights. Until it comes, I'll be making some more searches on our flasher wire system and see if the new one will work.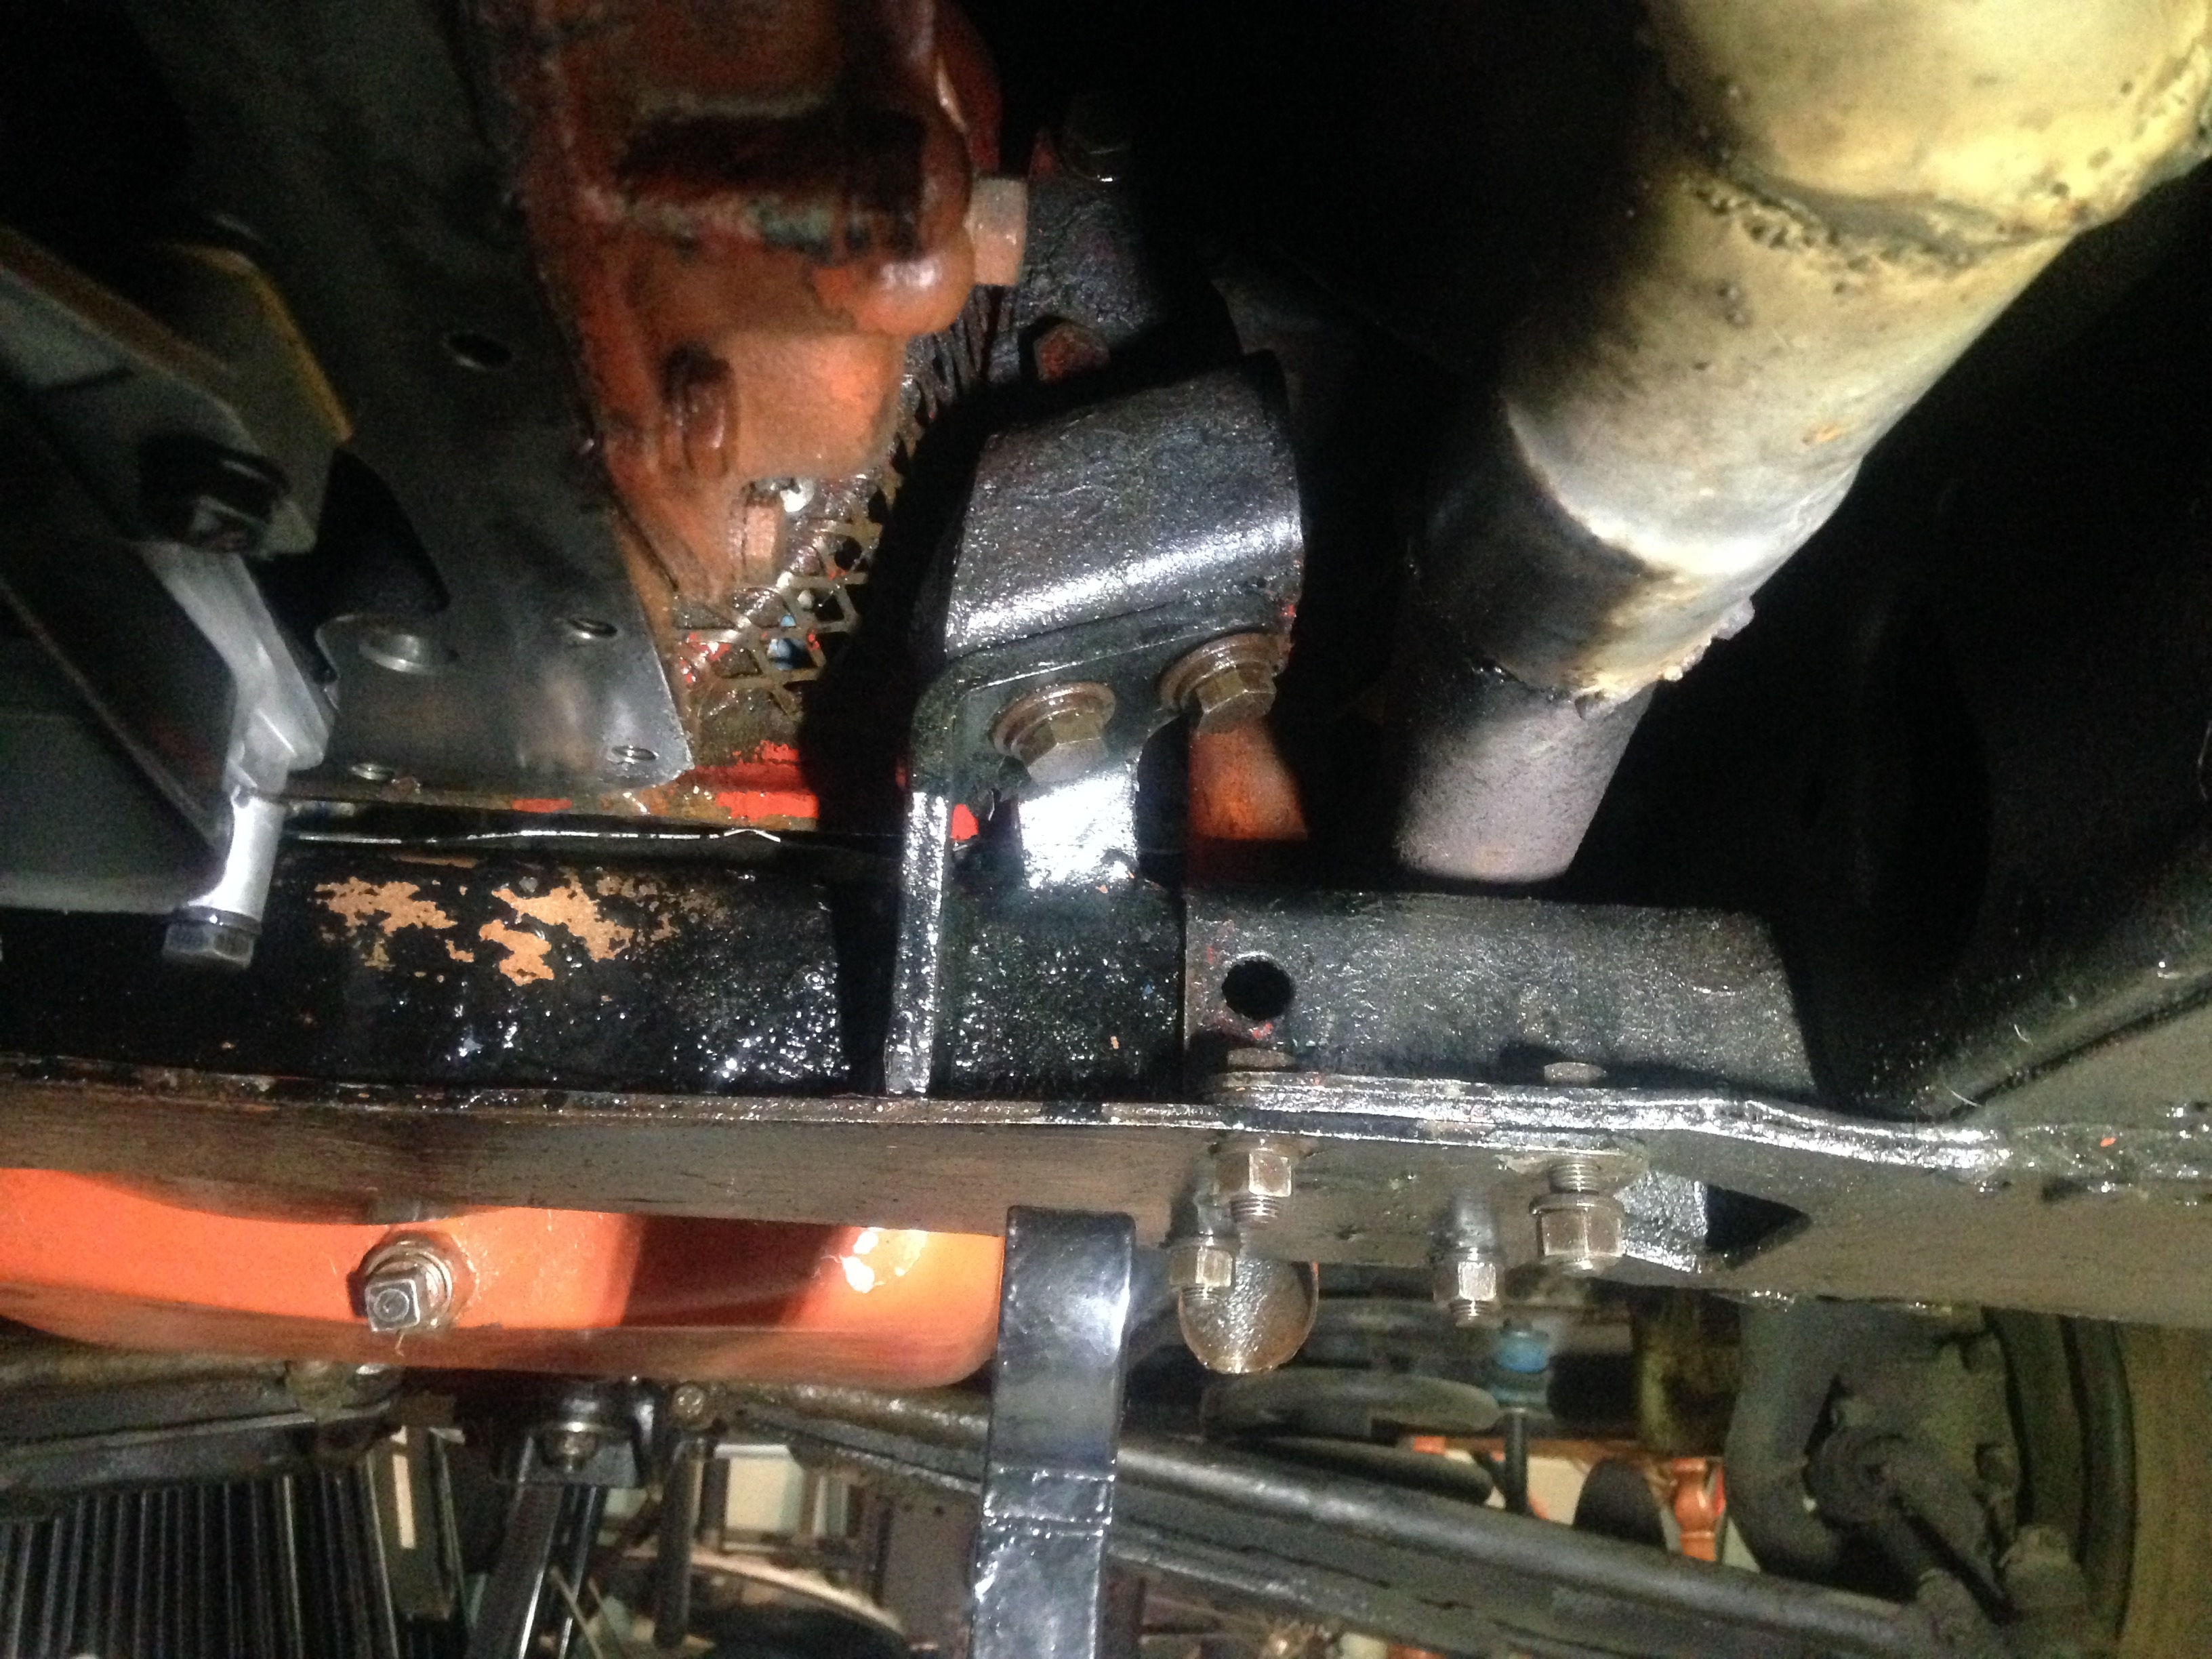
I've also being busy under the car as I wanted to flush the torque converter from the automatic transmission fluid that I also suspected to be burnt. The only way to do it though was to remove the crossmember that is also used as a support for the engine and tranny alike.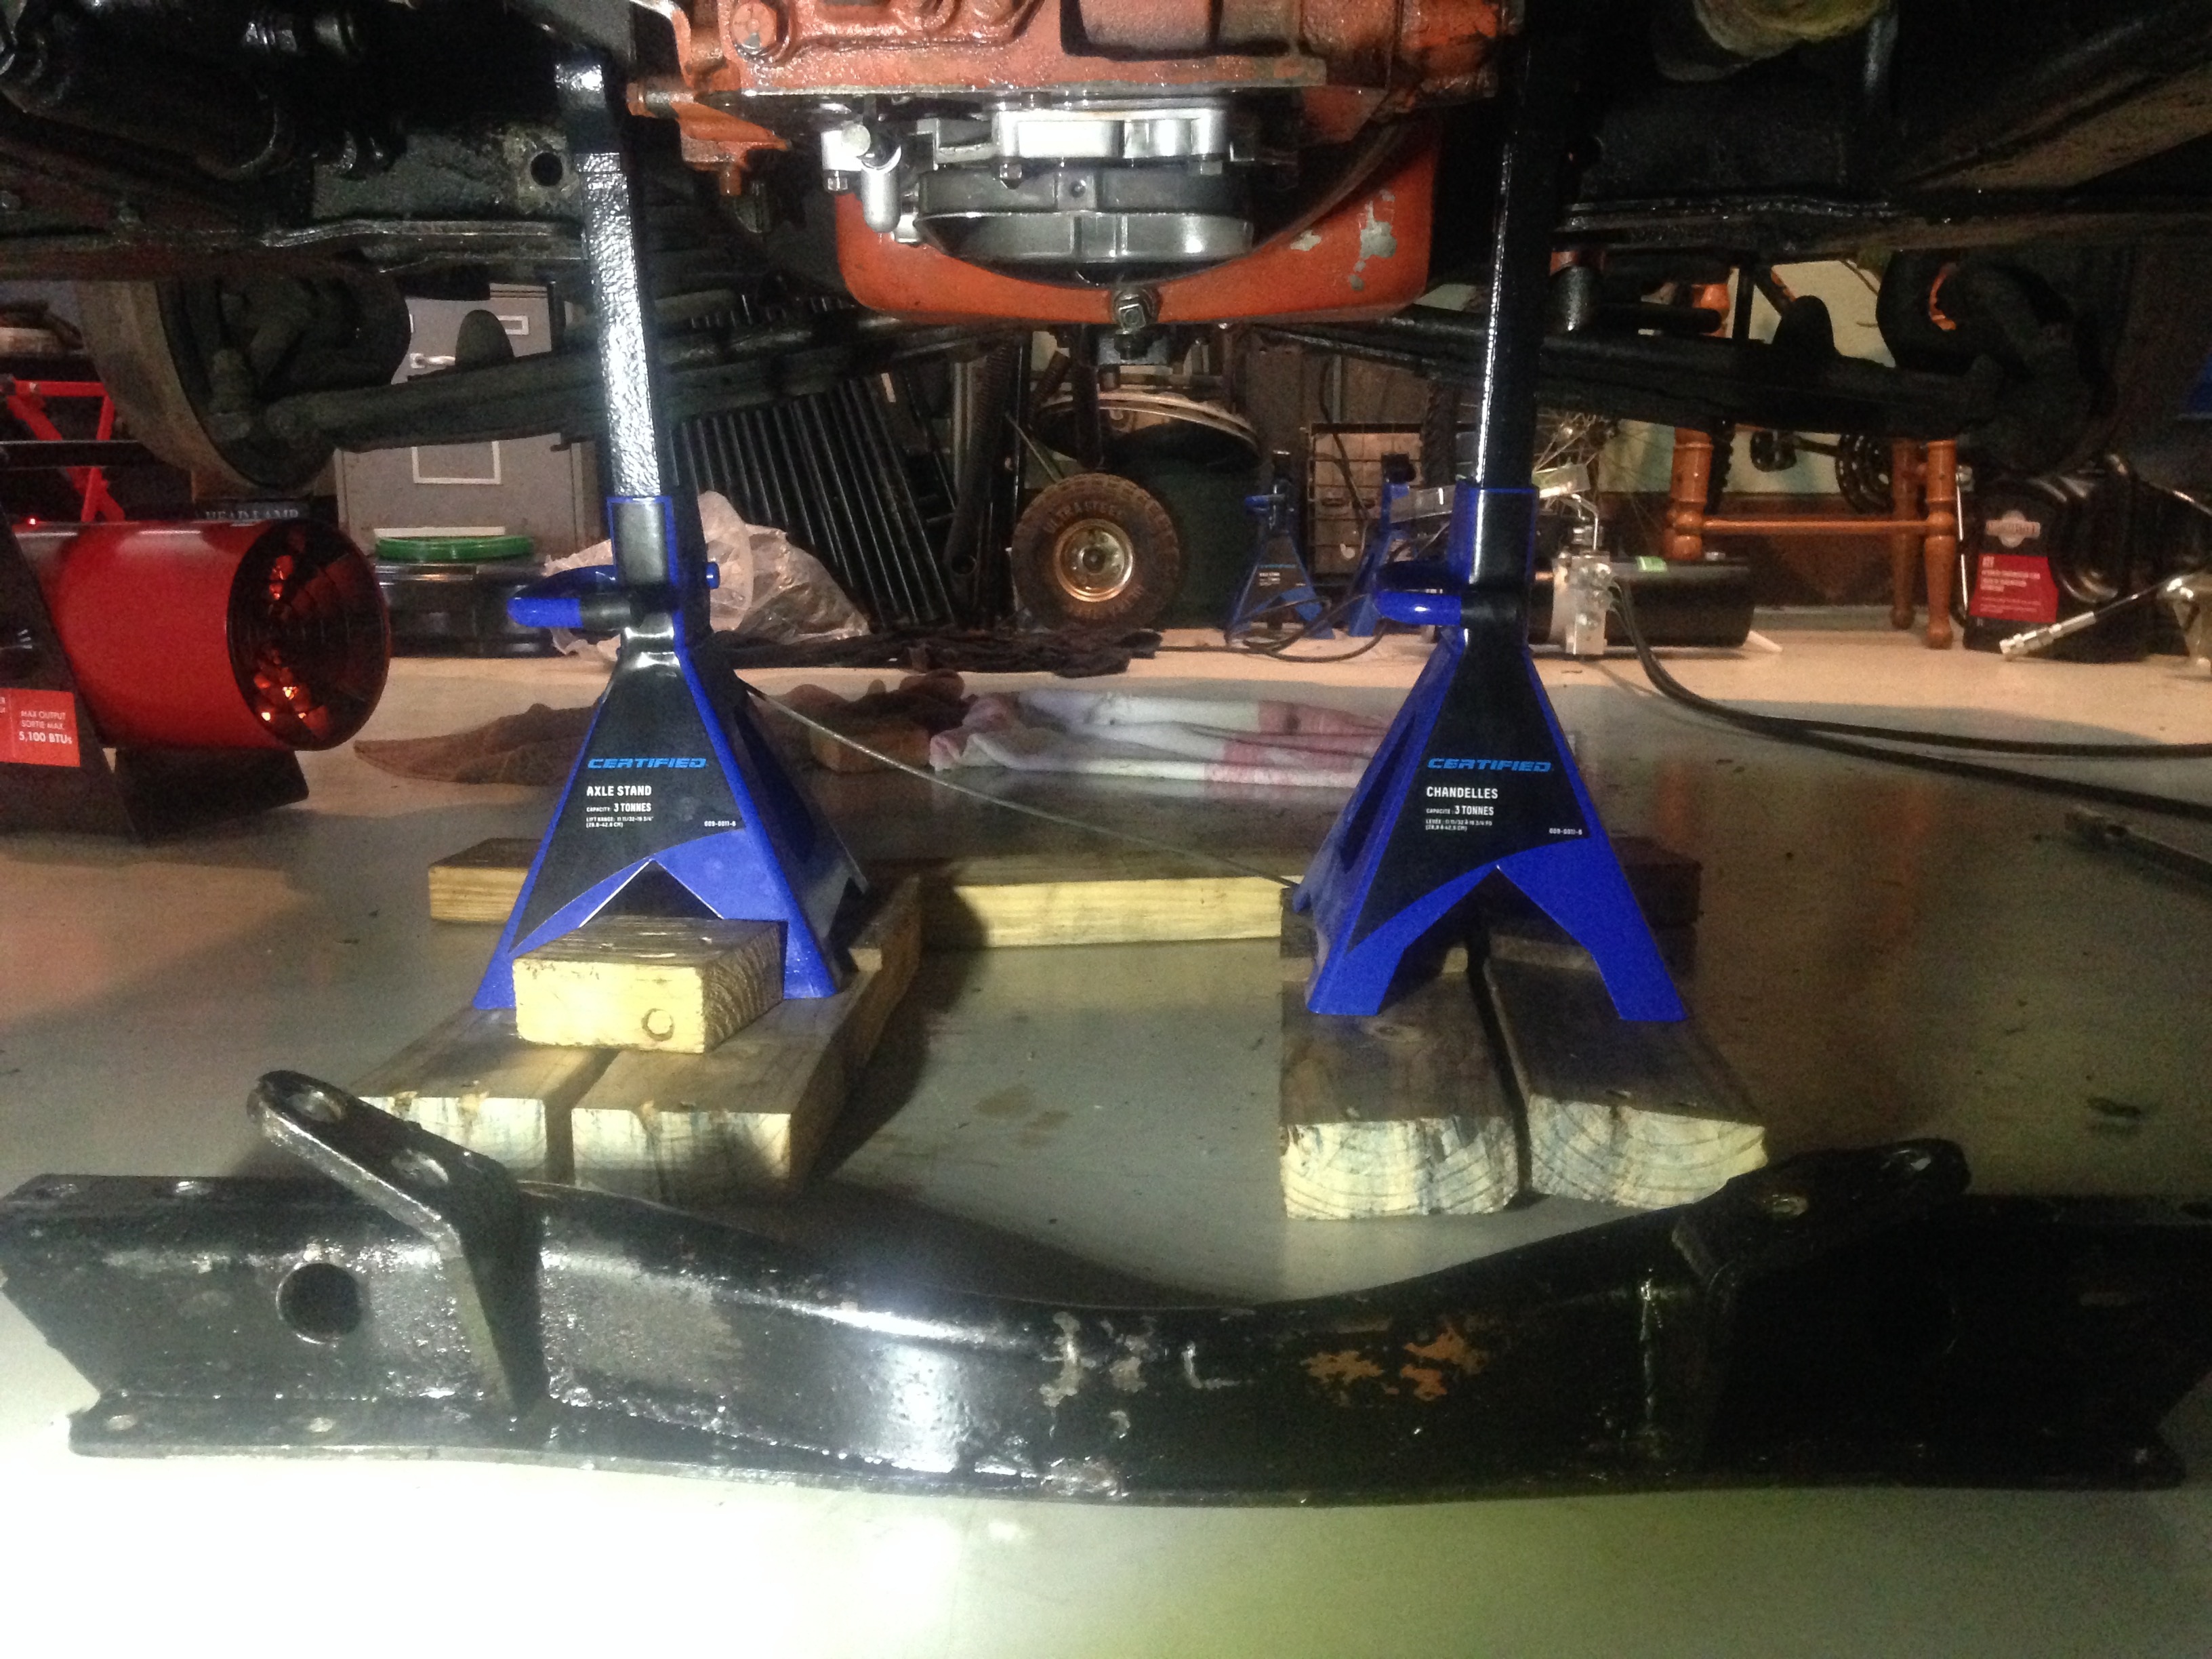
While the crossmember was put down, I've put stands below the mounting pads where it was bolted on to keep the transmission as level as possible,just to make sure to not put loads of stress on other supports for the time being.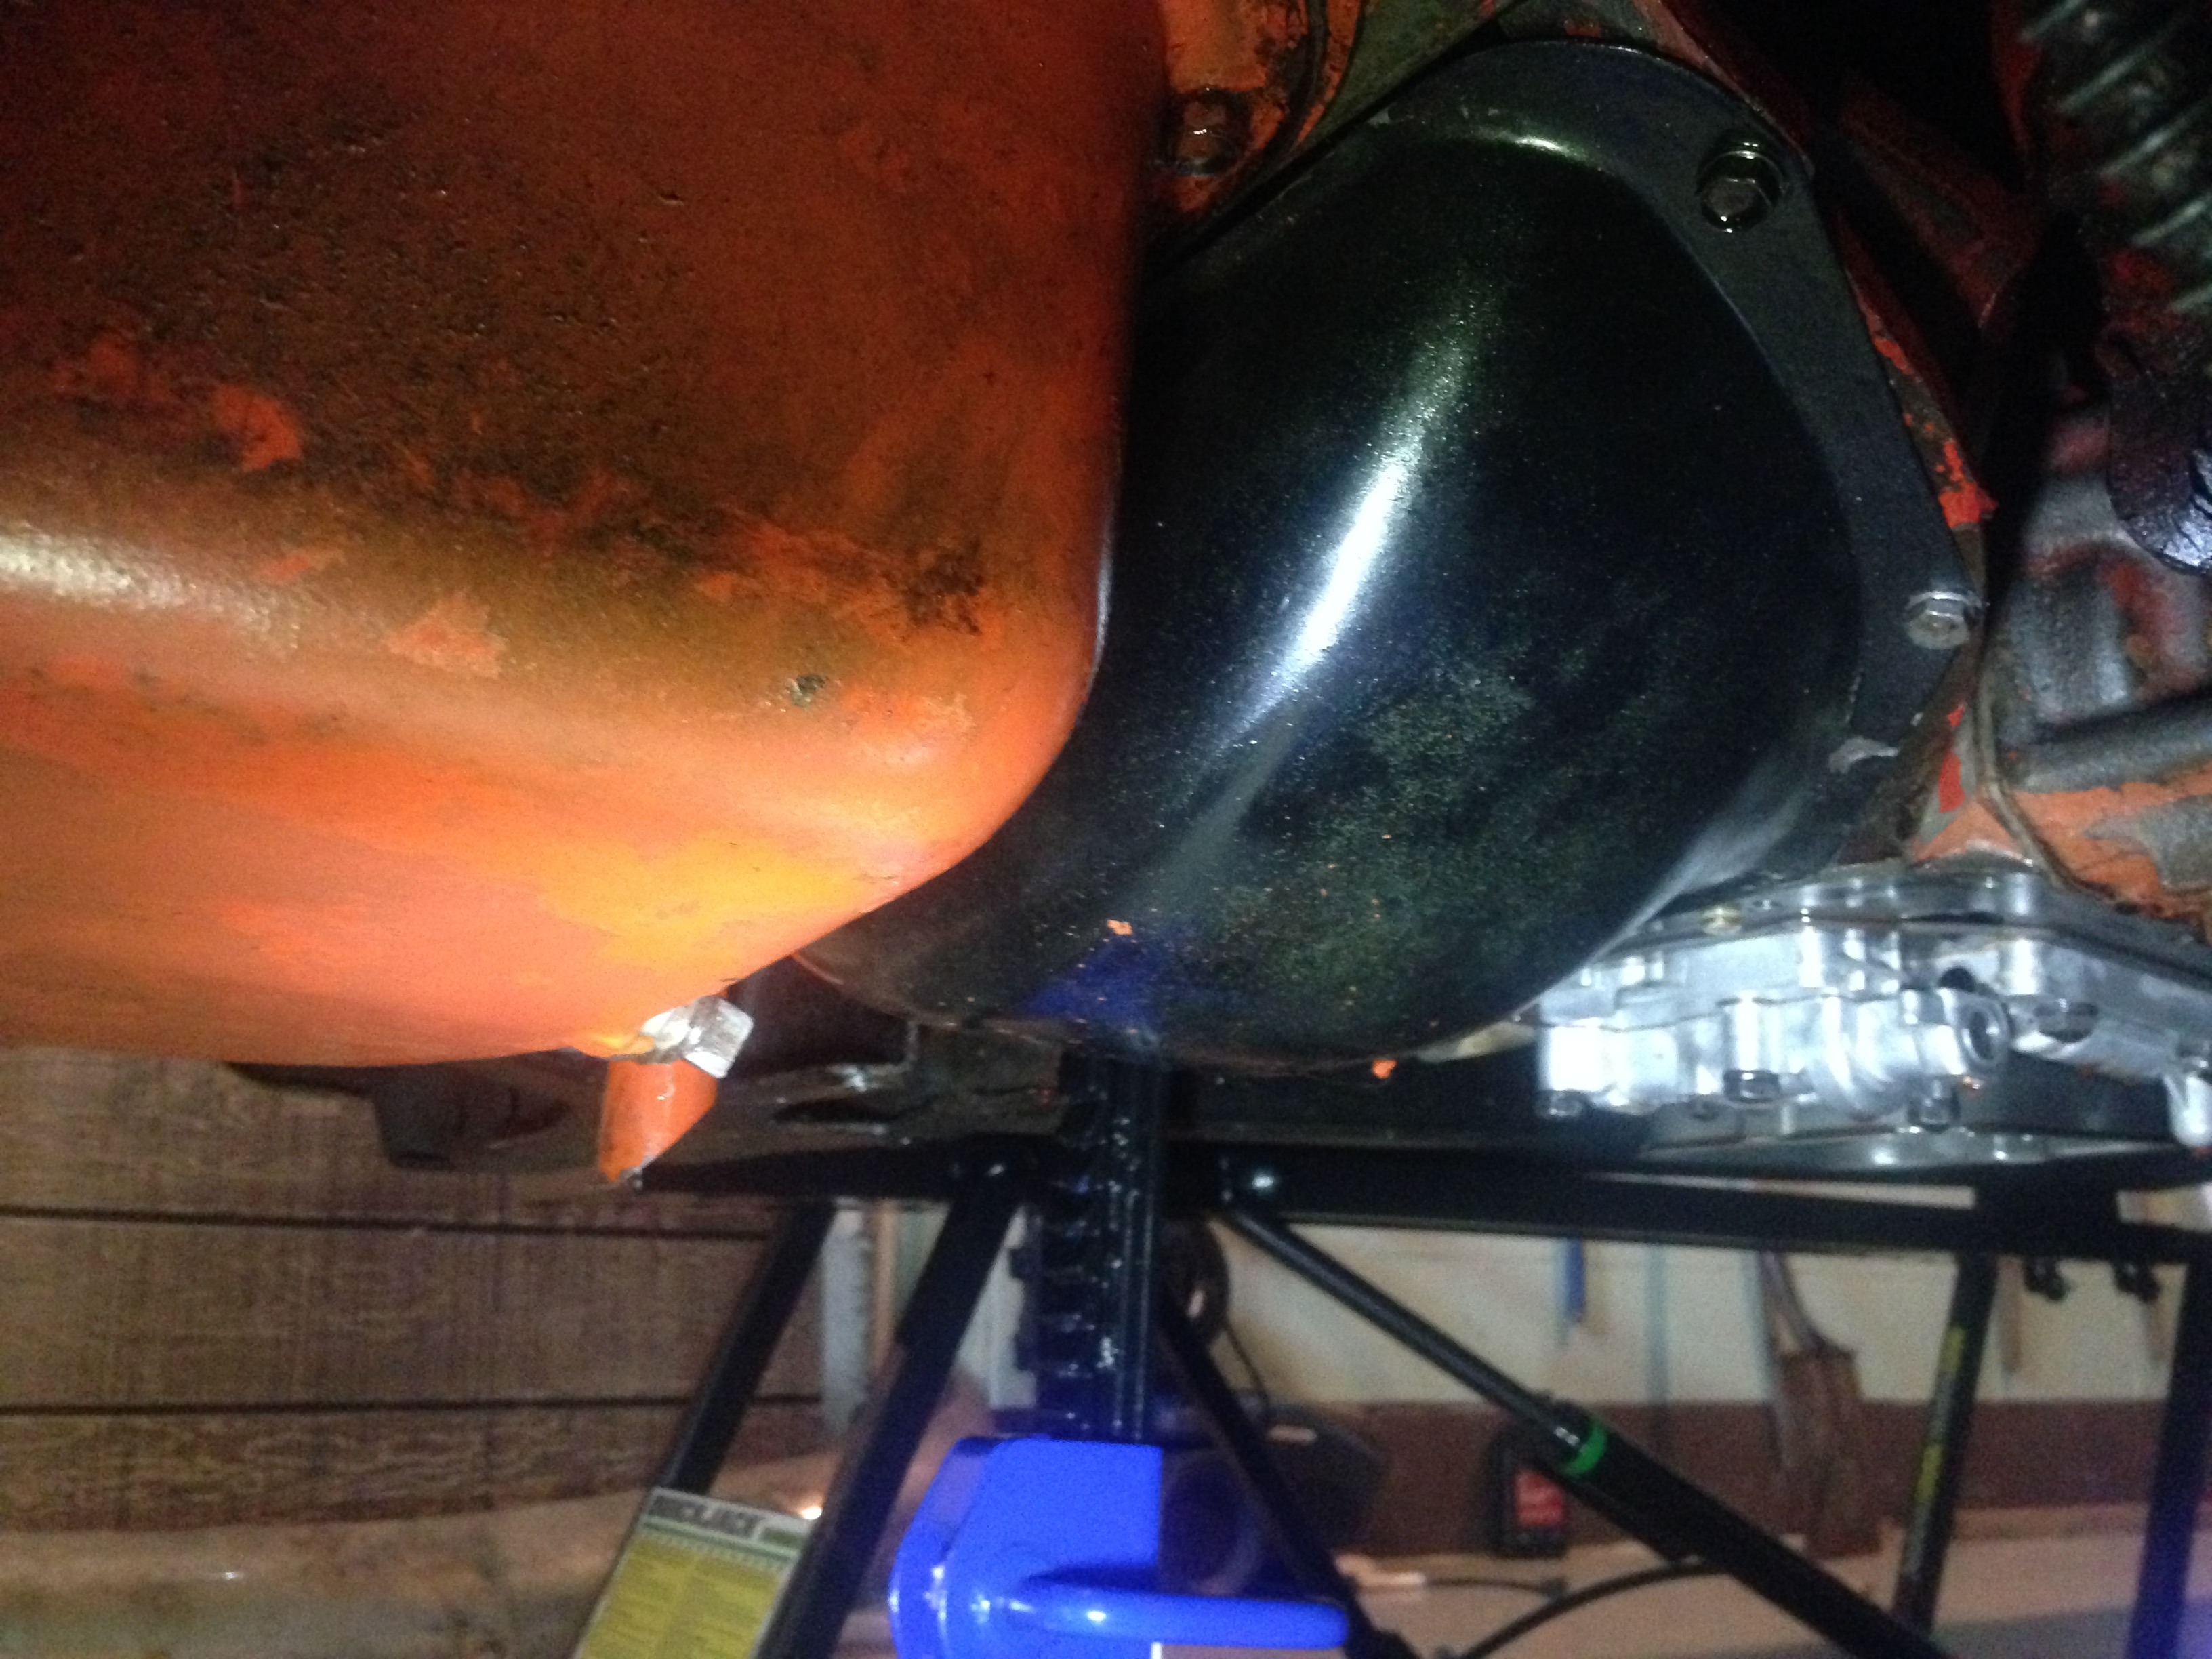
With the crossmember removed and the transmission controls disconnected from it, I did have a better access to the torque converter and drained all the fluid inside.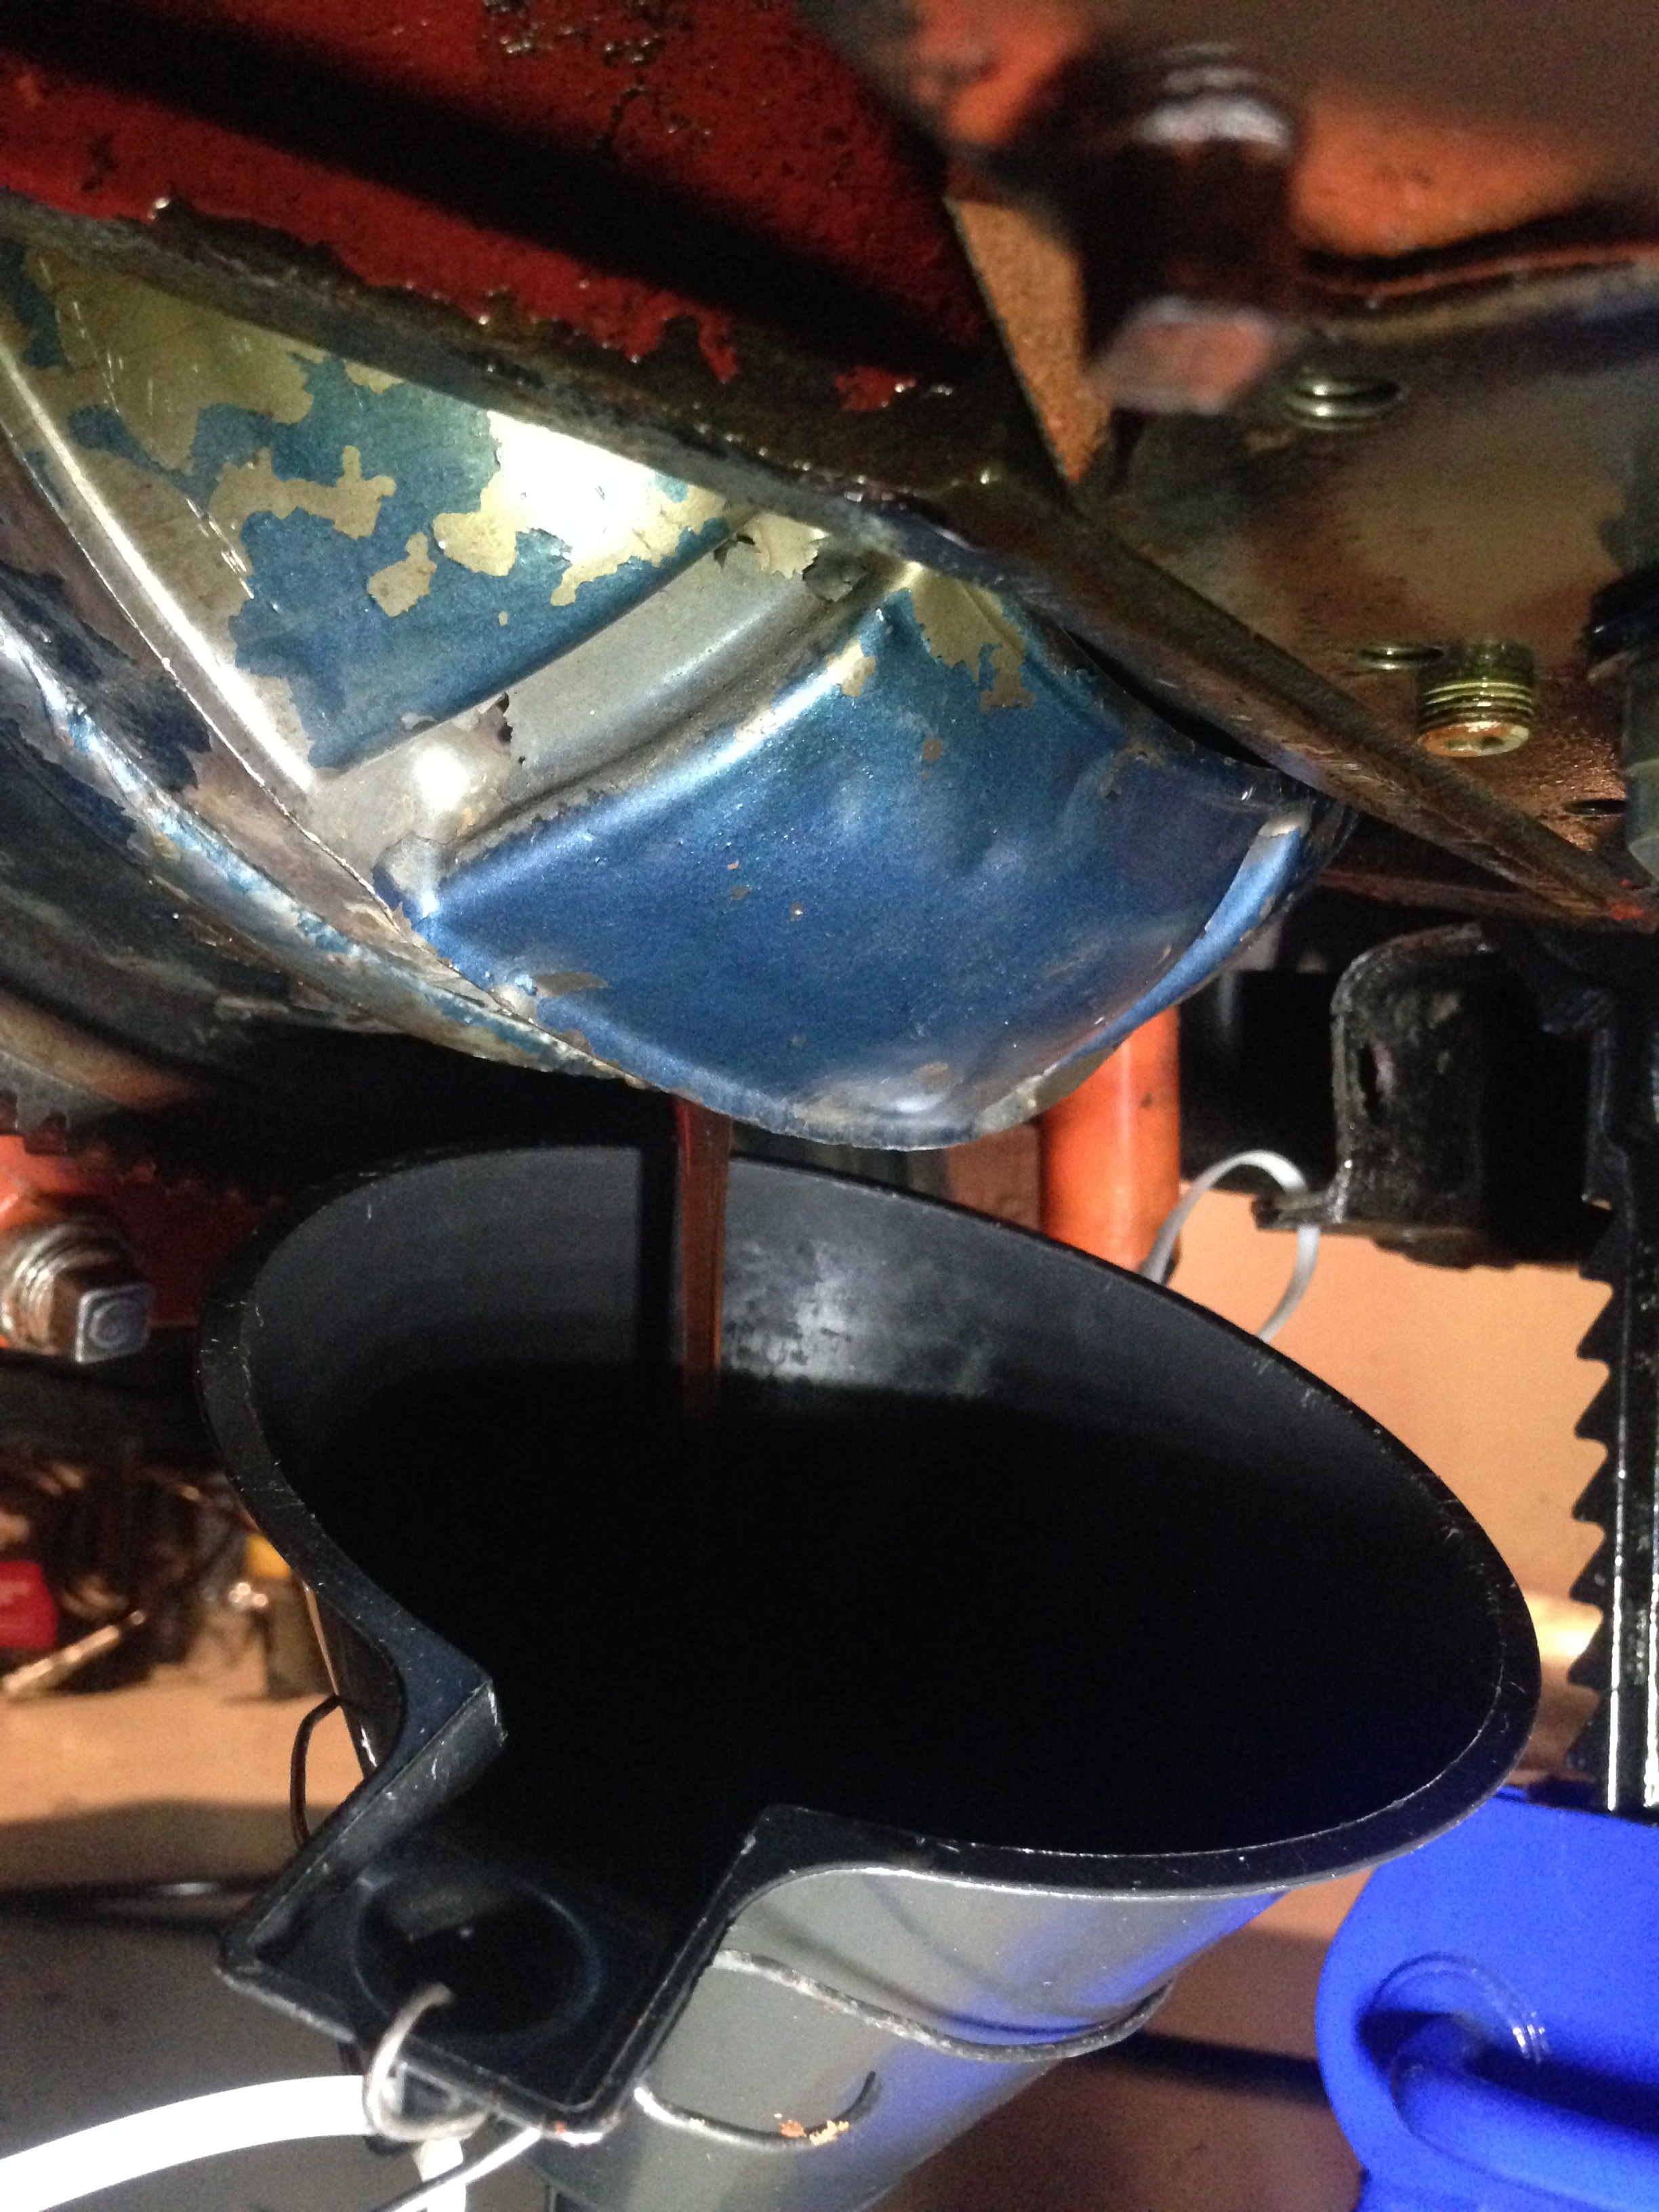
As I did suspected, the fluid inside the torque, just like inside the transmission had burned, the smell of it was still horrible, but it was necessary to drain it.
From here, everything is ready for the traansmission's removal. As said in the beginning, I'm excited to have it in hand make some closer inspections, starting with the front pump as it was leaking between the tranny and the torque converter housing. I'll be also looking for any other symptoms on it. Feel free to give me some tips or advices while I'll be reading the tranny's shop manual for the upcoming inspection.
See you on my next update !
Your Autistic Hudsoneer,
Max
0 -
https://studebaker-info.org/Tech/Transmission/DG/dgmaint1.html
Weak point - parking pawl. Be careful when taking the car out of park on a hill, or you will break the pawl.
https://studebaker-info.org/Tech/Transmission/DG/sdc36153.html
Also good info on adjusting the bands.
0 -
Update of December 2nd
This last weekend was the moment that I've been waiting for : the transmission is out of the car and moved on the my humble work bench.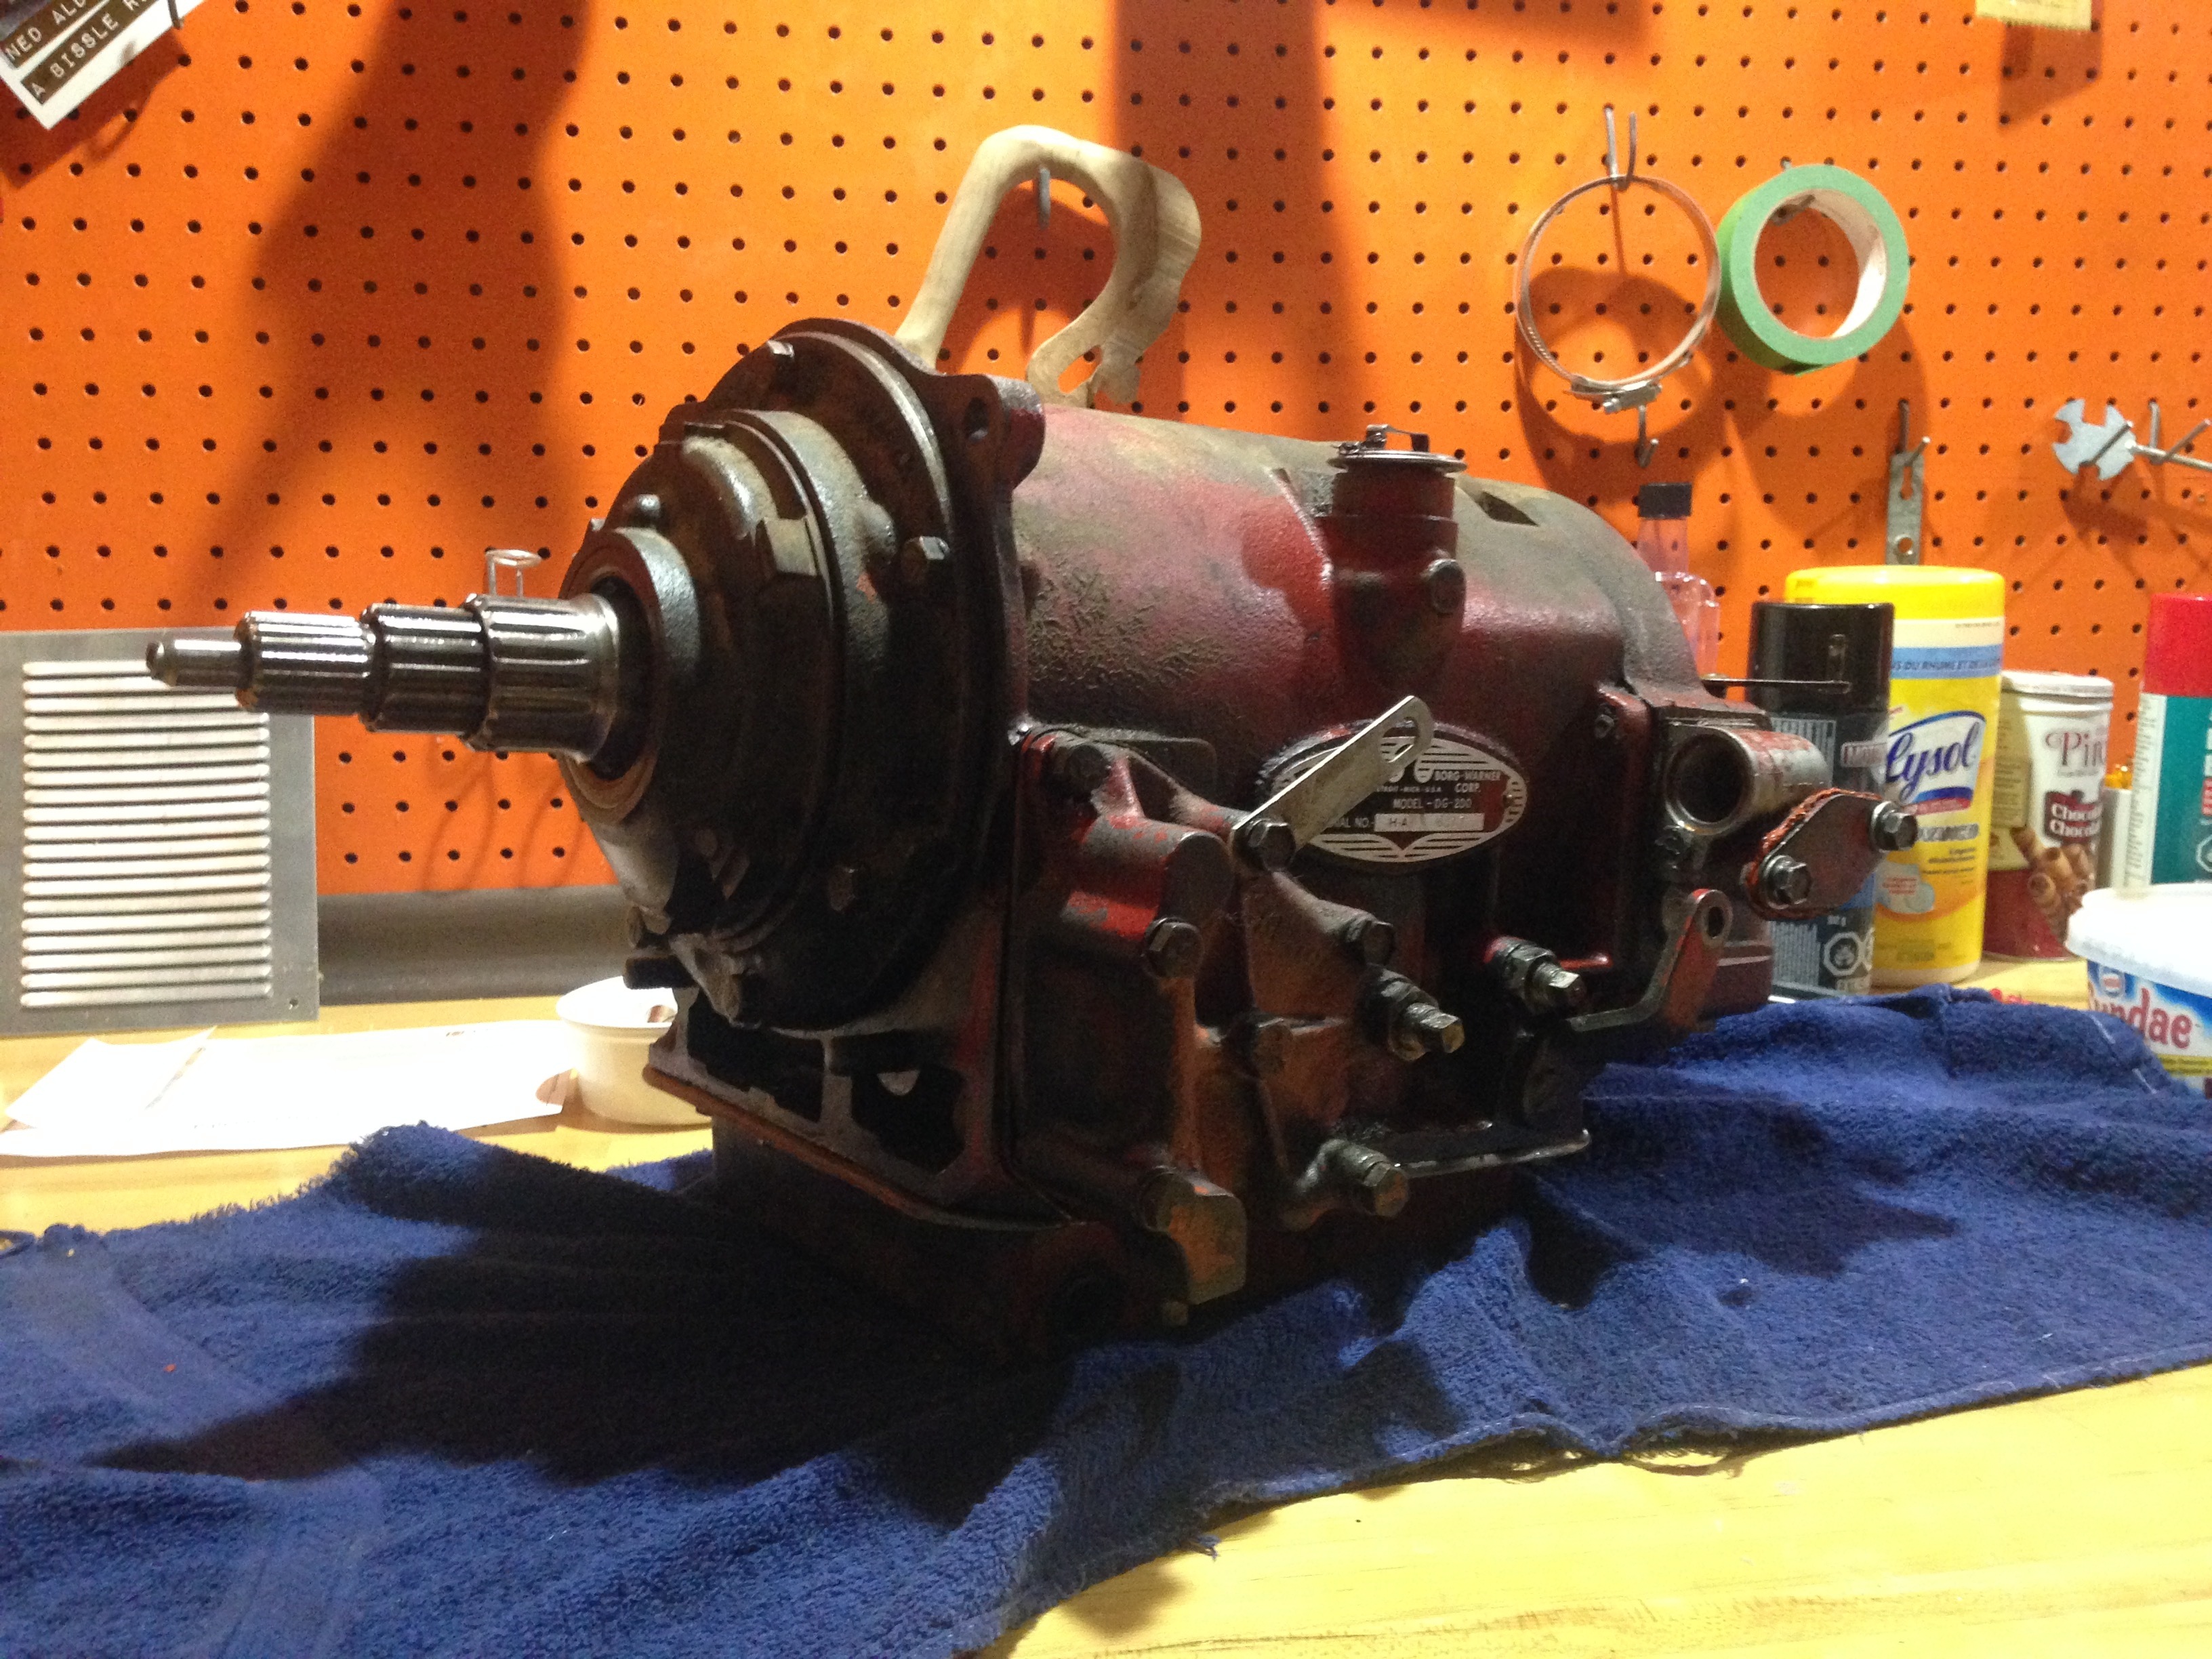
Sorry if I didn't put some pictures of the removal process as it did took me a whole day to replace some supports and figure out how to do it that I forgot to take some.
Nevertheless, the tranny is on the desk and we can start together the T.I. ( Transmission Investigation )
From the beginning, I wanted to check the front pump as the main issue I've got before the transmission got hot was a leak between the converter housing and the tranny itself. After careful removal of the front pump from the rest, I got myself a bit impressed of what I saw.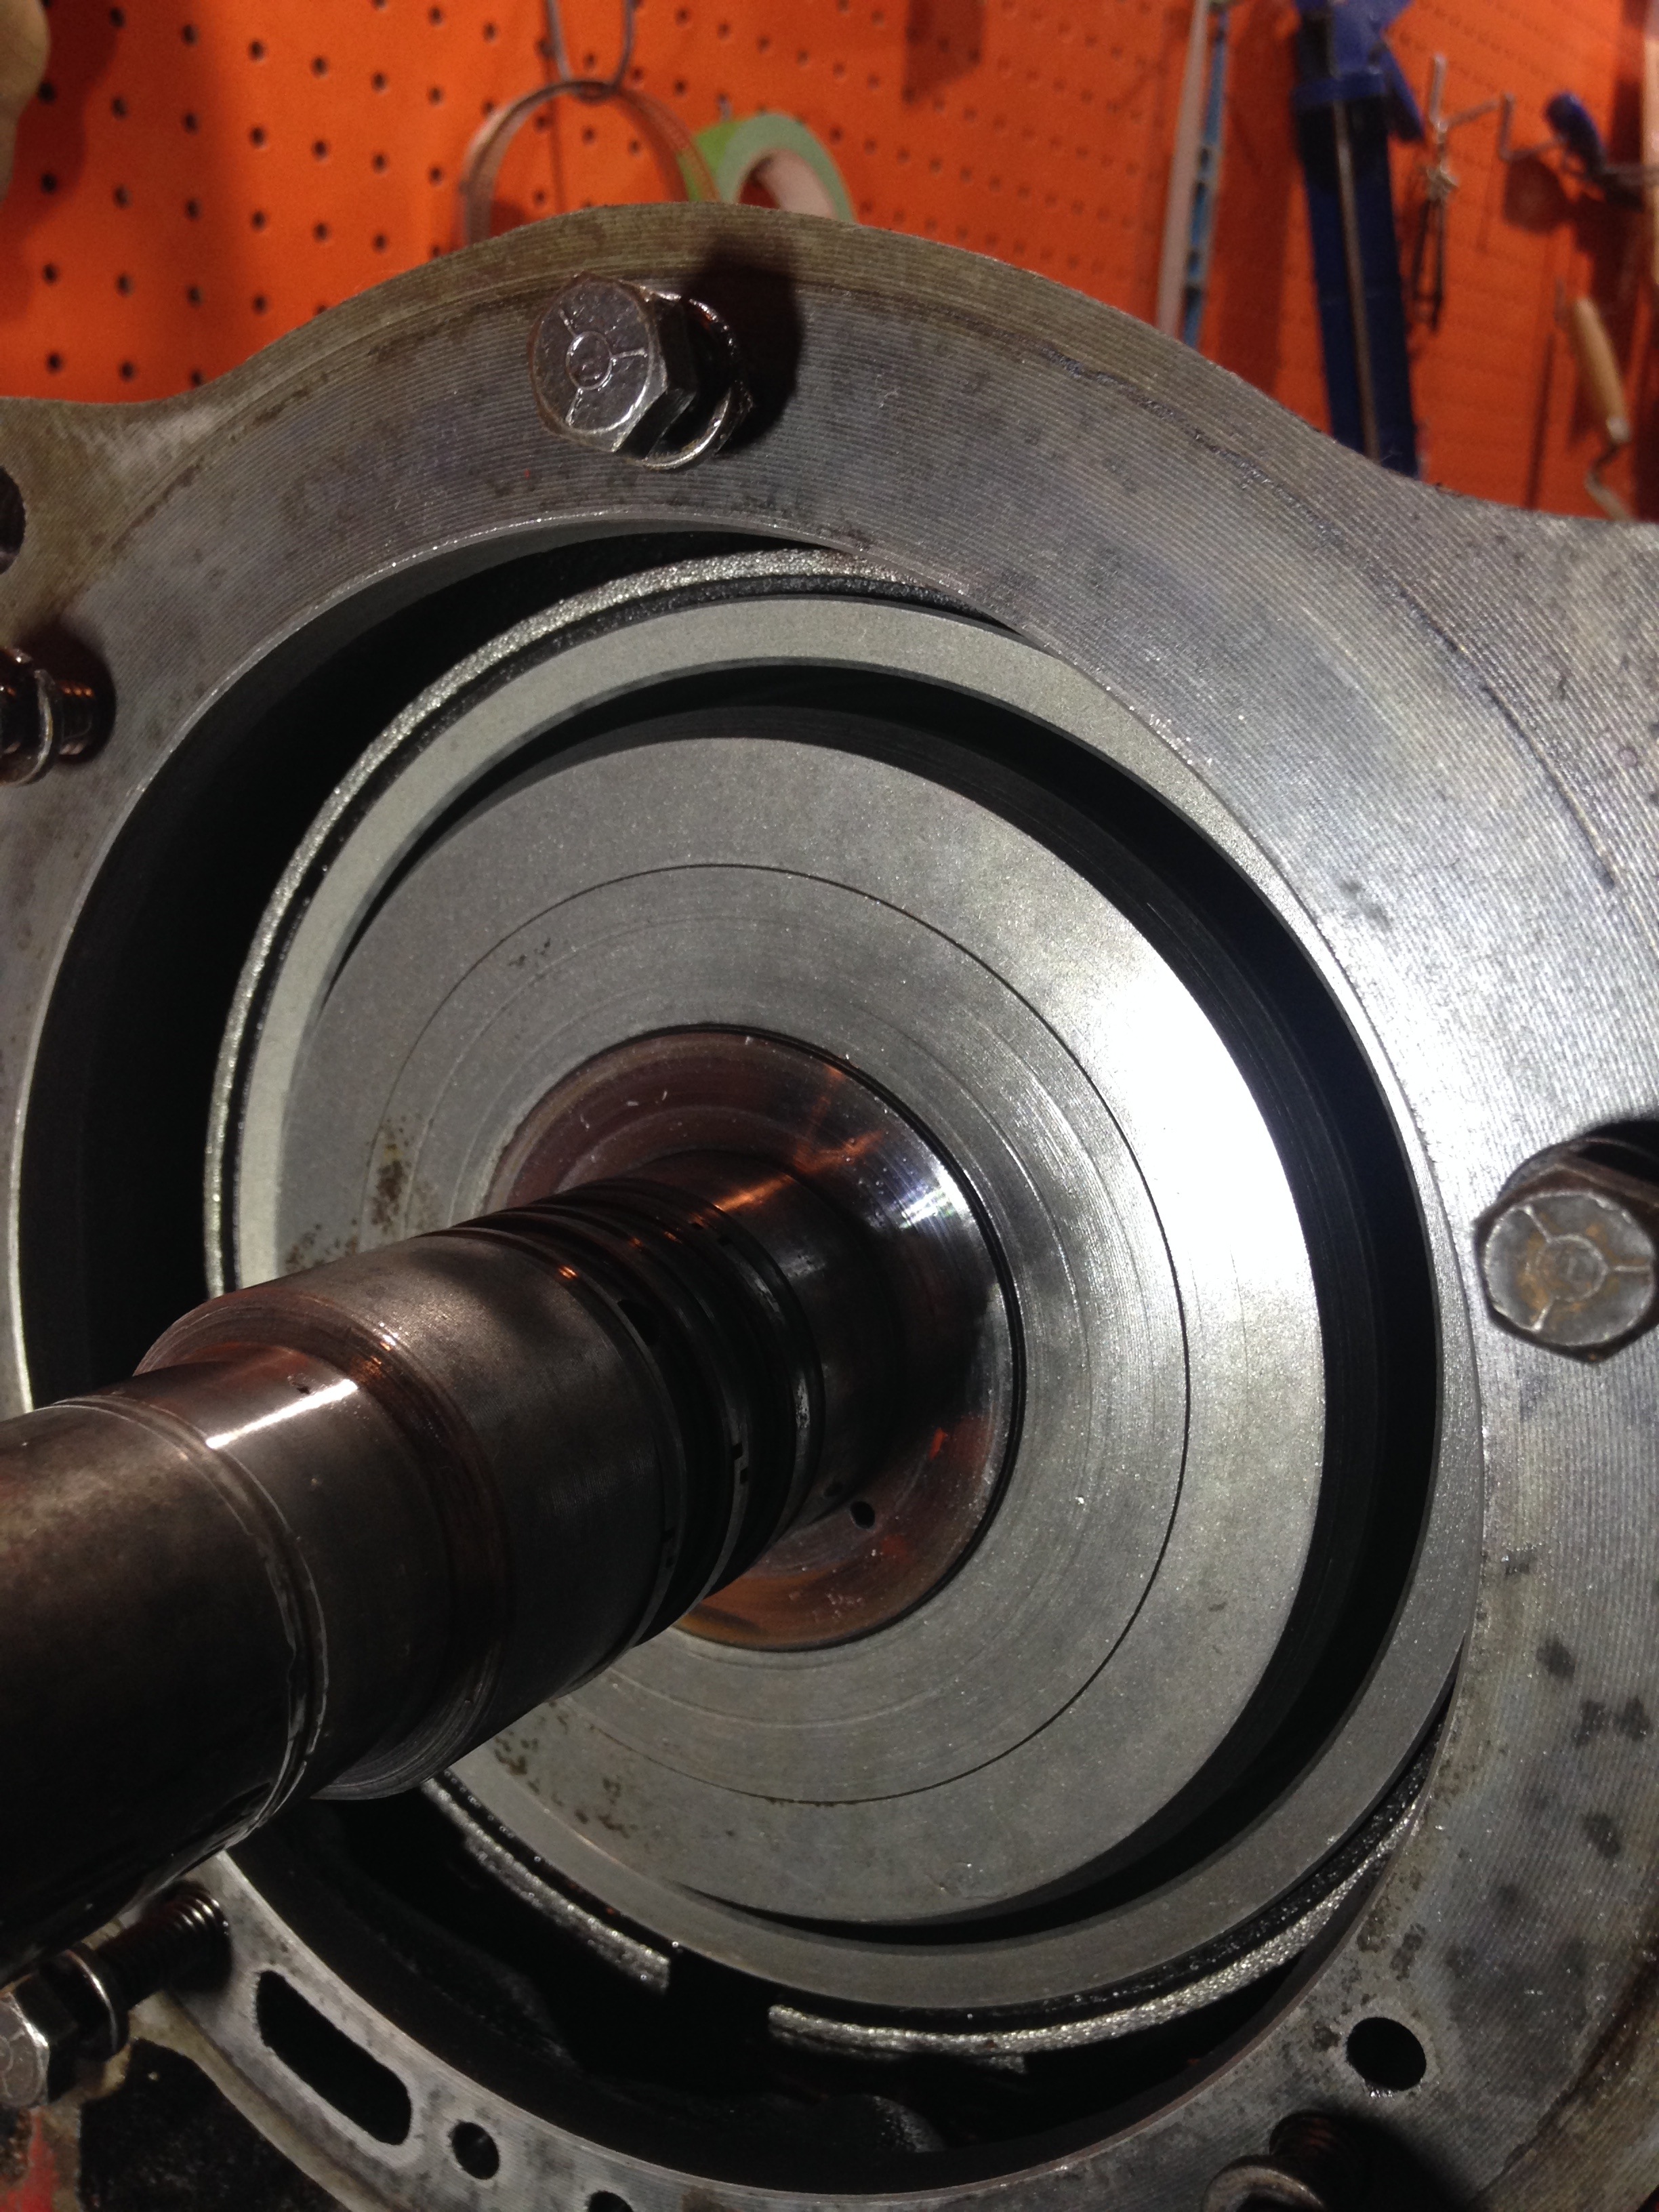
What you see here is the front face of the transmission where the front pump sits and from the first look, it seme to be in good shape so far. I'll hear what the experts will have to say about it as I'll also try to reach some member of the Studebaker during this investigation. They are the creators of the DG trannies after all.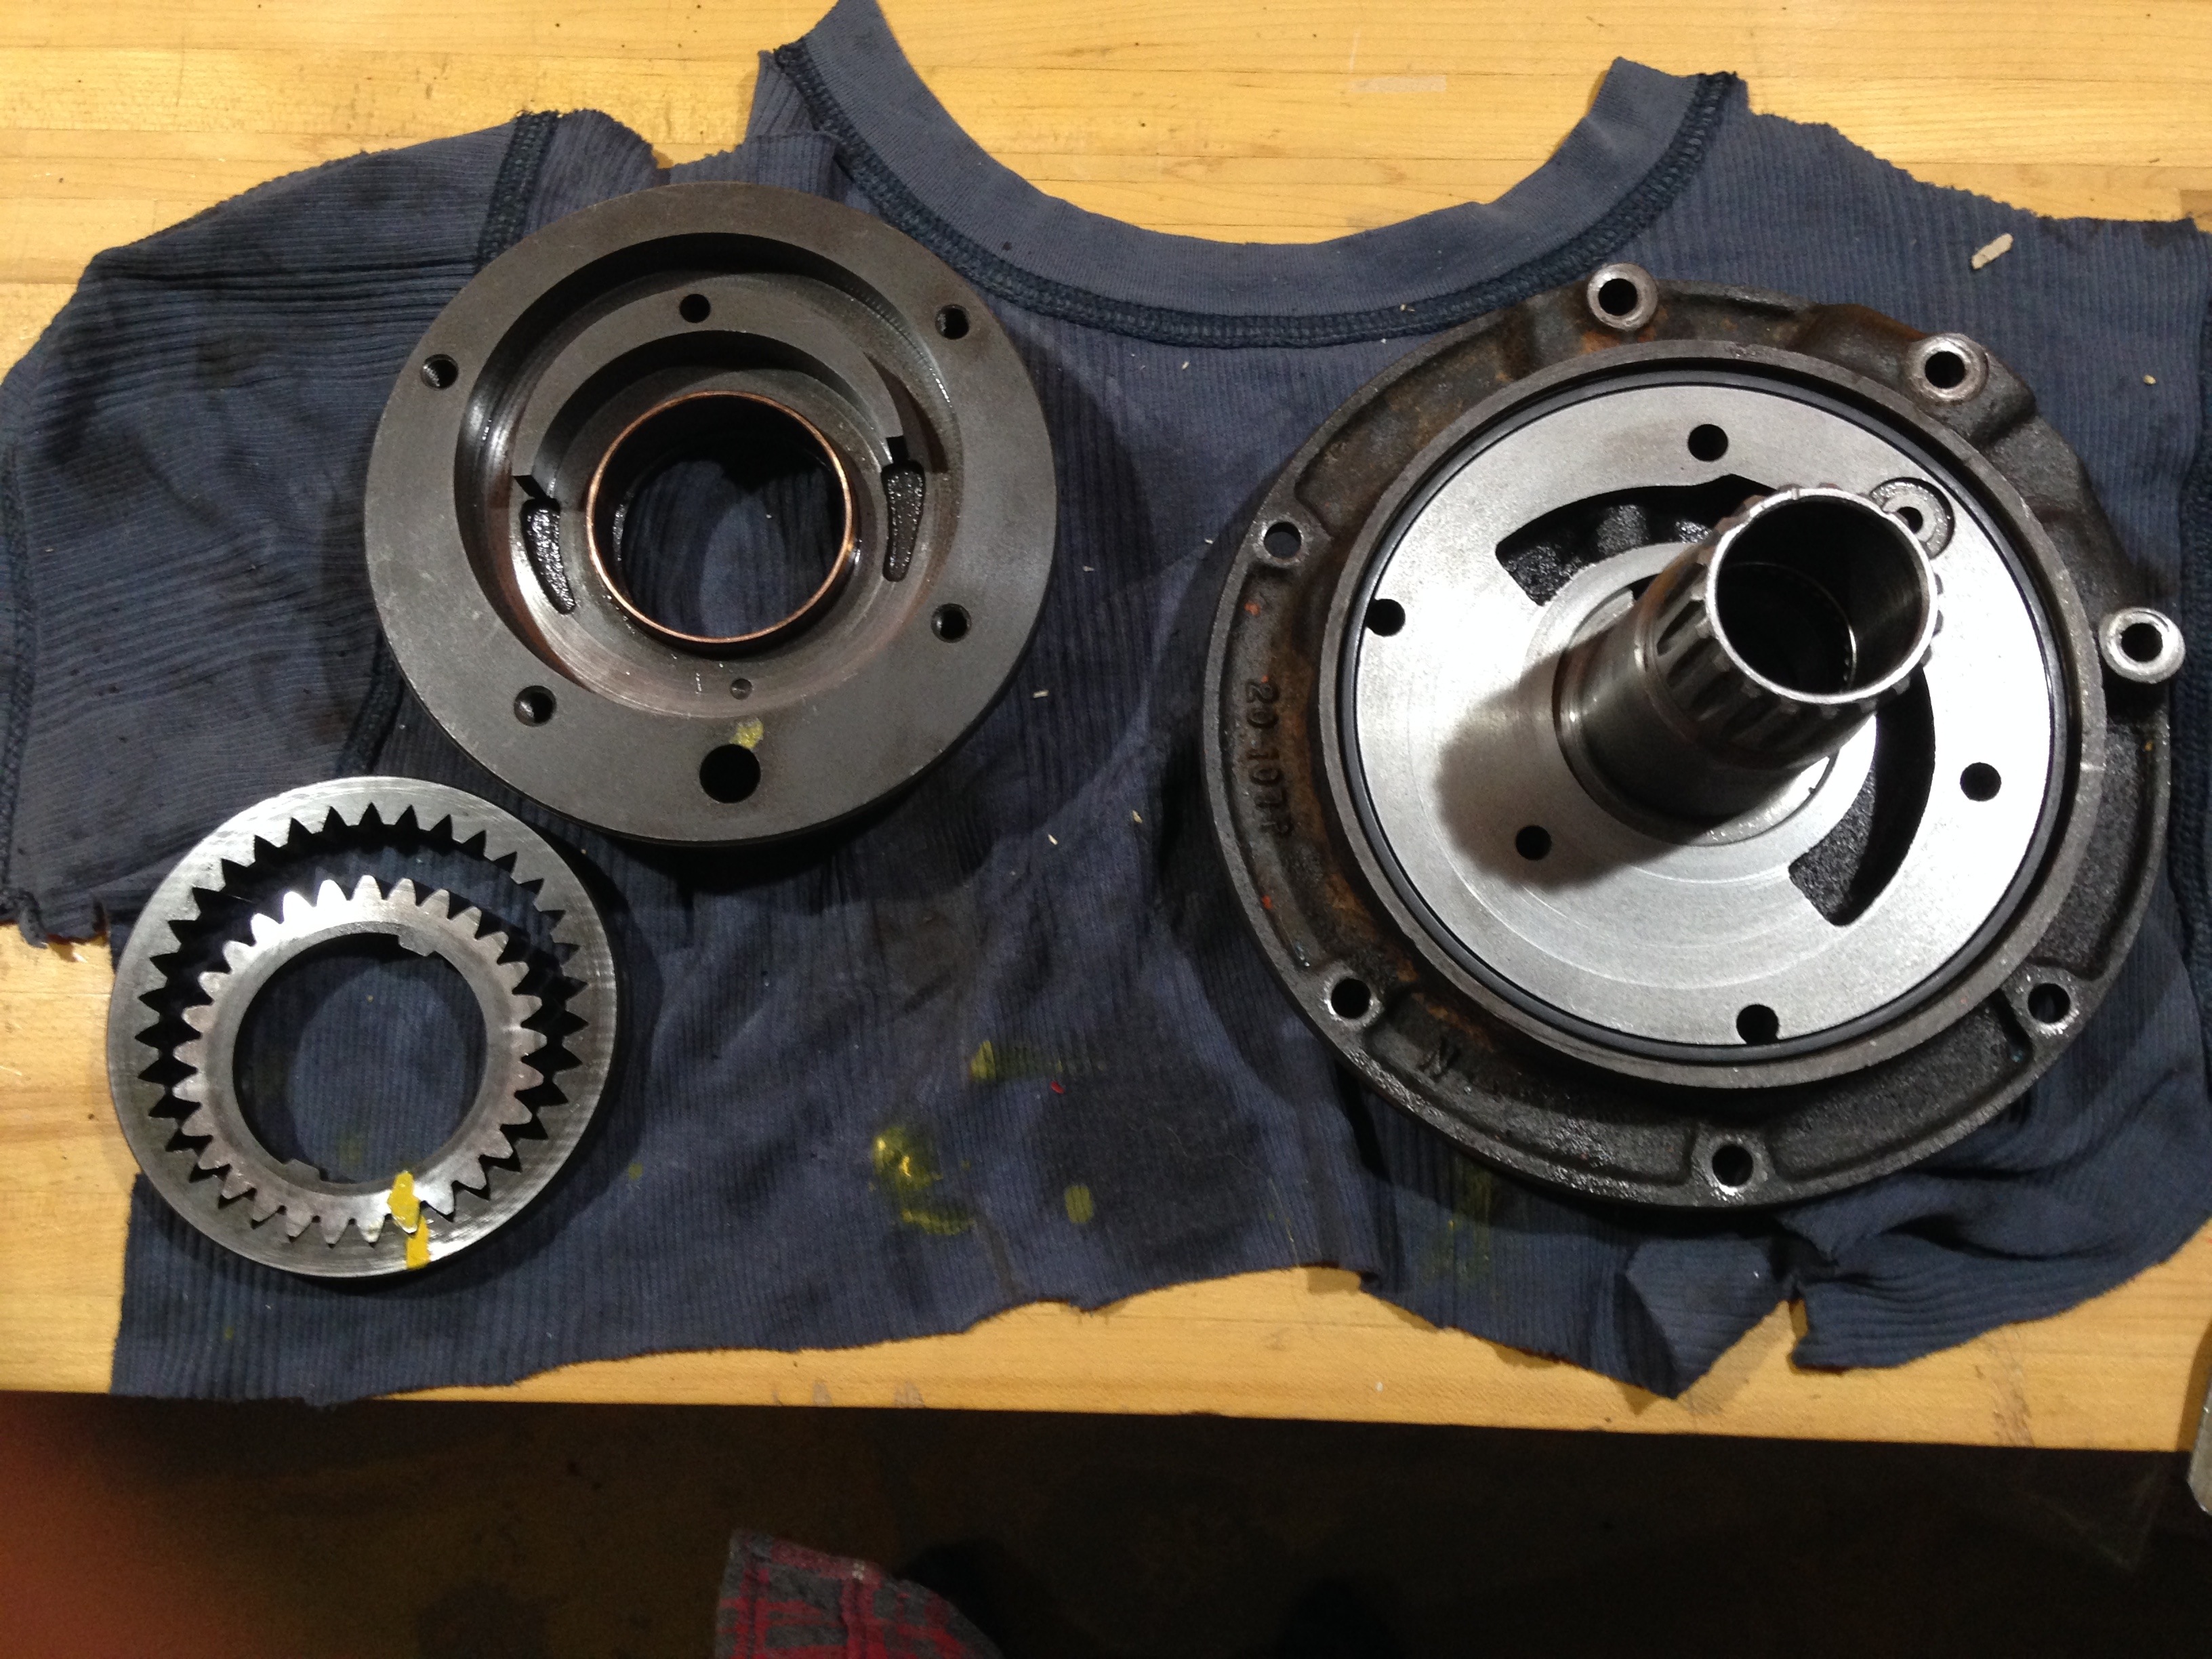
As for the front pump itself after its disassembly, it is also in a near pristine shape, almost like a new one. Looks like the only work to do is olny replacing some of the old gaskets and o-rings on it. If it is just that, that'll be fantastic. I'll be looking around for any o-rings that are of the right size and thickness to replace the old ones while searching for new gaskets for the front pump.
In the meantime, I'll be also checking the bands to see if they can be either the cause or a symptom of the overheat and bind them properly as they should be.
When I have inspected the transmission in close detail, I've observed that some part of the case was a bit covered by transmission fluid as if it got spilled on the transmission case, especially at the lower end of it. Could this be caused by the one leak between the tranny and the converter housing or is it a sign that most of the extrenal blocks' gaskets are in need to be changed ? I'm curious to see your thoughs on it.
Until next update,
your Autistic Hudsoneer,
Max
0 -
There is a rebuilt DG-200 for sale on Hudson Essex Terraplane - Buy/Sell/Trade facebook page for $1000.00, in Knoxville, Tn.0
-
Update of Decmber 21st
This update will be a bit short tan usual as I'm searching and waiting for the needed parts for the Tranny's repairs. Don't worry though, as when I go them I'll be giving you updates for the transmission for sure.
While waiting to have the parts, I've been busy trying to finish a smaller project that is the light improvement.
As you know I've improved the lights on Molly by switching the original light bulbs with 6V approved LED light bulbs, exterior and interior alike and as of right now, the only thing remaining is to fix the turn signals.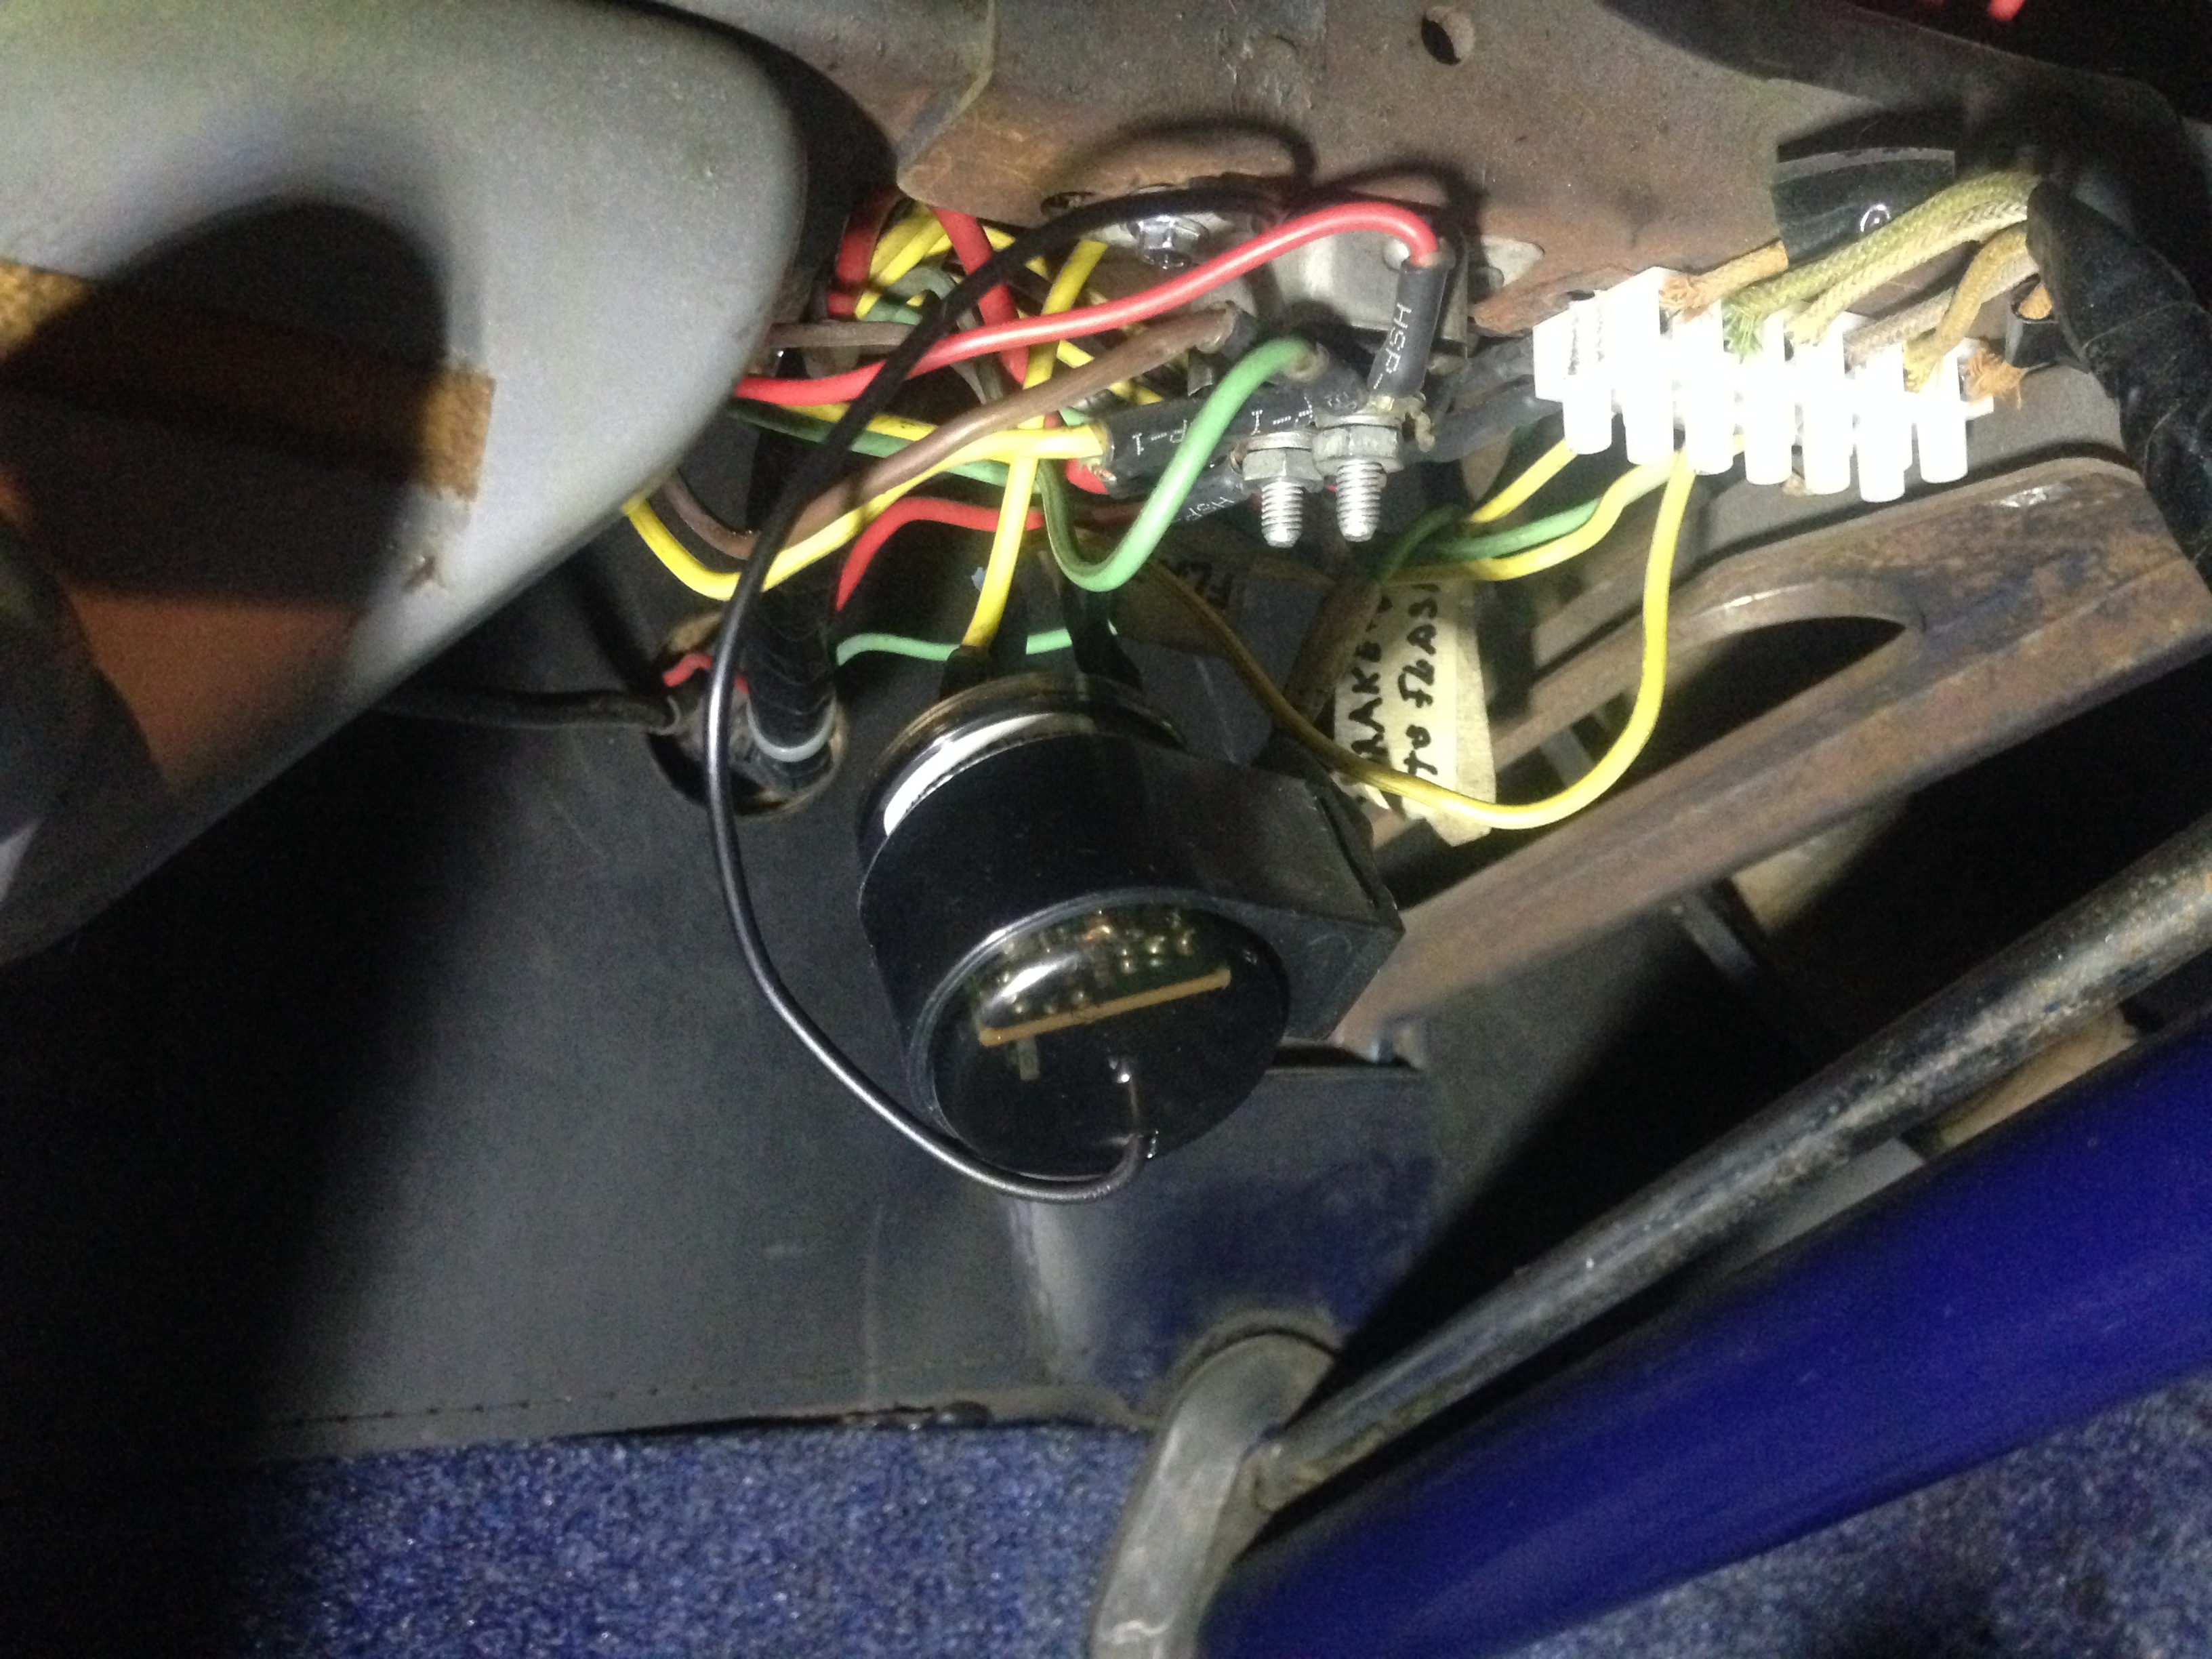
Thanks to your imputs and advices from the HET club's Facebook page, I did bought an electronic flasher made to work with my 6V LED lights for my turn signals. Once installed, the flasher was doing its job fine, but when I activate the turn signal to the left side ( where I've put a resistor ) with the headlights on, the flasher is blinking faintly and the left rear LED bulb is barely flashing, as if it doesn't have enough juice to make them work.The right side don't work as I haven't put a resistor on it yet with the headlights on. I've done some testings and haven't managed to nail the problem so far.
Could it be too much resistance in the system ? Does the headlights somehow drains most of the current, preventing the turn signals to work? I'm running out of ideas of what could be the problem. Your thoughts on this will be welcome.
I also have a question regarding gasket maker products such as this one seen in the picture below.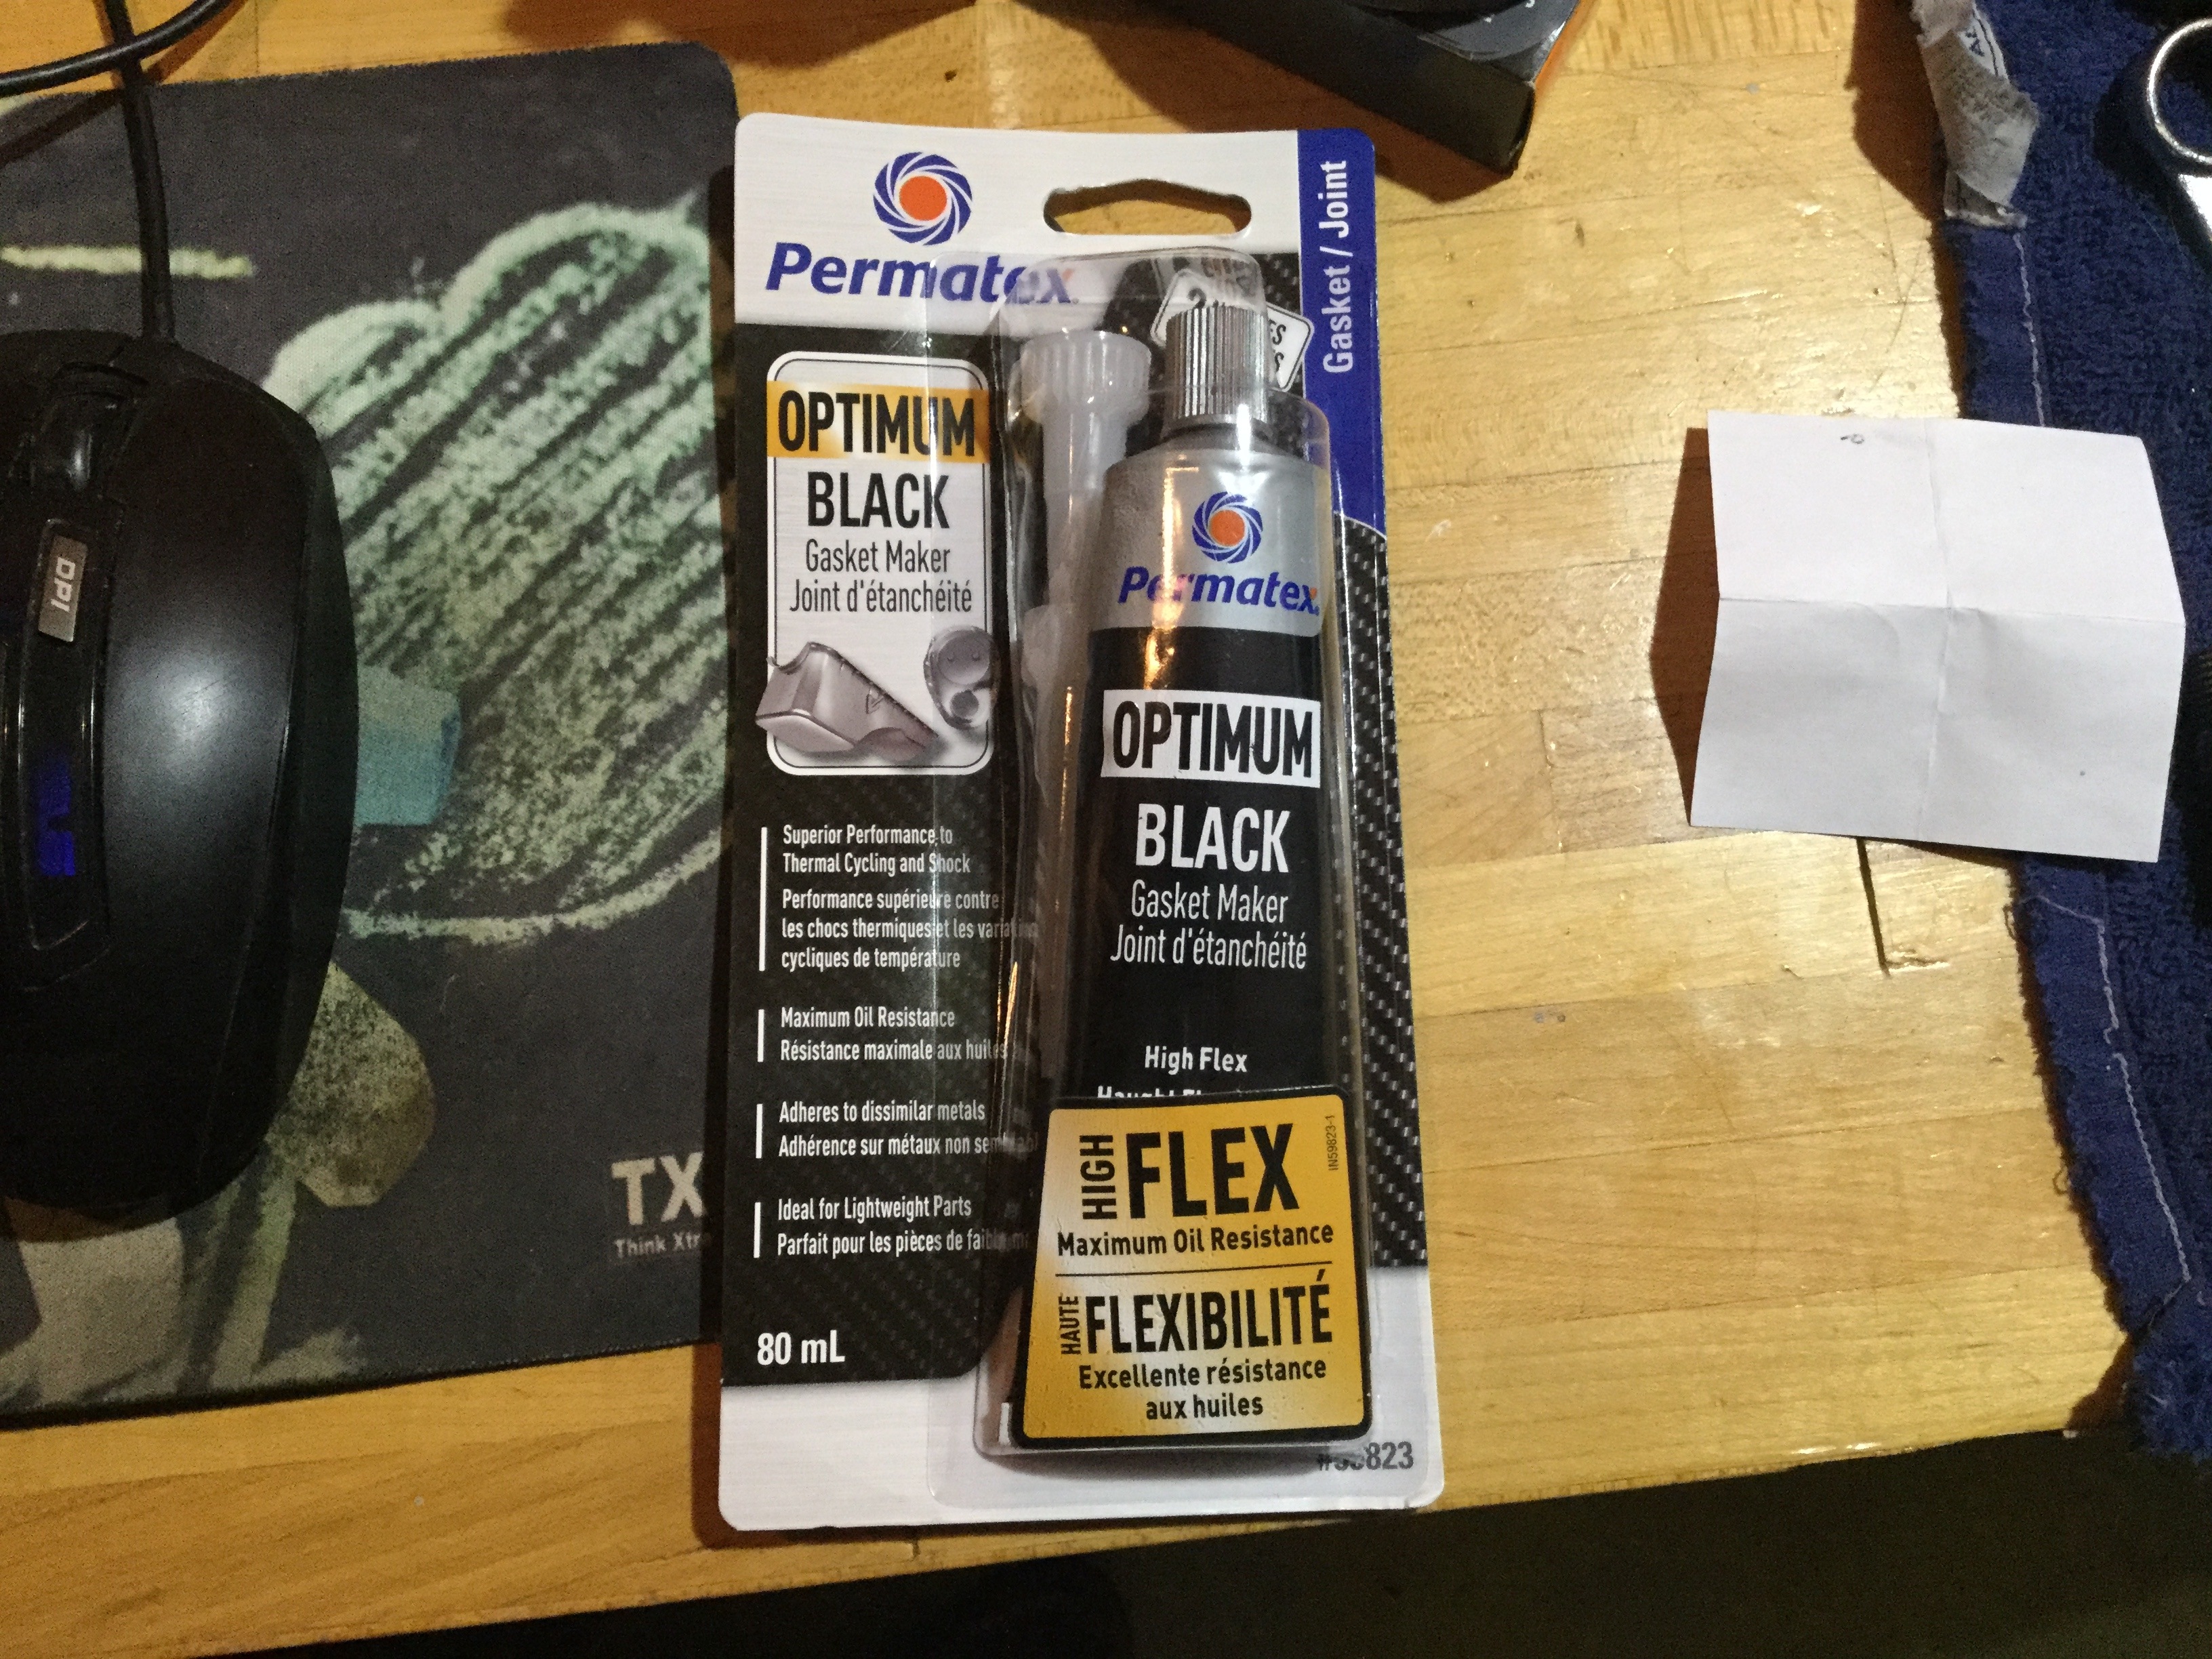
I know it does work well on modern cars, but I am wondering if this can work on the transmission as gasket replacement/help for the old gaskets or if it's better to get the proper original gaskets and not bother with such products. I'll be still searching for the proper gaskets just to be on the safe side. I'll be listening to any good advice for this as I want to fix the tranny once and for all.
Until the next update, I wish you all a merry christmas.
Your Autistic Hudsoneer,
Max0 -
I used that successfully on a Hydramatic side-pan. Follow the directions! Nice 1/8 bead, surround every bolt hole, install screws just barely finger tight, let set for a few hours, then tighten. Follow the directions!0
-
If you don't have a fully charged battery, the headlights may pull enough juice to slow flasher down. I've spent a lot of time troubleshooting turn signals just to find low battery was the problem.
Chuck
0 -
Interesting thread. It would be great to have more detail on the headlight conversion, such as parts numbers. Also, what is the load equalizer?
Peter s.0 -
Update of February 8th
Hello fellow Hudsonites,
After a long holiday break while waiting for some crucial parts, it is time to give you some updates on Miss Molly.
"About time darnit ! Was waitin' for this !"
First, some infos for some of you ( enjoy pseftoncomsatnet )who asked me for some details regarding the LED lights conversion;
The headlights I've used are a pair of 7 inches semi-sealed headlight housings model no.6003 that are the perfect fit for my car and two P43t LED dual filament non polarity headlights. For the equalizers I used the 3 Ohms ones as you will only need two of them (one per side, either in front or rear ) compared to the 6 Ohms equalizers as you'll need four of them, one per side.
I've bought all those from LEDLight.com, that does have a great variety of LED lights and does have also tab with all the compatible LED lights and components that works for 6 Volts positive ground vehicules.
Now, for the tranny updates: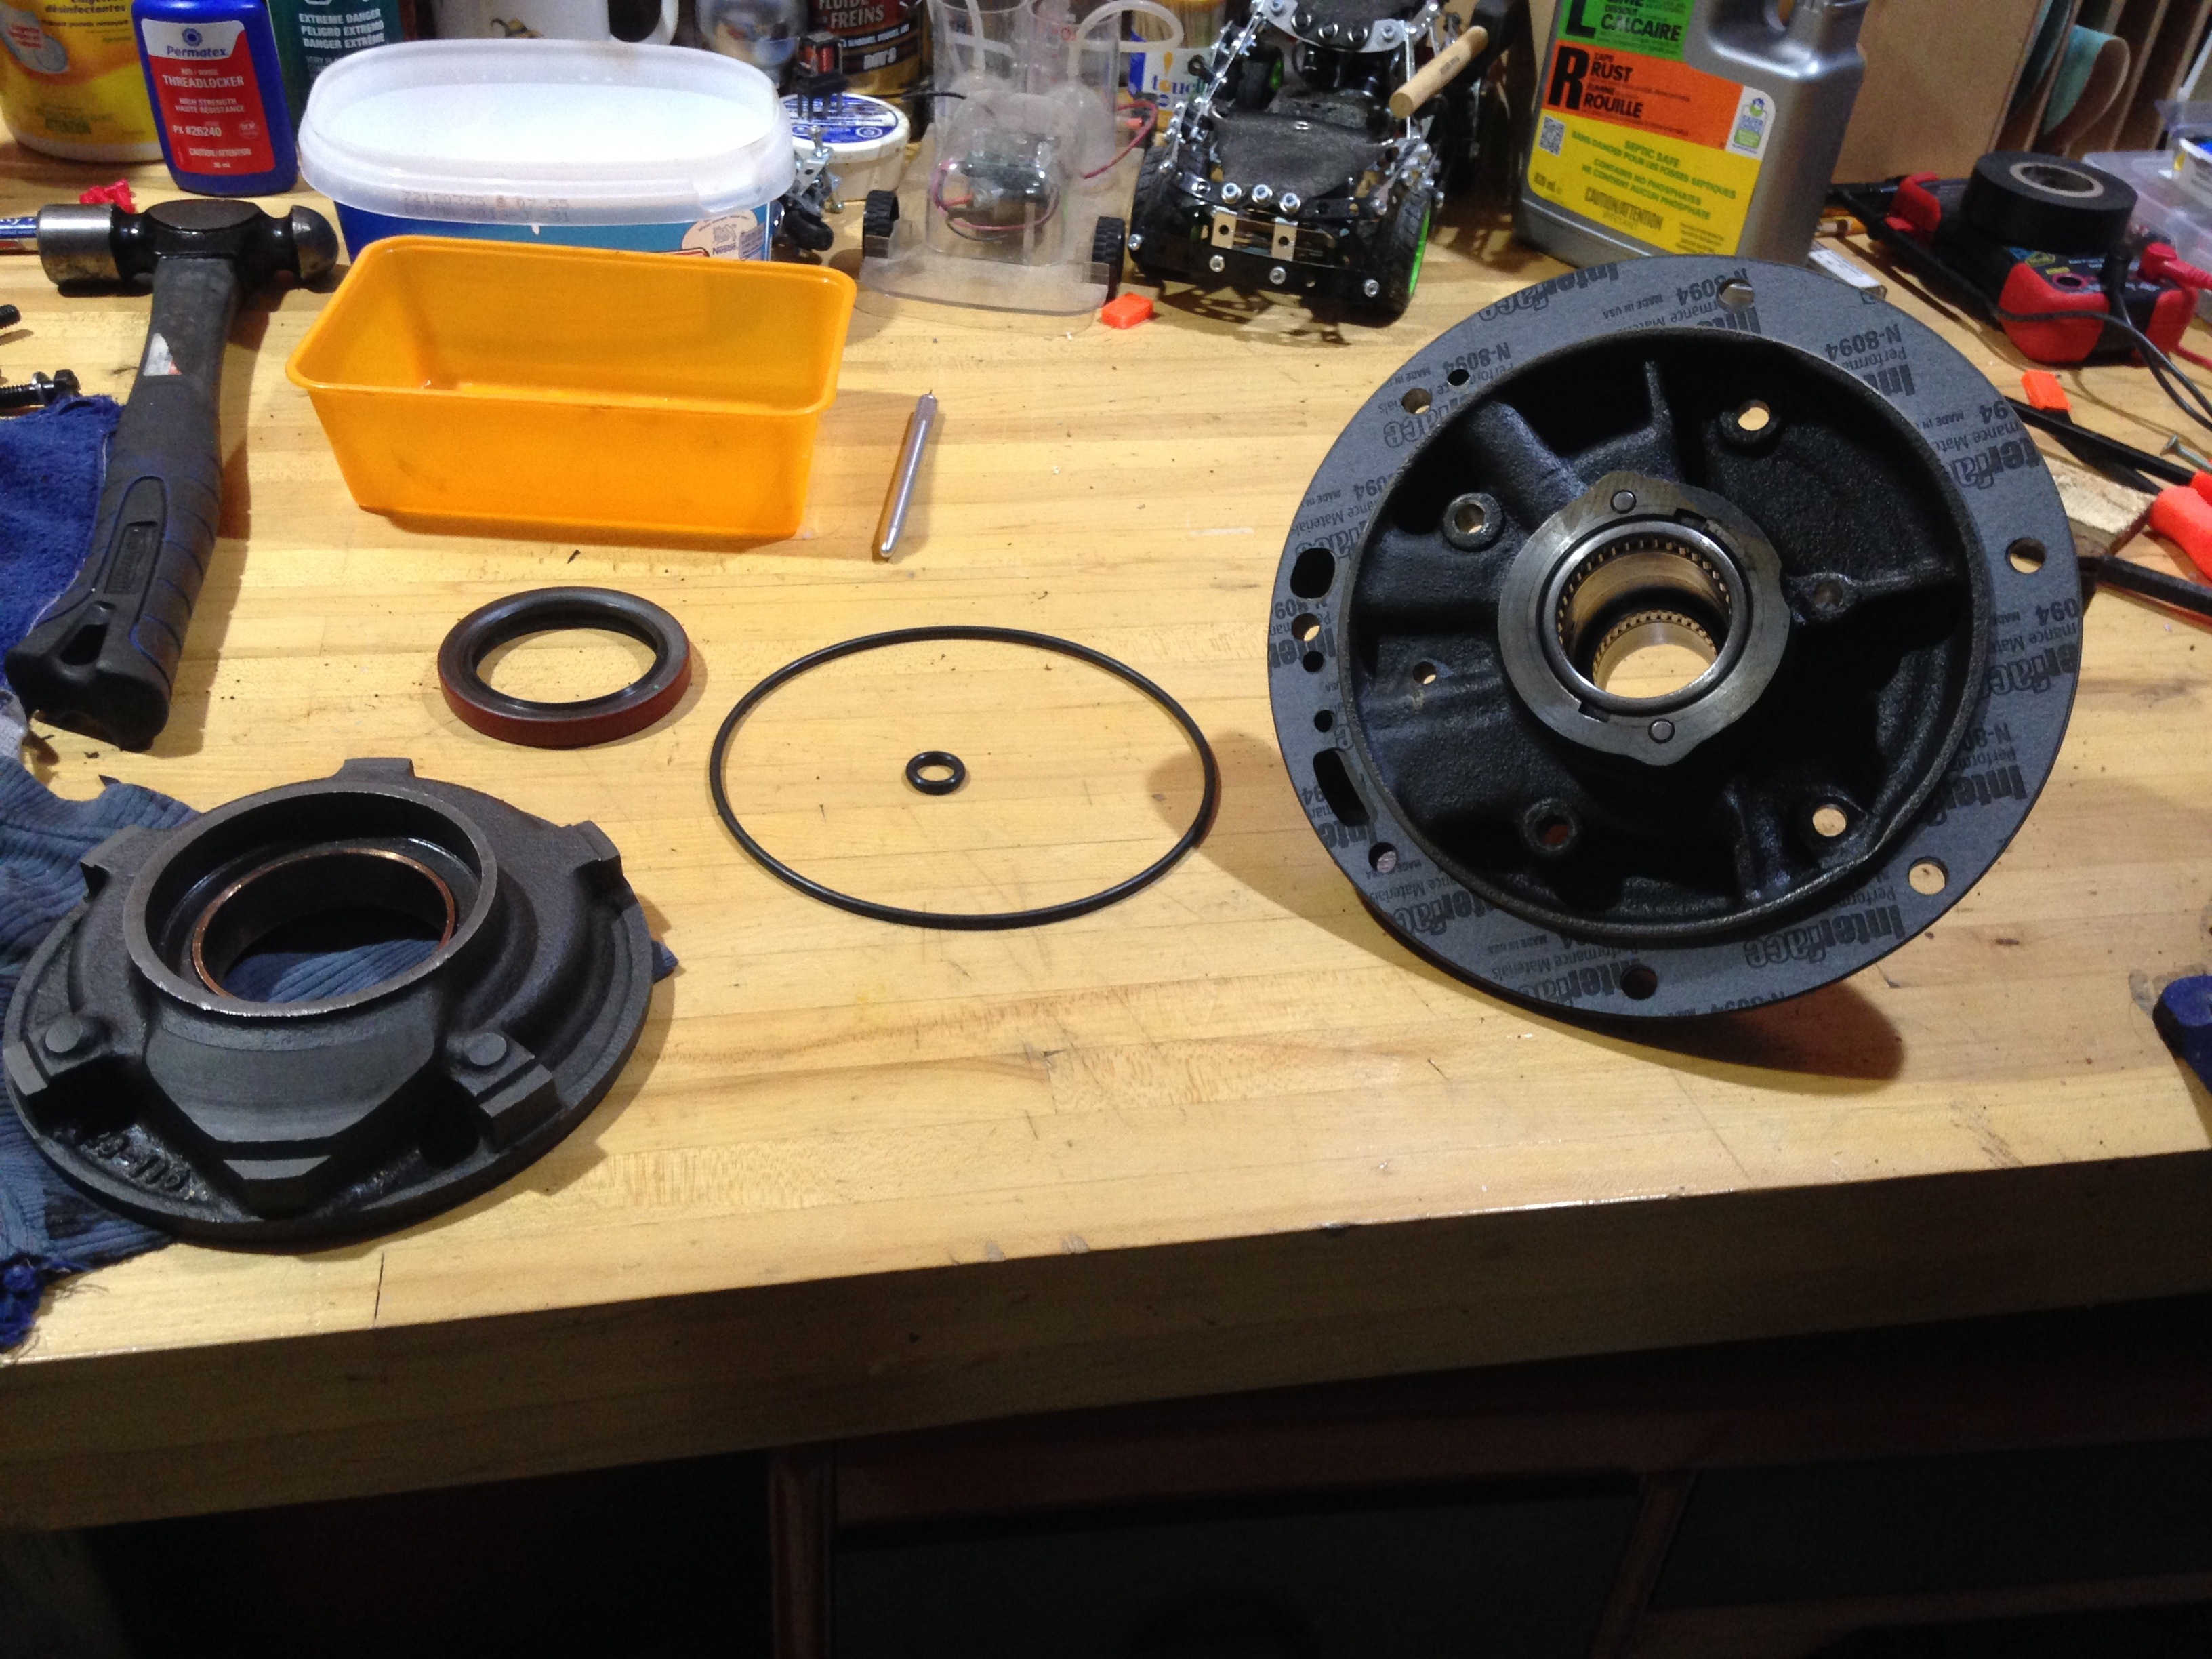
After the holiday break I received the final parts for the front pump of my transmission.
" Thank you, Studebaker fans, masters of the Borg Warner DG trannys."
The reassembly of the pump was a breeze and was put back in its place on the transmission in no time.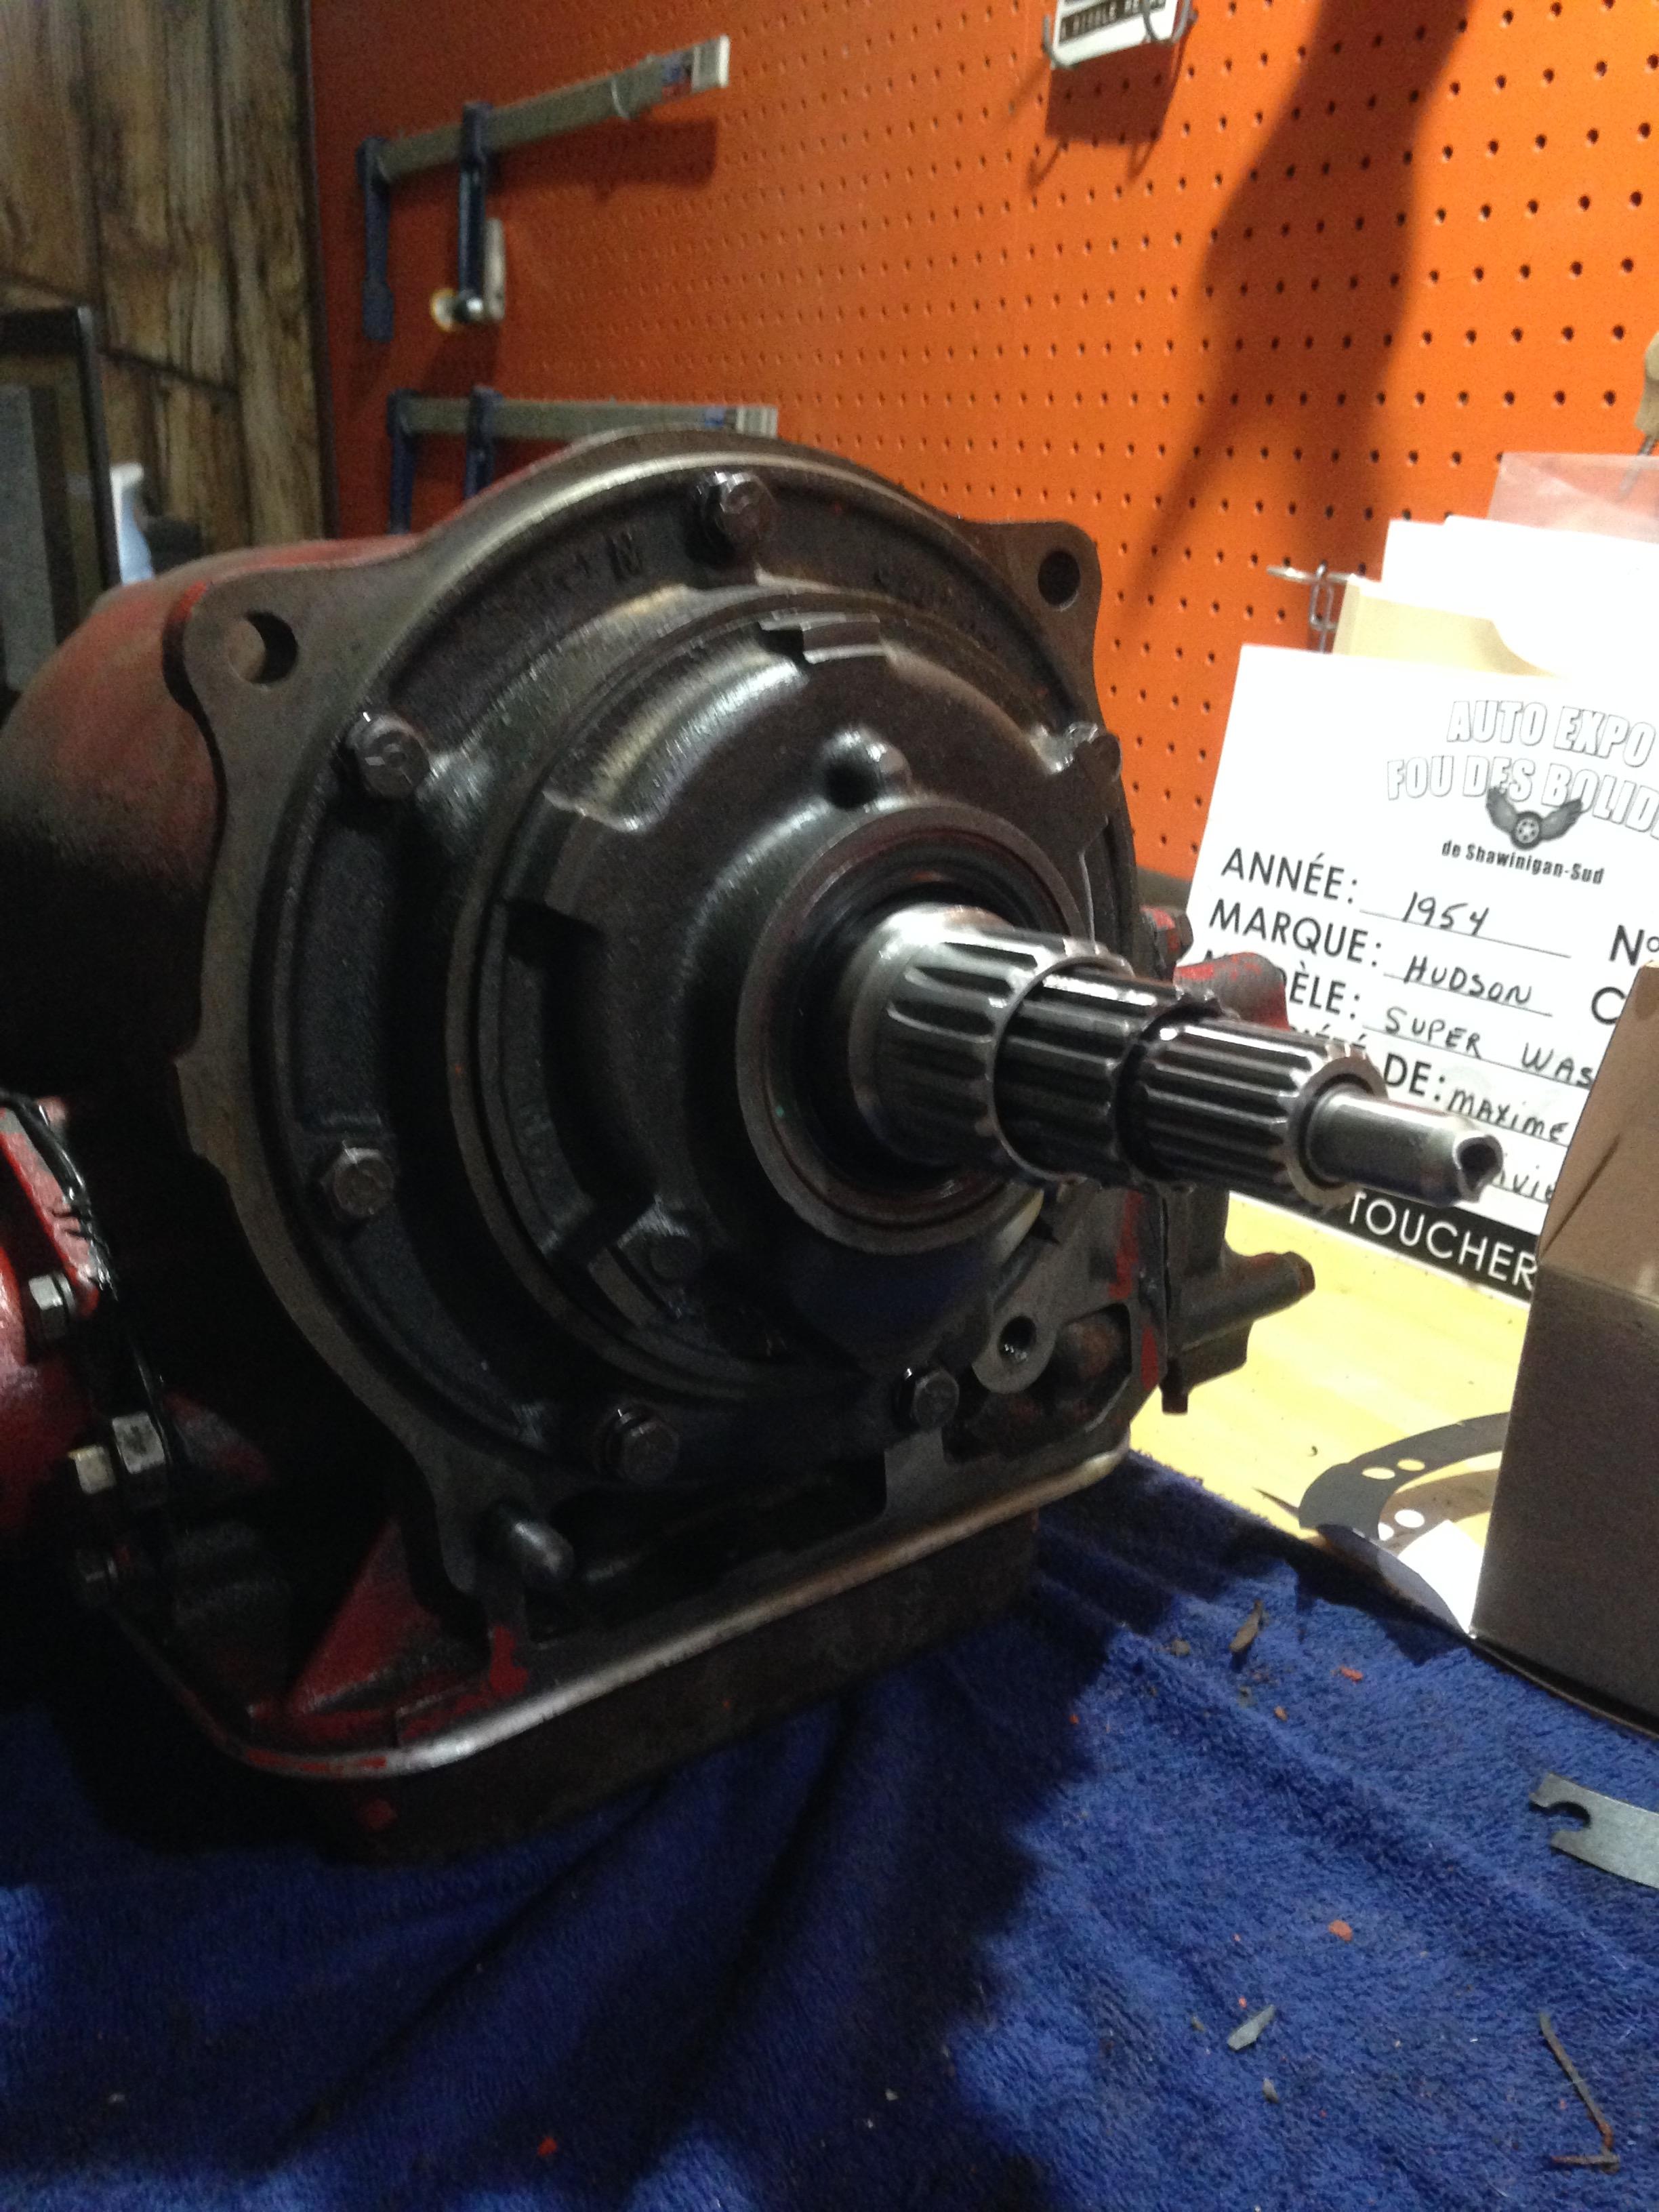
I also bought a new pair of transmission mount from Doug Wildrick as the old one's rubber got busted a bit so the tranny can be firmly held below the car.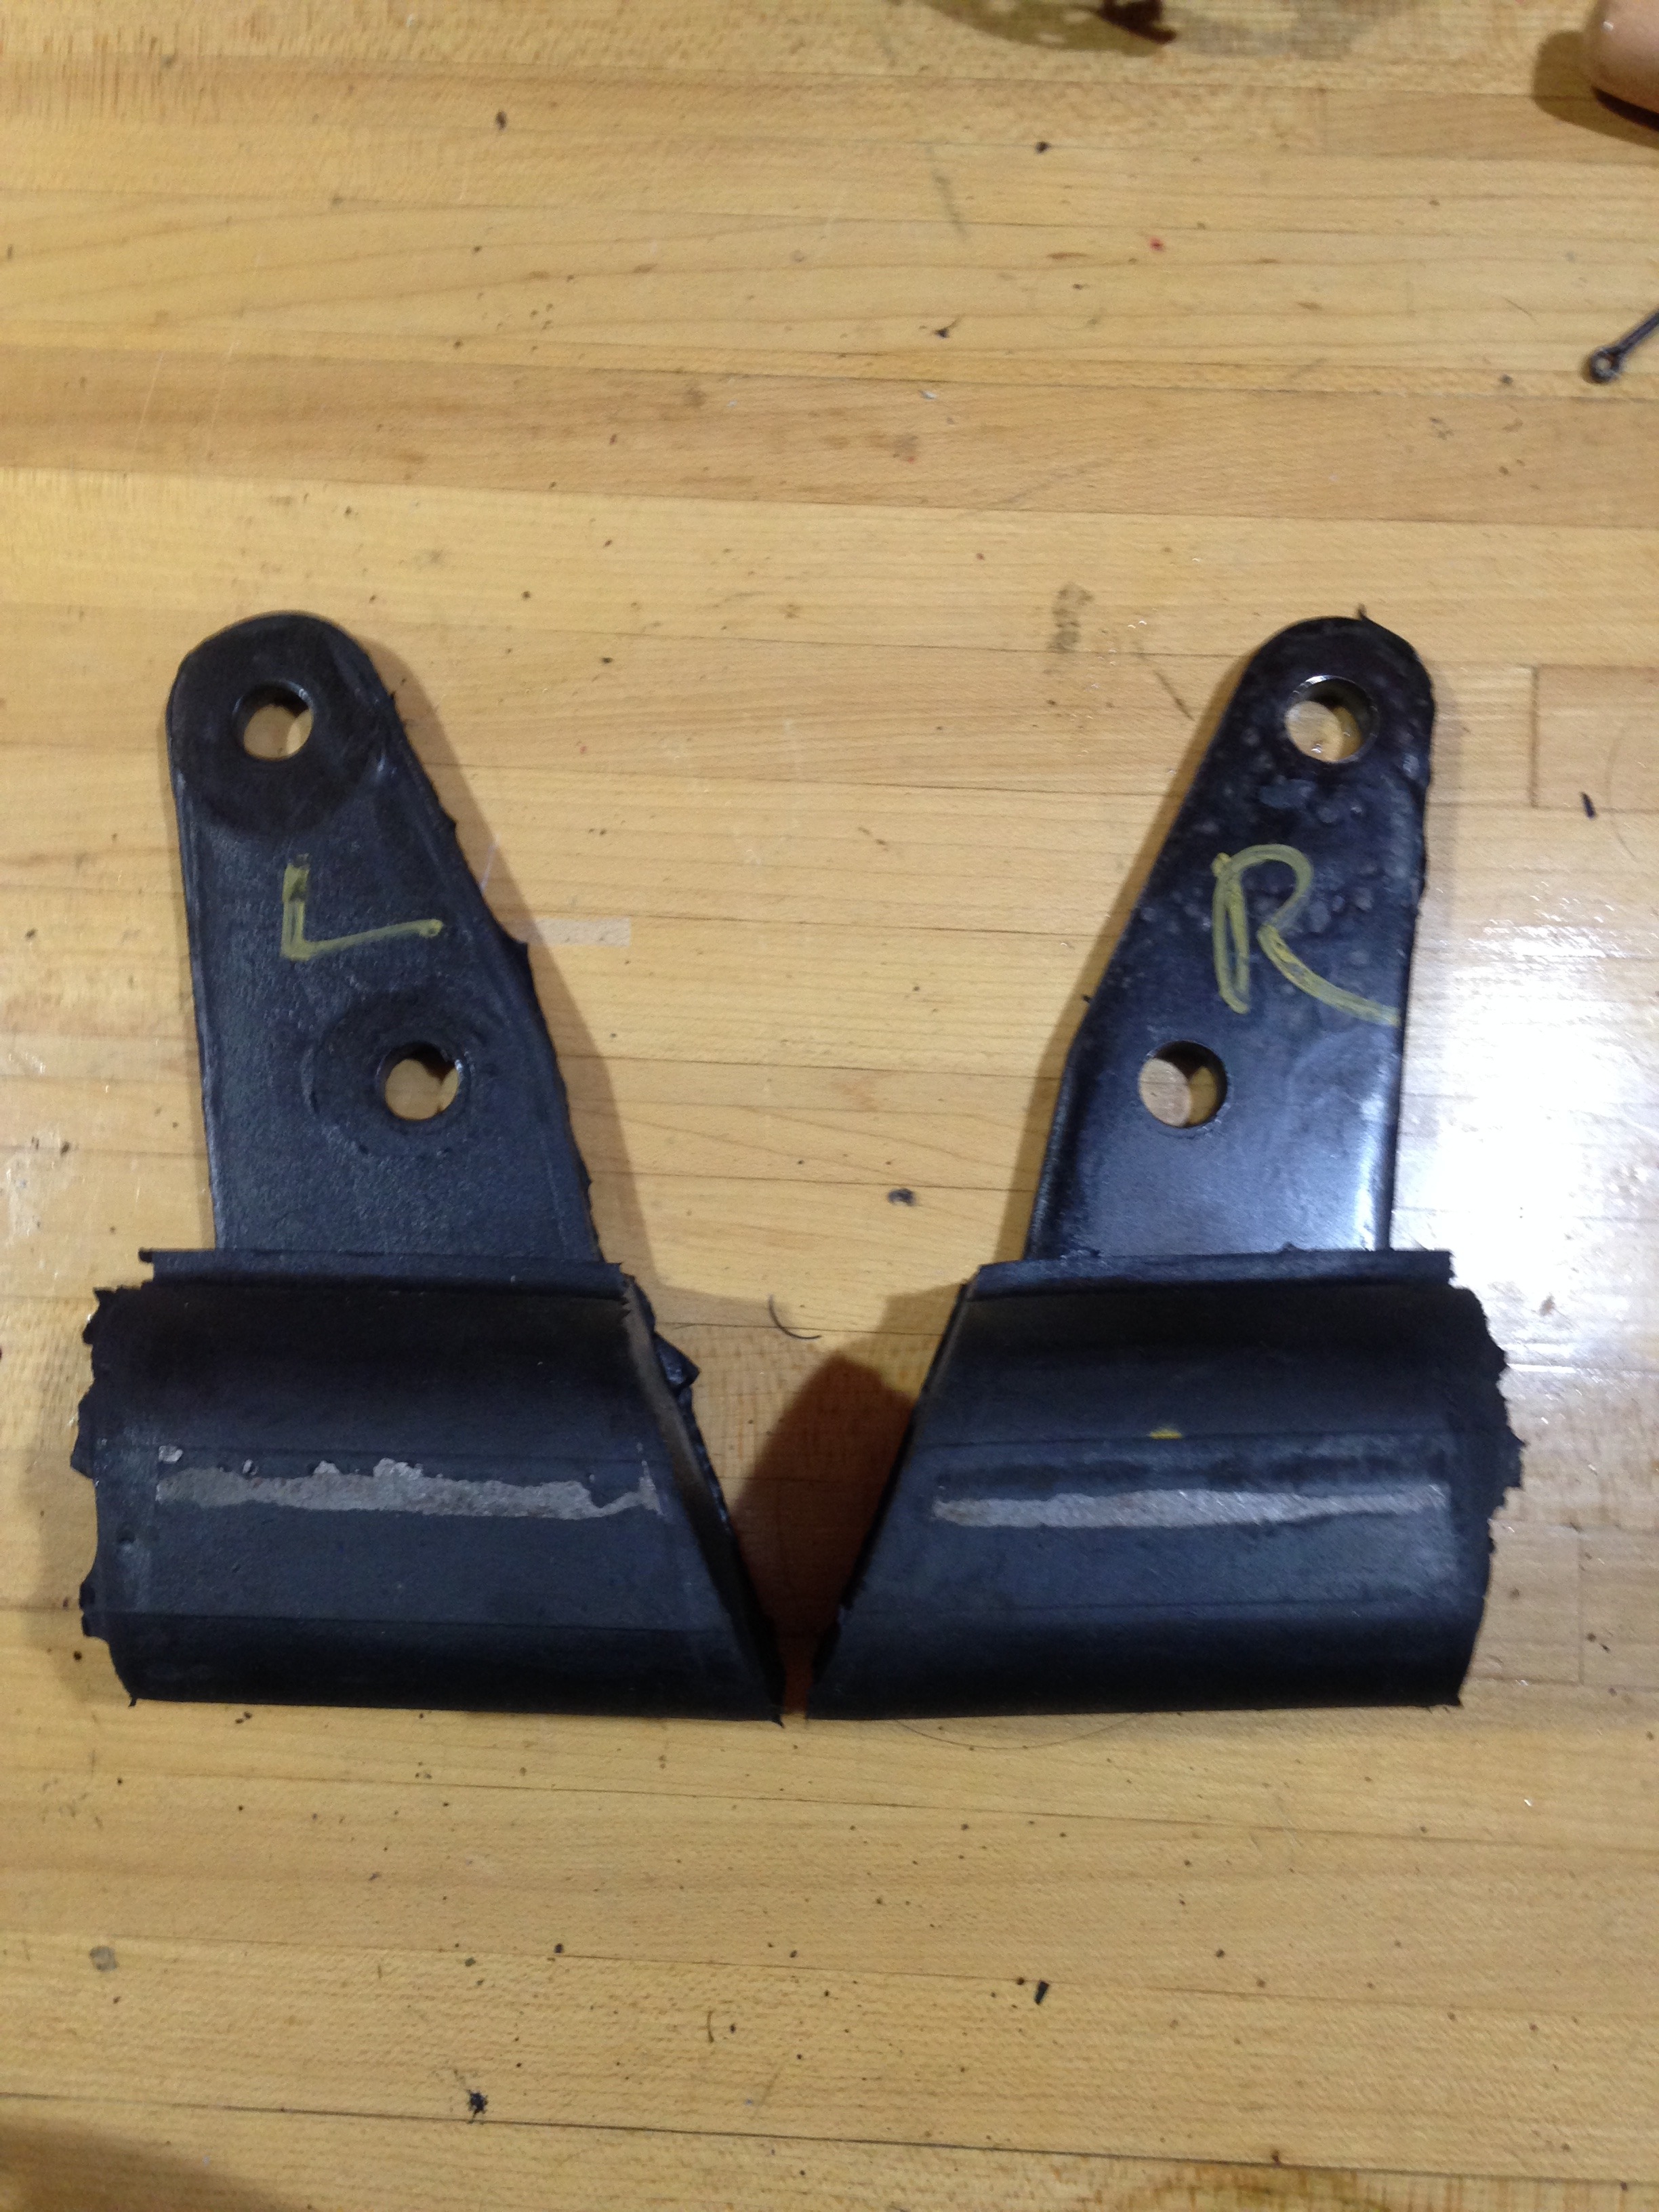
With the transmission ready and brought up in my humble garage, I've put the crossmember back in place to ease the upcomming job and while doing so, I looked the torque converter housing and a question sprung in my mind: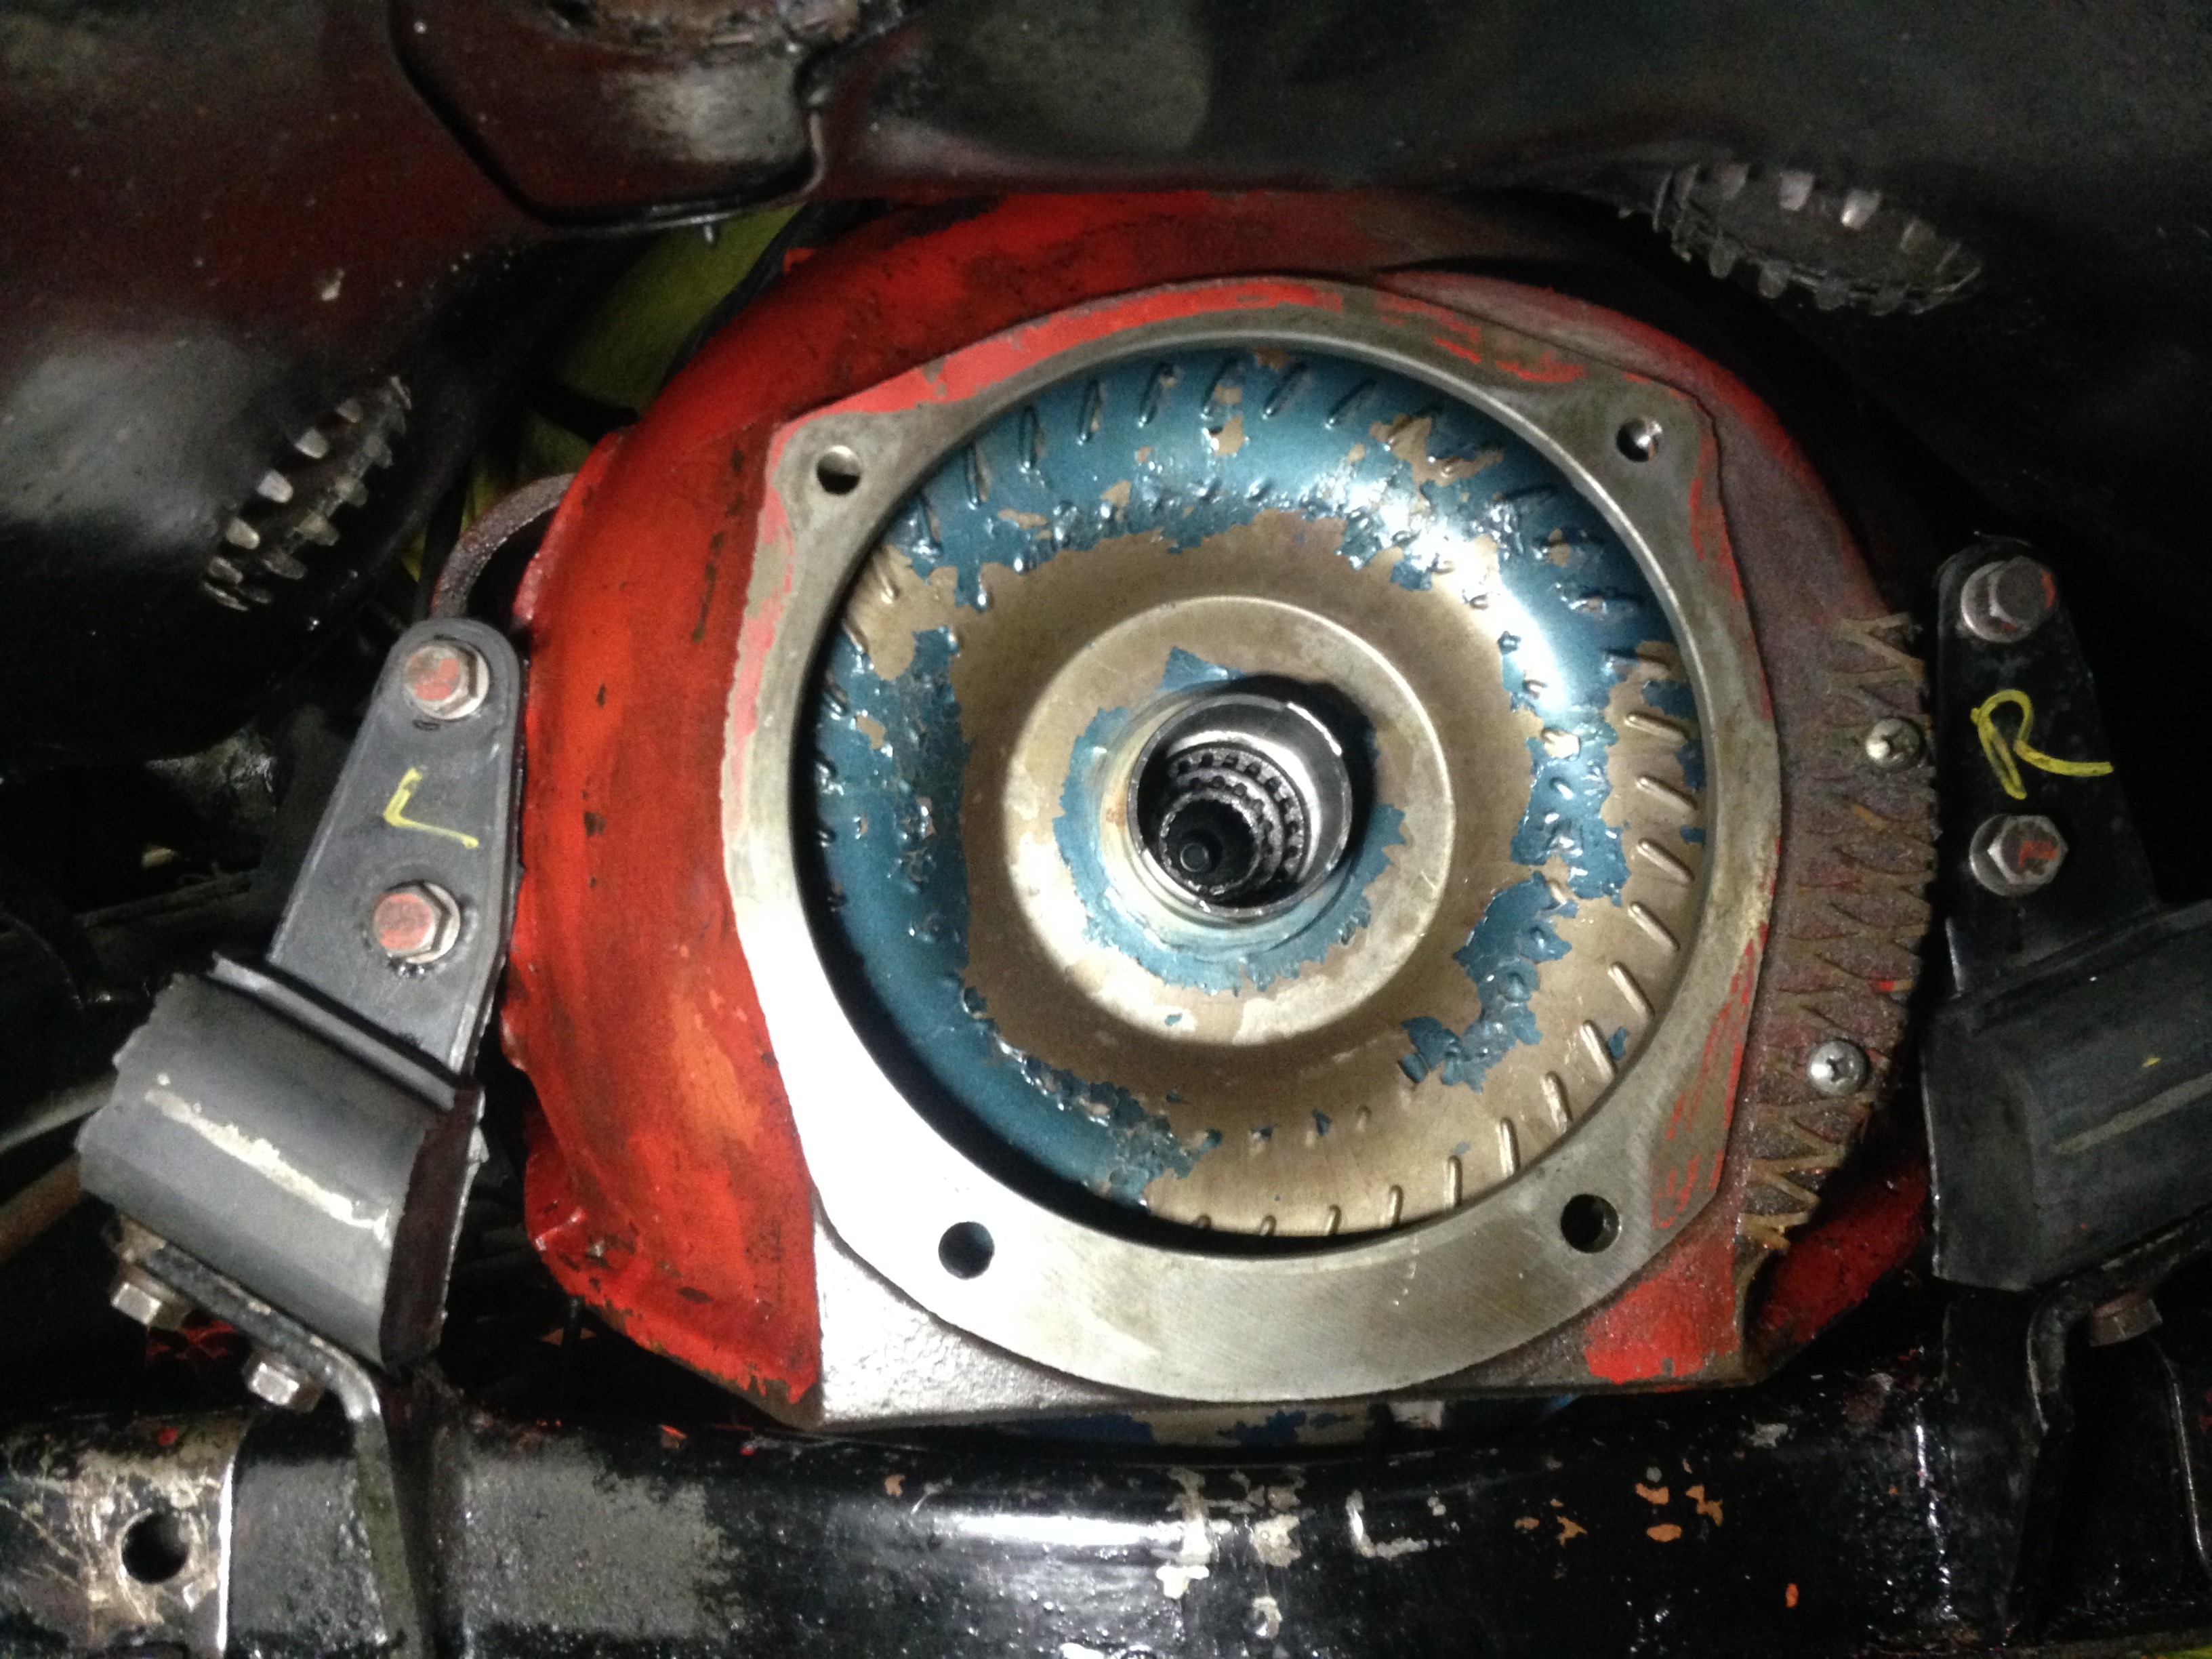
Was there originaly a gasket between the T/C housing and the transmission? If no, will putting a gasket there will help or hinder the tranny? Your answers will surely help me for this one.
The next update may be the day for the tranny to return to its place I can't wait for this moment.
Until then, have a good time,
Your Autistic Hudsonite,
Max0 -
thanks, great info on the LED headlights!!
0 -
Update of March 7th:
Hello fellow Hudsonites,
this update will be shorter than usual, but I needed to give you some news regarding Molly.
The good new is I'm passing an improtant milestone as I'm trying to put the transmission back on the car. It has been a long time since the day that I removed the tranny under the vehicle. Unfortunately, the job isn't as easy as I would have thought.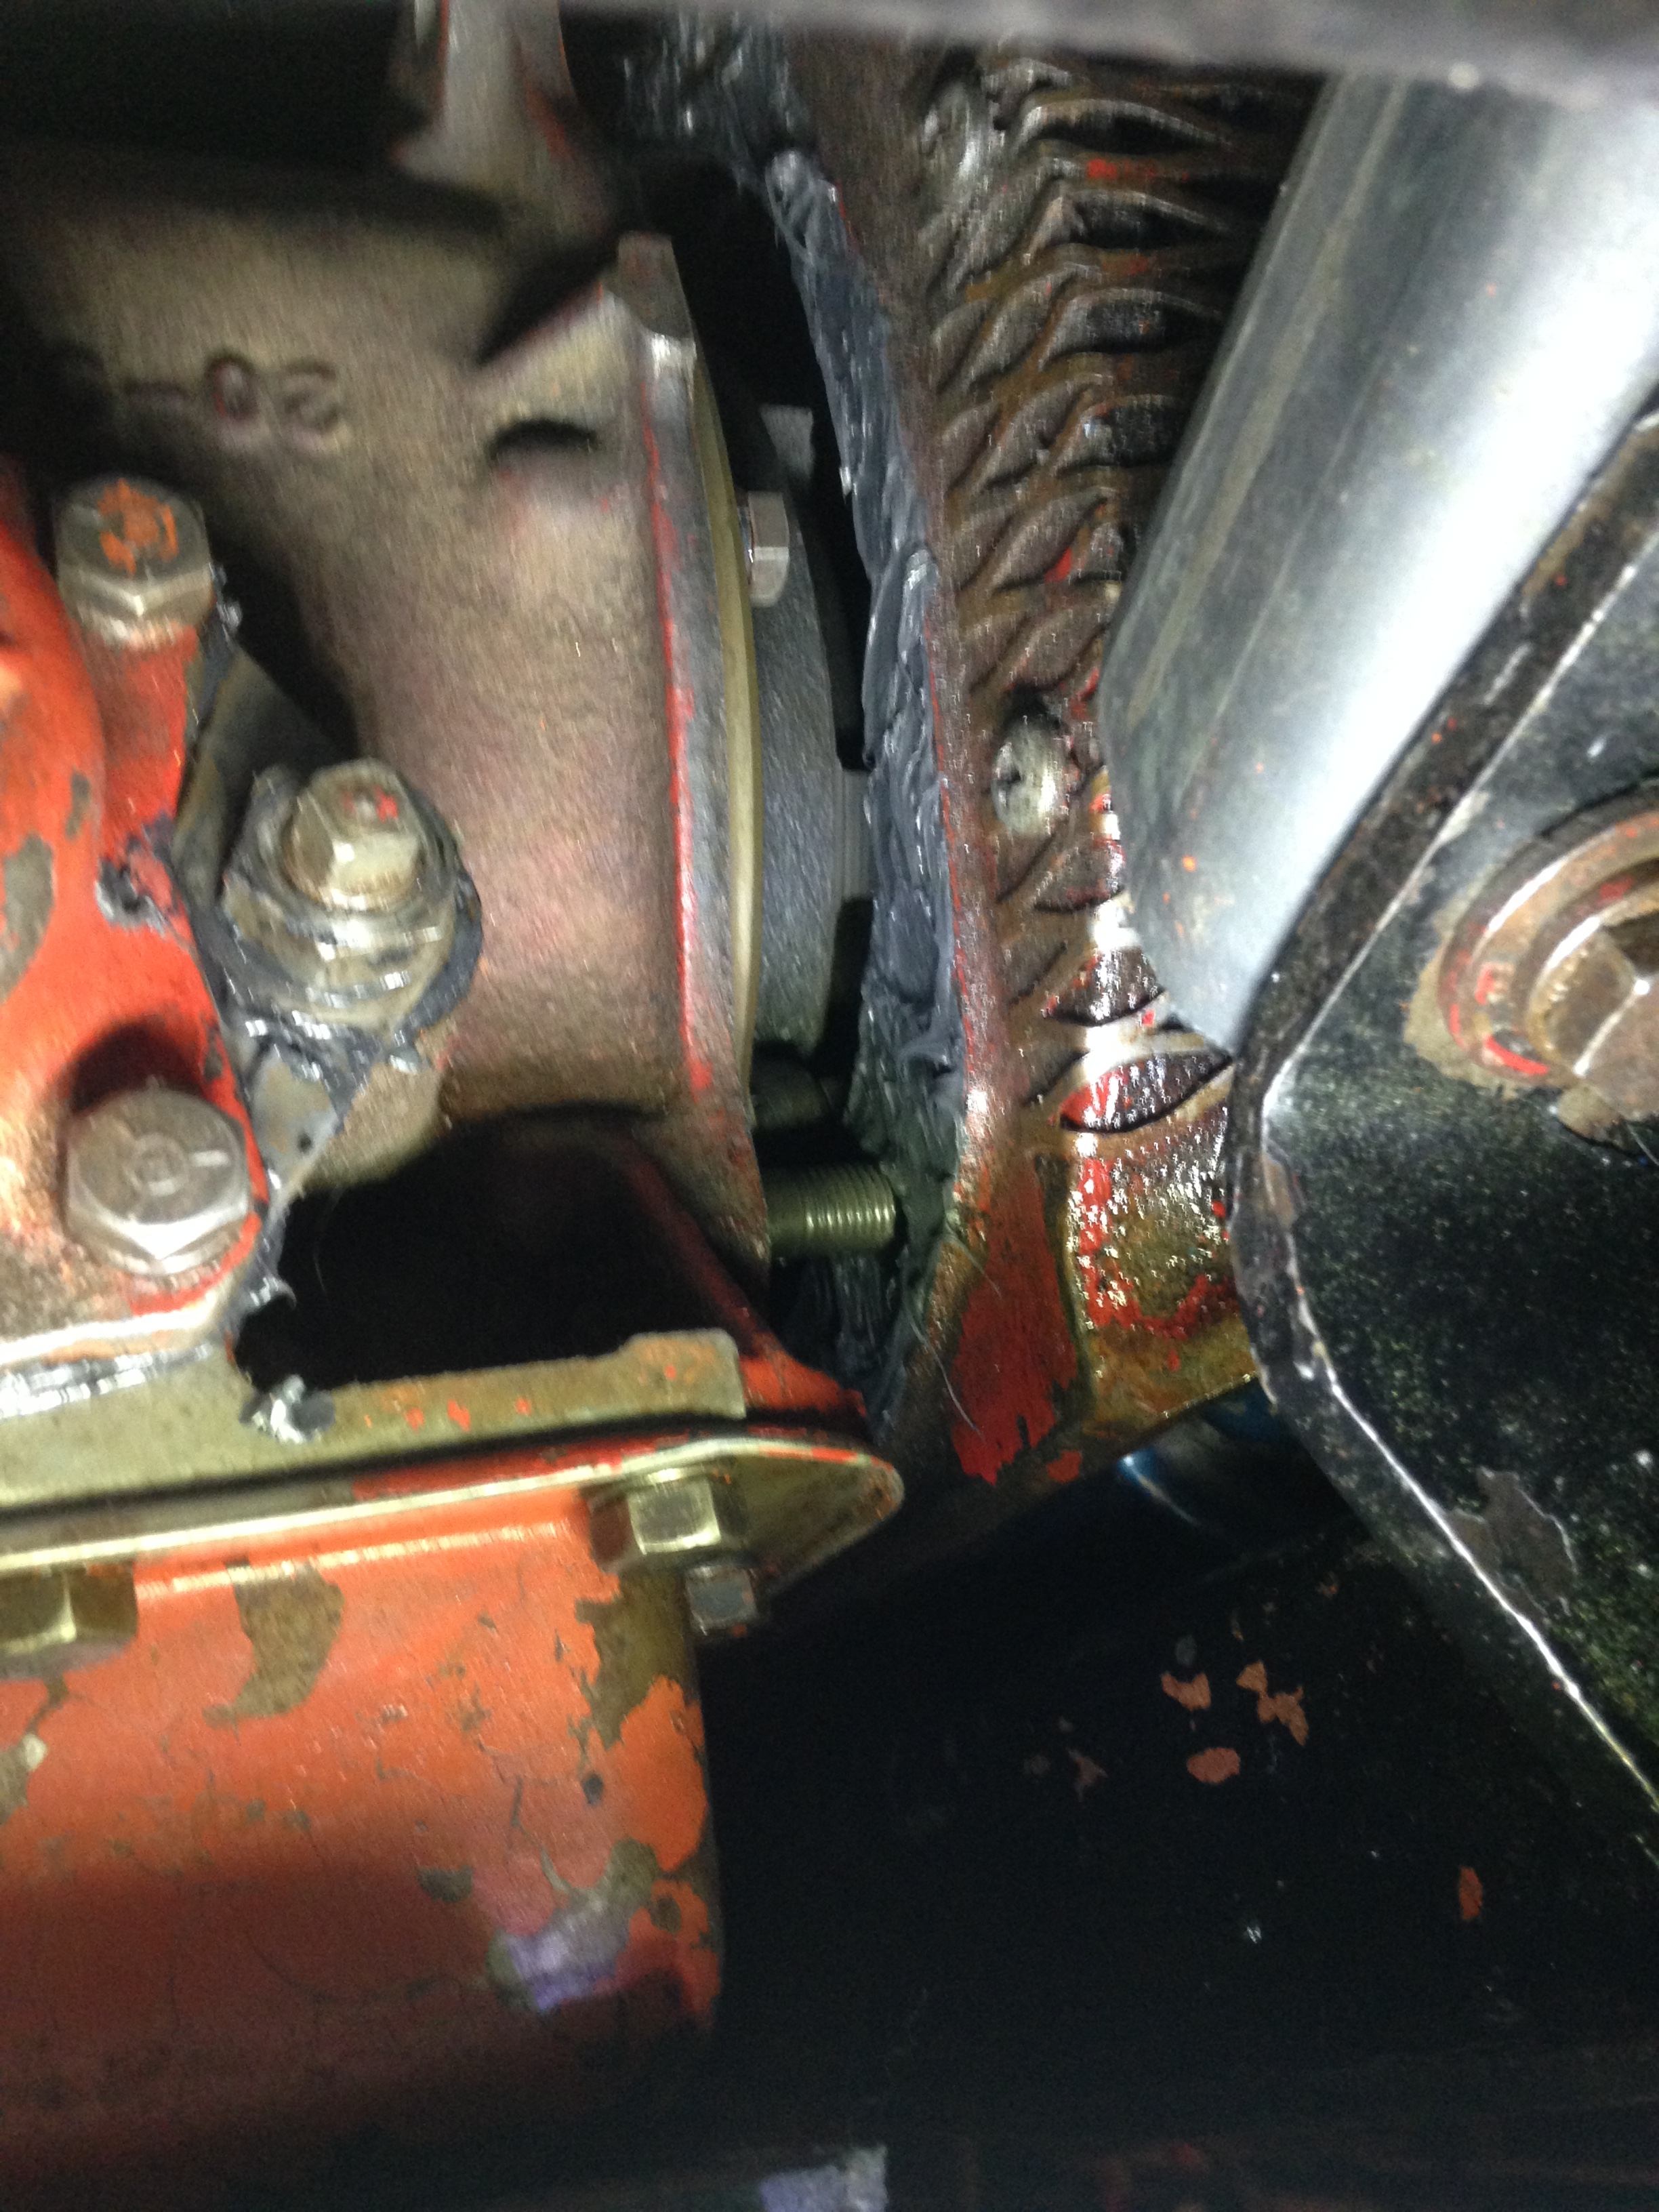
As seen on the picture, I struggle a bit with the alignment of the tranny to the torque converter. I always end up having that kind of gap between them no matter what.
"So close, yet so far darnit!"
My problem is obviously related to the alignment but I don't exactly know what part to center and how to do it. From here, it could be the splines or the converter itself that are not centered, preventing the transmission to gently slide to the housing. Any solution are welcome to help me on this one.
Until next time,
Your Autistic Hudsonite,
Max0 -
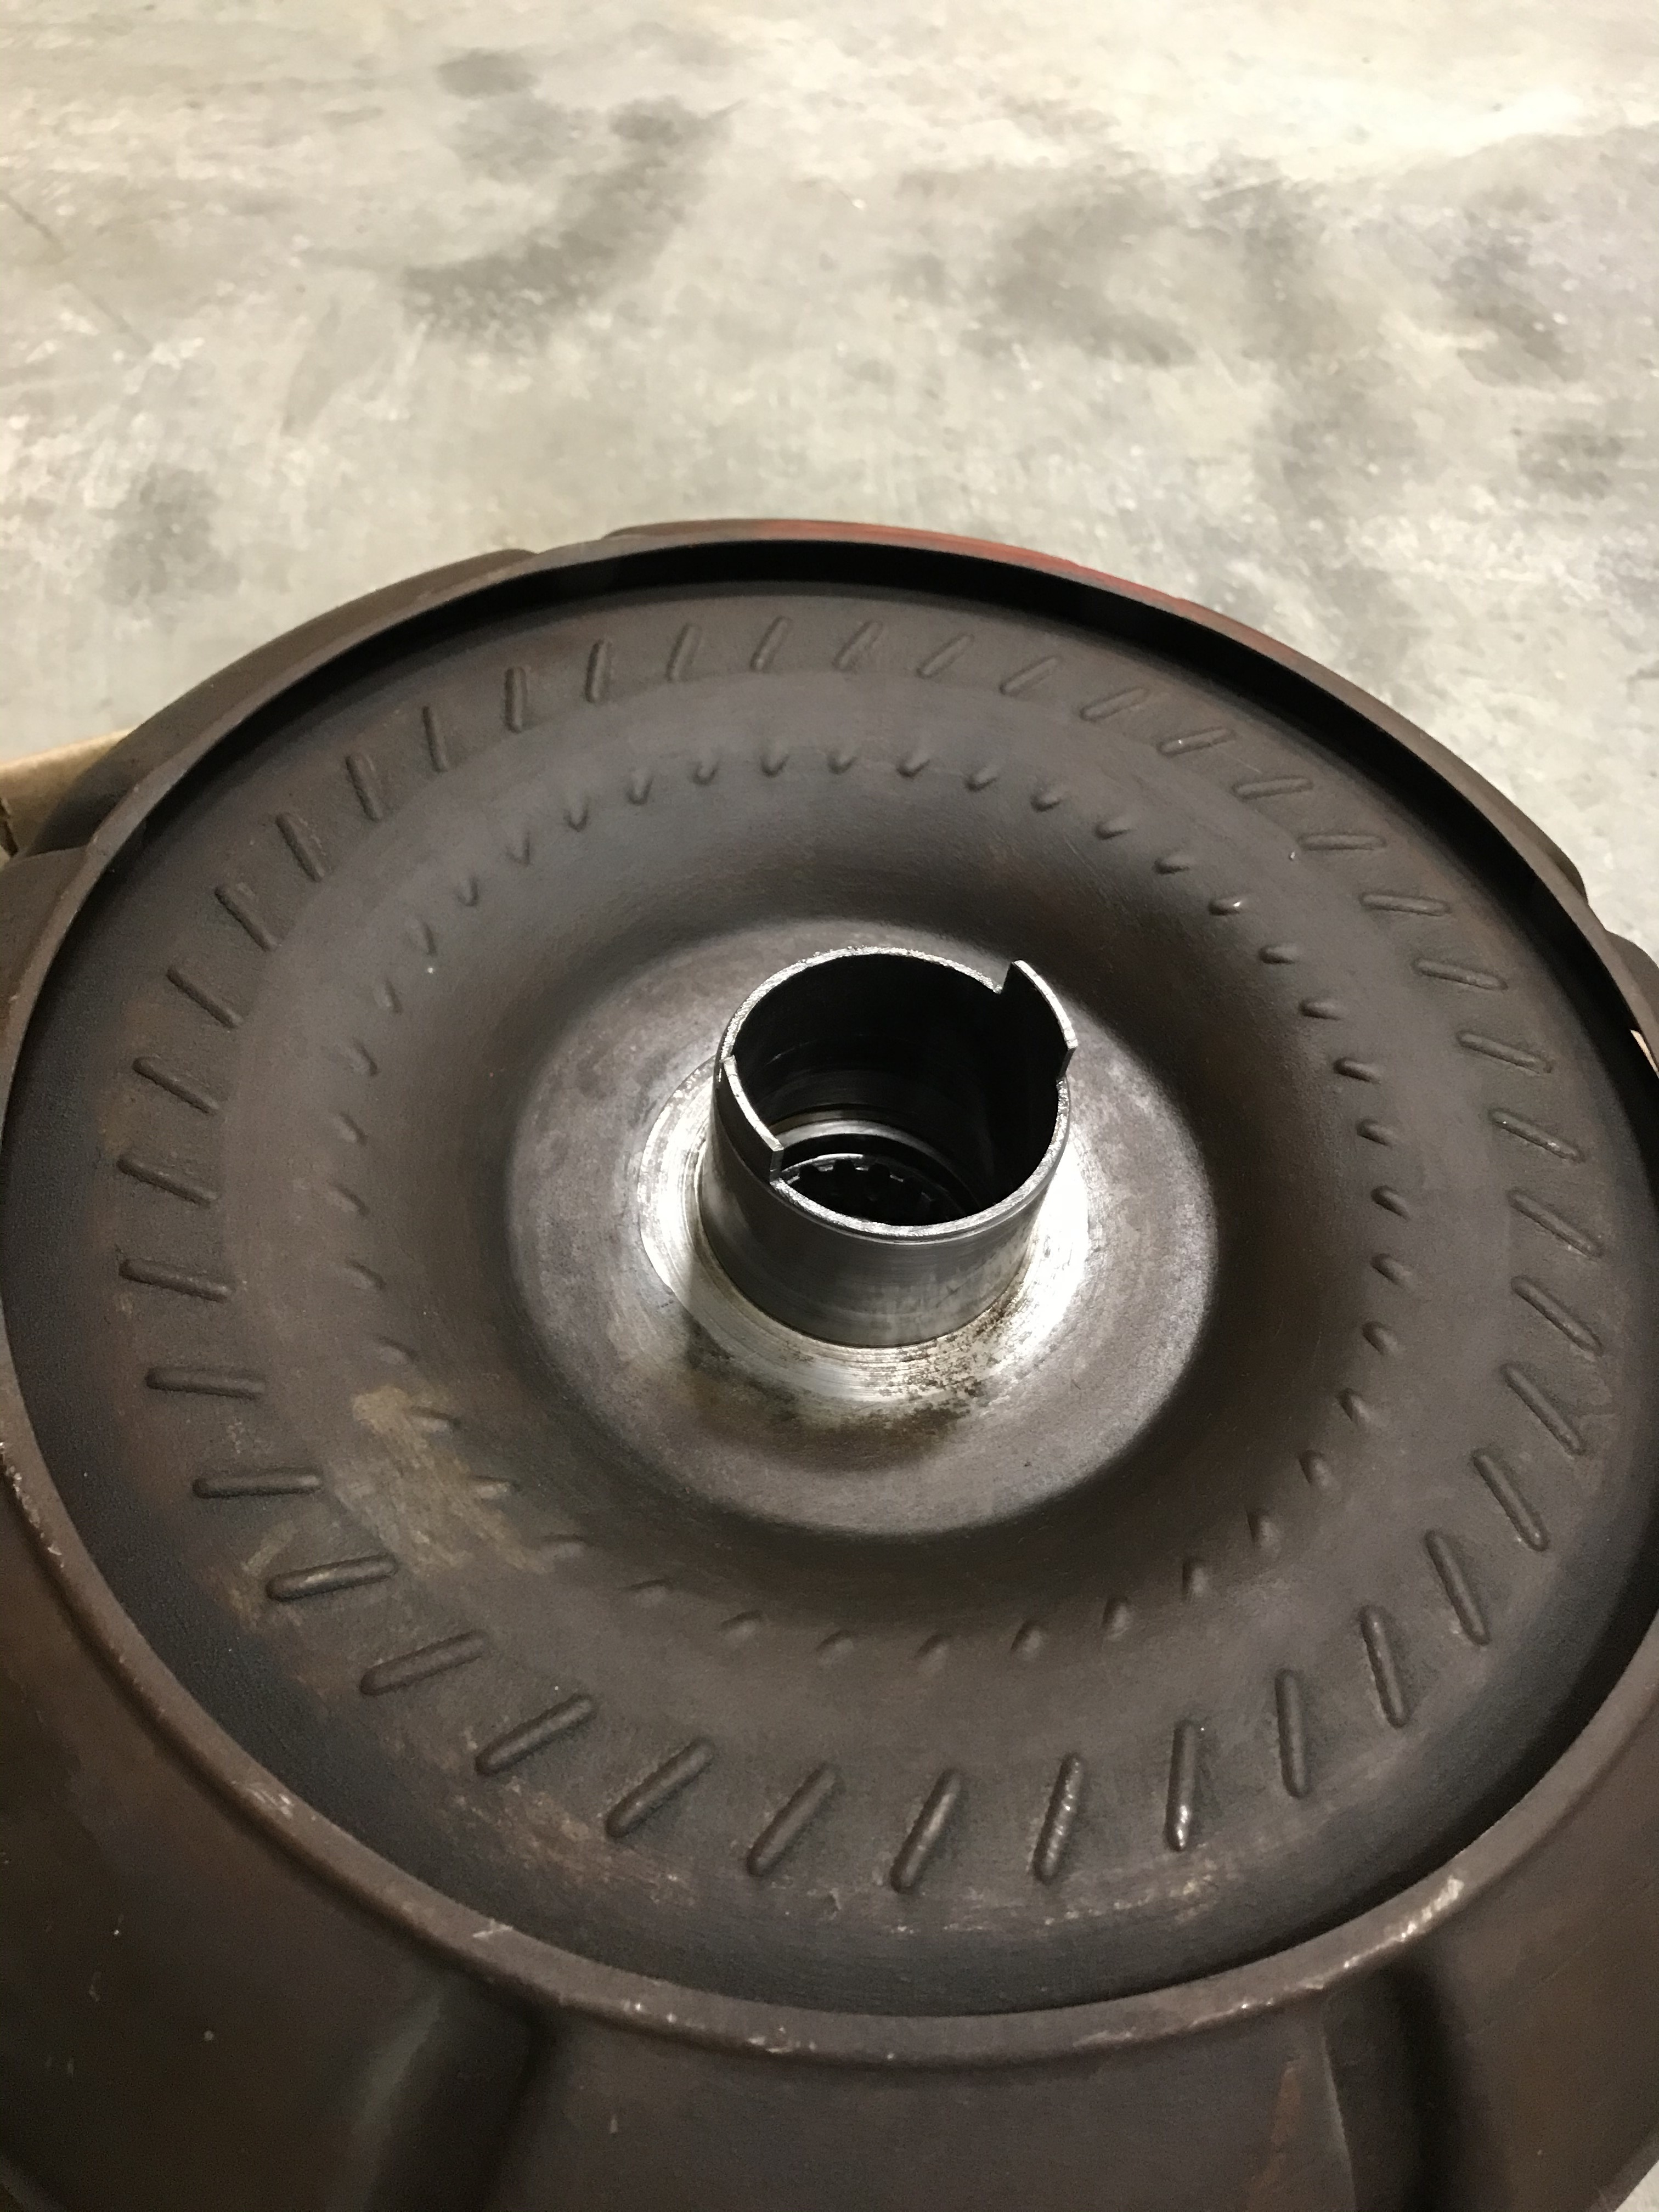
It could be that you don't have the two tangs on the torque converter lined up correctly, or the new seal could be real tight, or both. What's all the goop slathered on the mating surface? Try putting the transmission in PARK and slowly rotate the engine by grabbing the torque converter with your hands. Removing the spark plugs makes it easier to rotate. Hope this helps. Don't try pulling it together with the bolts, it will go when its ready.
0 -
Update of March 19th
Hello fellow Hudsonites.
As we all know, we are living in a bit of a grim moment as the Coronavirus is knocking to our doors like an unwanted guest. Even here in Quebec, the streets are giving me the feel of roaming in a ghost town.
Though still lifted up on the jack waiting to be fixed, Molly is standing gorgeous and strong, not giving an iota of care to the virus outside, reminding me that she needs to be fixed and getting prepped for the great International Meet at Burlington if not cancelled.
Speaking of repairs, I finally reached a milestone: the transmission is well installed to its old place, bolted and torqued properly and for good.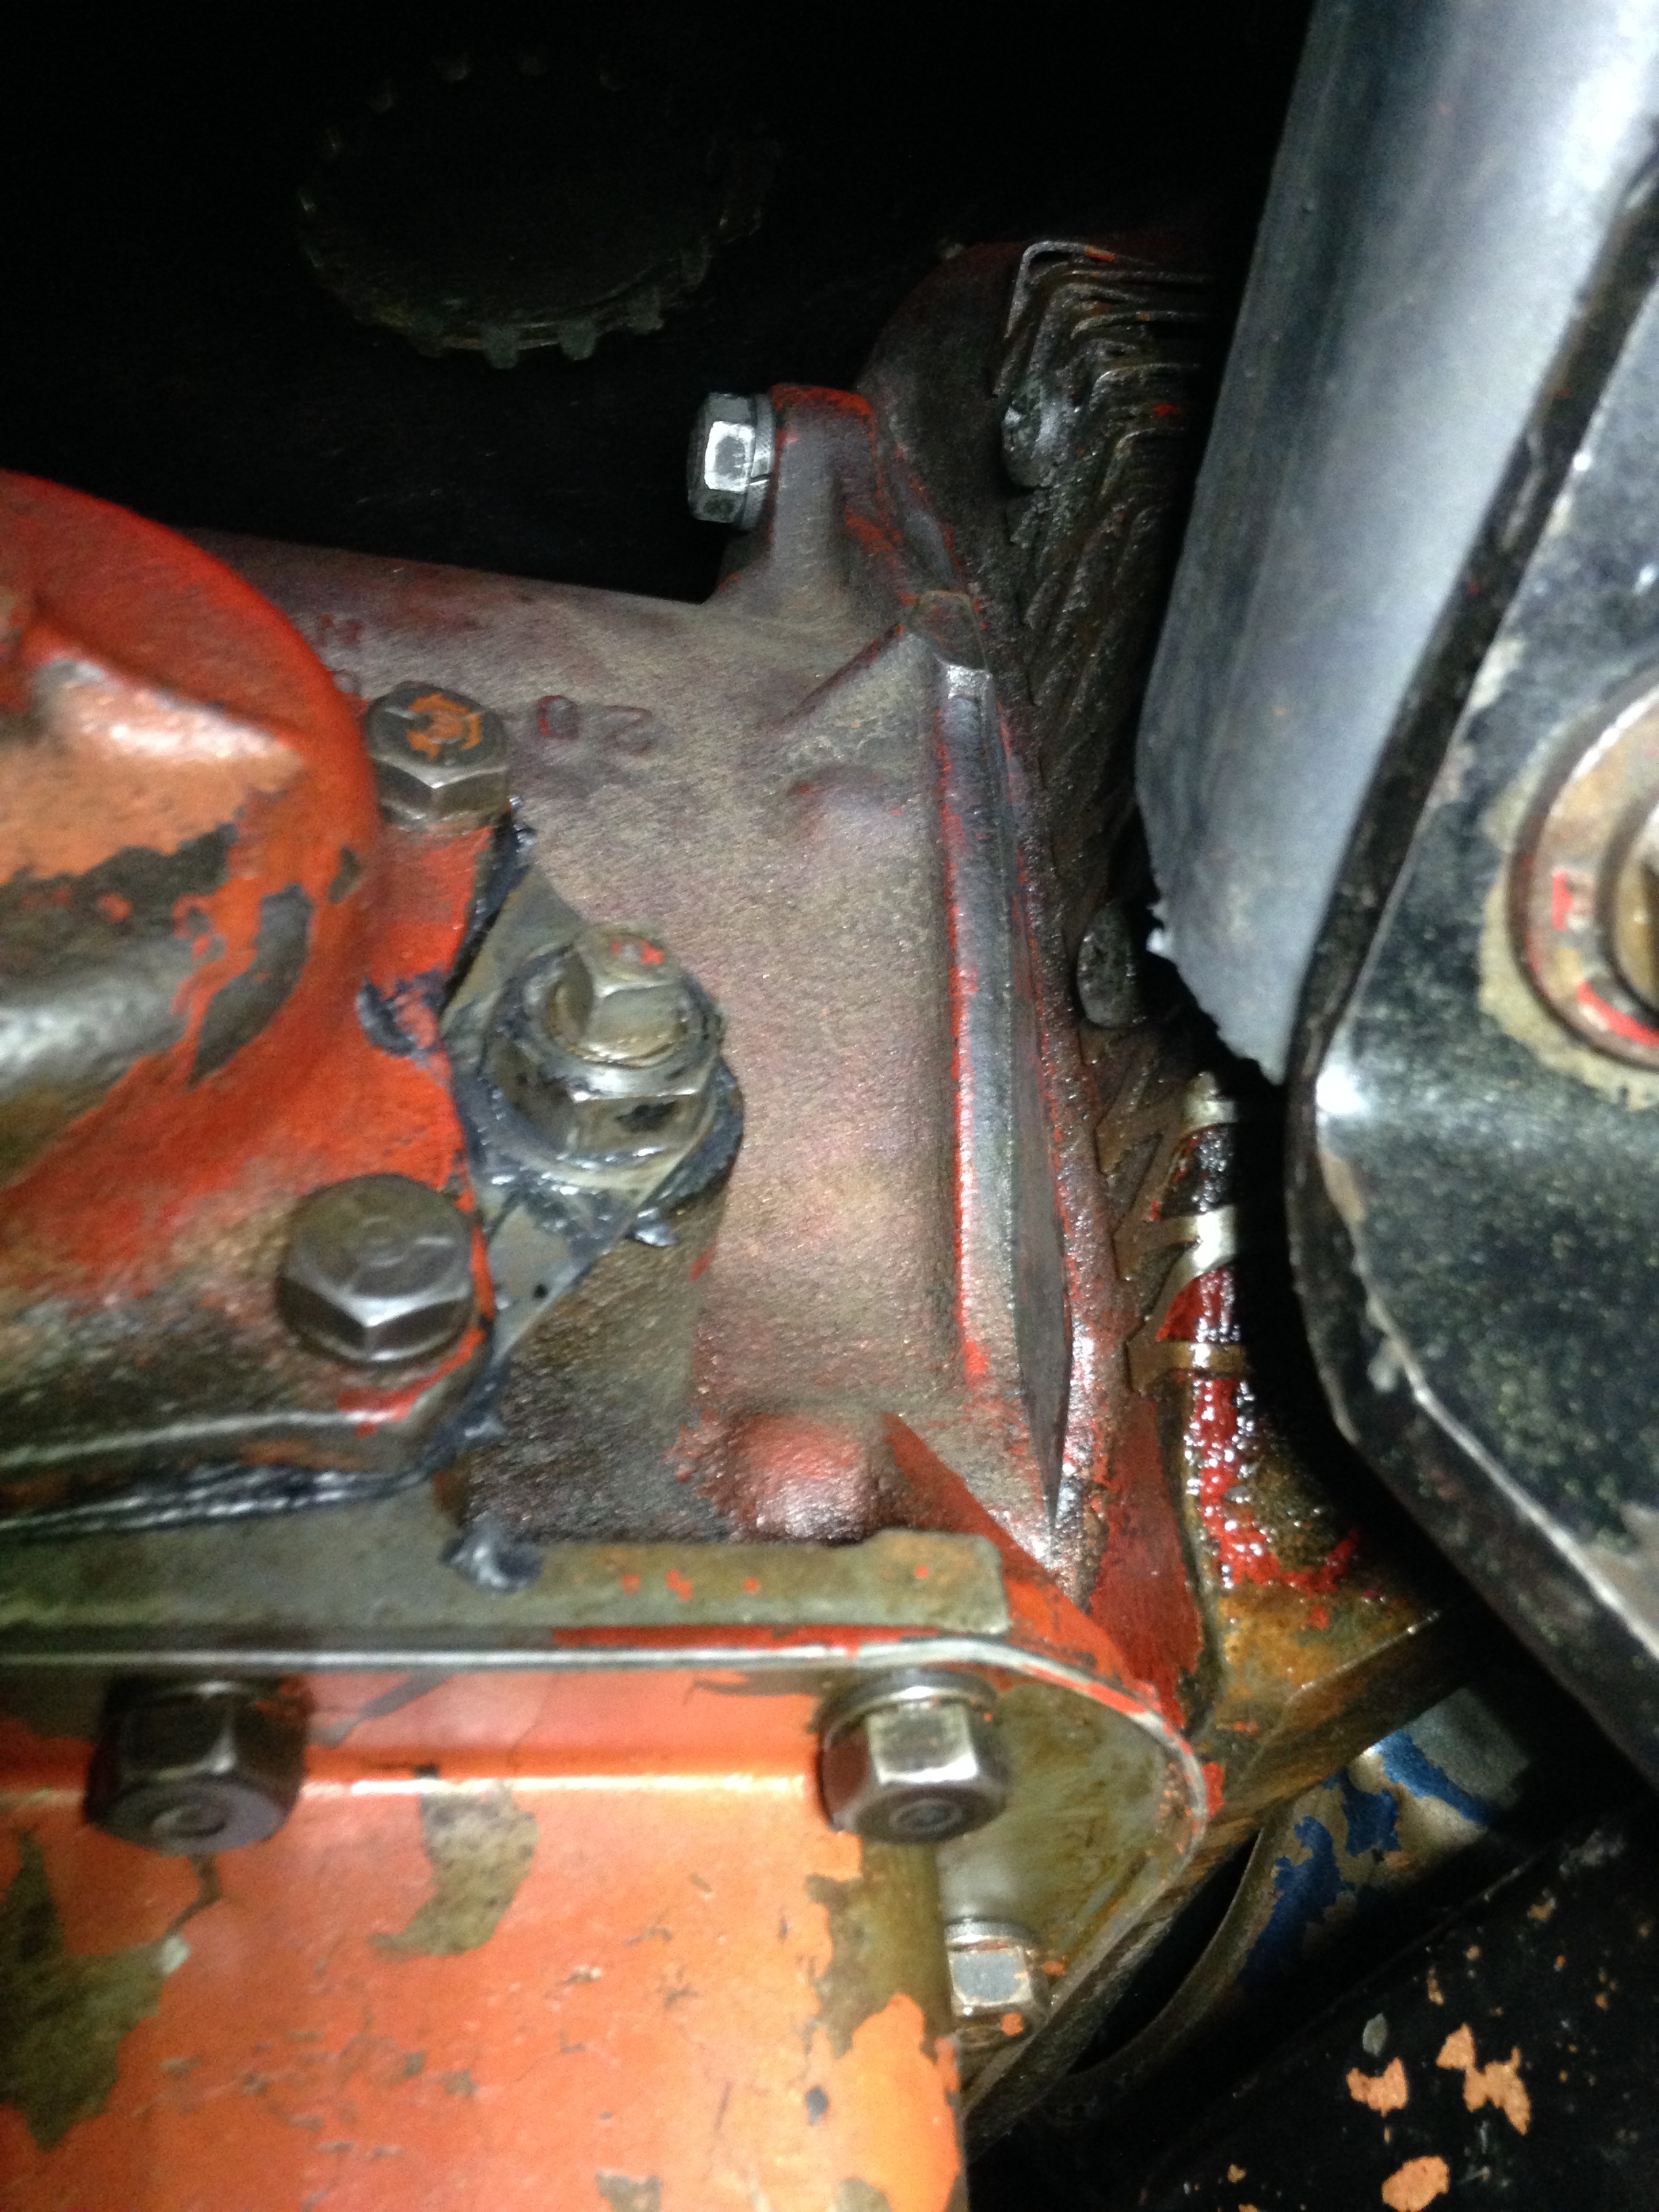
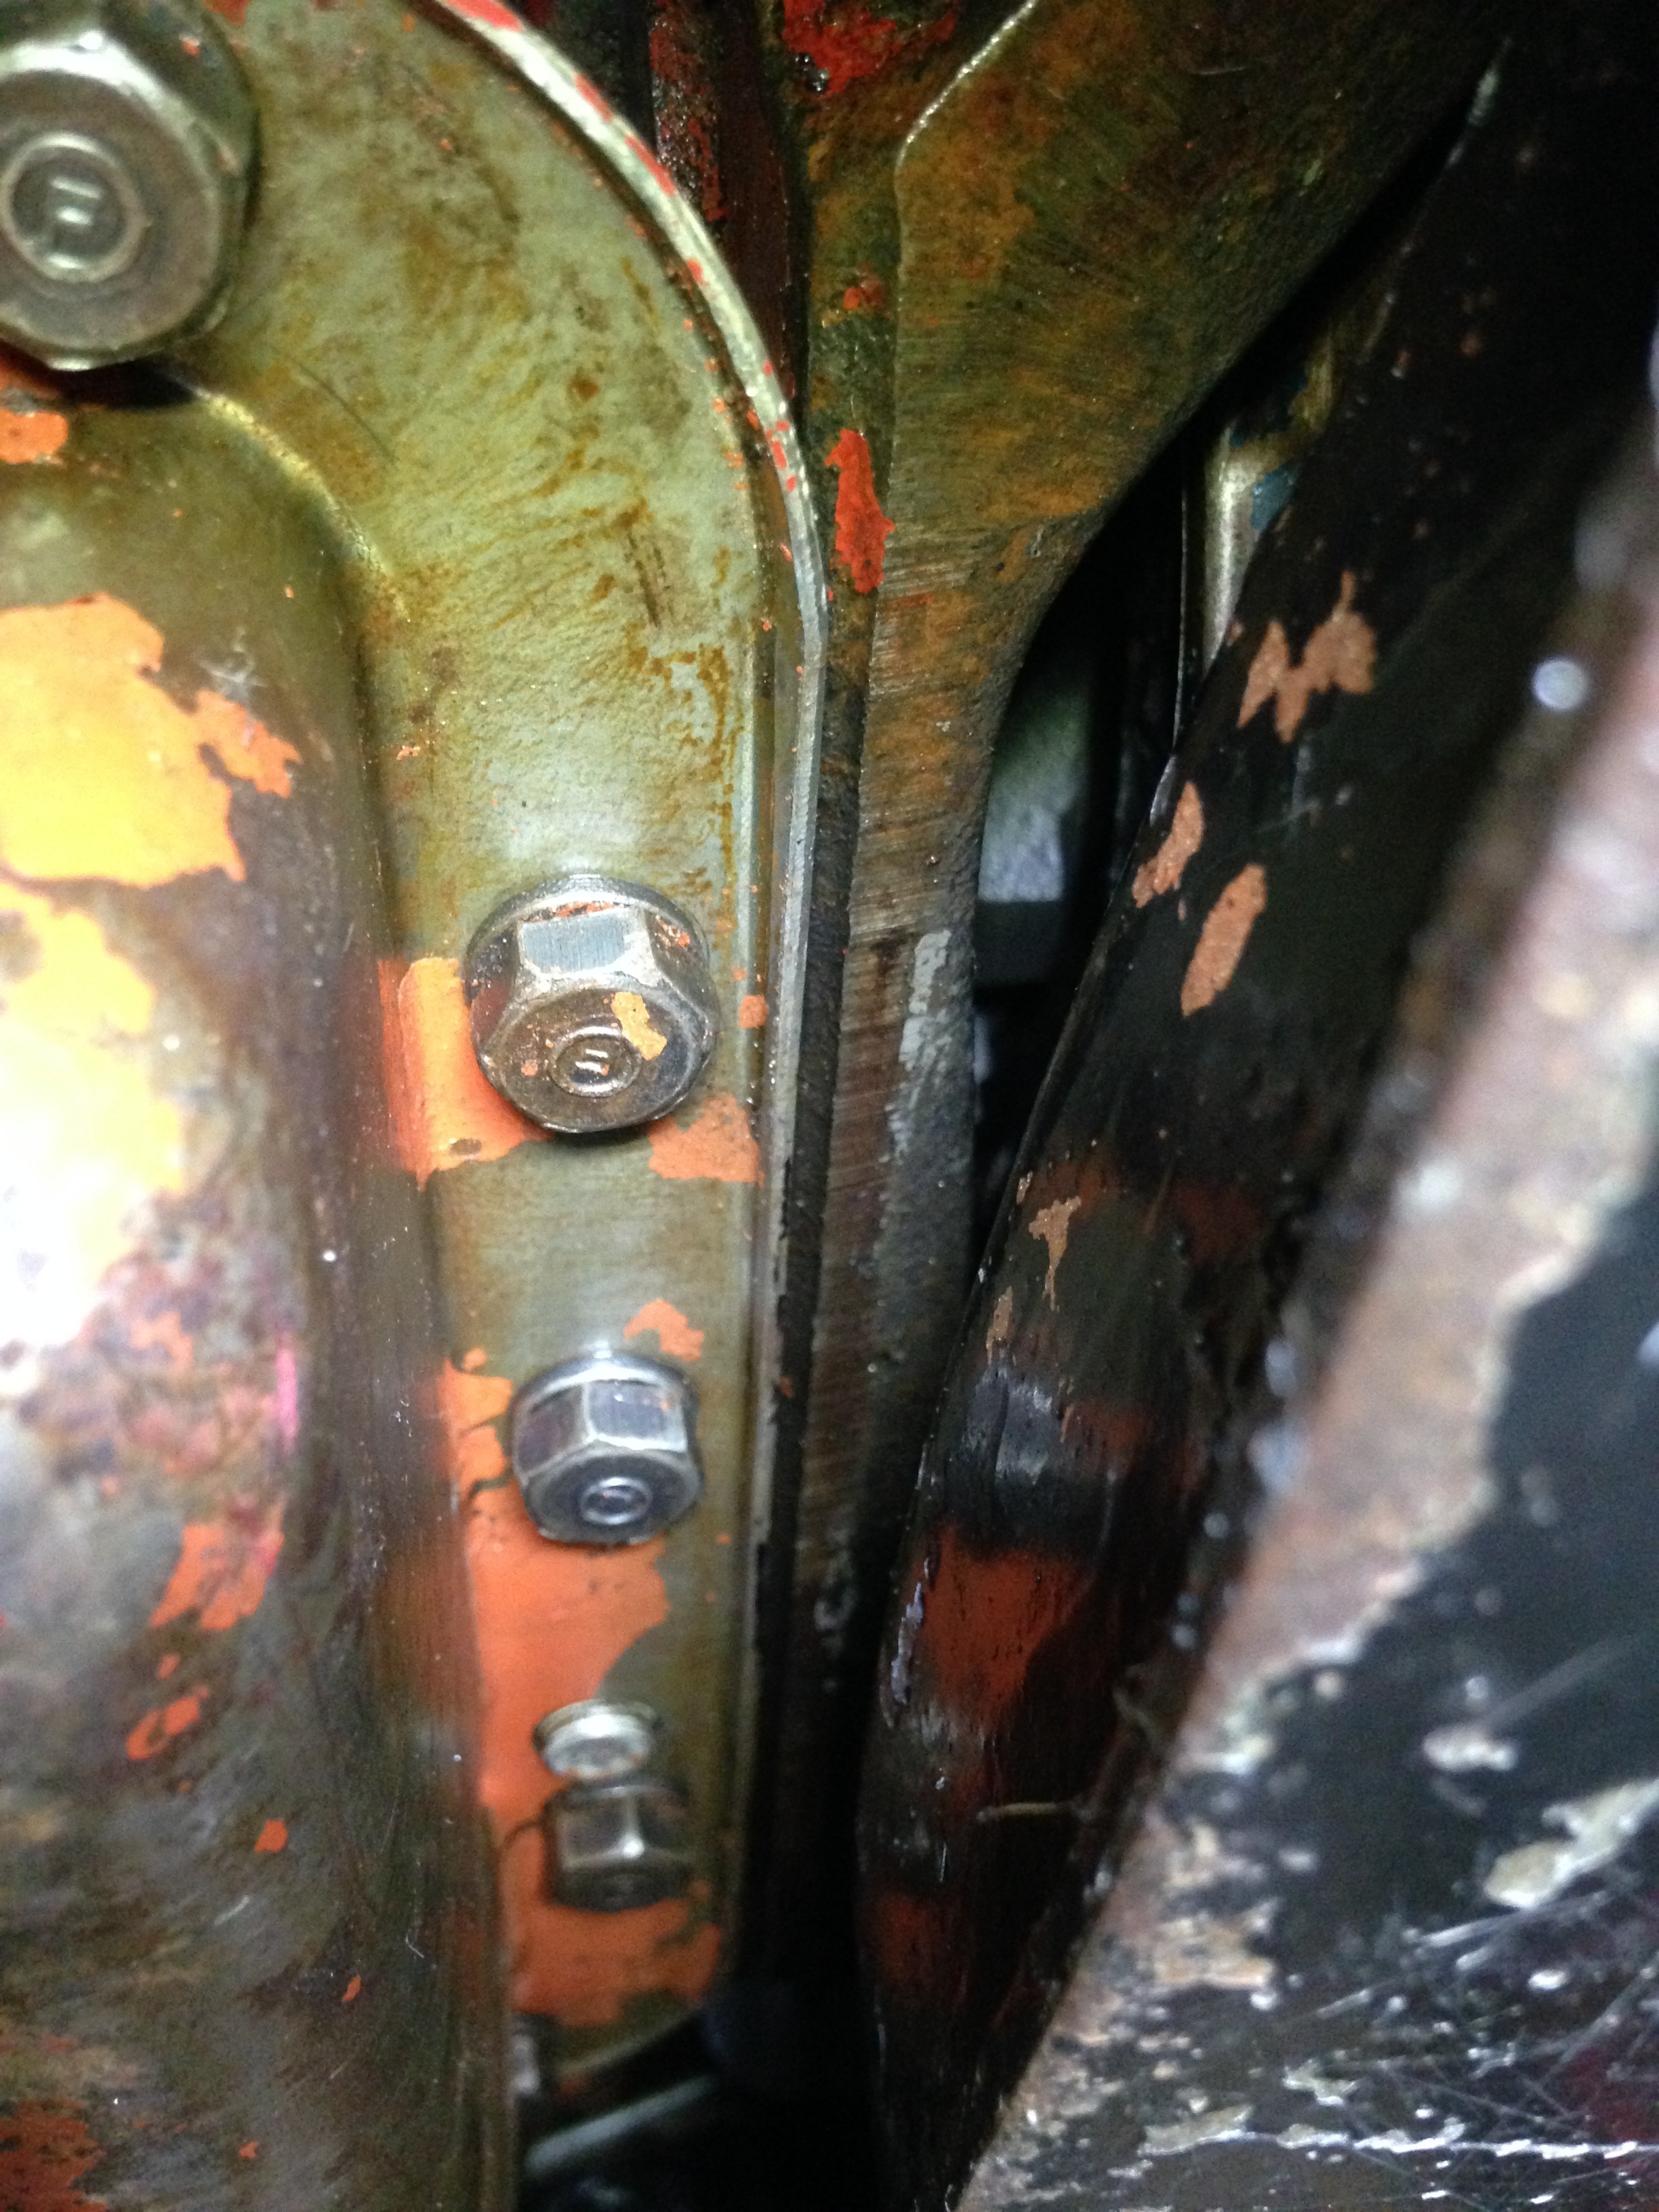
It took me a little while to find a way to close the gap between the tranny and the torque converter housing without forcing it, but I made it and guys was I happy to see it back to its good old spot. I also took the time to put the new transmission oil pan gasket and a new washer for the plug. . From here, all that is remaining is to put the bits and bobs along with the propeller shaft under, reconnect and re-adjust the tranny control linkages and pour new trans. fluid before giving it a test.
As for the goop that was on the mating surfaces, it was a gasket maker from Permatex as I was thinking to put a gasket between for better seal, but didn't worked at all as it was all dried up while I was trying to find the proper alignment. I simply removed it and put the tranny without it
While putting the tranny back to its place, I also decided to make some small improvements and replacements on the car, starting with the spark plugs.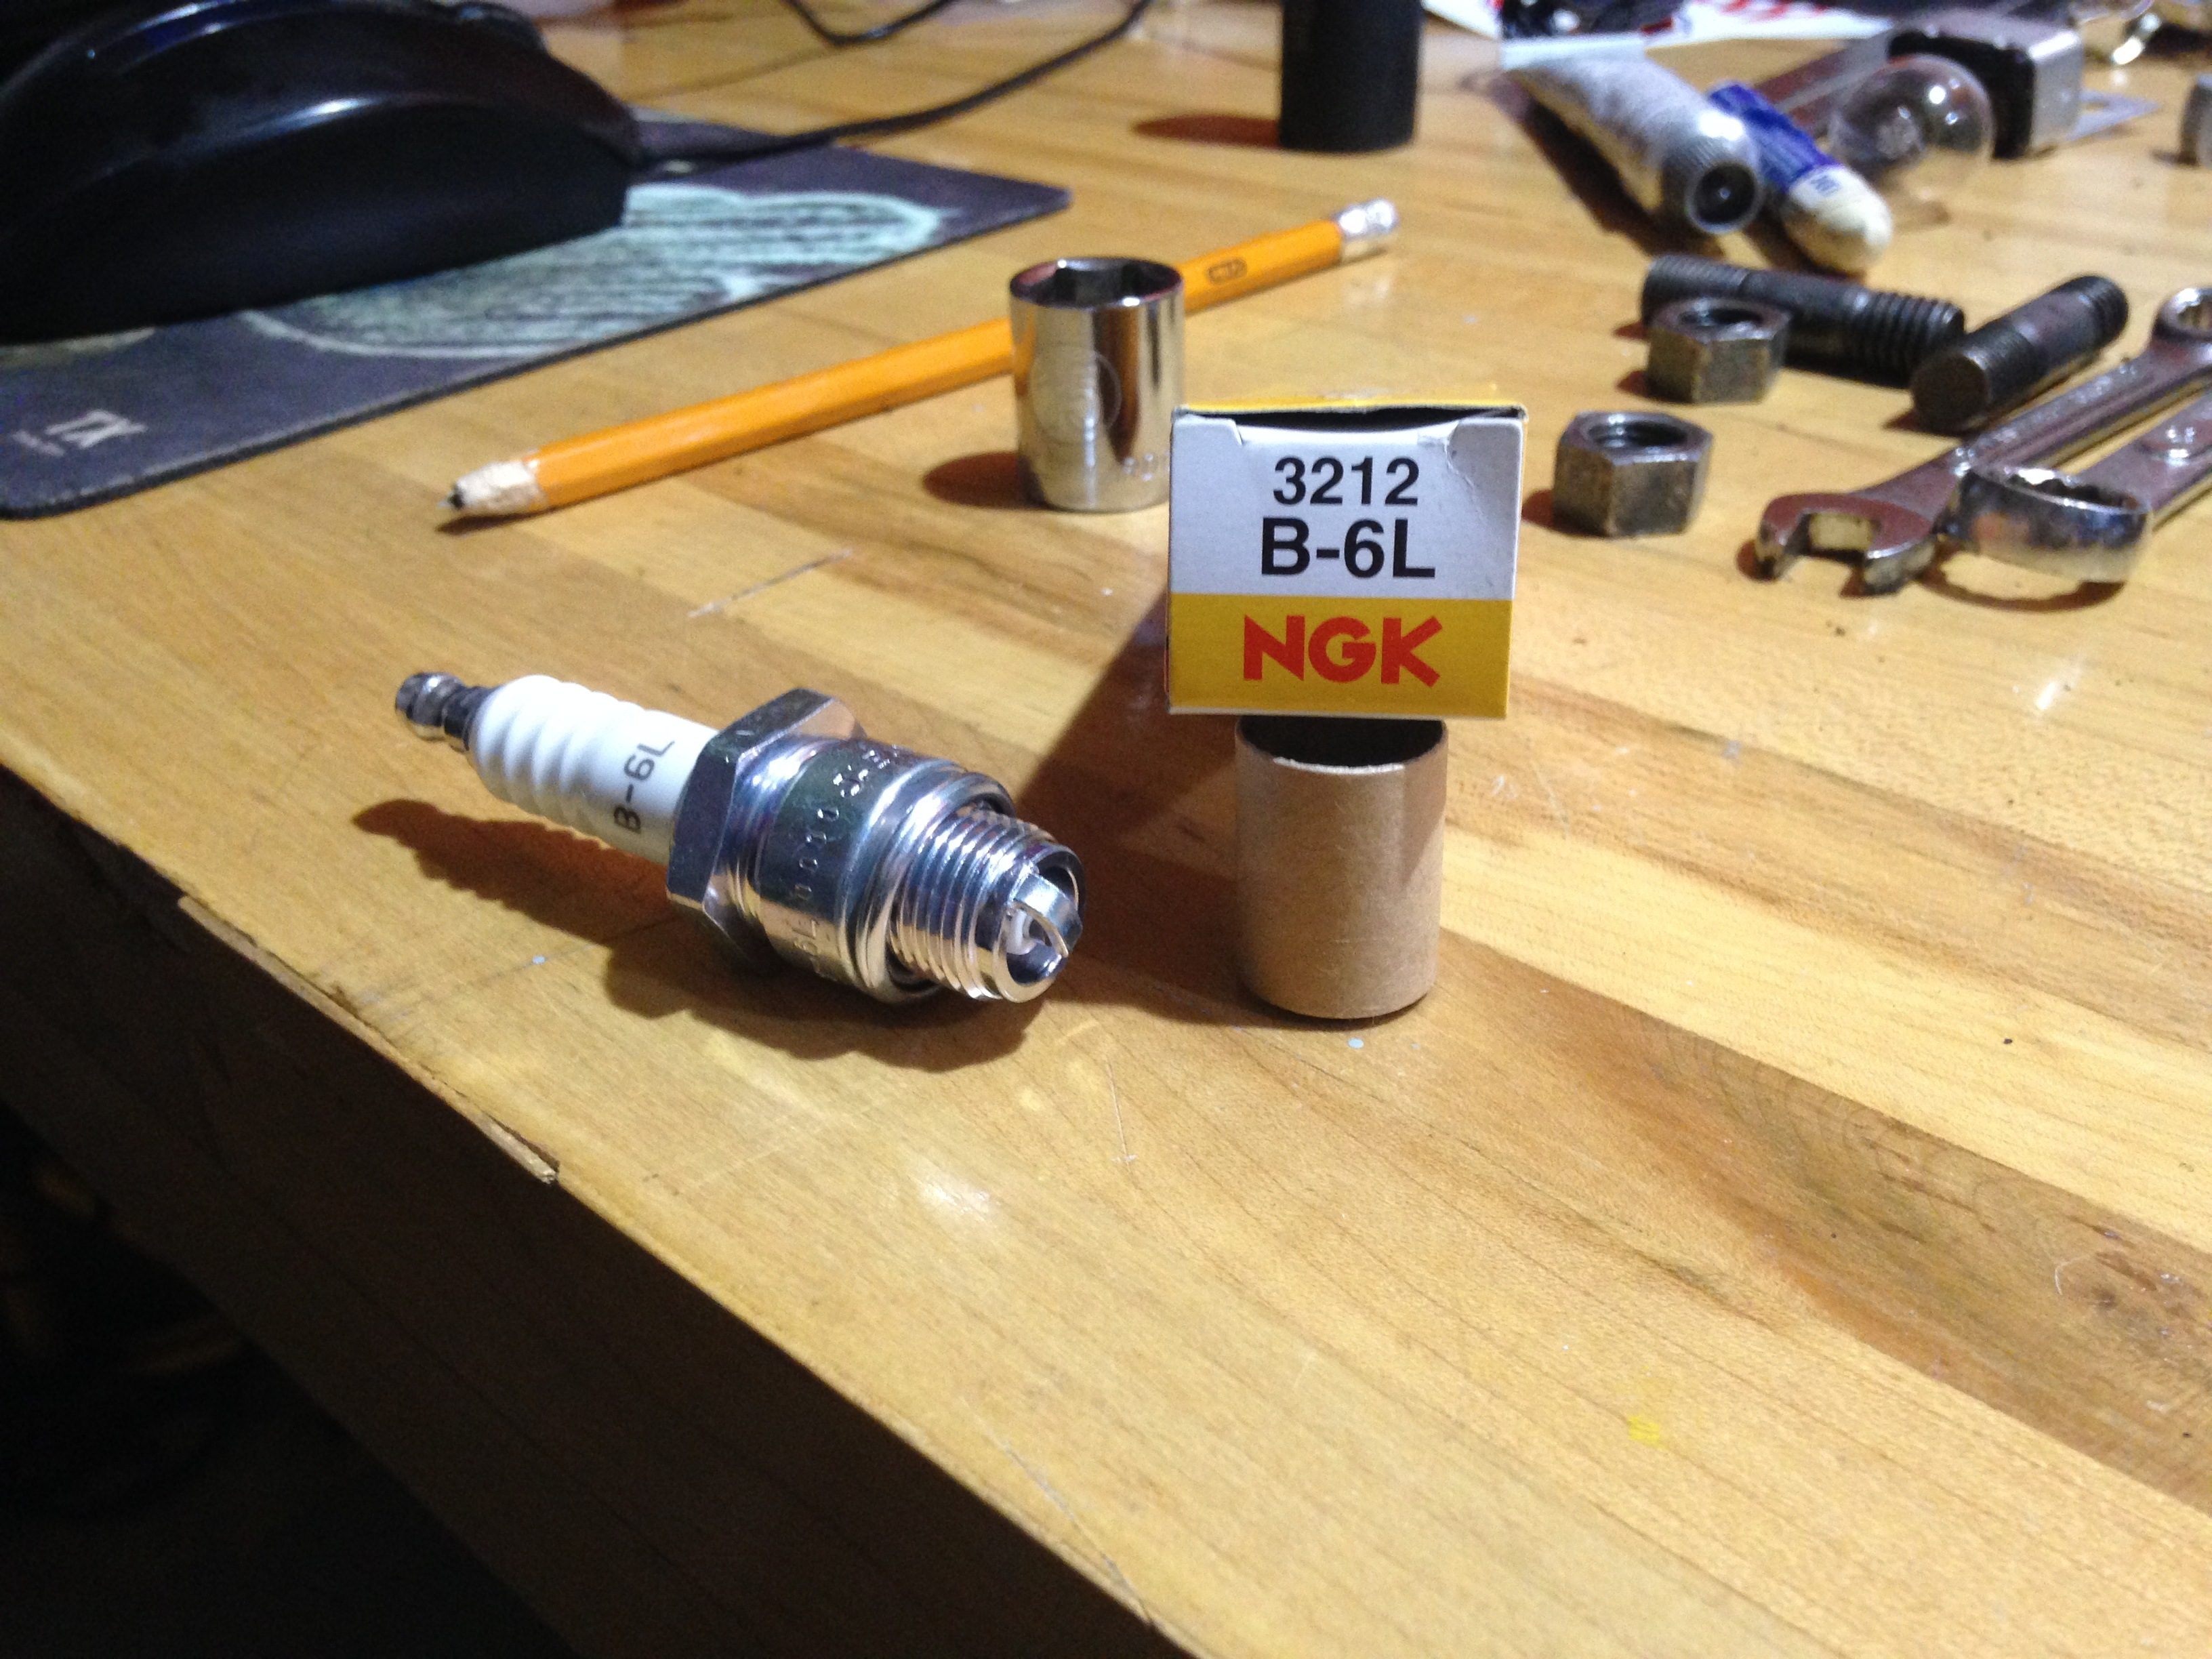
Since I removed the spark plugs for easier torque converter rotation, I decided to change them for good measure, but I'm not quite sure if I do have the right ones. On the picture above are NGK B-6L spark plug and I'm wondering if they will fit on the engine and causing problems. While I'll check the original specs of the spark plugs, feel free to give some hints or recommendations.
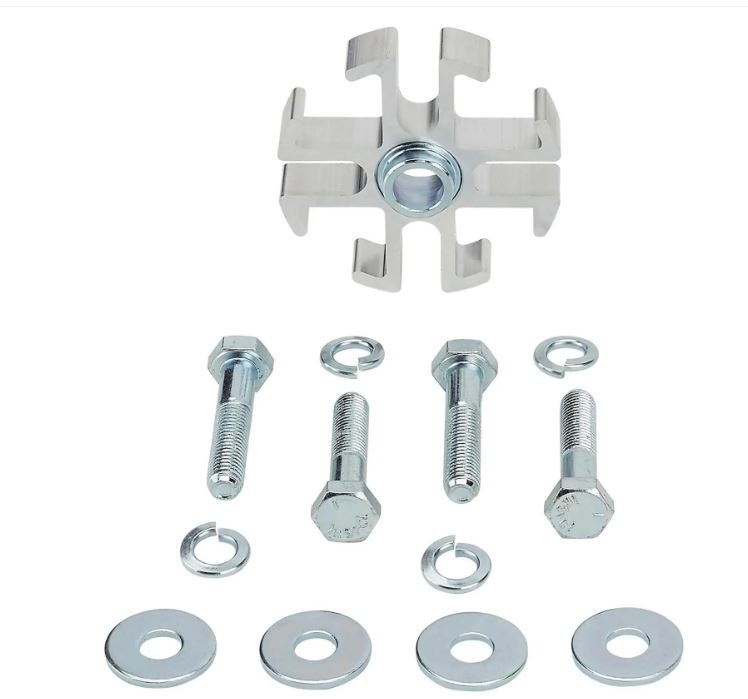
I also decided to change the original 4 blades cooling fan for a six blades one, but I'll need your imput and expertise on this one.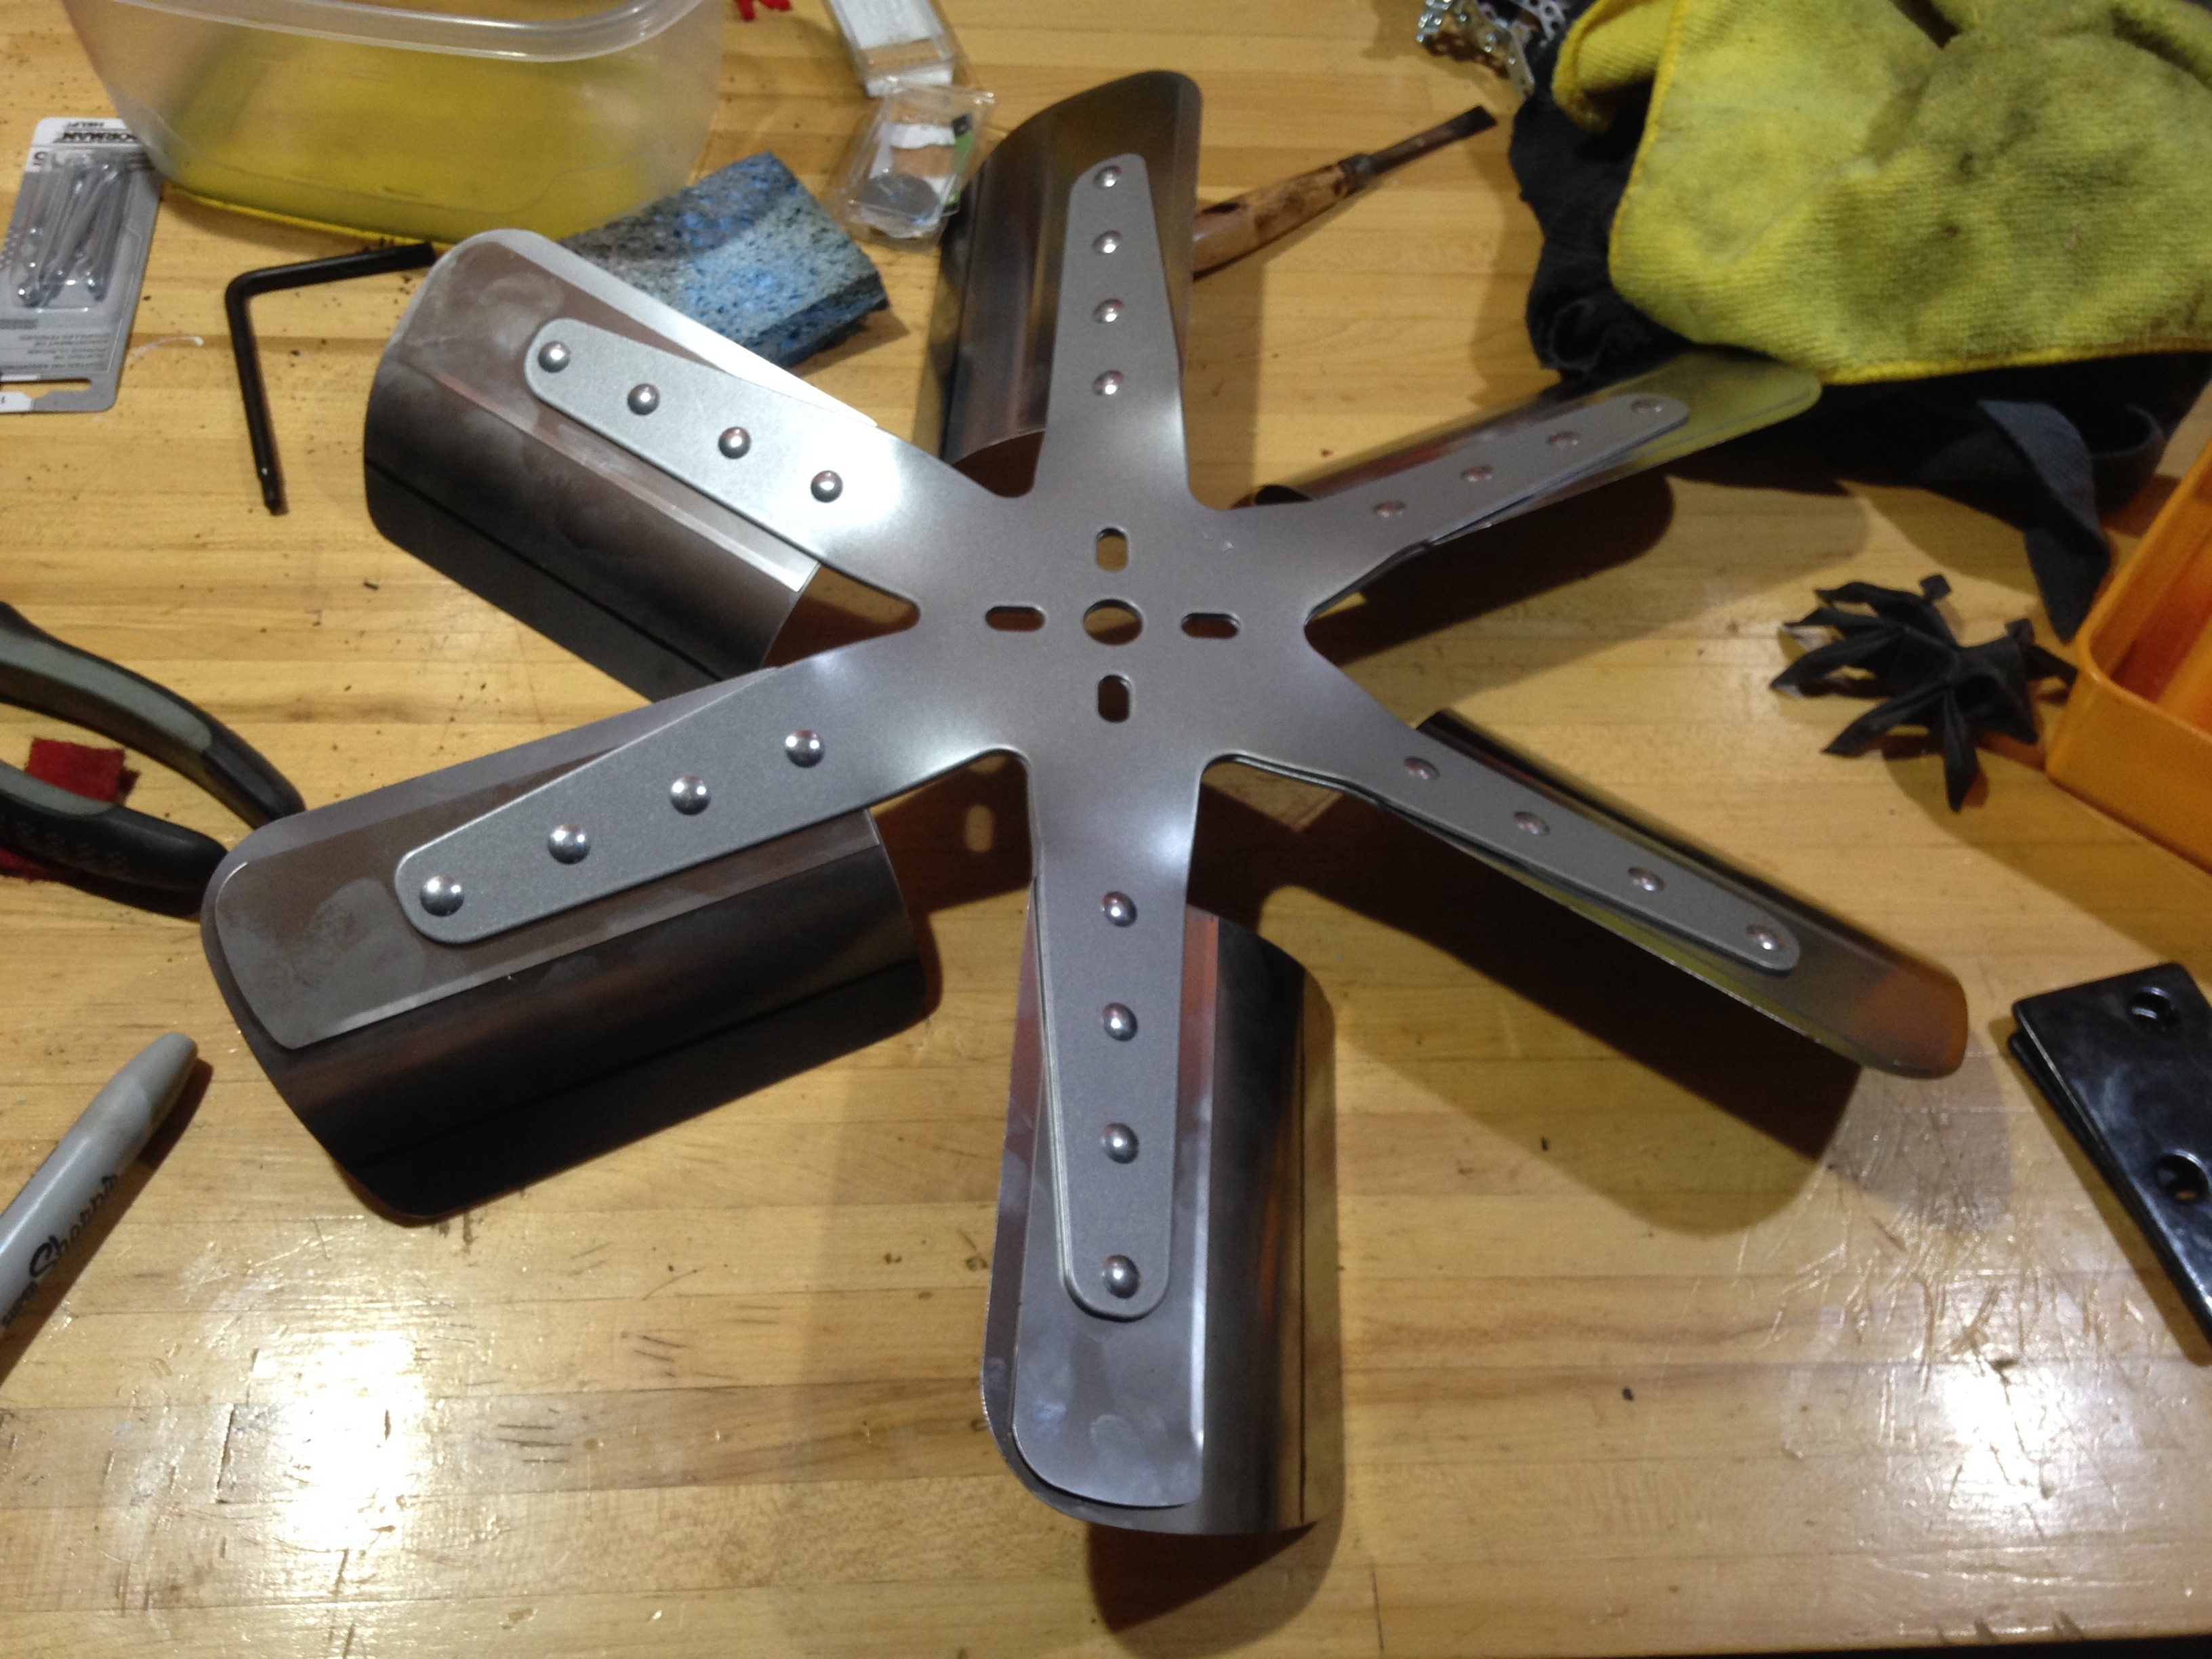 As seen here, a six blades fan will push more air to the radiator, keeping the engine cooler at low to idle speed, but the blades themselves are too long, causing them to get in the way to the water pump belt, wich is not good at all. If I want to put this fan, I would need to shorten the blades, but I'm afraid that by shortening its blades the fan won't be able to do its intended work. Your imput on this case is welcome.
Until the next update, stay safe with the Coronavirus stalking outside.
Your Autistic Hudsonite,
Max
0 -
Max: The use of this type of fan on the Hudson water pump may require a spacer. In the description you provided, I suspect this is a requirement. The vendor from whom you purchased the fan may have an assortment of spacers. I would take a bit of time to determine the space out from the pump mount required and then purchase the spacer needed to clear the engine accessories. Good Luck. BTW I am using a 1.5 inch on my 232 engine... with an installed B400 Dodge replacement radiator. Got my fan and spacer from Speedway motors.
 0
0 -
Update of March 26th
Hello fellow Hudsonites,
For this update I've took some time to put most of the braking system back under Molly.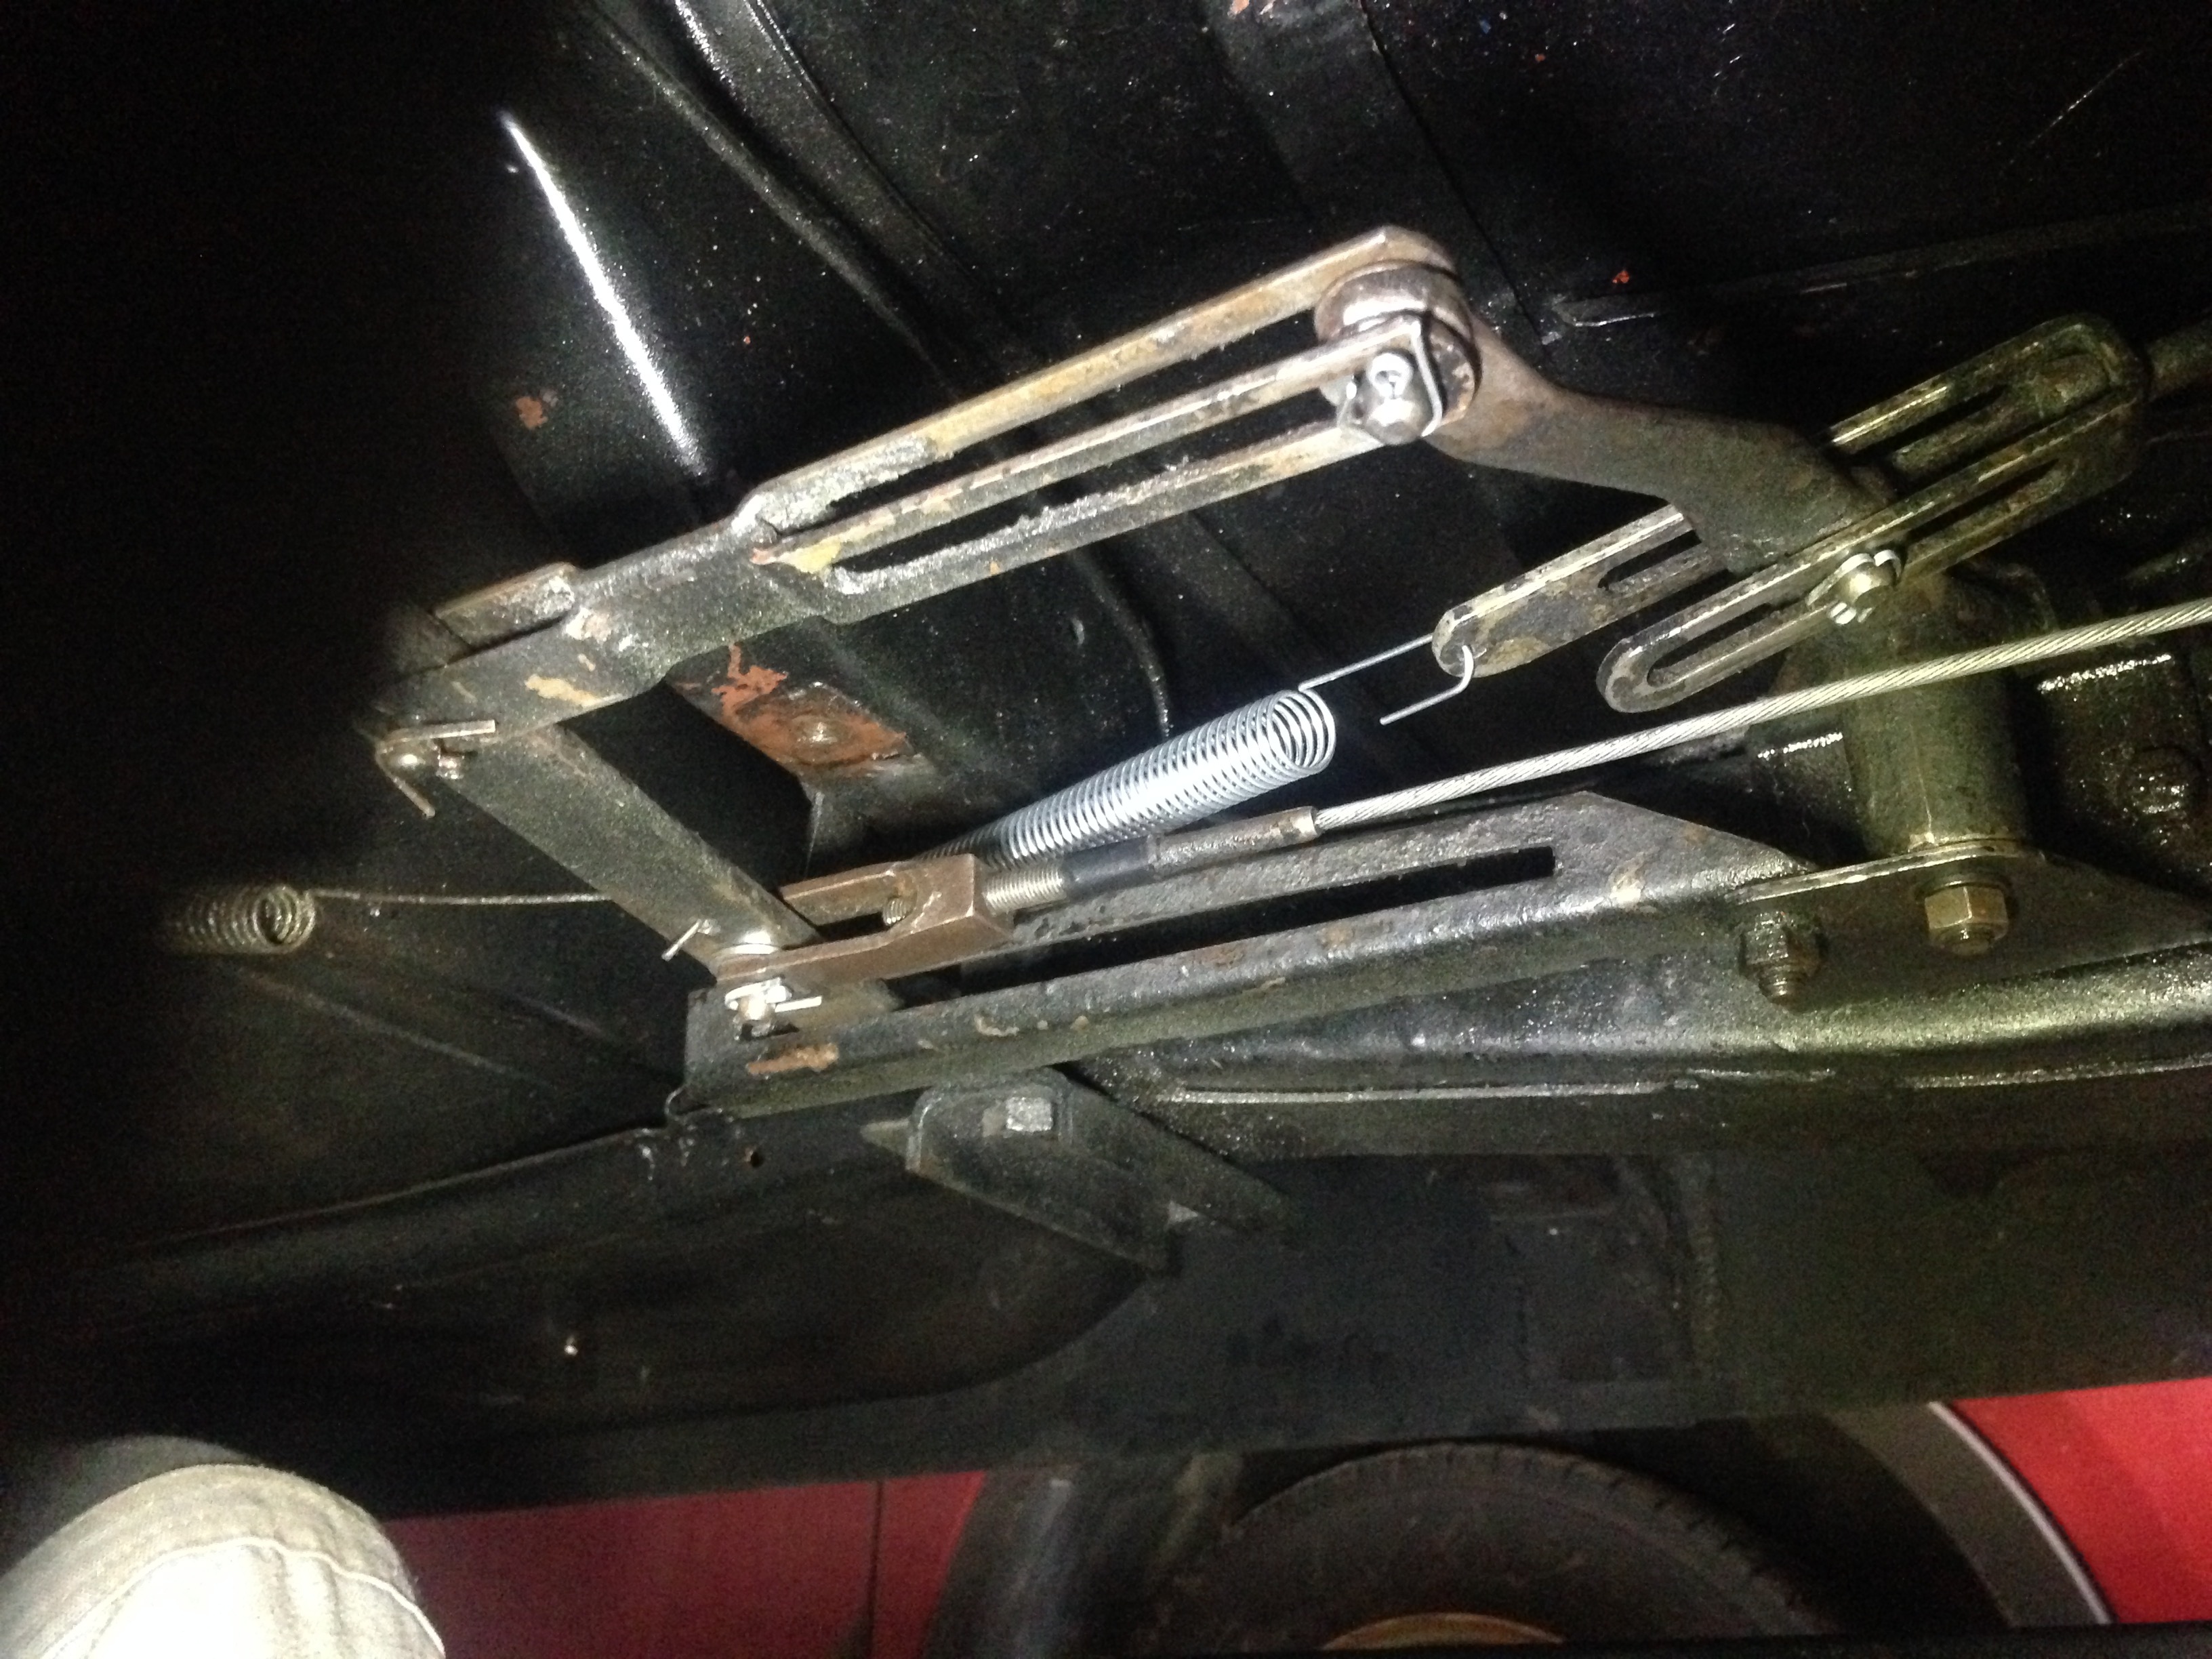
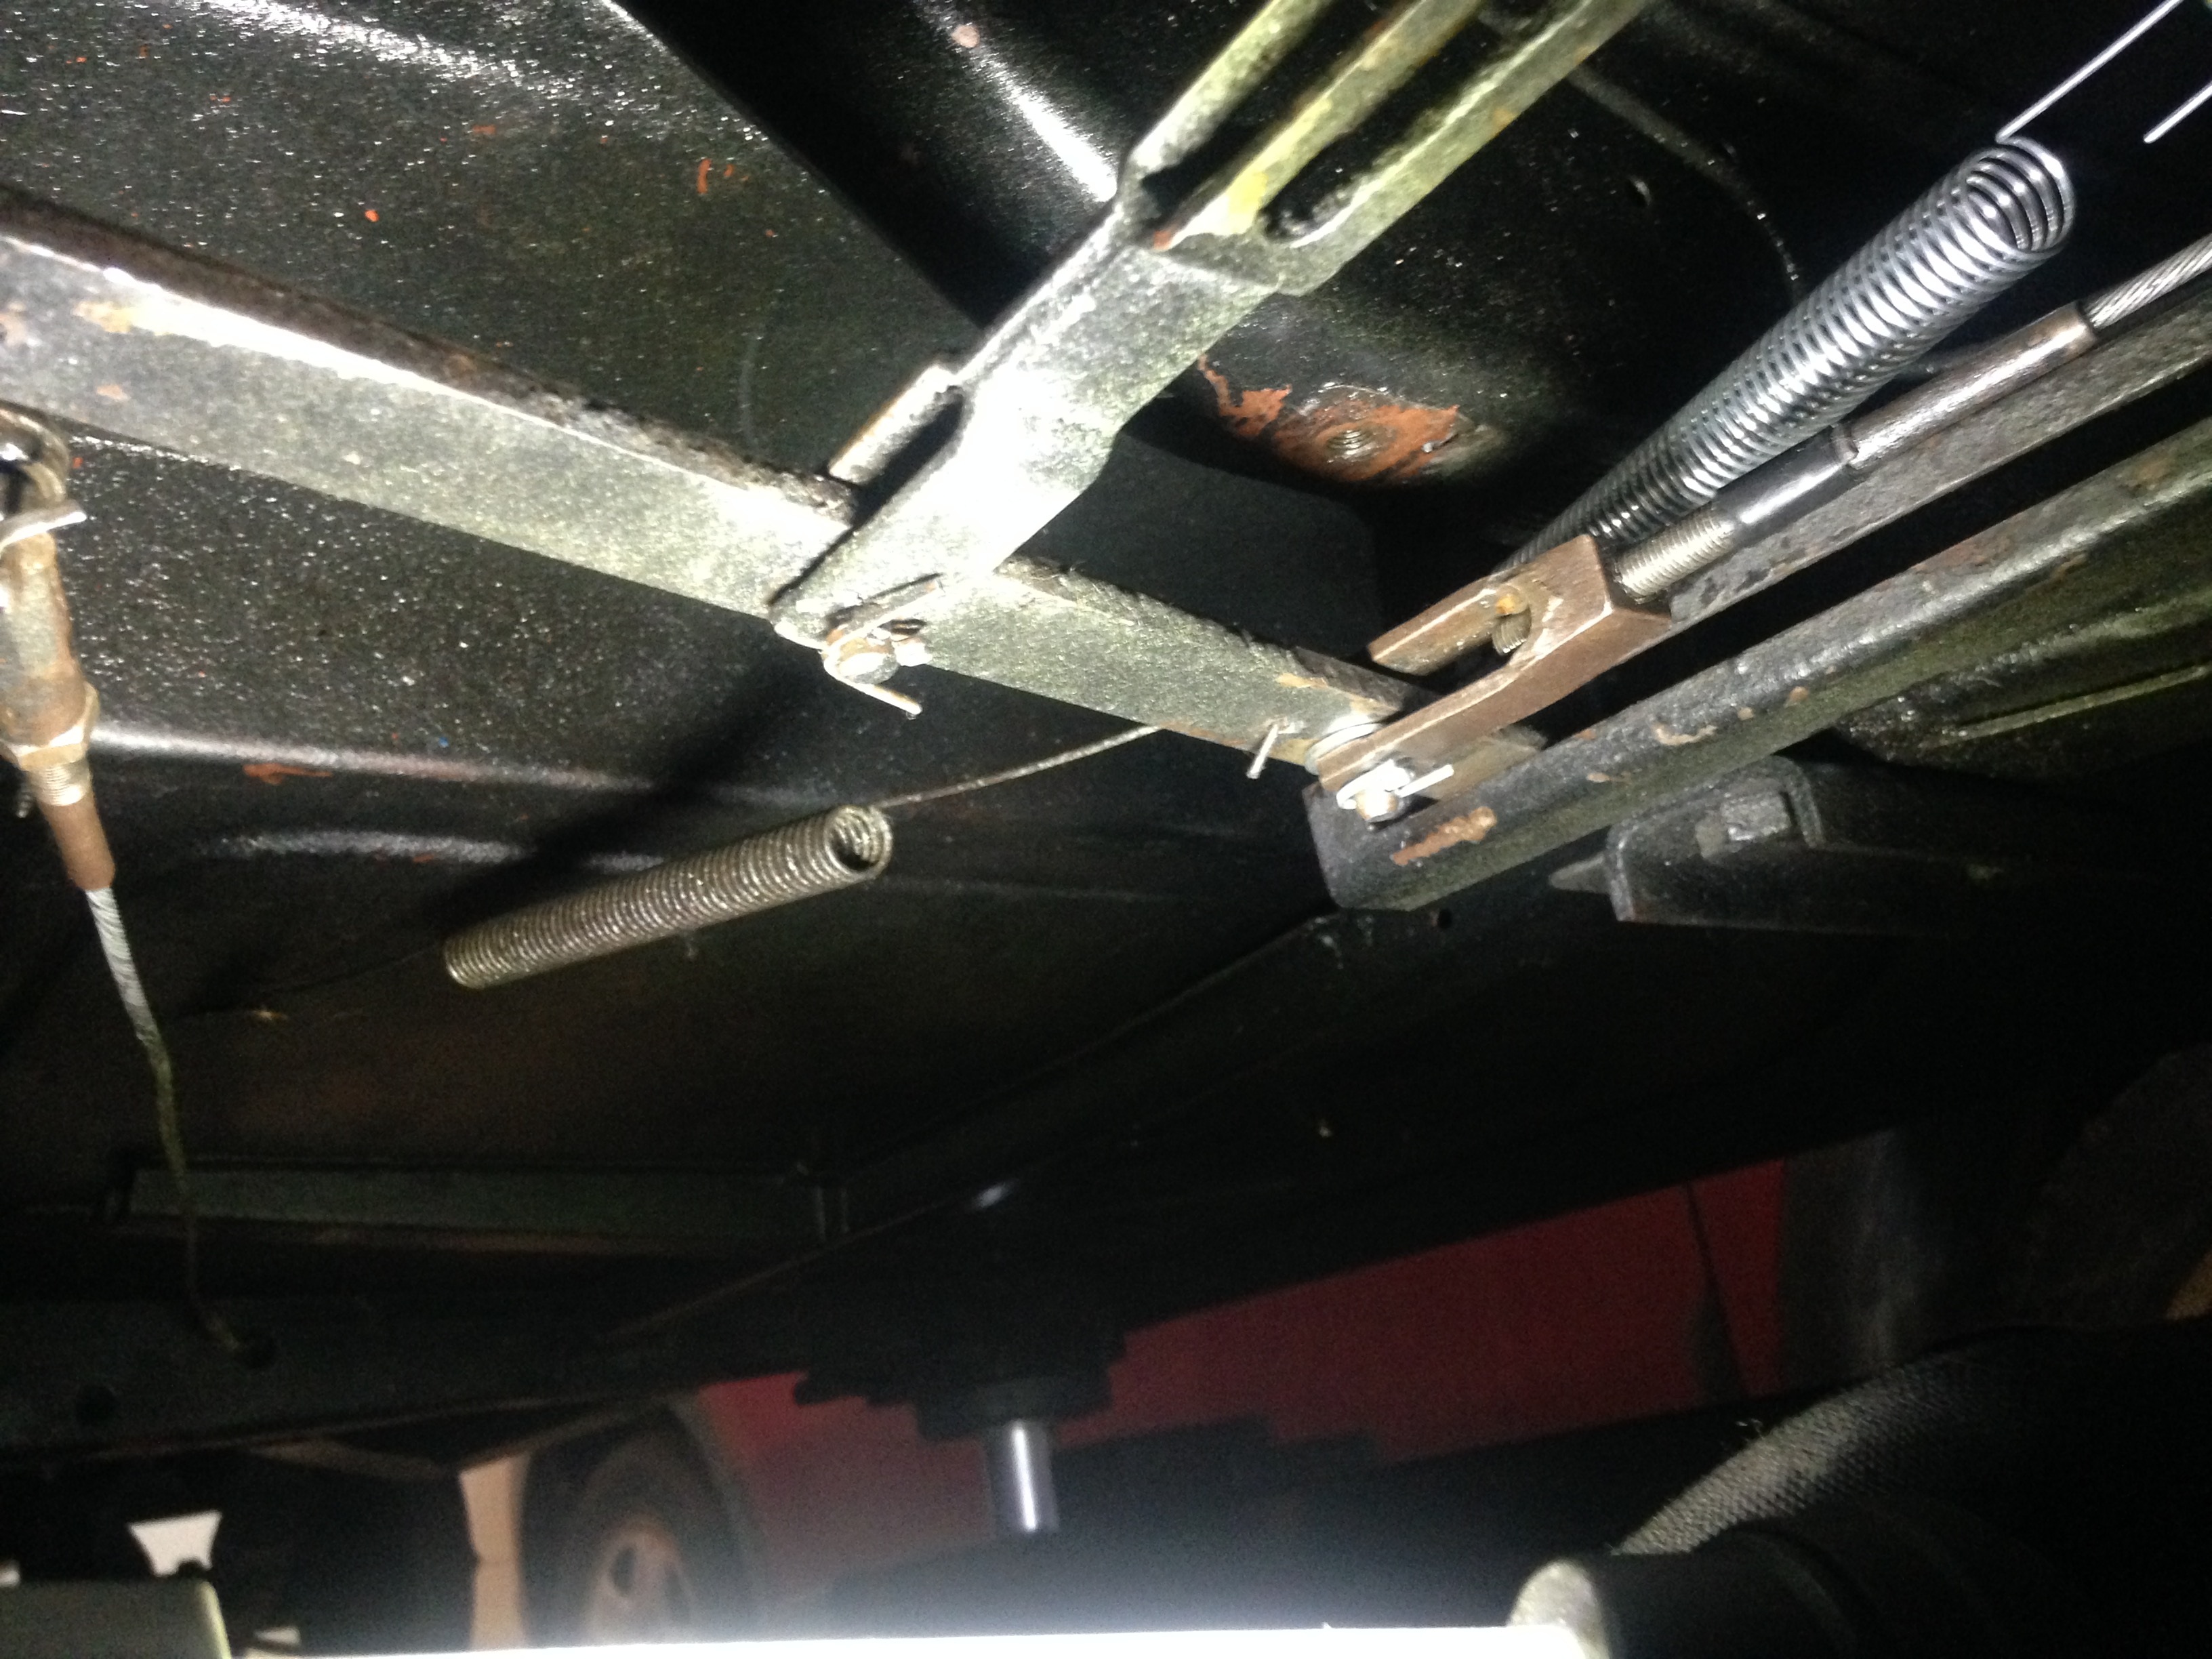
As seen on the pictures, I've started to put the springs back, but can't quite remember their original places for the brake and for the transmission controls.
" Darnit, should have took some pictures of those before removing them ..."
If some of you does have some pictures of the springs' places it would be appreciated.
I've also took some measures for my cooling fan and from what I've gathered, the fan blades seems to be still too long, even if I put spacers on it. I may have to find another 6 blades fan that should be as identical as the original one dimention wise.
I'll end this update with a question for you guys: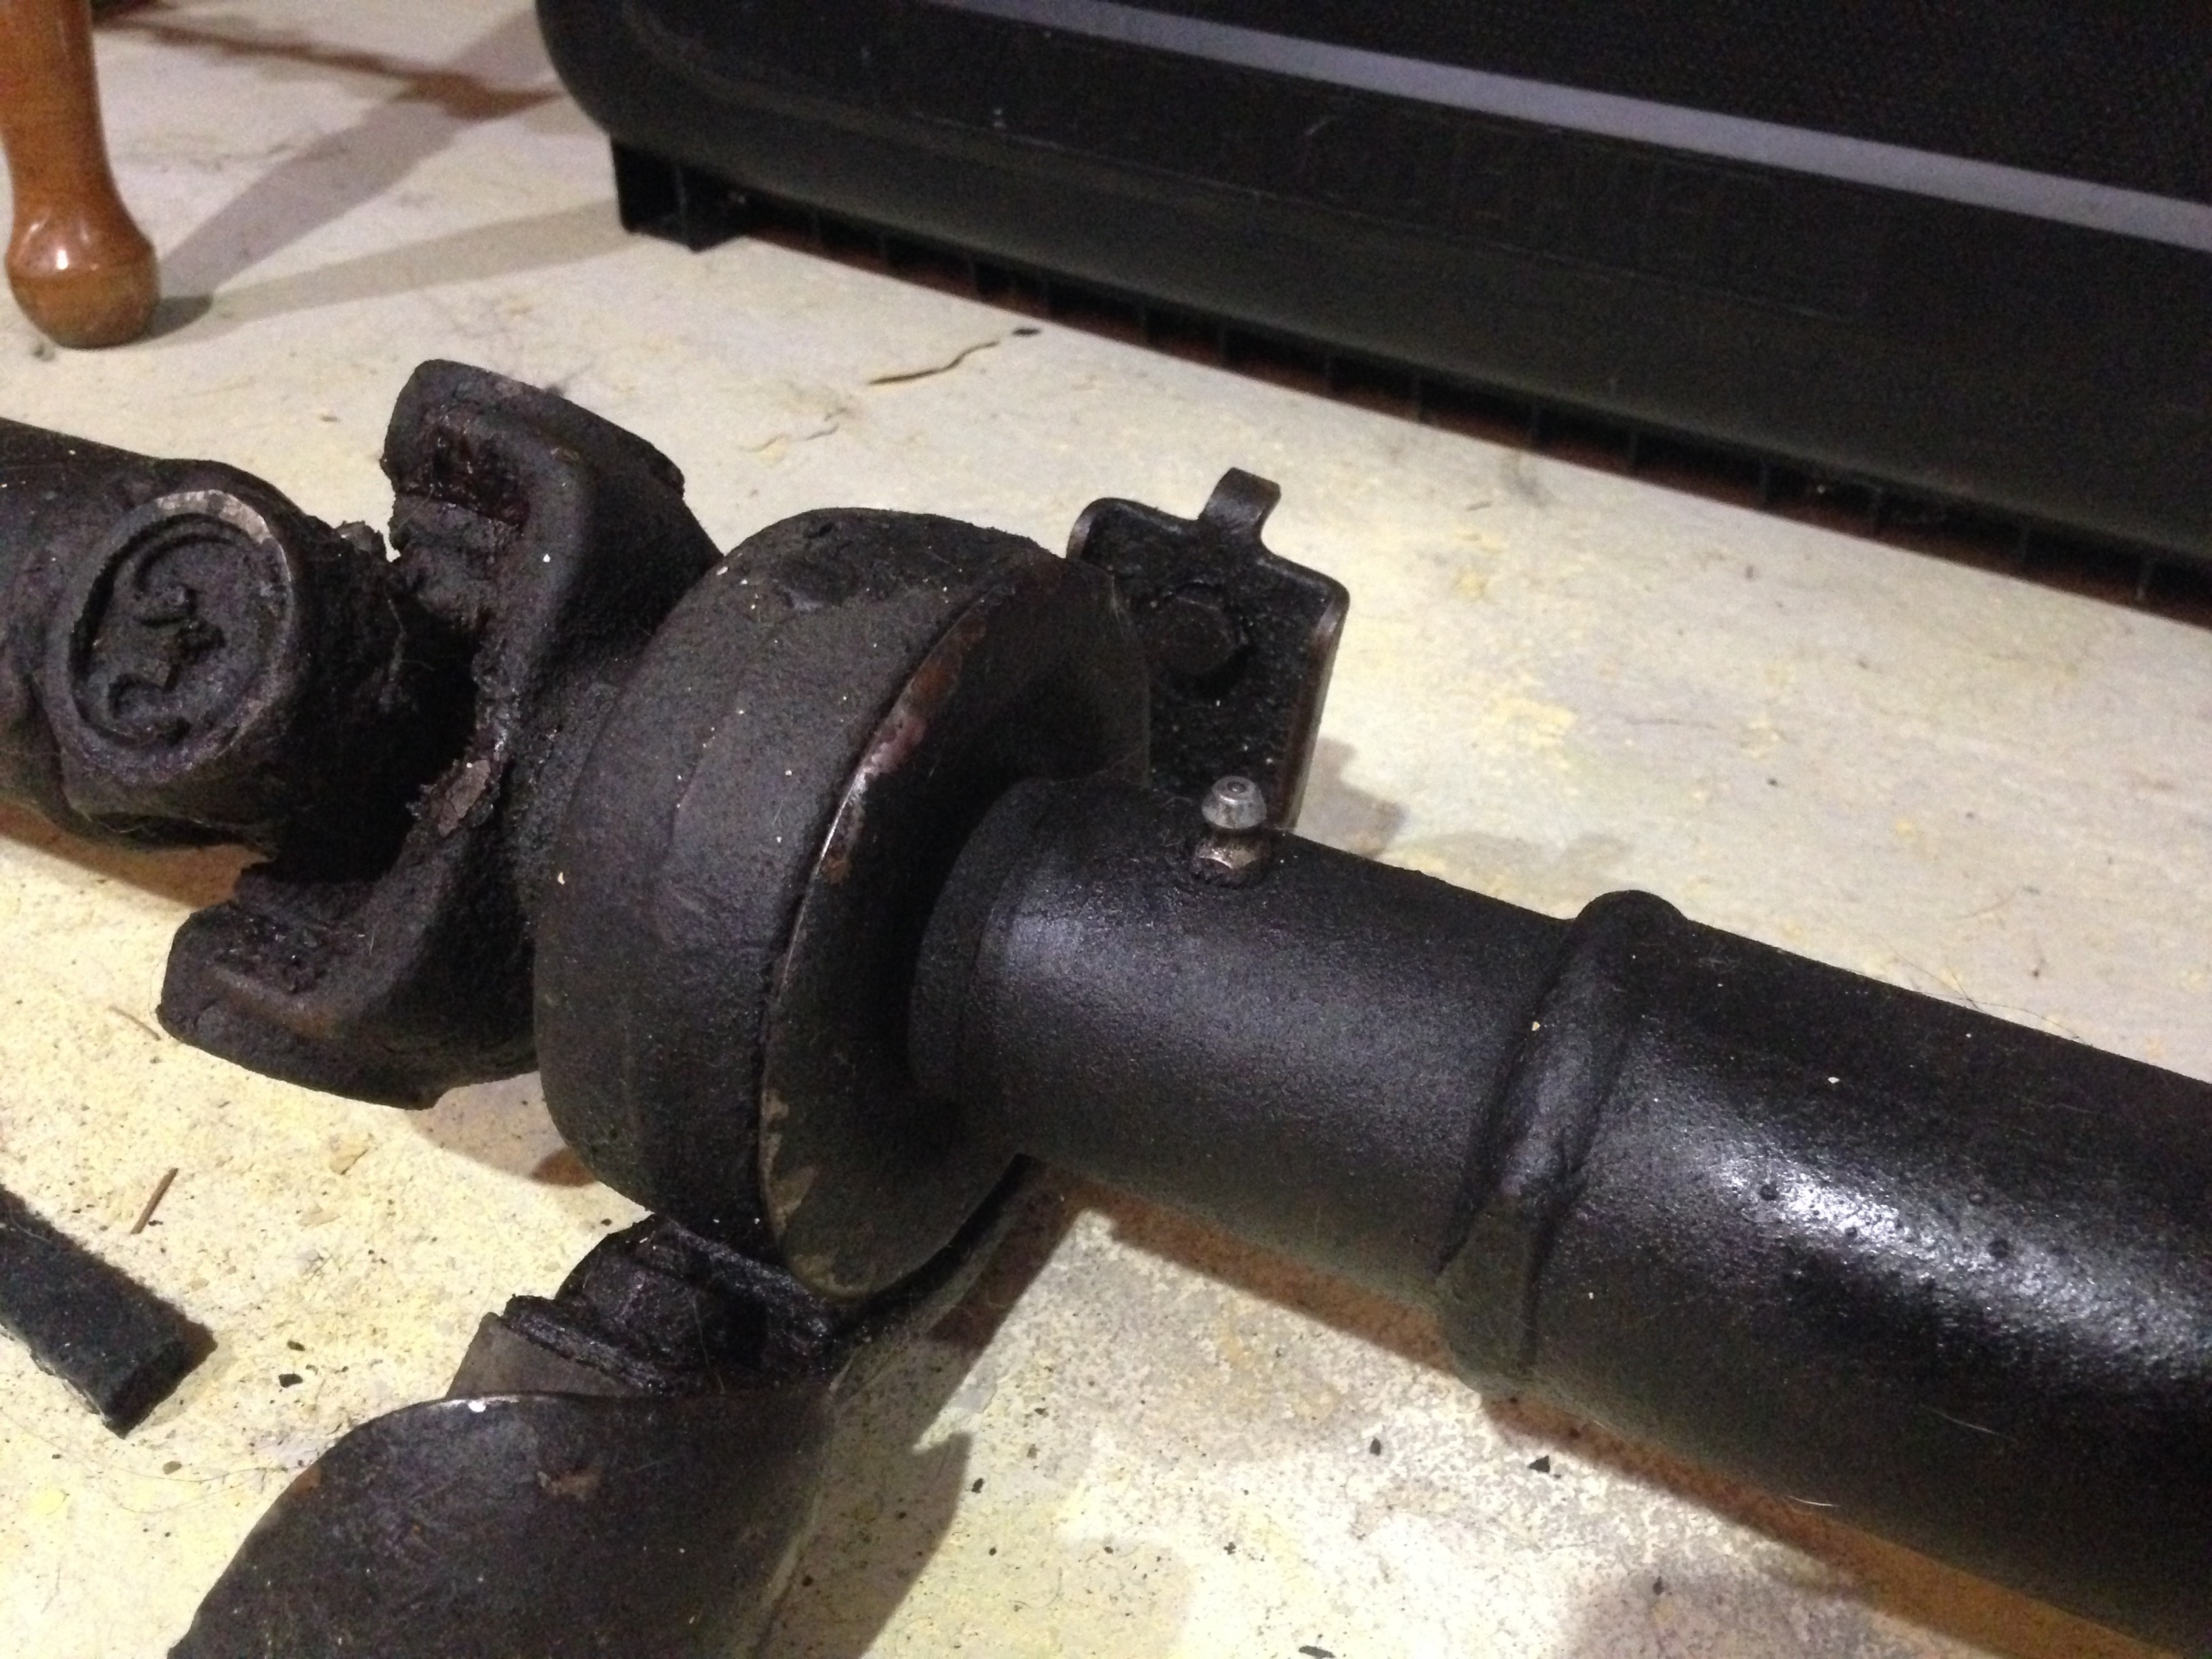
This is the central bearing for the driving shaft with what looks like a grease gun port. Knowing that you can grease the U-joints without removing them, does this one seen on the picture is used to grease the shaft itself or the central bearing? From what I see it should be used only to grease the shaft. Your answer on this is welcome as always.
Until next update, stay safe and have a good day.
Your Autistic Hudsonite,
Max
0 -
Greases the splined shaft.
0 -
Update of April 13th:
Hello fellow Hudsonites,
It's been a while since the last update, but I took the time to tidy things up before making the final tests for Molly's transmission fix.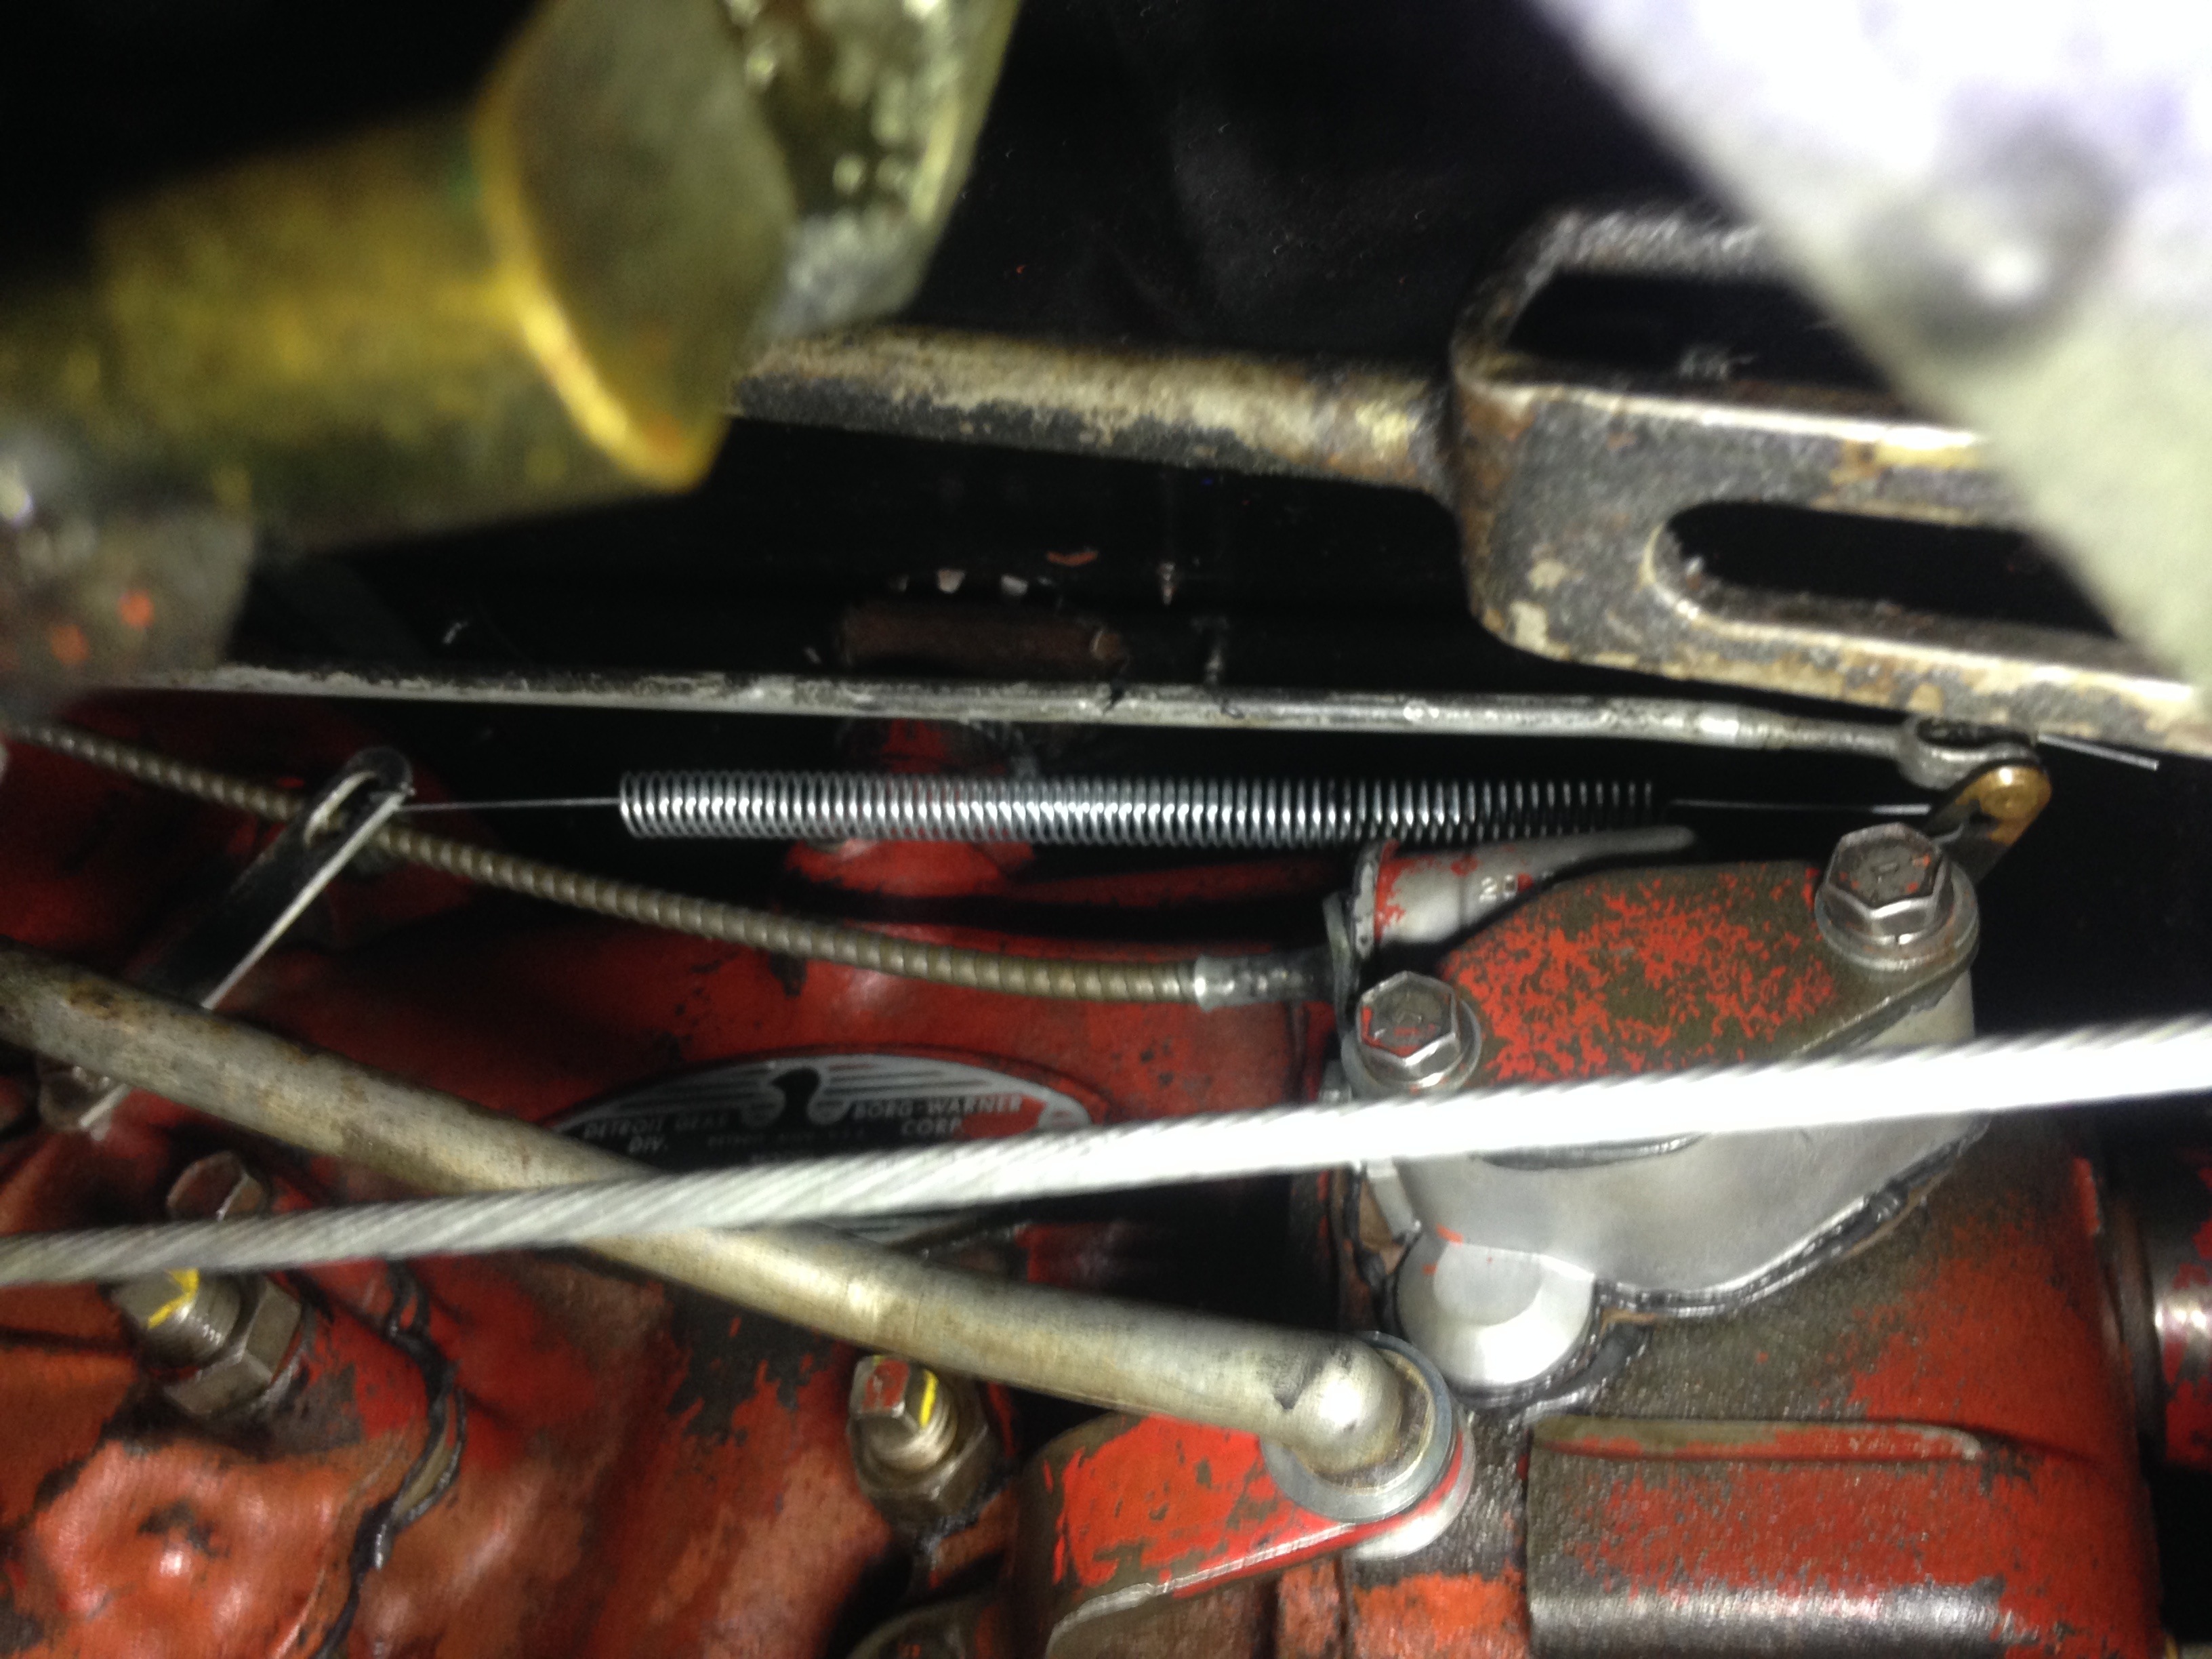
Starting underneath the car, I may have figured out where the spring goes on the tranny. I'll still keep an eye on it if the transmission seems to not function as it should be.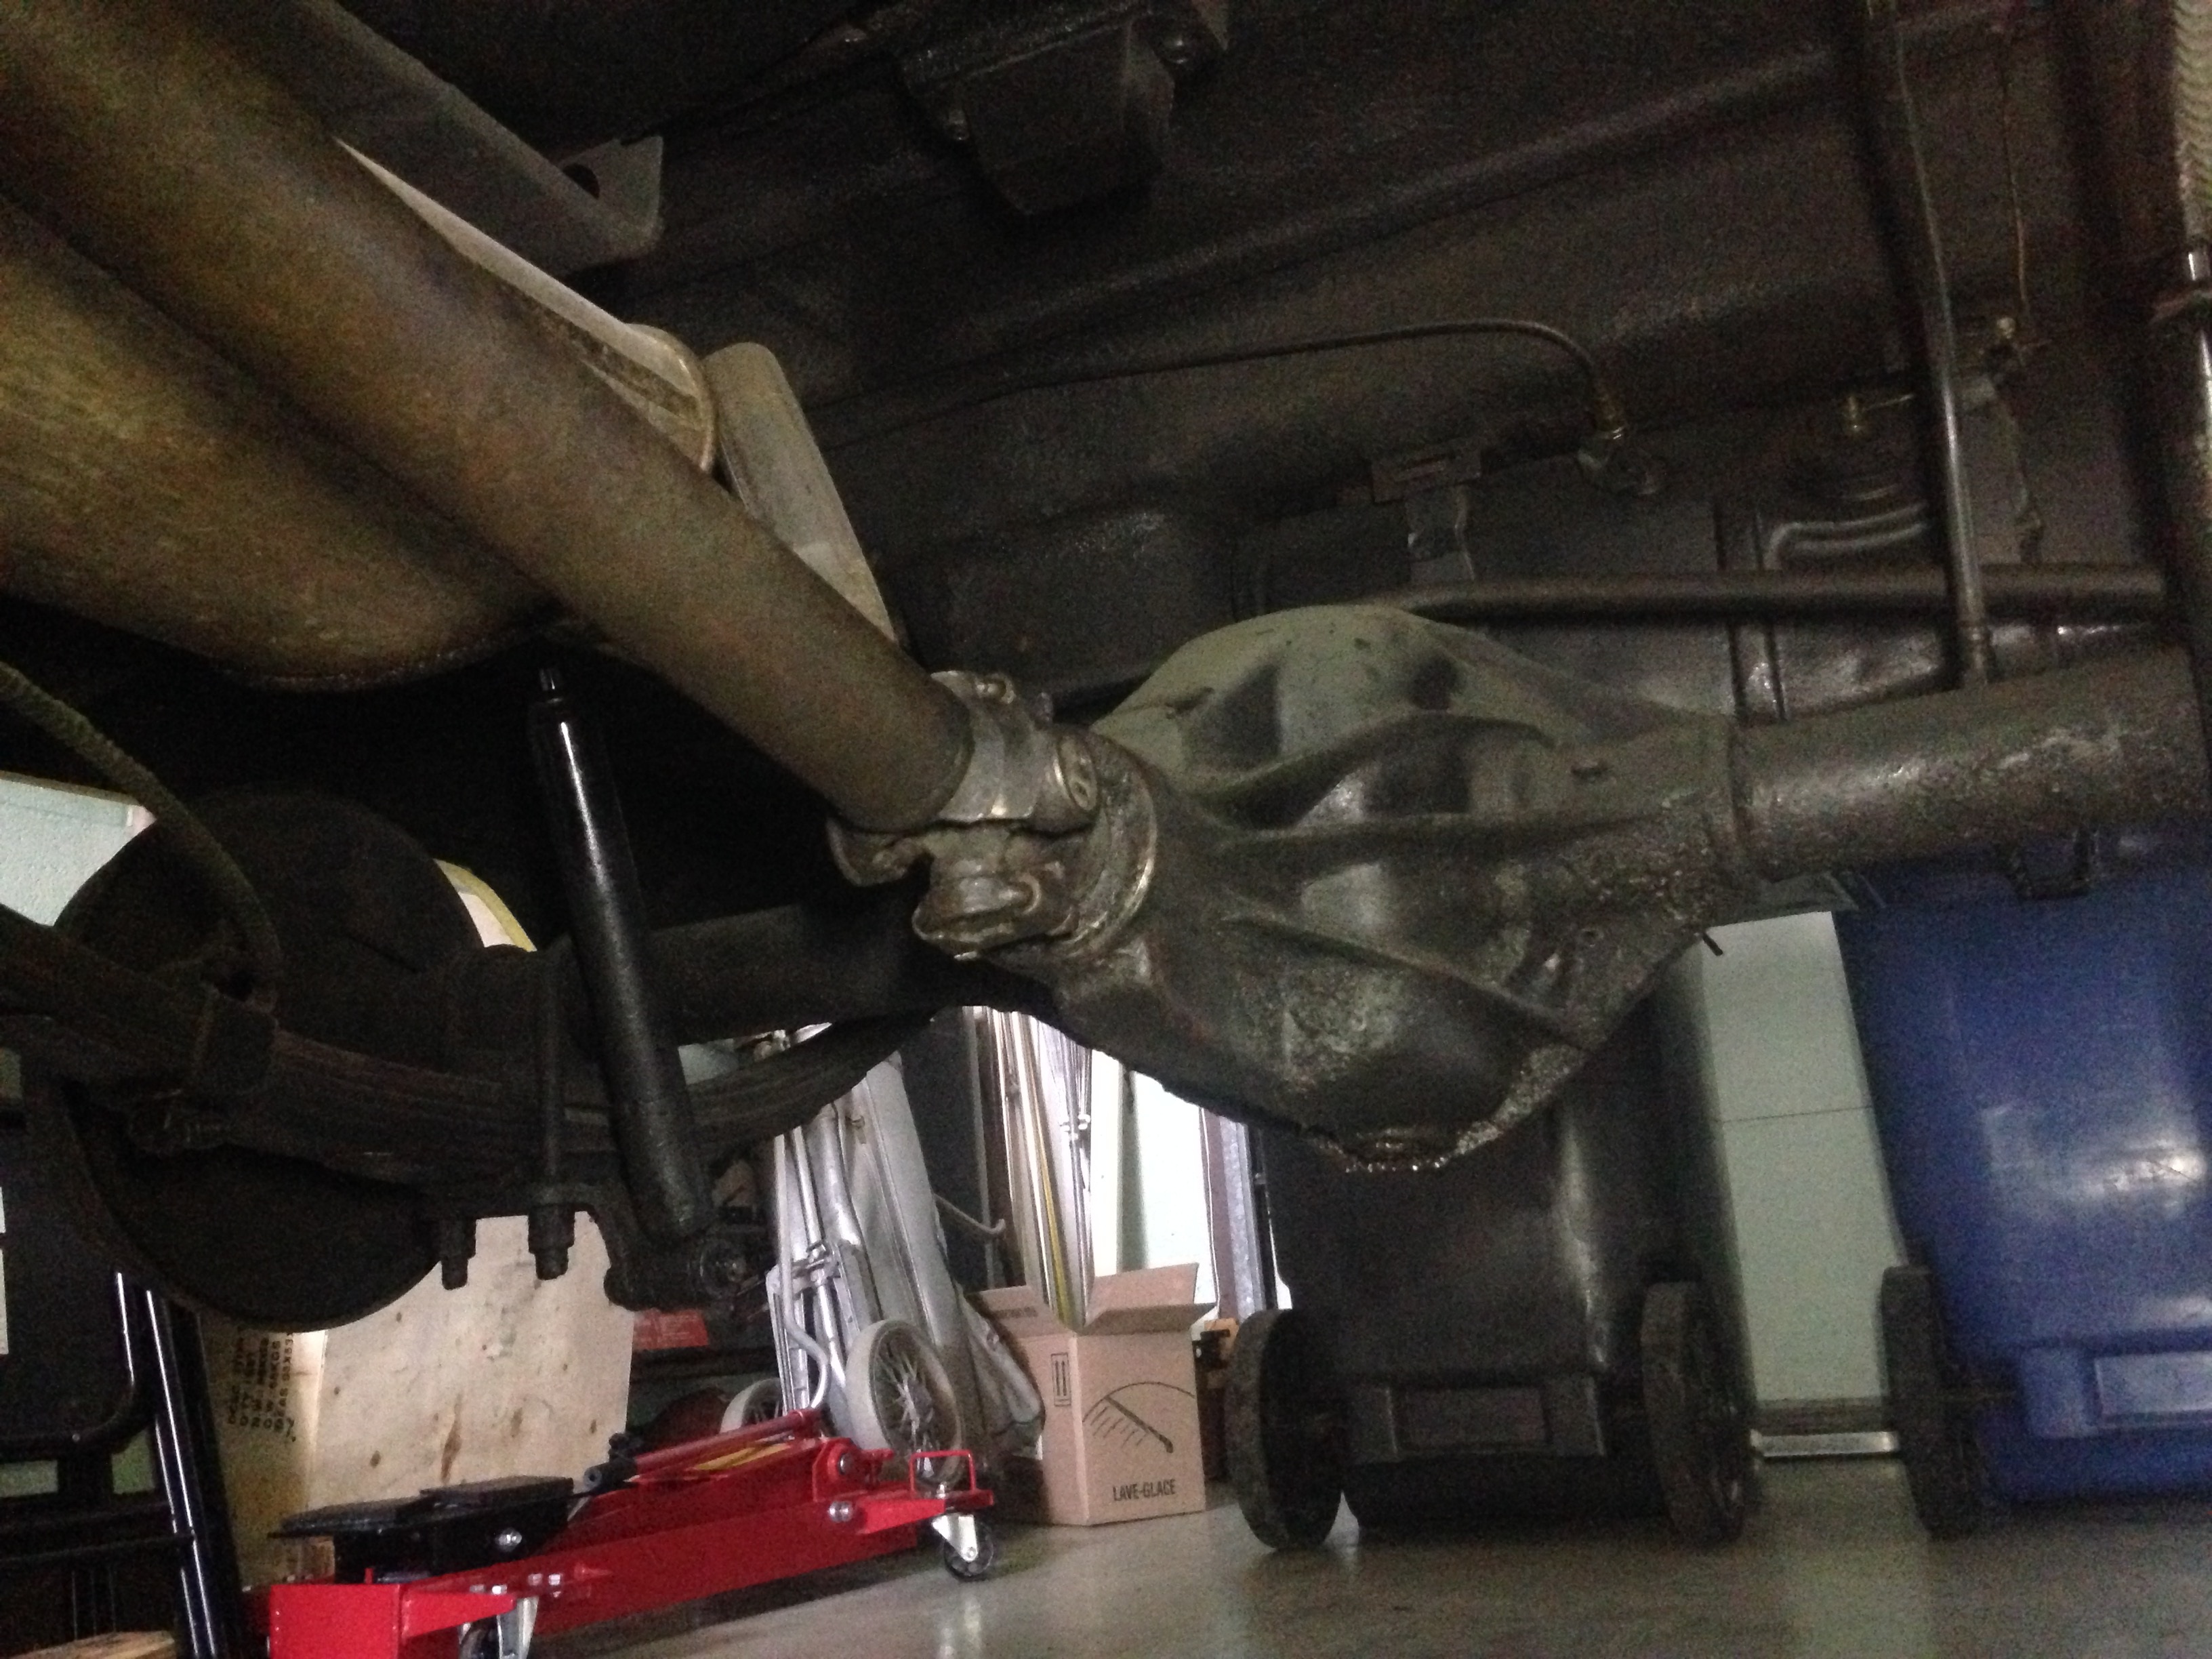
The main shaft is reinstalled at its place,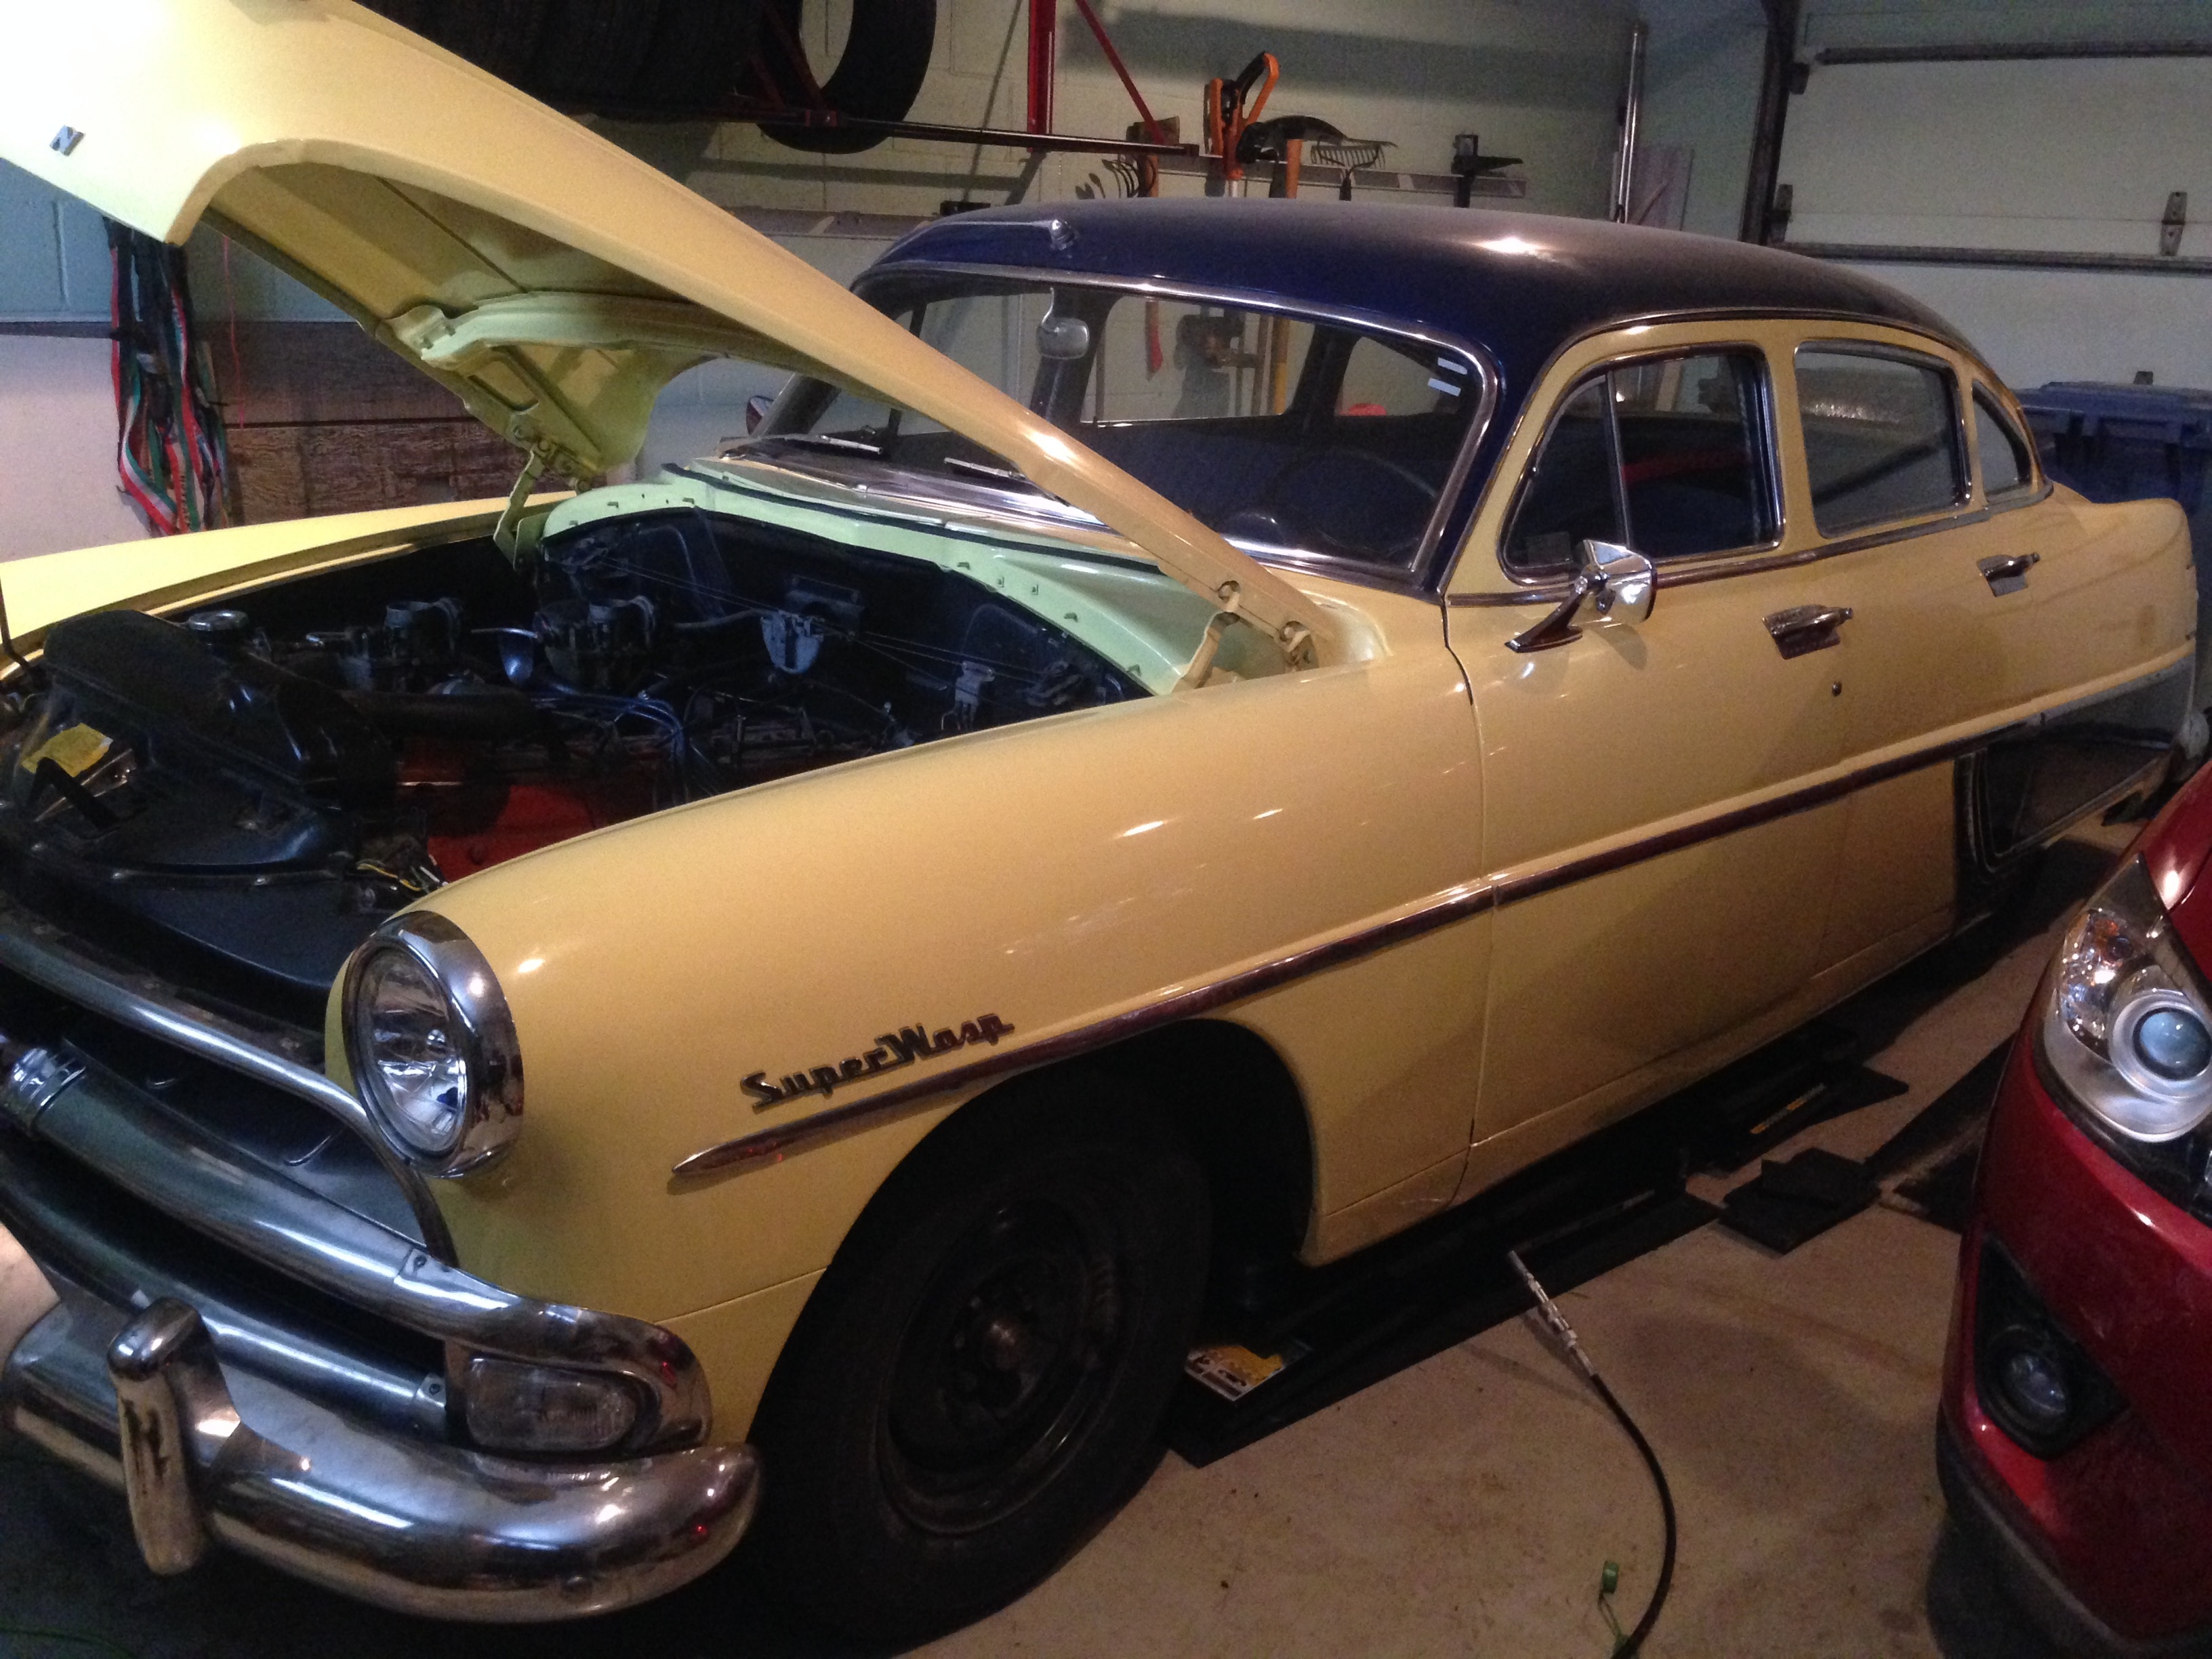 the wheels are put back and Molly has been put back down on the ground. It feels good to see Molly that way, but I I've observed something that looks odd to me...
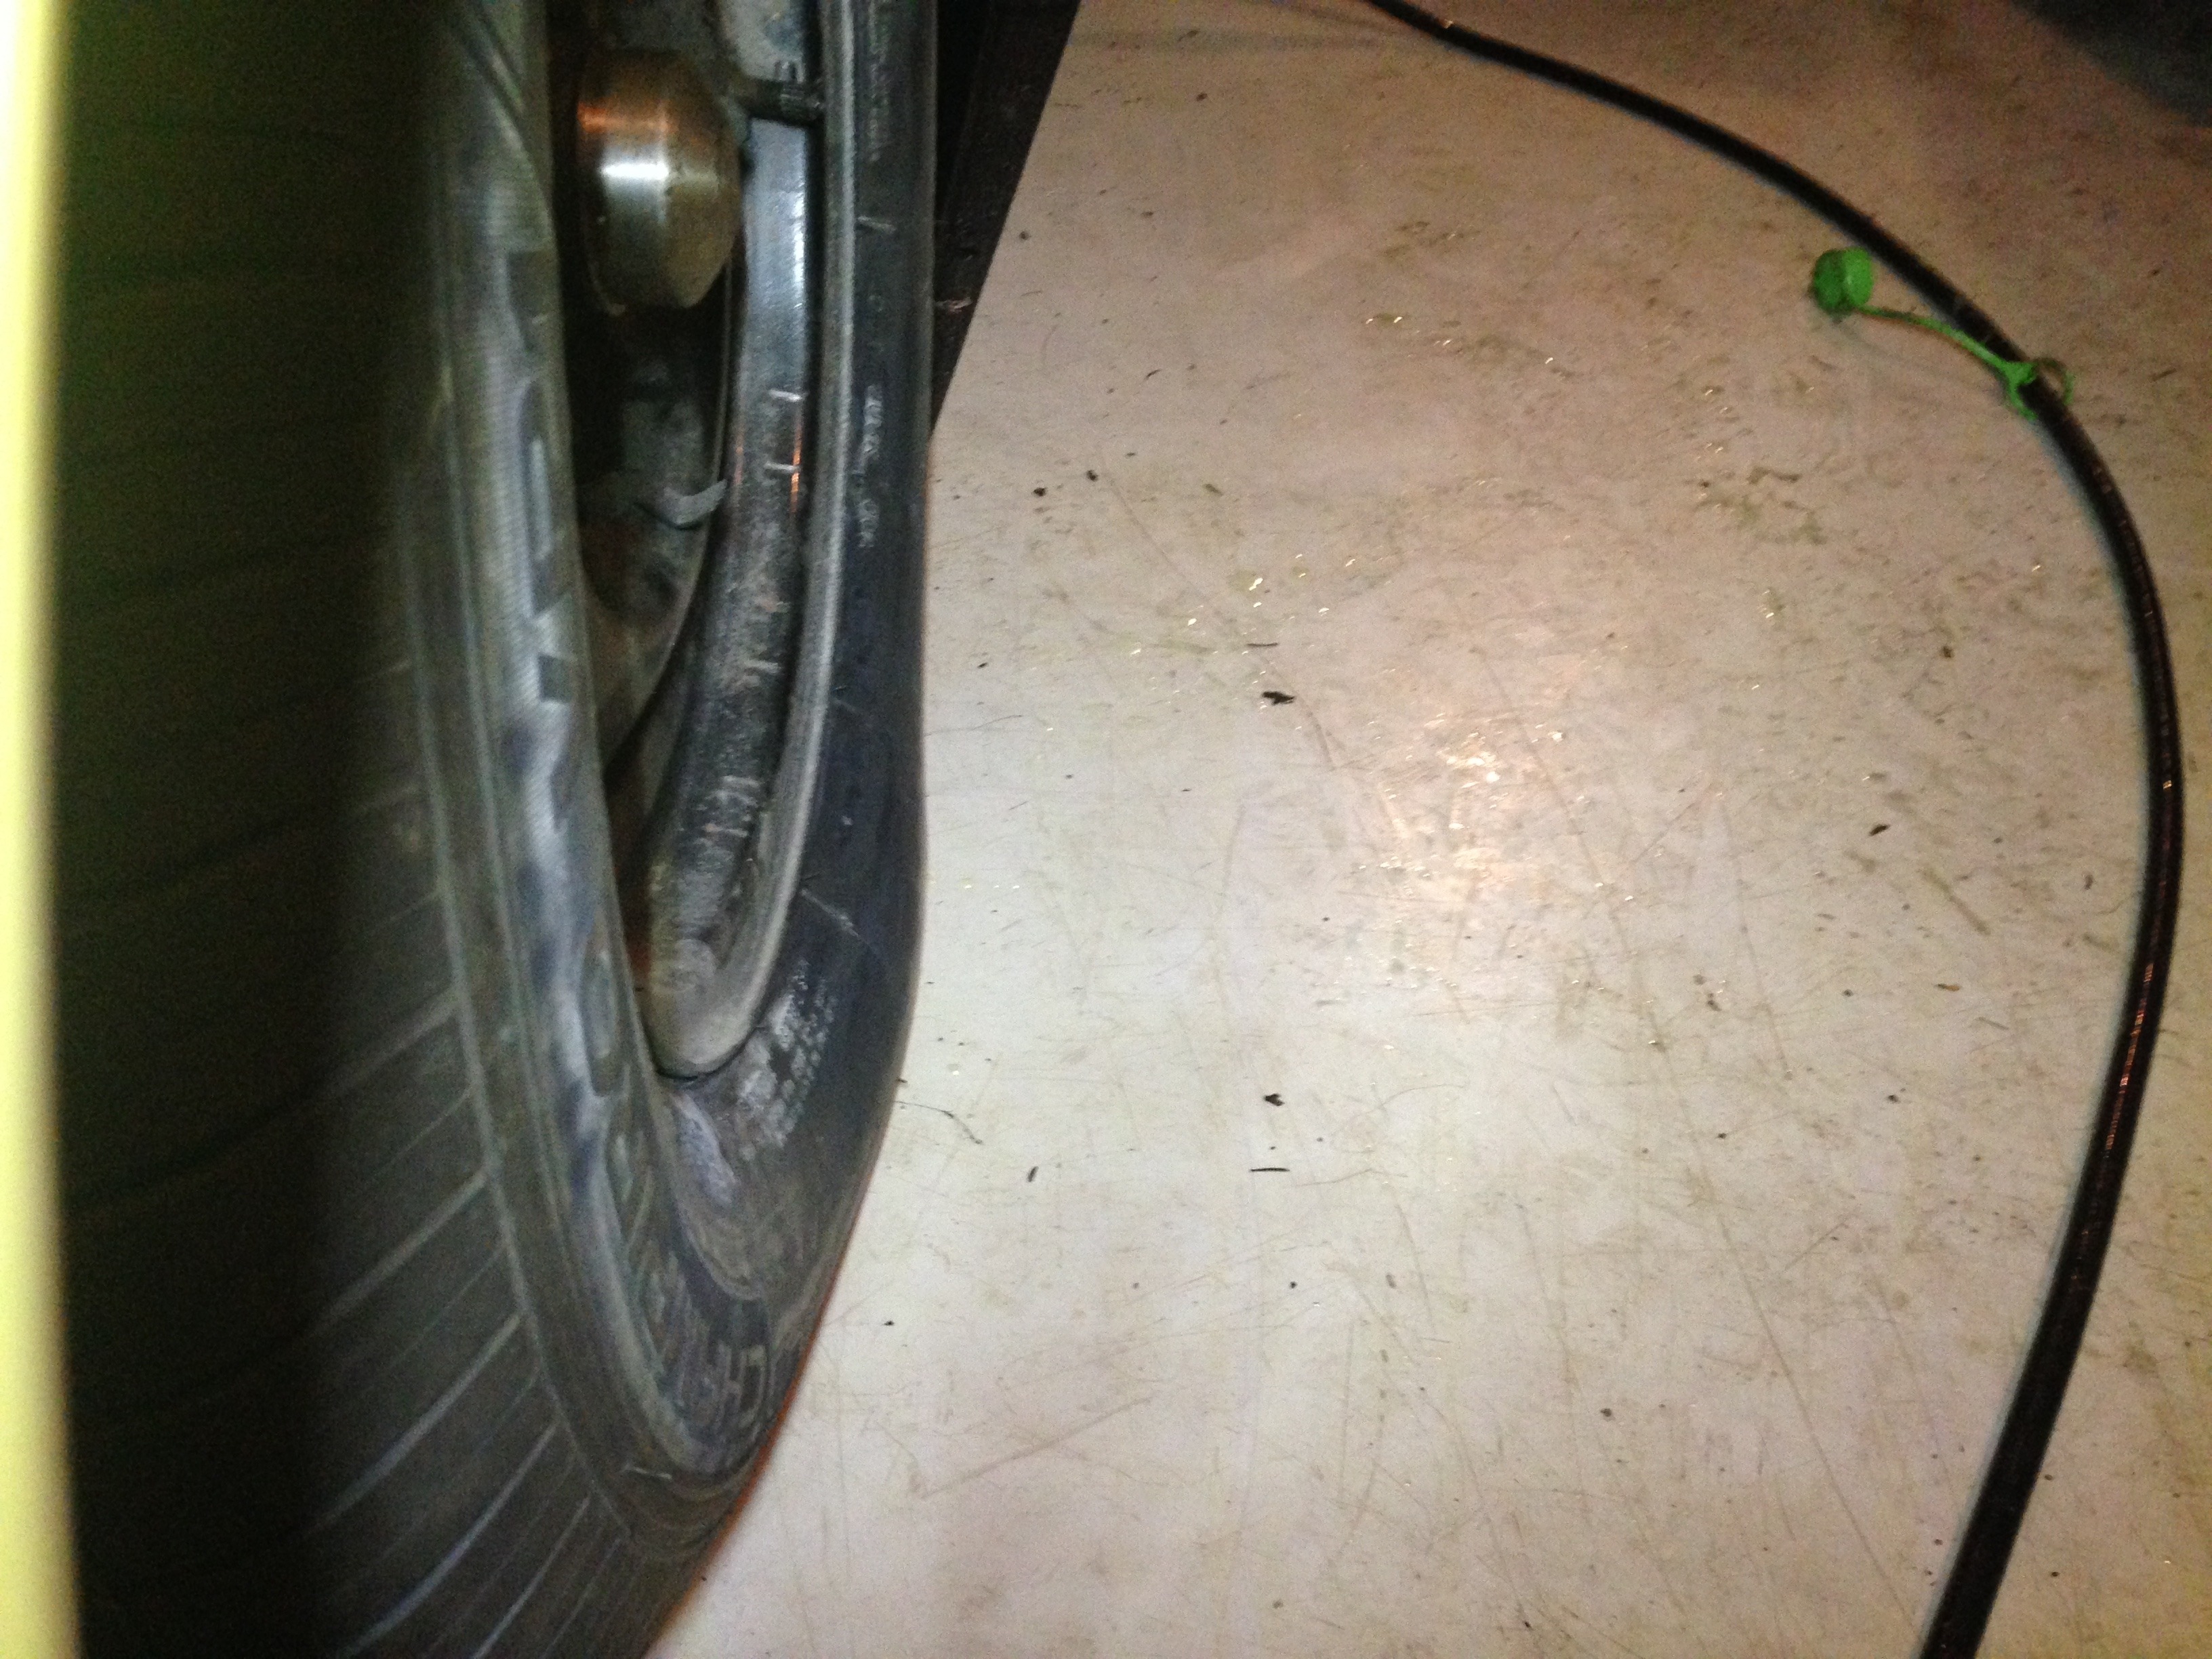
As seen on this picture, the tires look like they don't have enough air inside even though I've put the recommended air pressure on them ( 26 psi in front and 24 psi in the back ). It might also be just me being worrying for nothing but if it's not the case feel free to tell me the proper pressure for those tires.
During that time I've done the engine oil change too for good measure and habit.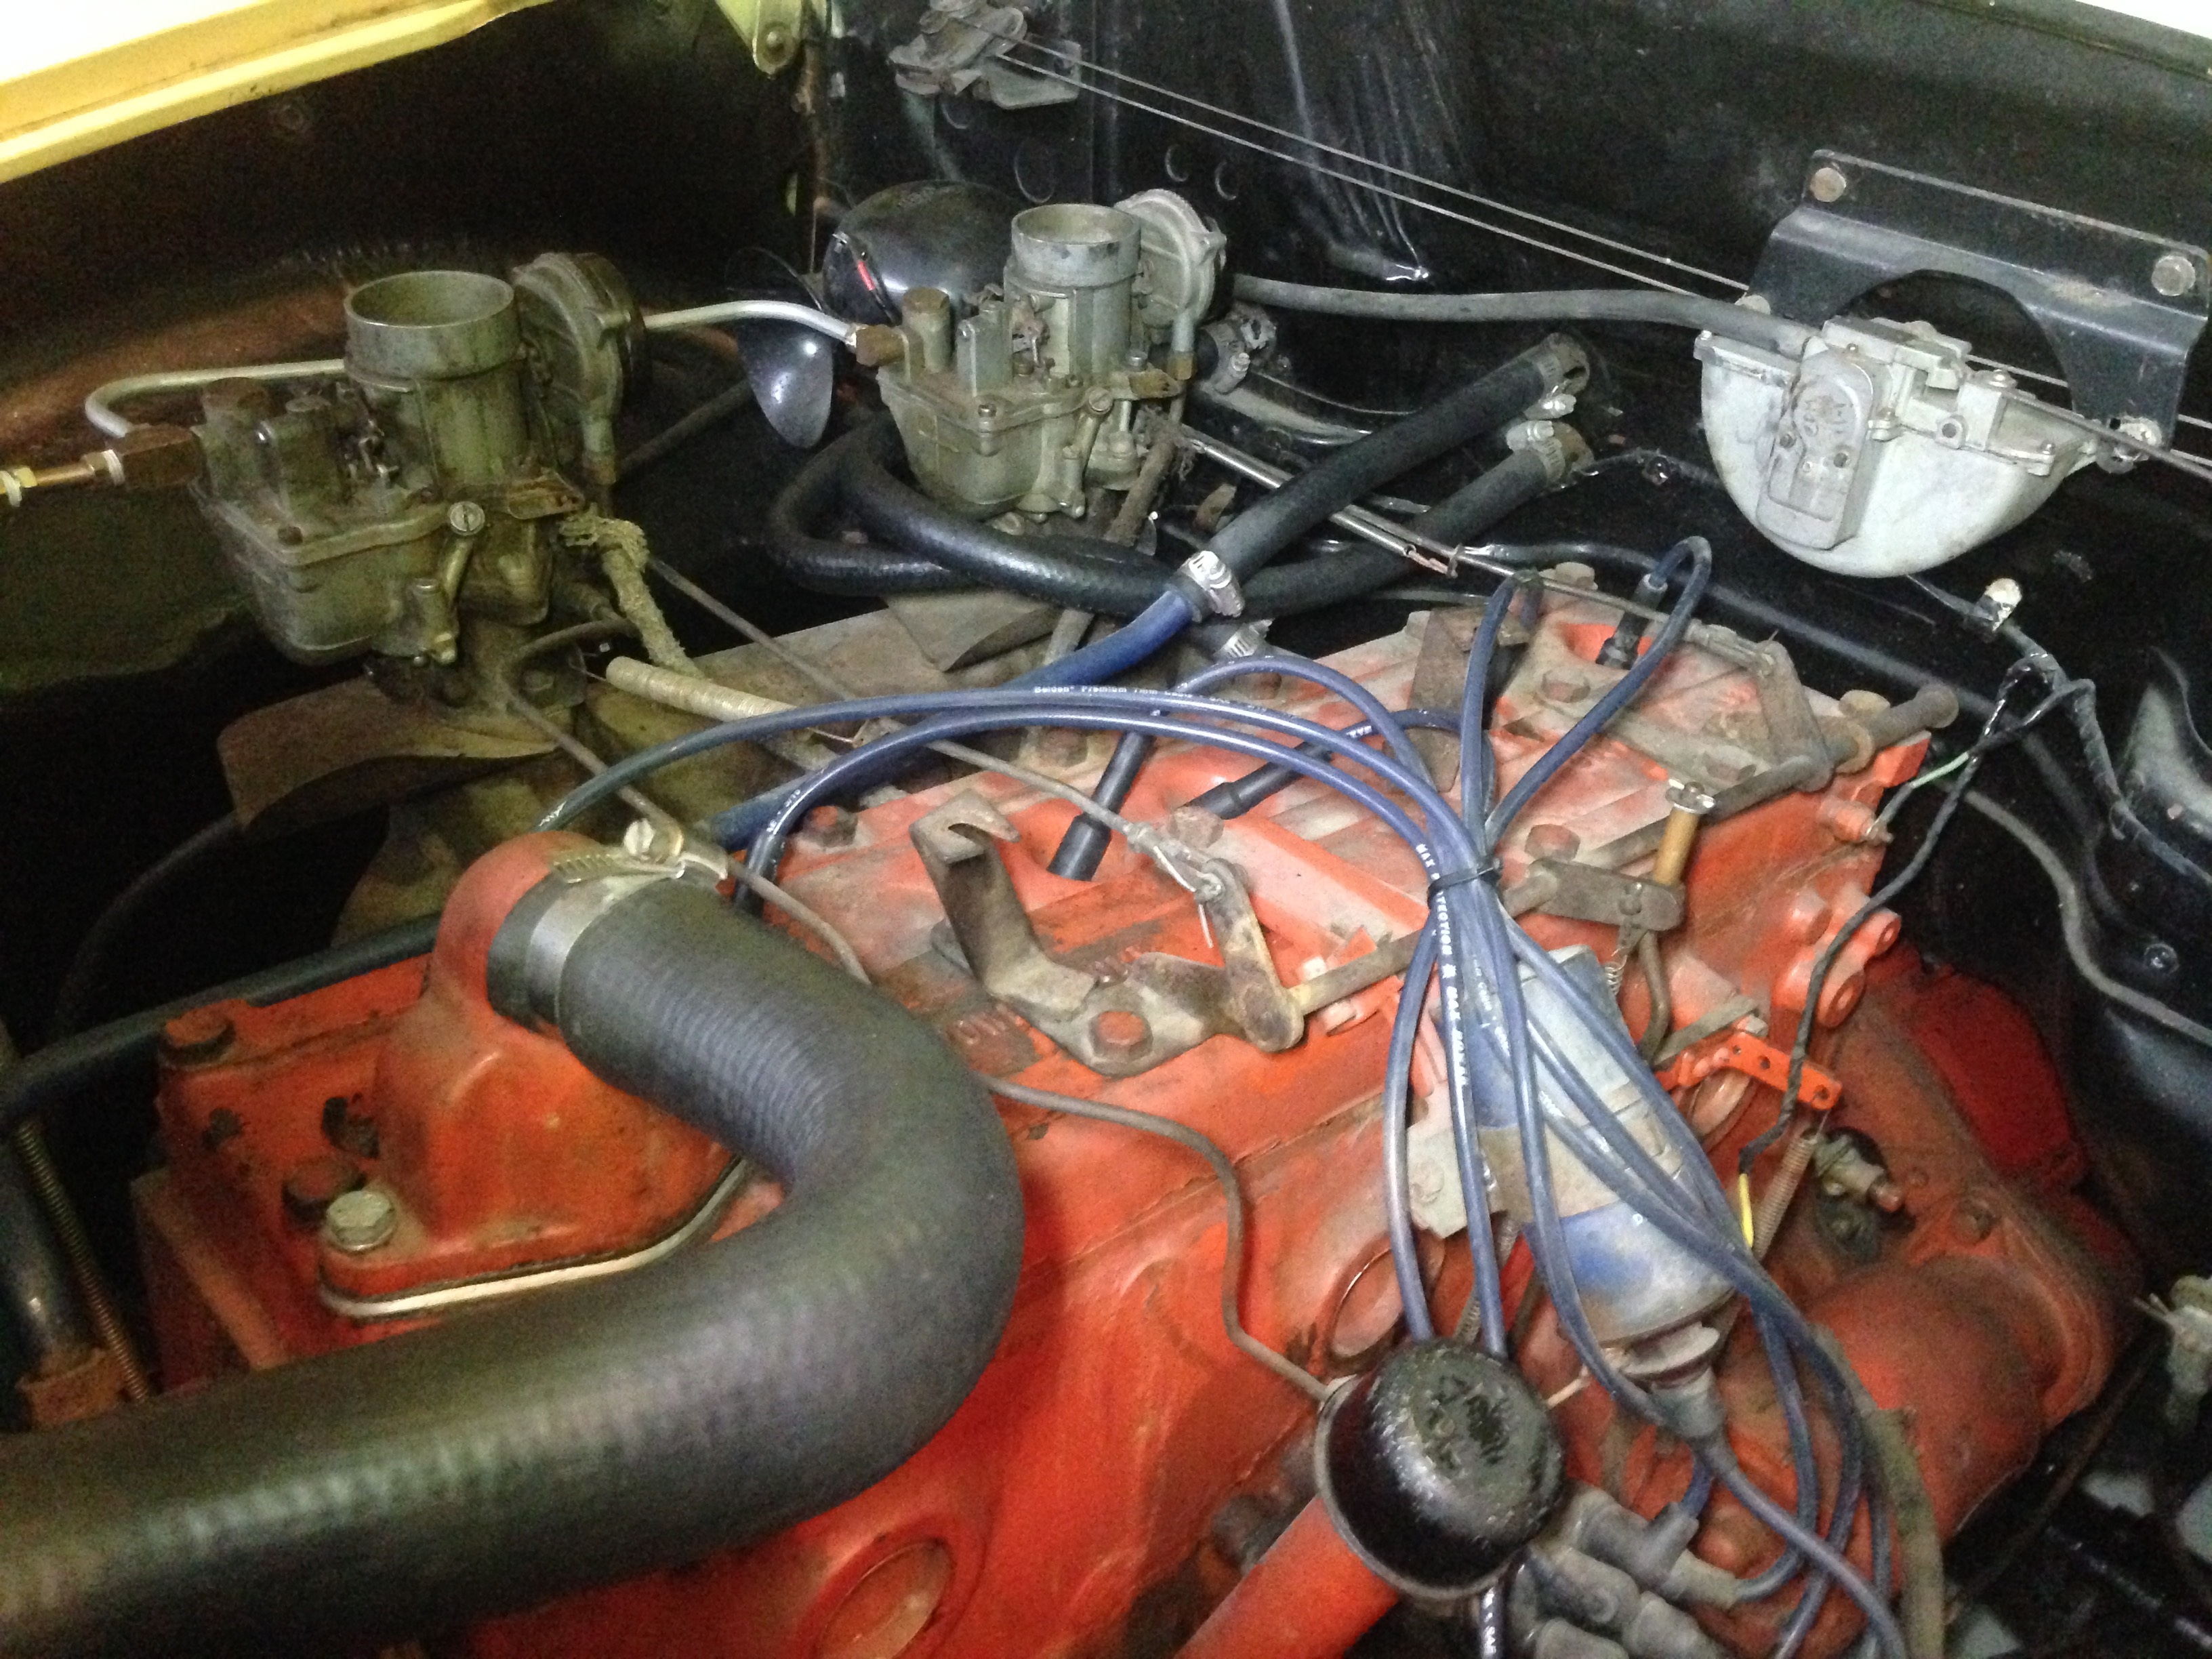
When I've stored Molly for winter and started her tranny's repair, the engine oil has gone down back to the oil pan as the engine hasn't ran since that time. While I was changing the oil, I wondering if there is a way to bring the oil inside the engine, thus trying to prevent any internal damages to the engine.
Is it possible to work the engine oil pump manually or do I just crank the engine through the starter? Your answers will be appreciated.
Last subject of this update is a side project: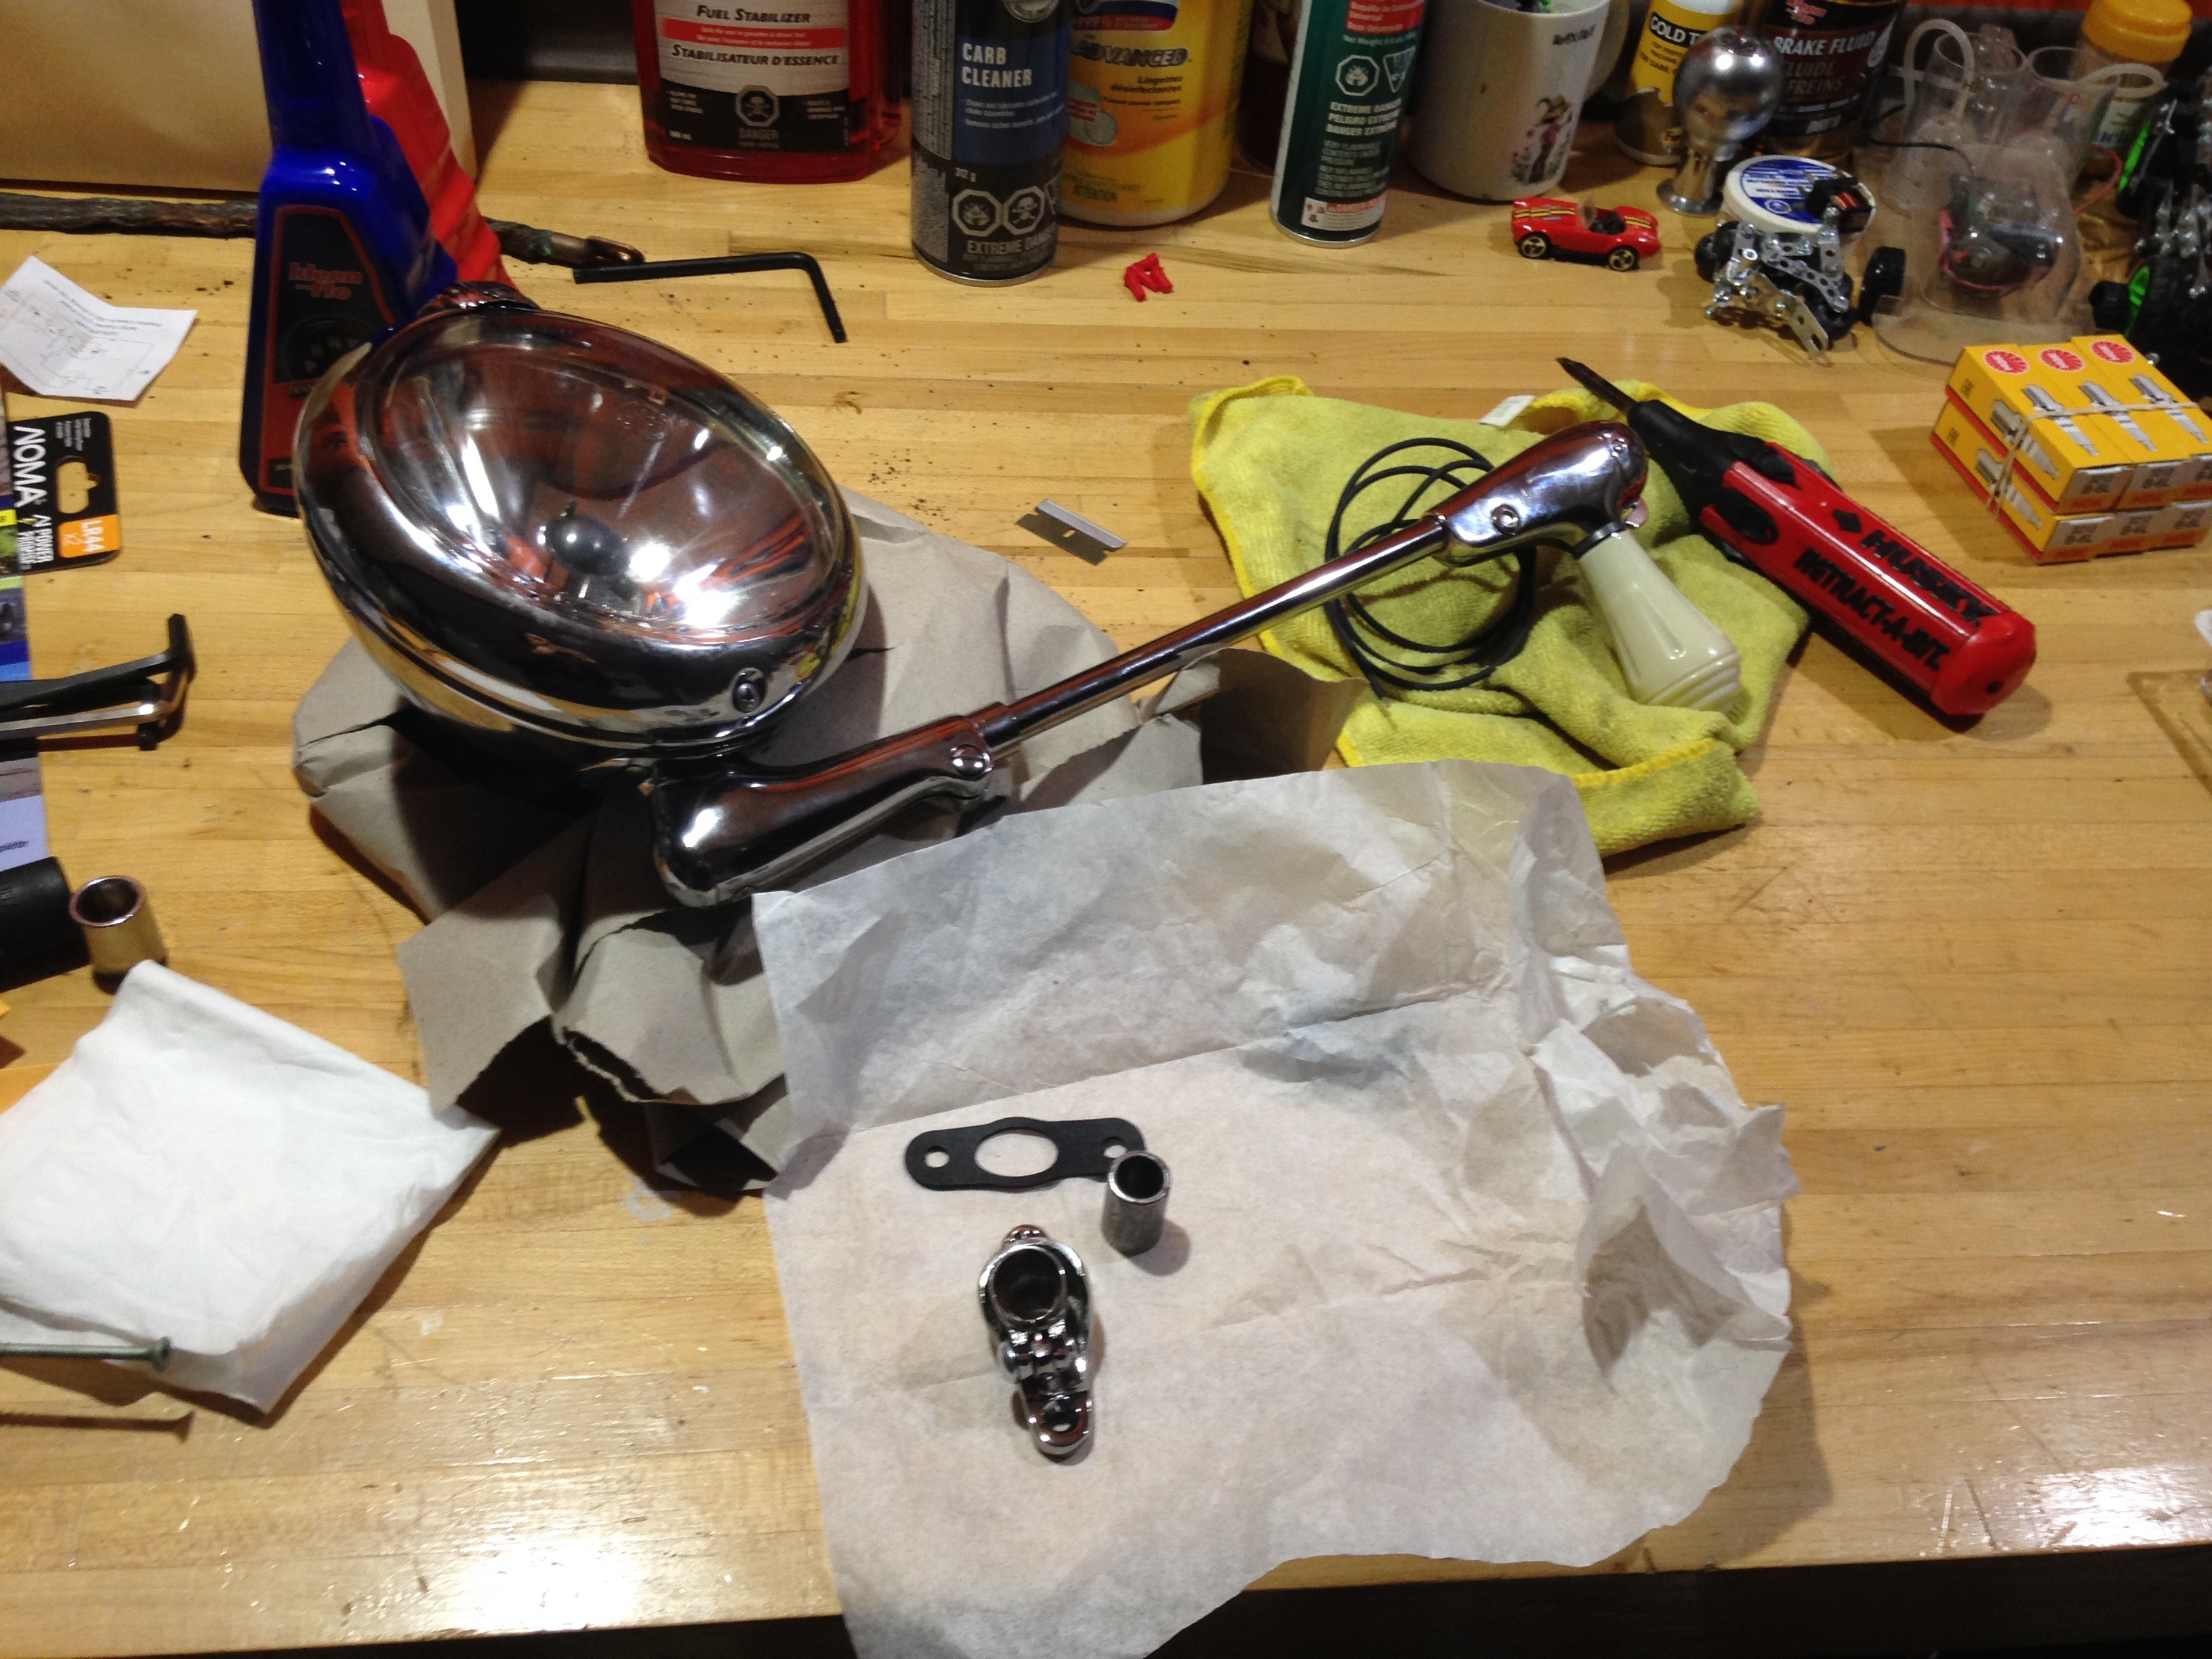
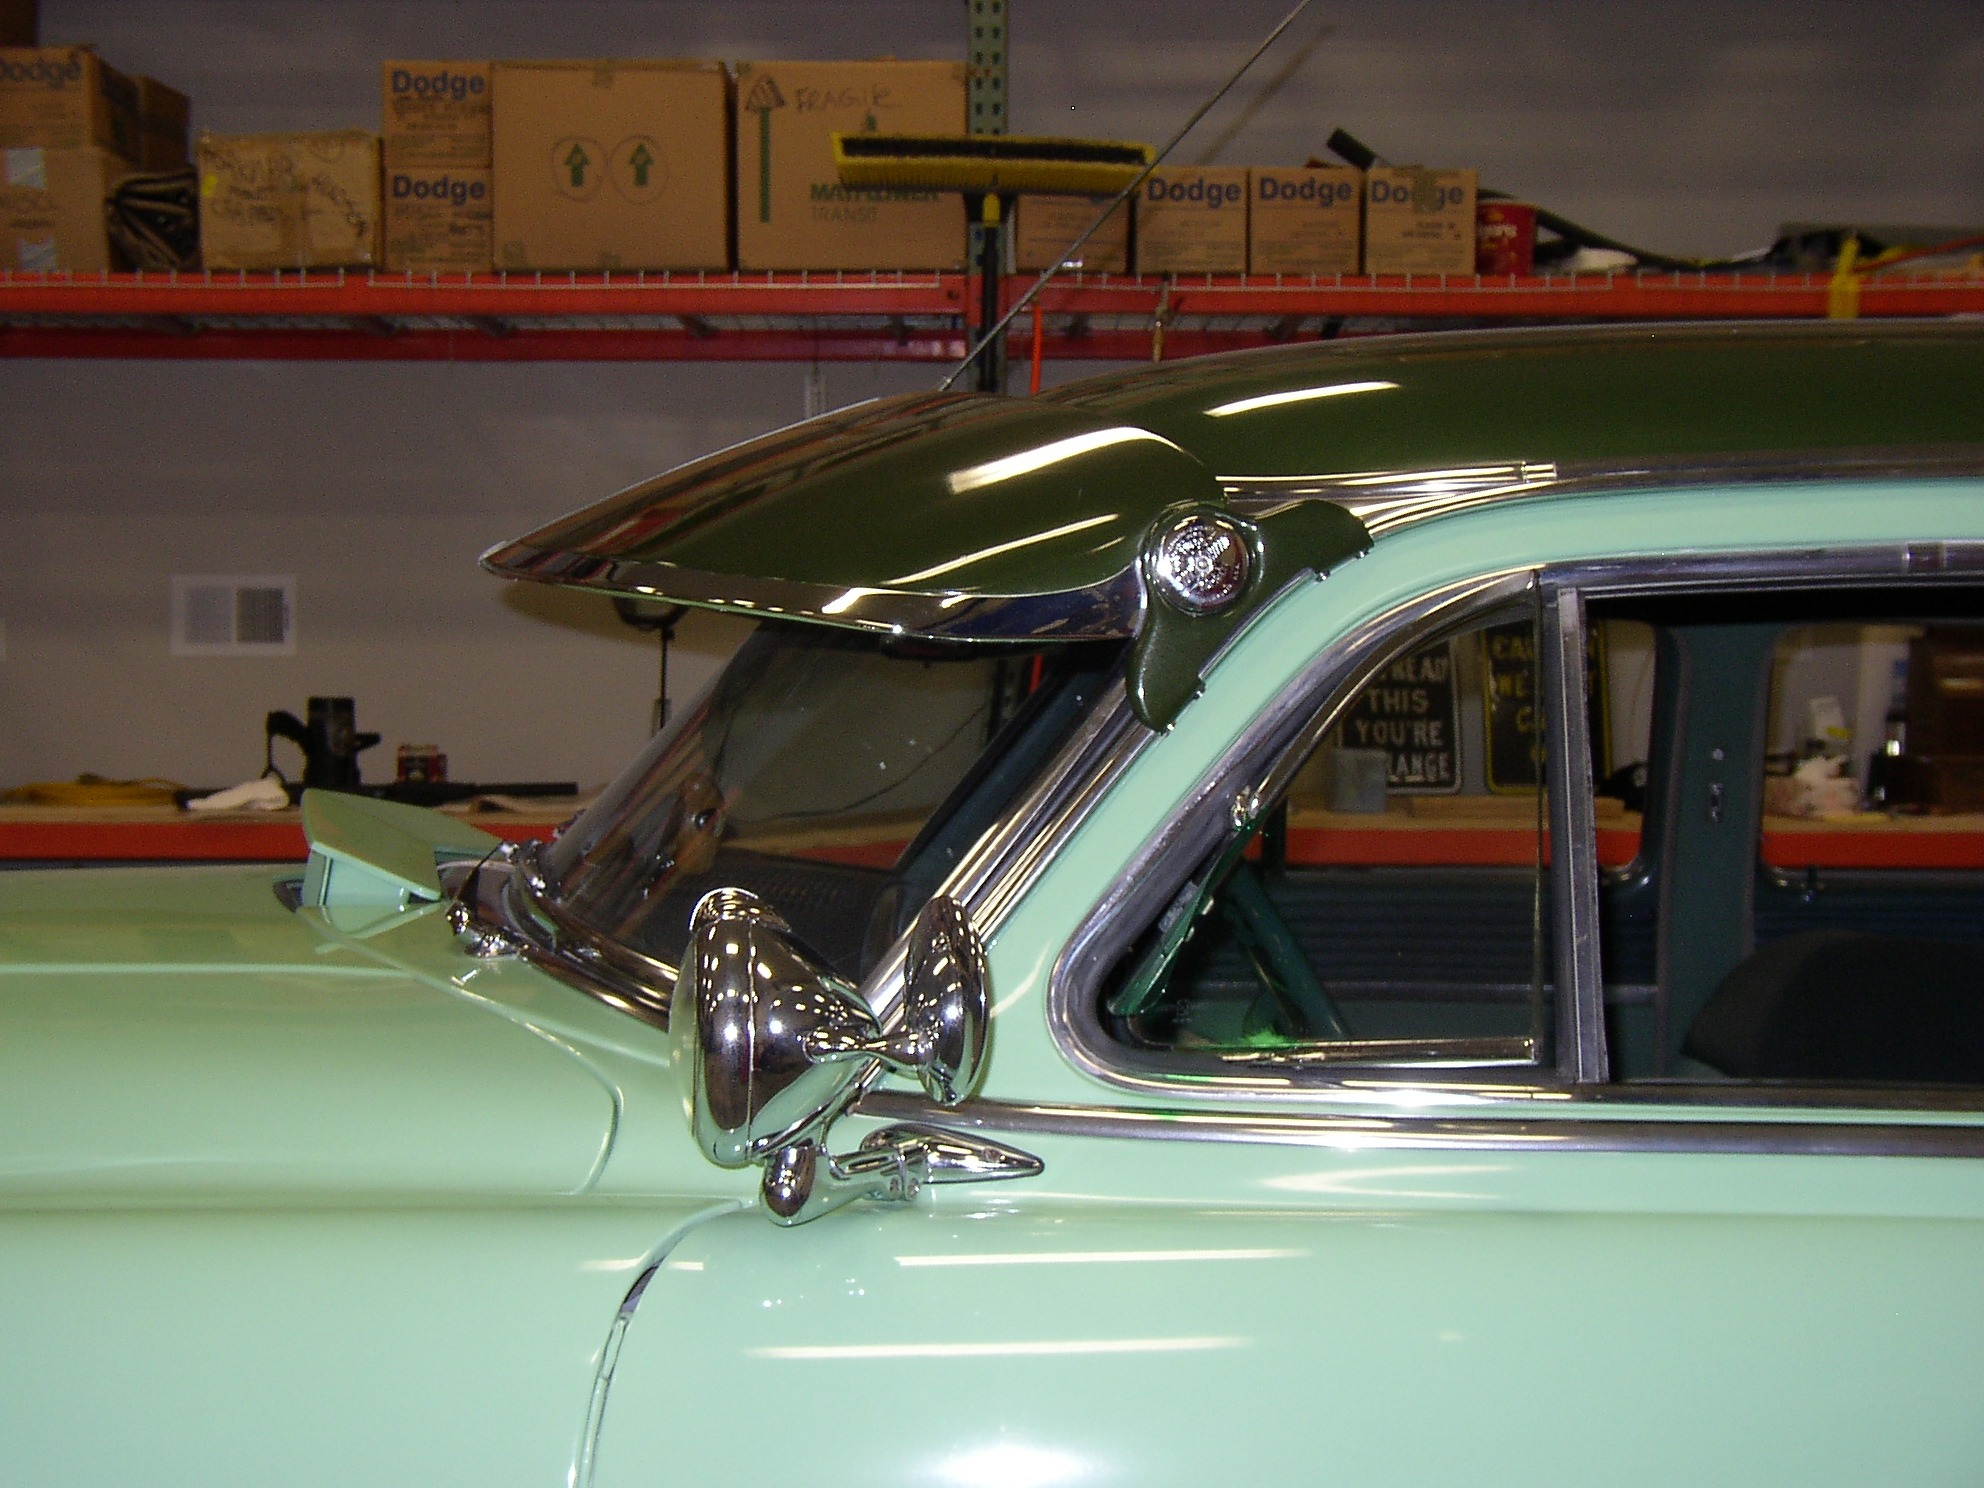
As mentioned on the H.E.T. Club's Facebook page, I've bought myself a vintage spotlight for Molly and I have to say, I'm getting excited to install it on the vehicule. But first, I needed to know where to put it.
According to Unity Light, the spotlight is supposed to be installed on the car's door, but unfortunately, they seem to not have the template pattern anymore on their website ( the pattern number is B-246 if I remember ). If some of you knows where it goes on the door or does still have the said template pattern, please let me know. I just want to make sure I don't screw things up while installing it.
I'll be giving you inputs for the final tests for the tranny as soon as possible.
Unil next time!
Your Autistic Hudsonite,
Max
0 -
 Max,
Max,
I know have a template from when I installed my Unity spotlight, I'll go find it tomorrow.
John Forkner0 -
Max,
I made a copy of the template next to a ruler so you can make sure it prints out to scale. I'll send it to you in an email.
Hope this helps,
John Forkner
0 -
Update of April 19th:
Hello fellow Hudsonites,
Yesterday was a great day as I finally to turn Molly's engine up for the transmission's final tests.
The good news are that the engine has started well even after nearly 6 months of inactivity and after filling the tranny's first 5 liters of fluid, no leak was seen under so far.
This is great news, but another problem still remain.
As I was trying to fill the tranny again with the engine running (Transmission and Torque Converter filling procedure), the transmission suddenly decided to shift into reverse by itself without me touching the controls. Thankfully, no harm was done and nothing got broken.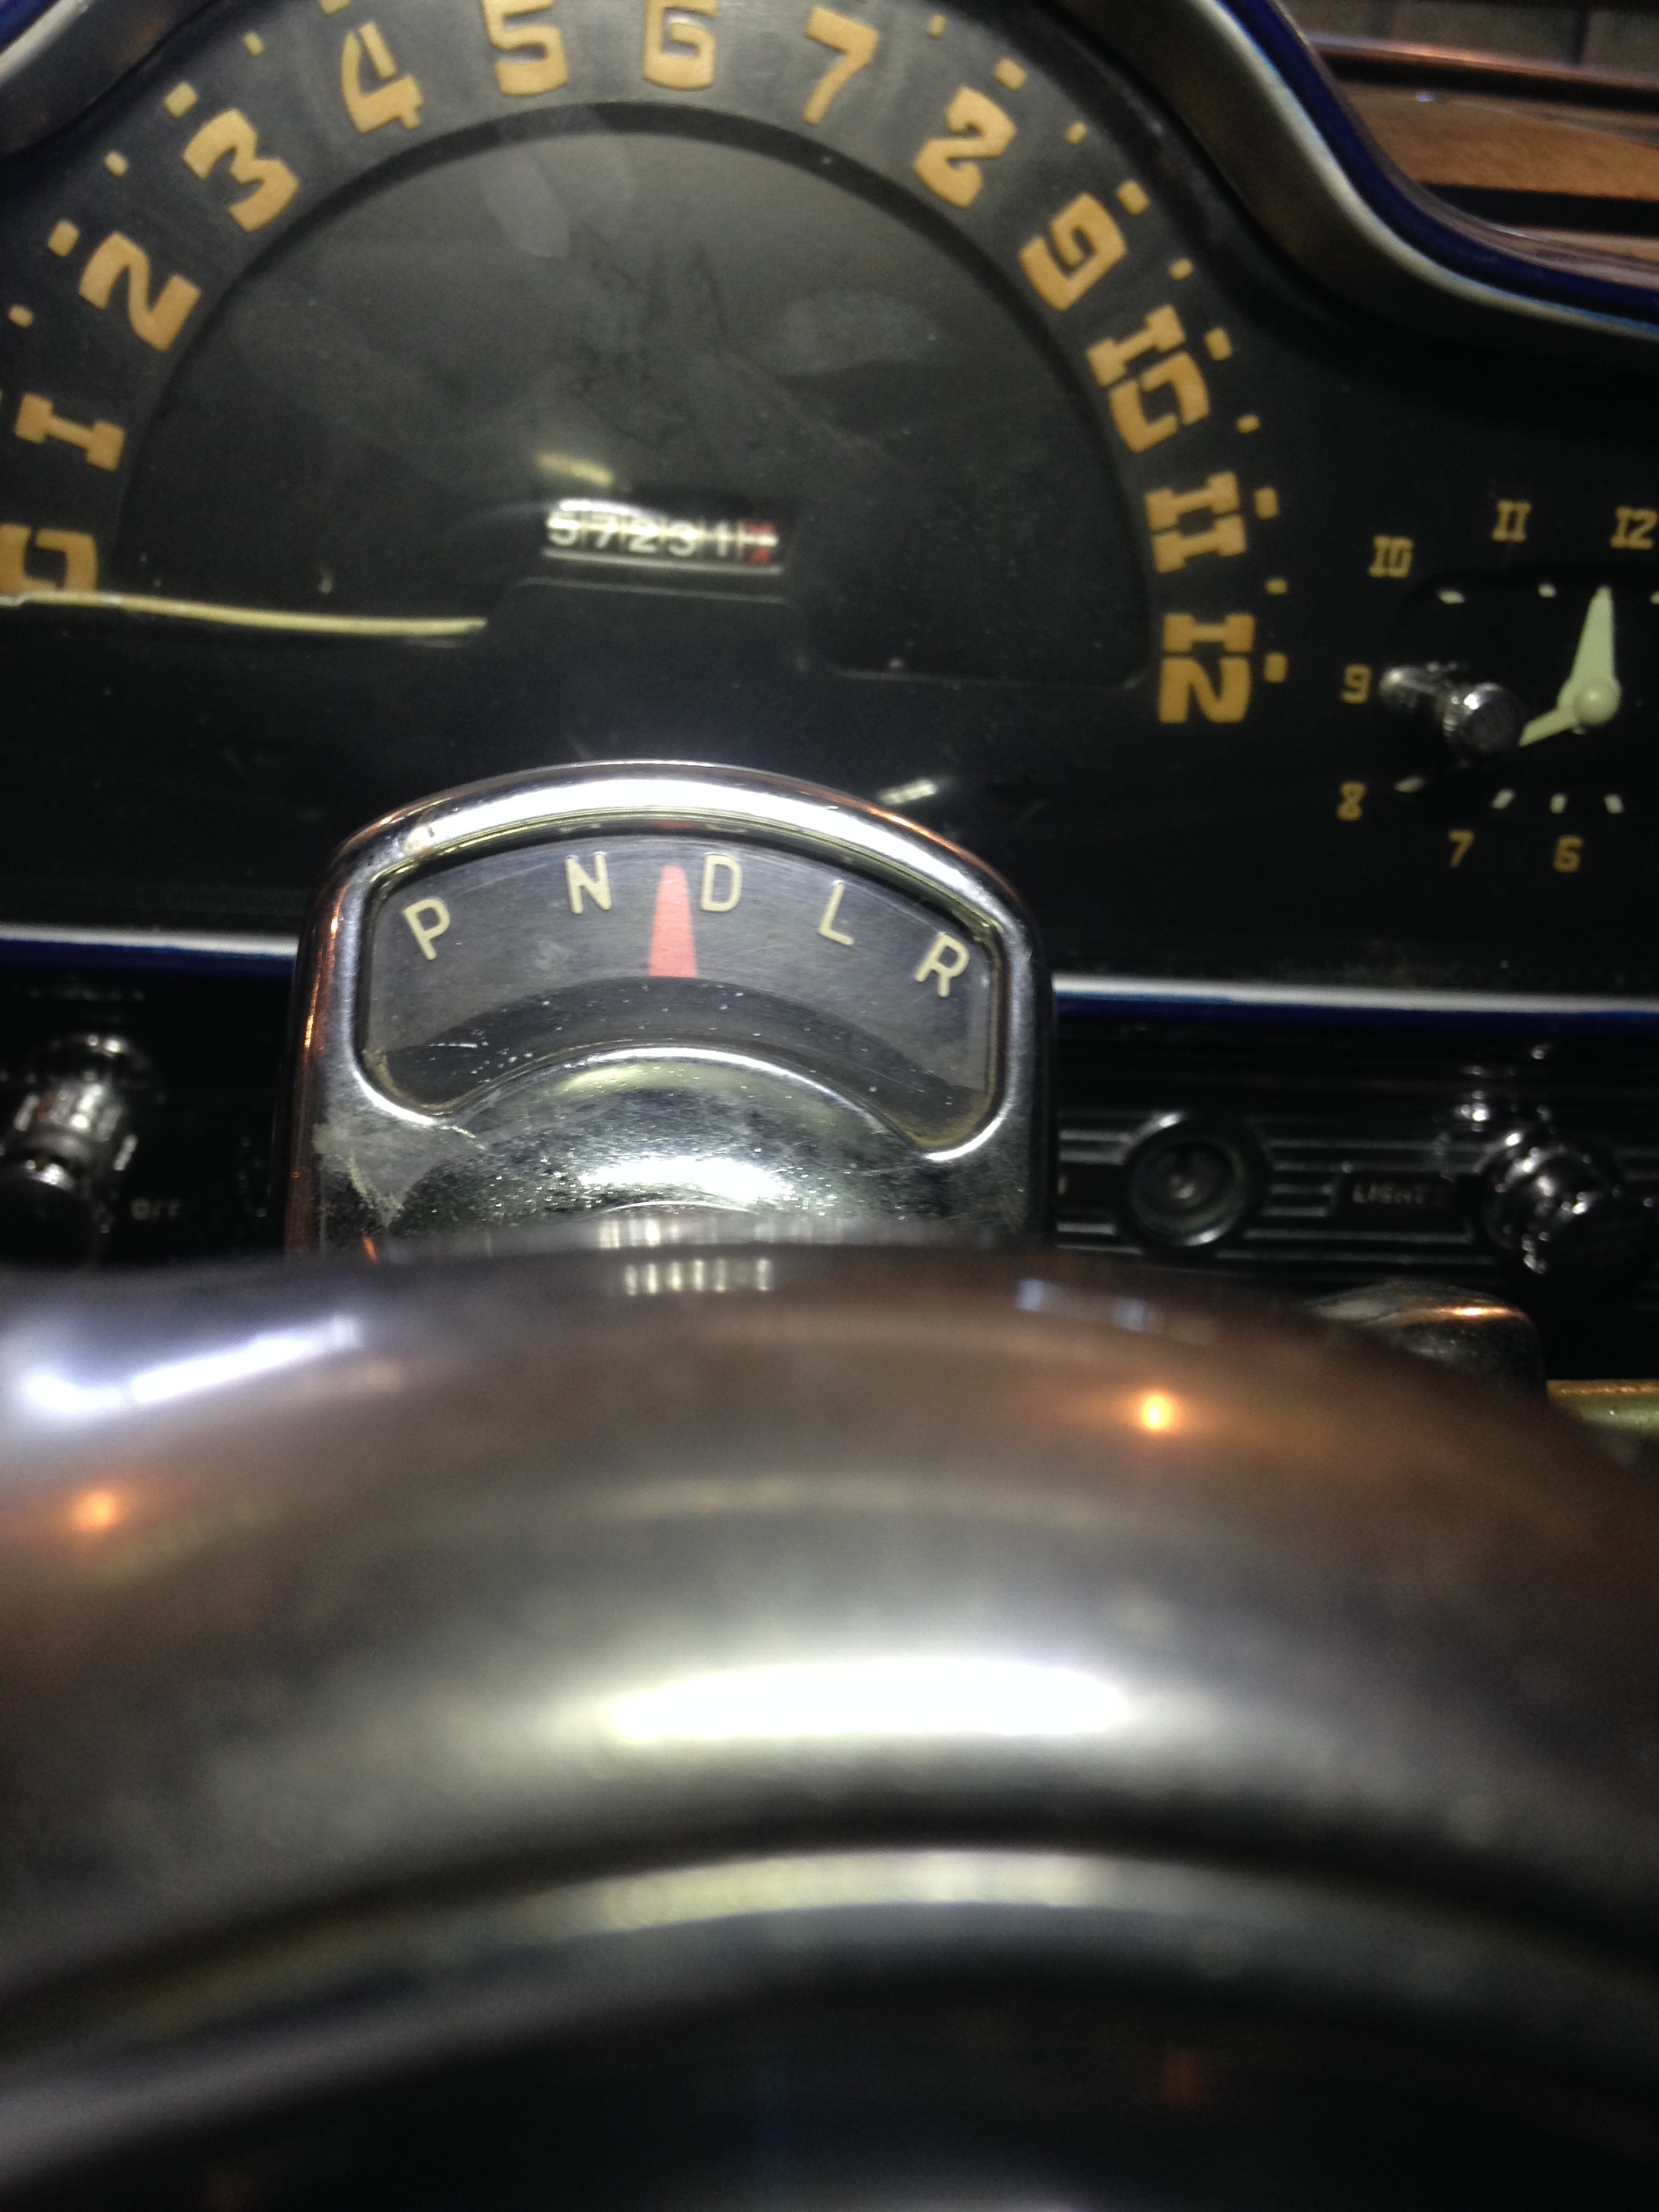
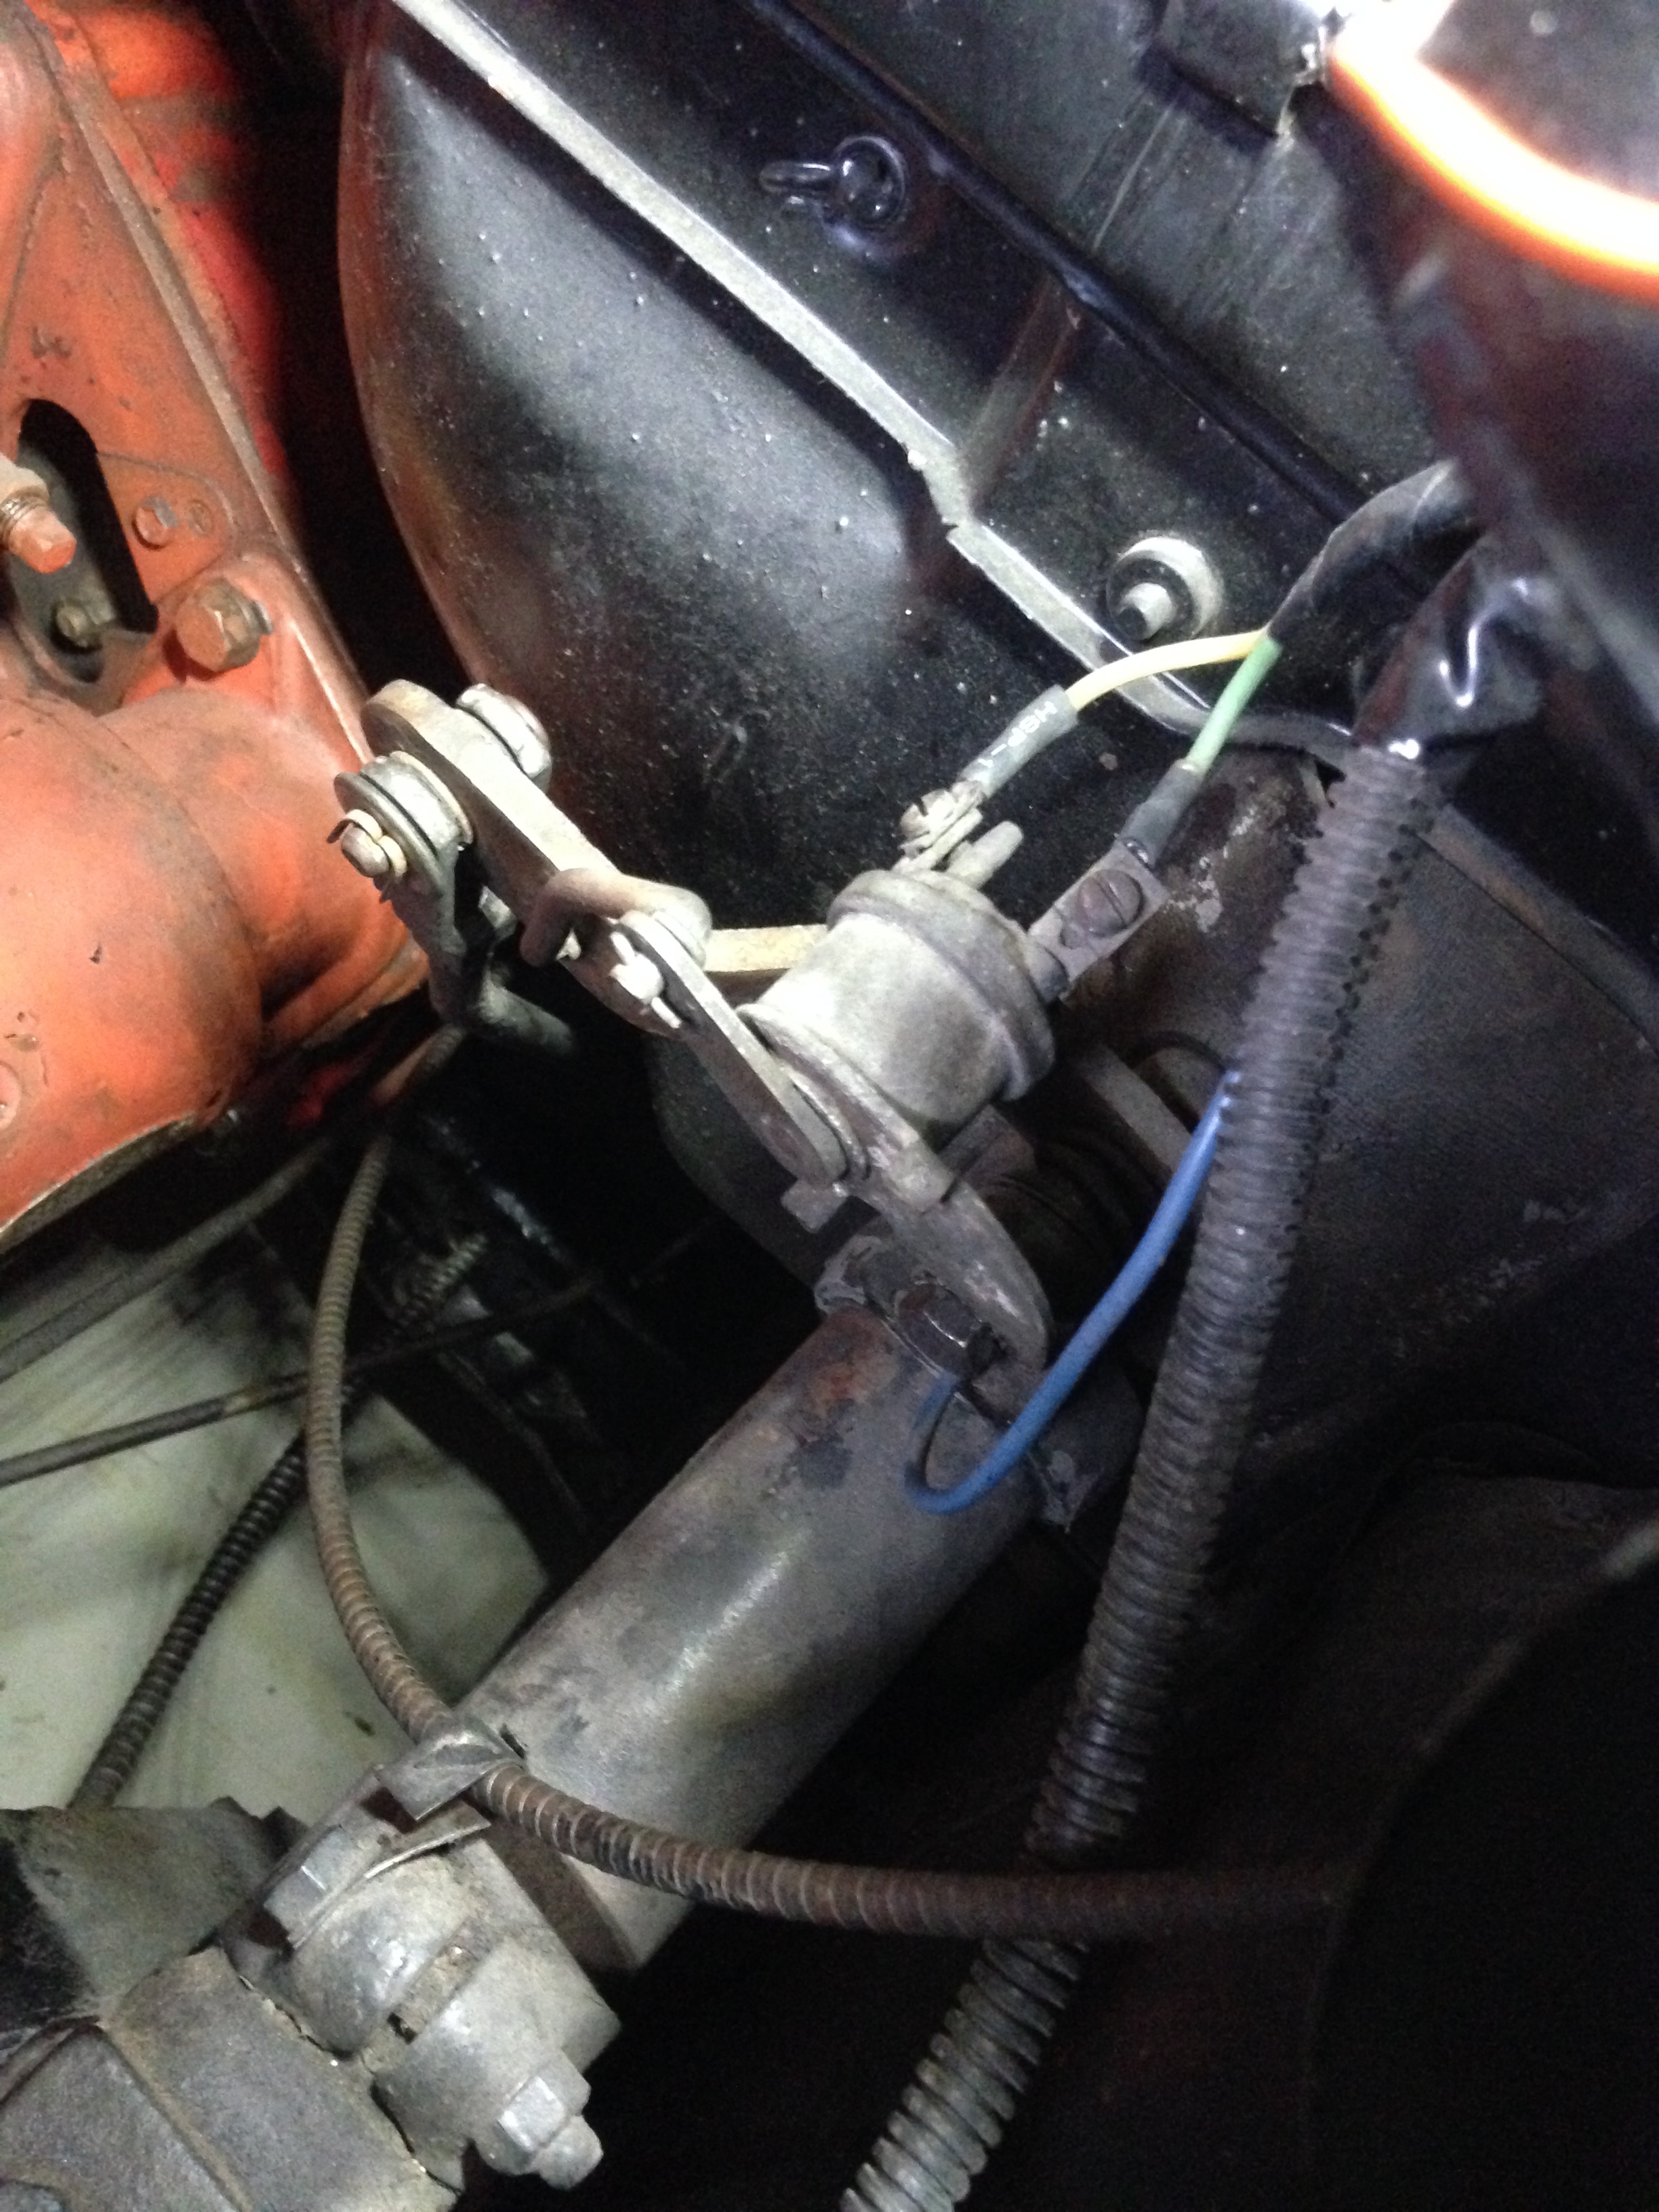
As seen on the pictures, the problem comes from the controls that need to be adjusted, but I don't know how to re-adjust it properly. Is there something I missed or done wrong in the adjustments? Your answers will be greatly appreciated.
Once this done though, I'll finish filling the tranny and the final tests. I just can't wait to drive her out, it was missing me for so long.
Until next time,
Your Autistic Hudsonite,
Max
0
Categories
- 37K All Categories
- 116 Hudson 1916 - 1929
- 21 Upcoming Events
- 96 Essex Super 6
- 28.6K HUDSON
- 576 "How To" - Skills, mechanical and other wise
- 995 Street Rods
- 151 American Motors
- 181 The Flathead Forum
- 49 Manuals, etc,.
- 78 Hudson 8
- 44 FORUM - Instructions and Tips on using the forum
- 2.8K CLASSIFIEDS
- 609 Vehicles
- 2.2K Parts & Pieces
- 78 Literature & Memorabilia
- Hudson 1916 - 1929 Yahoo Groups Archived Photos
