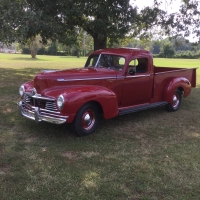
212 engine starter mounting studs — are they really necessary?
 I realized when I took the starter off my 212 engine this spring that something was not quite right, but only now while putting it back on did I figure out what it was. The folks that put this together 23 years ago used plain 3/8-16 bolts and nuts to mount the starter and I now see that the holes in the bellhousing are 7/16-14.
The shop manual mentions mounting studs, so I used the search function here to see if I could find any more information. I think I looked at every post that mentions starters, but did not find specs for the studs. I am guessing that the studs are 7/16 -14 to go in the bellhousing, then a shoulder of about .408 to go through the starter mounting flange holes and then some 3/8-16 threads to put a nut and lock washer on. Is that correct?
I have a lathe, so actually making studs like that and figuring out proper lengths is not a problem. I just want to know if I’m on the right track.
2nd question — Does the center part of the starter flange keep the starter sufficiently centered in the hole in the engine plate that using 3/8 bolts cranked tight enough would not cause a problem? I have had Studebakers in the past that used special shoulder bolts to mount starters and if plain bolts were substituted, bad things happen.
If the answer to the second question is “yes”, then I don’t have to spend lathe time.
Thanks in advance. Tom
0
Comments
-
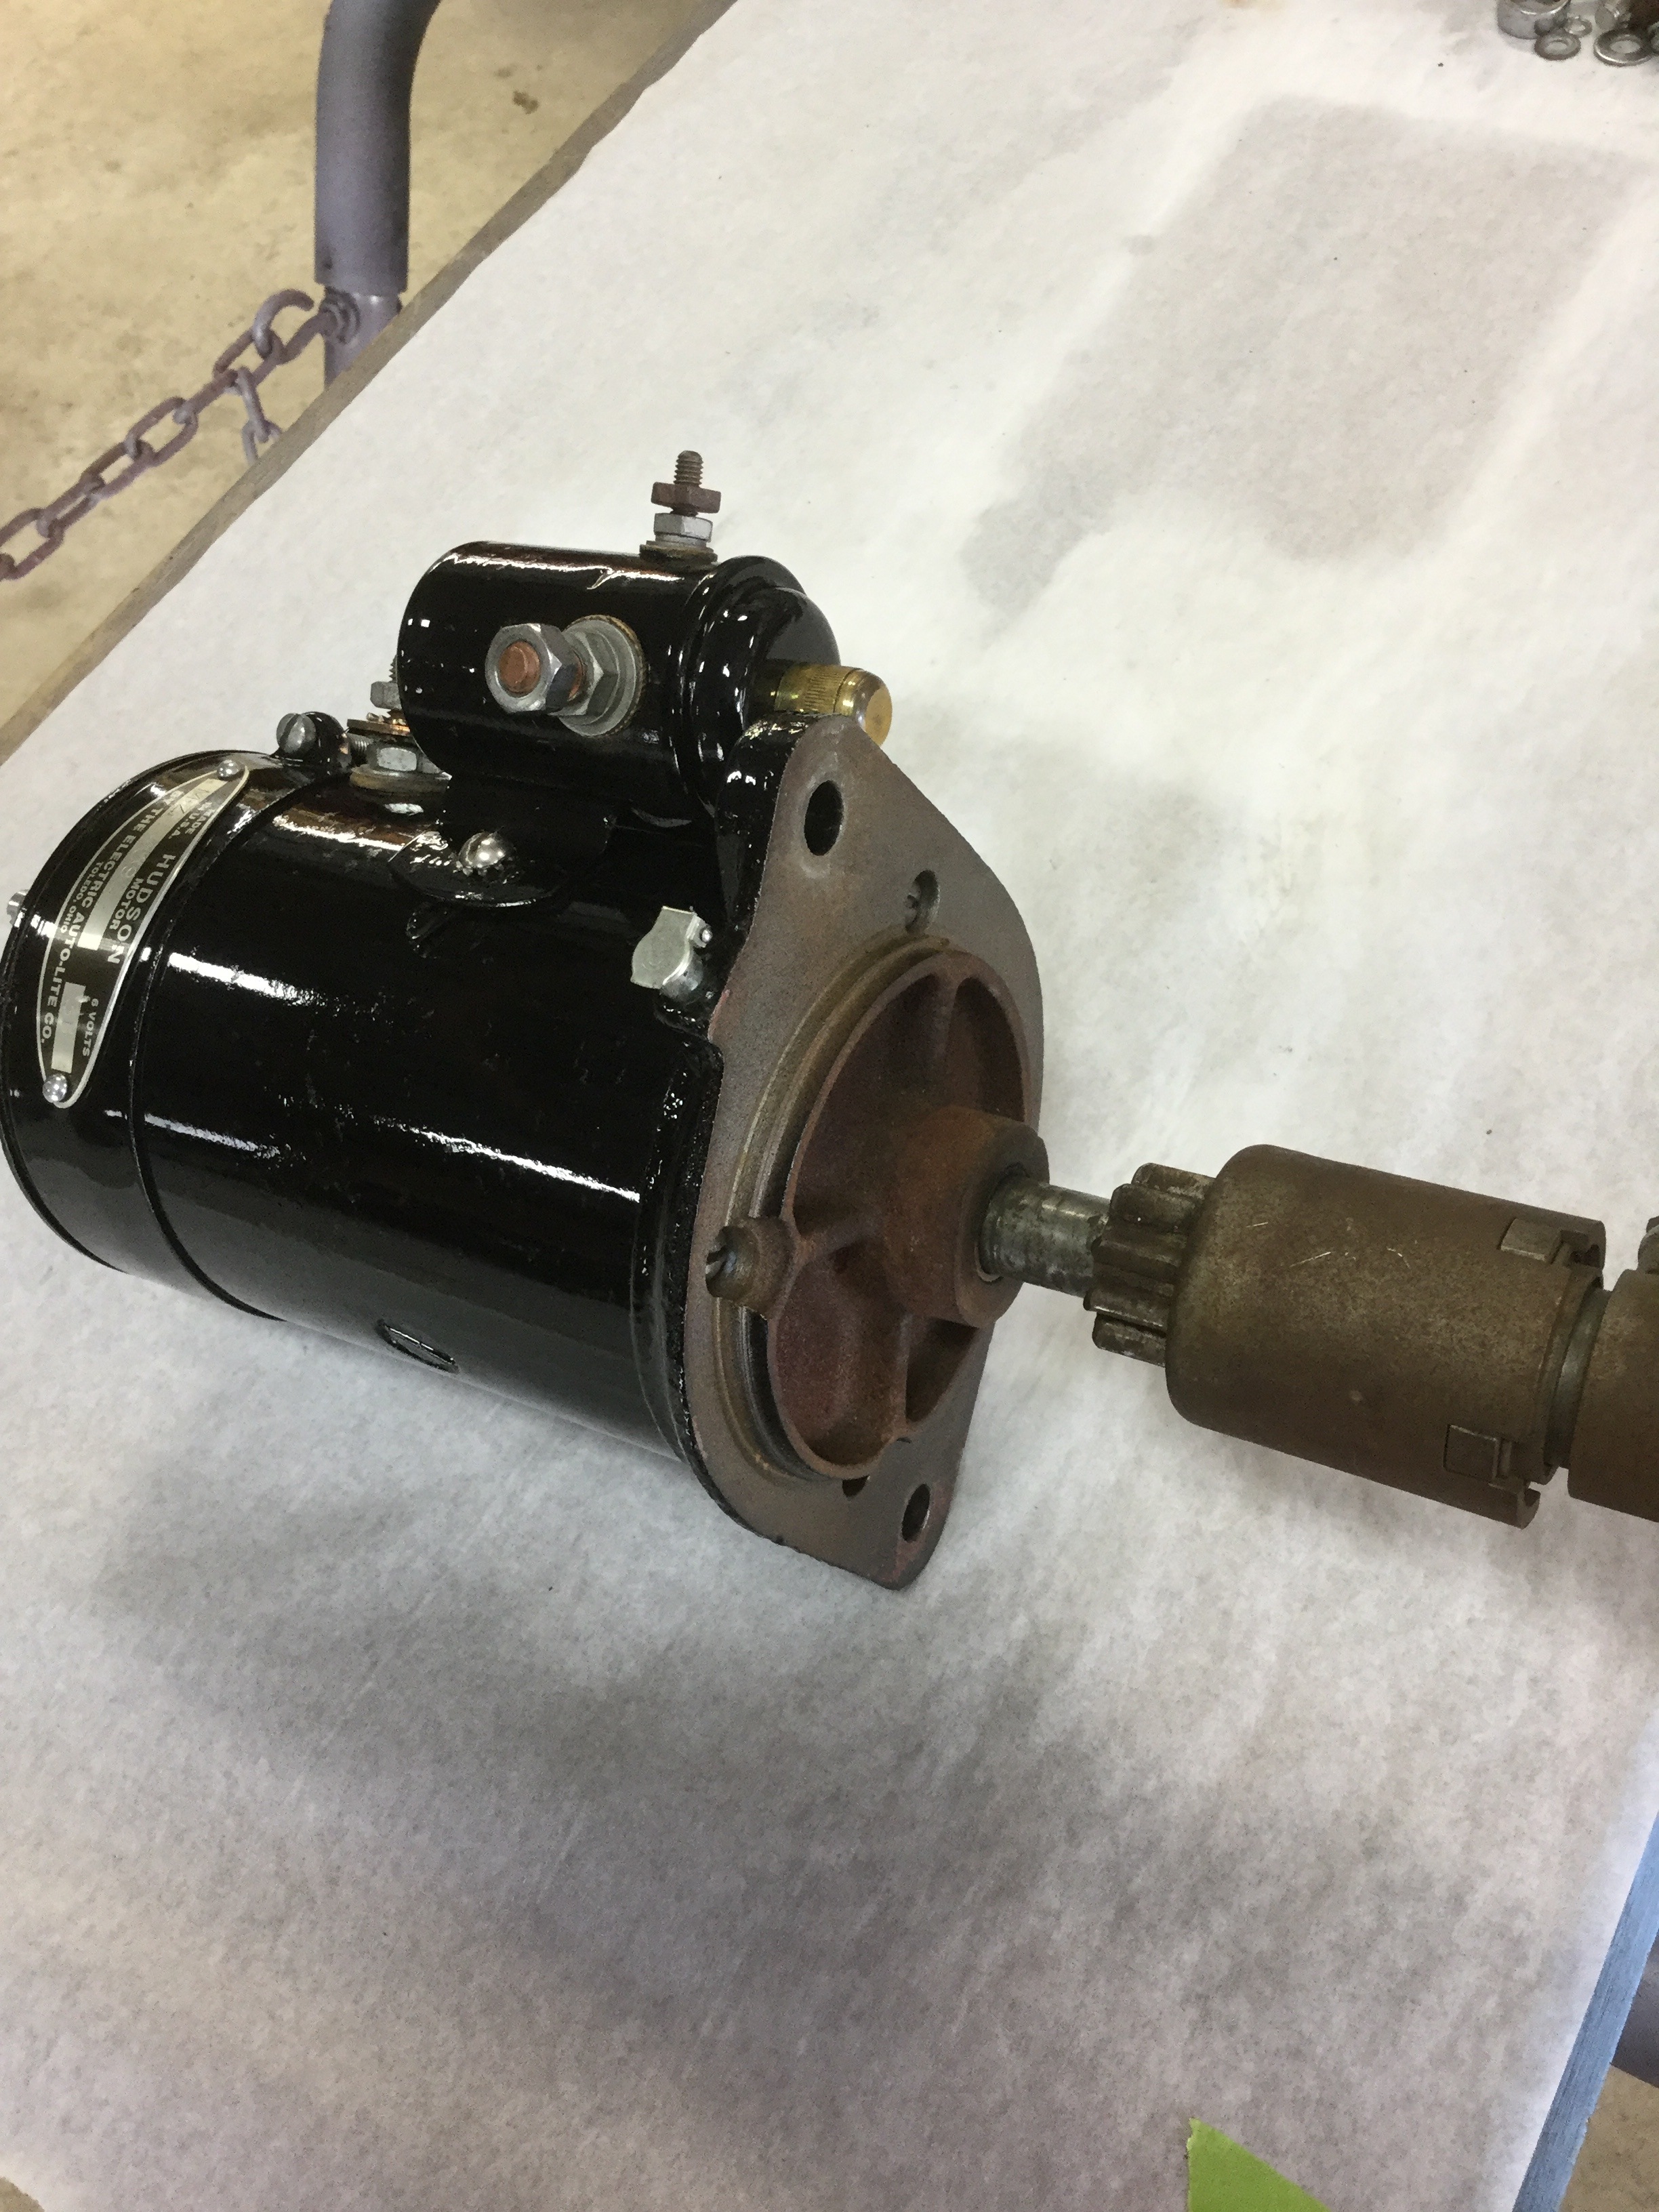
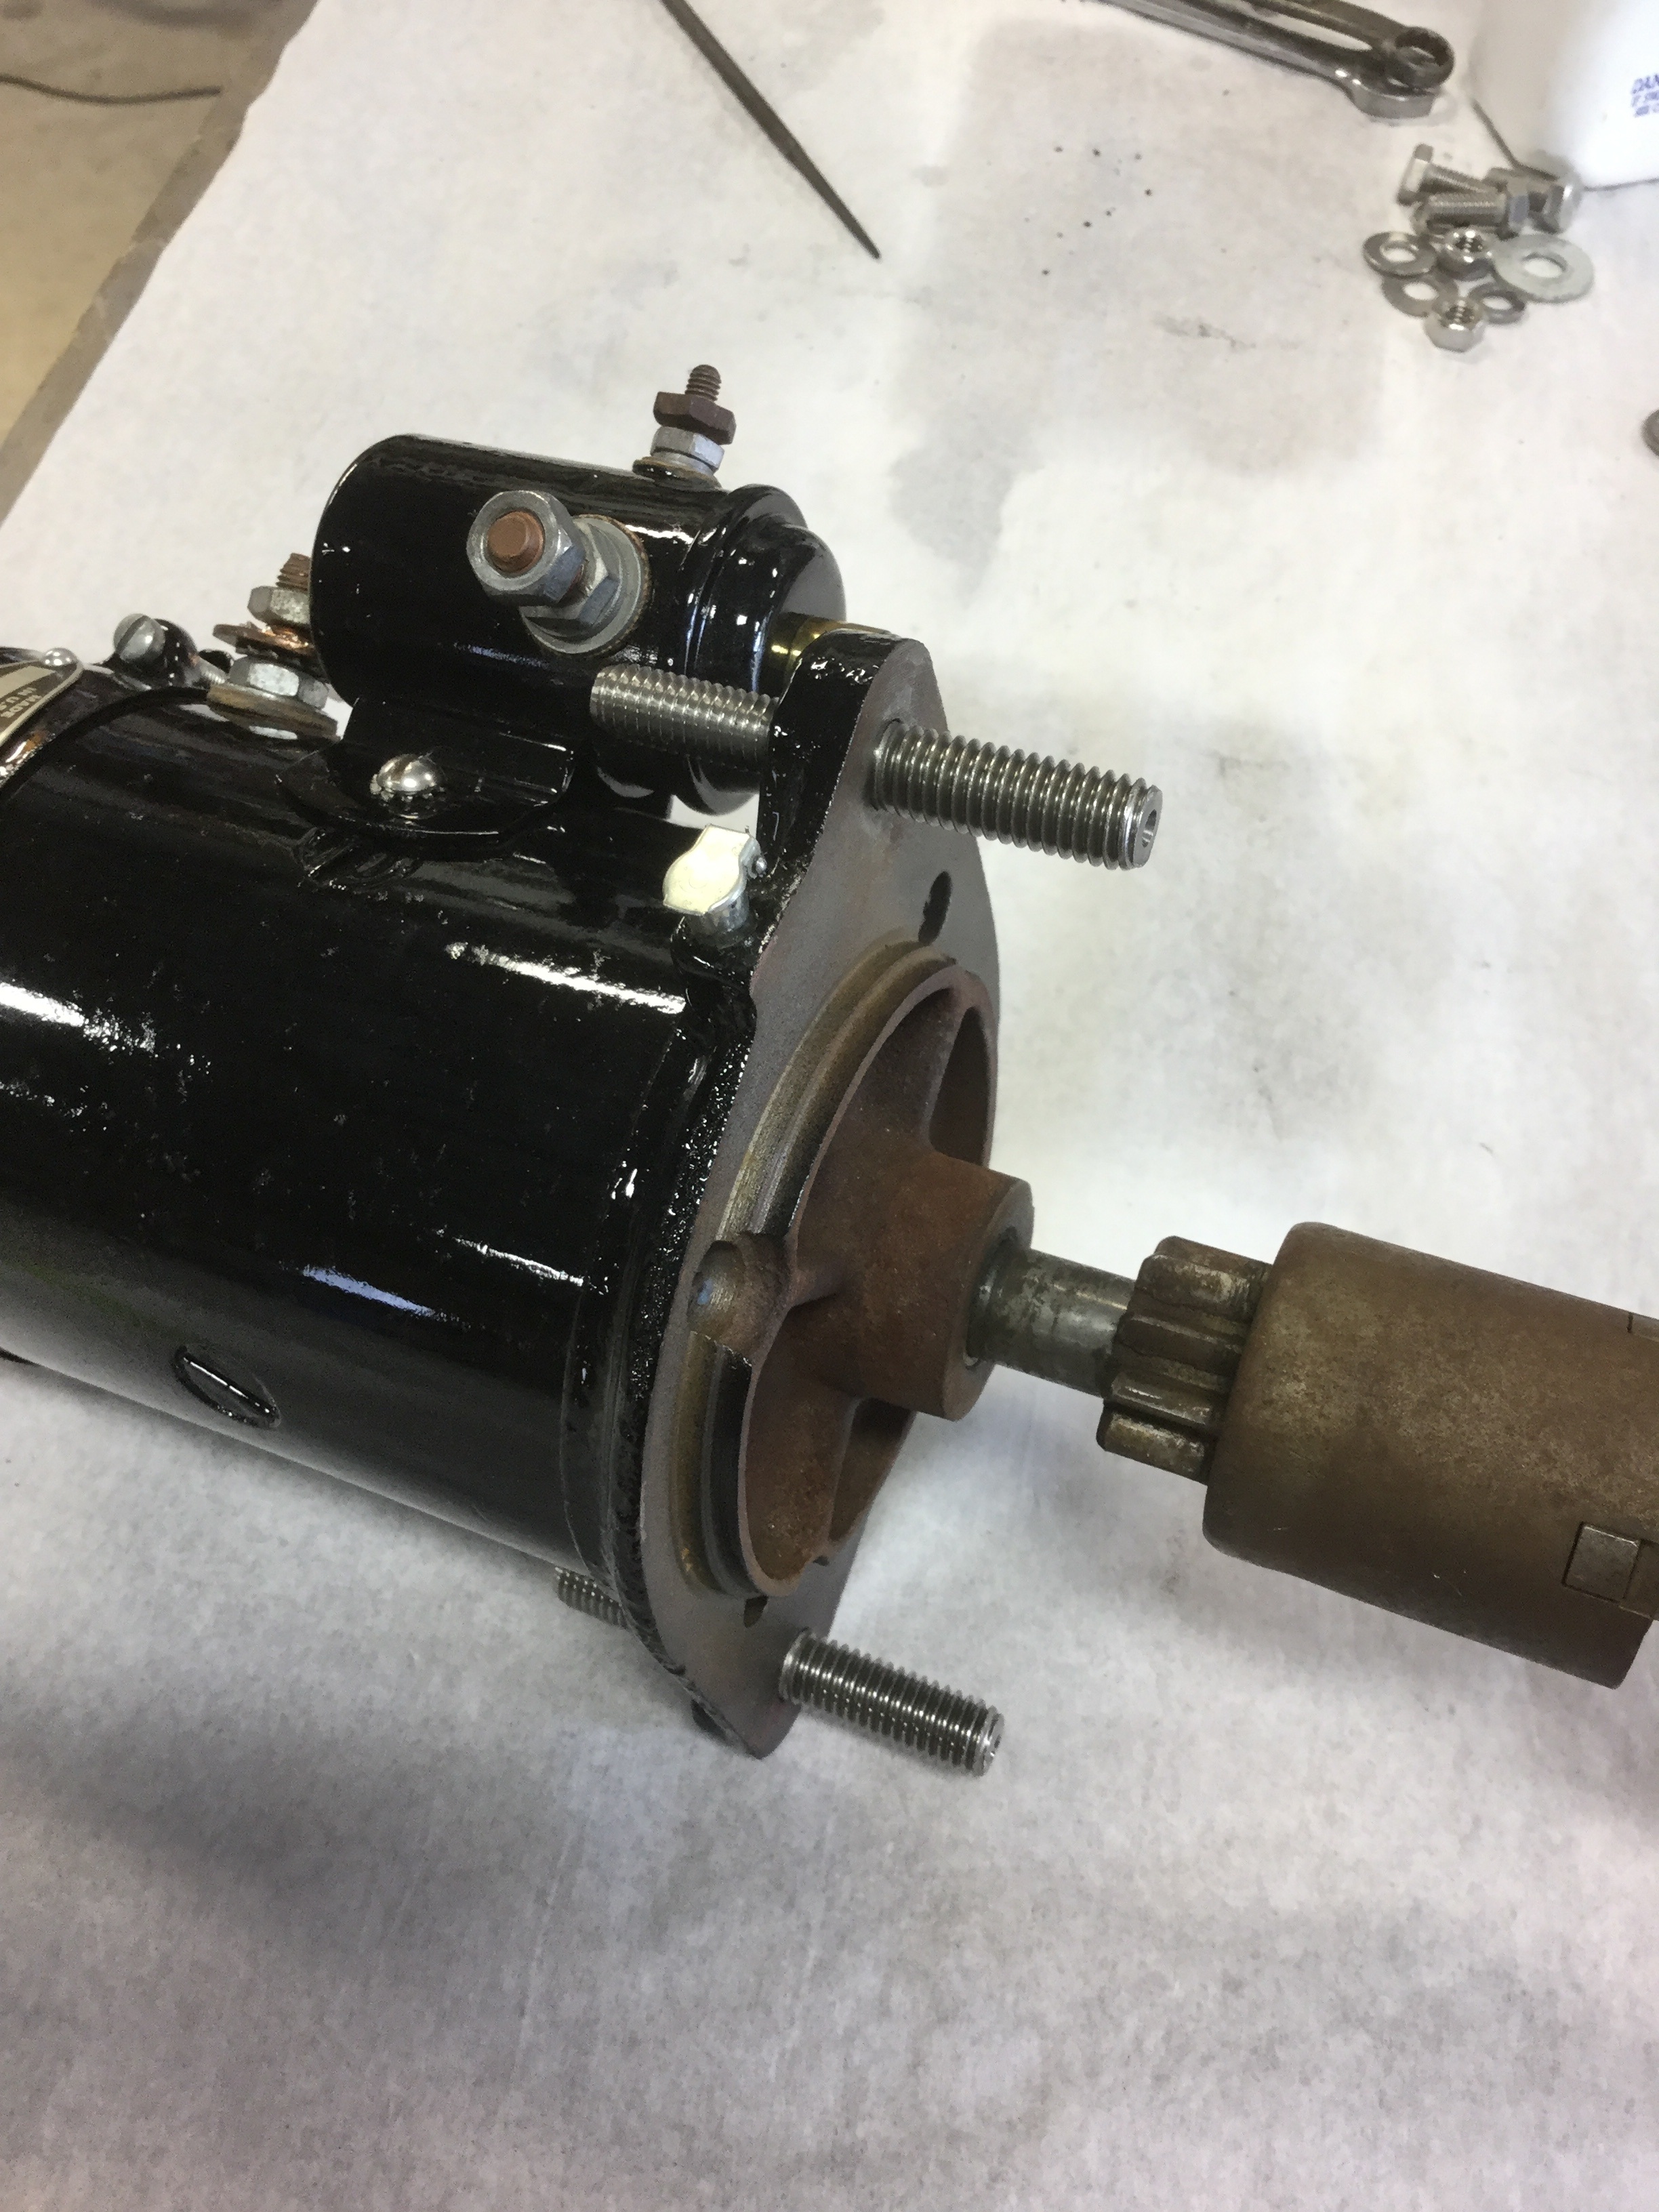
Tom, this is how my 37 212’s starter is mounted. If I find anything else on the studs I’ll let ya know.
 0
0 -
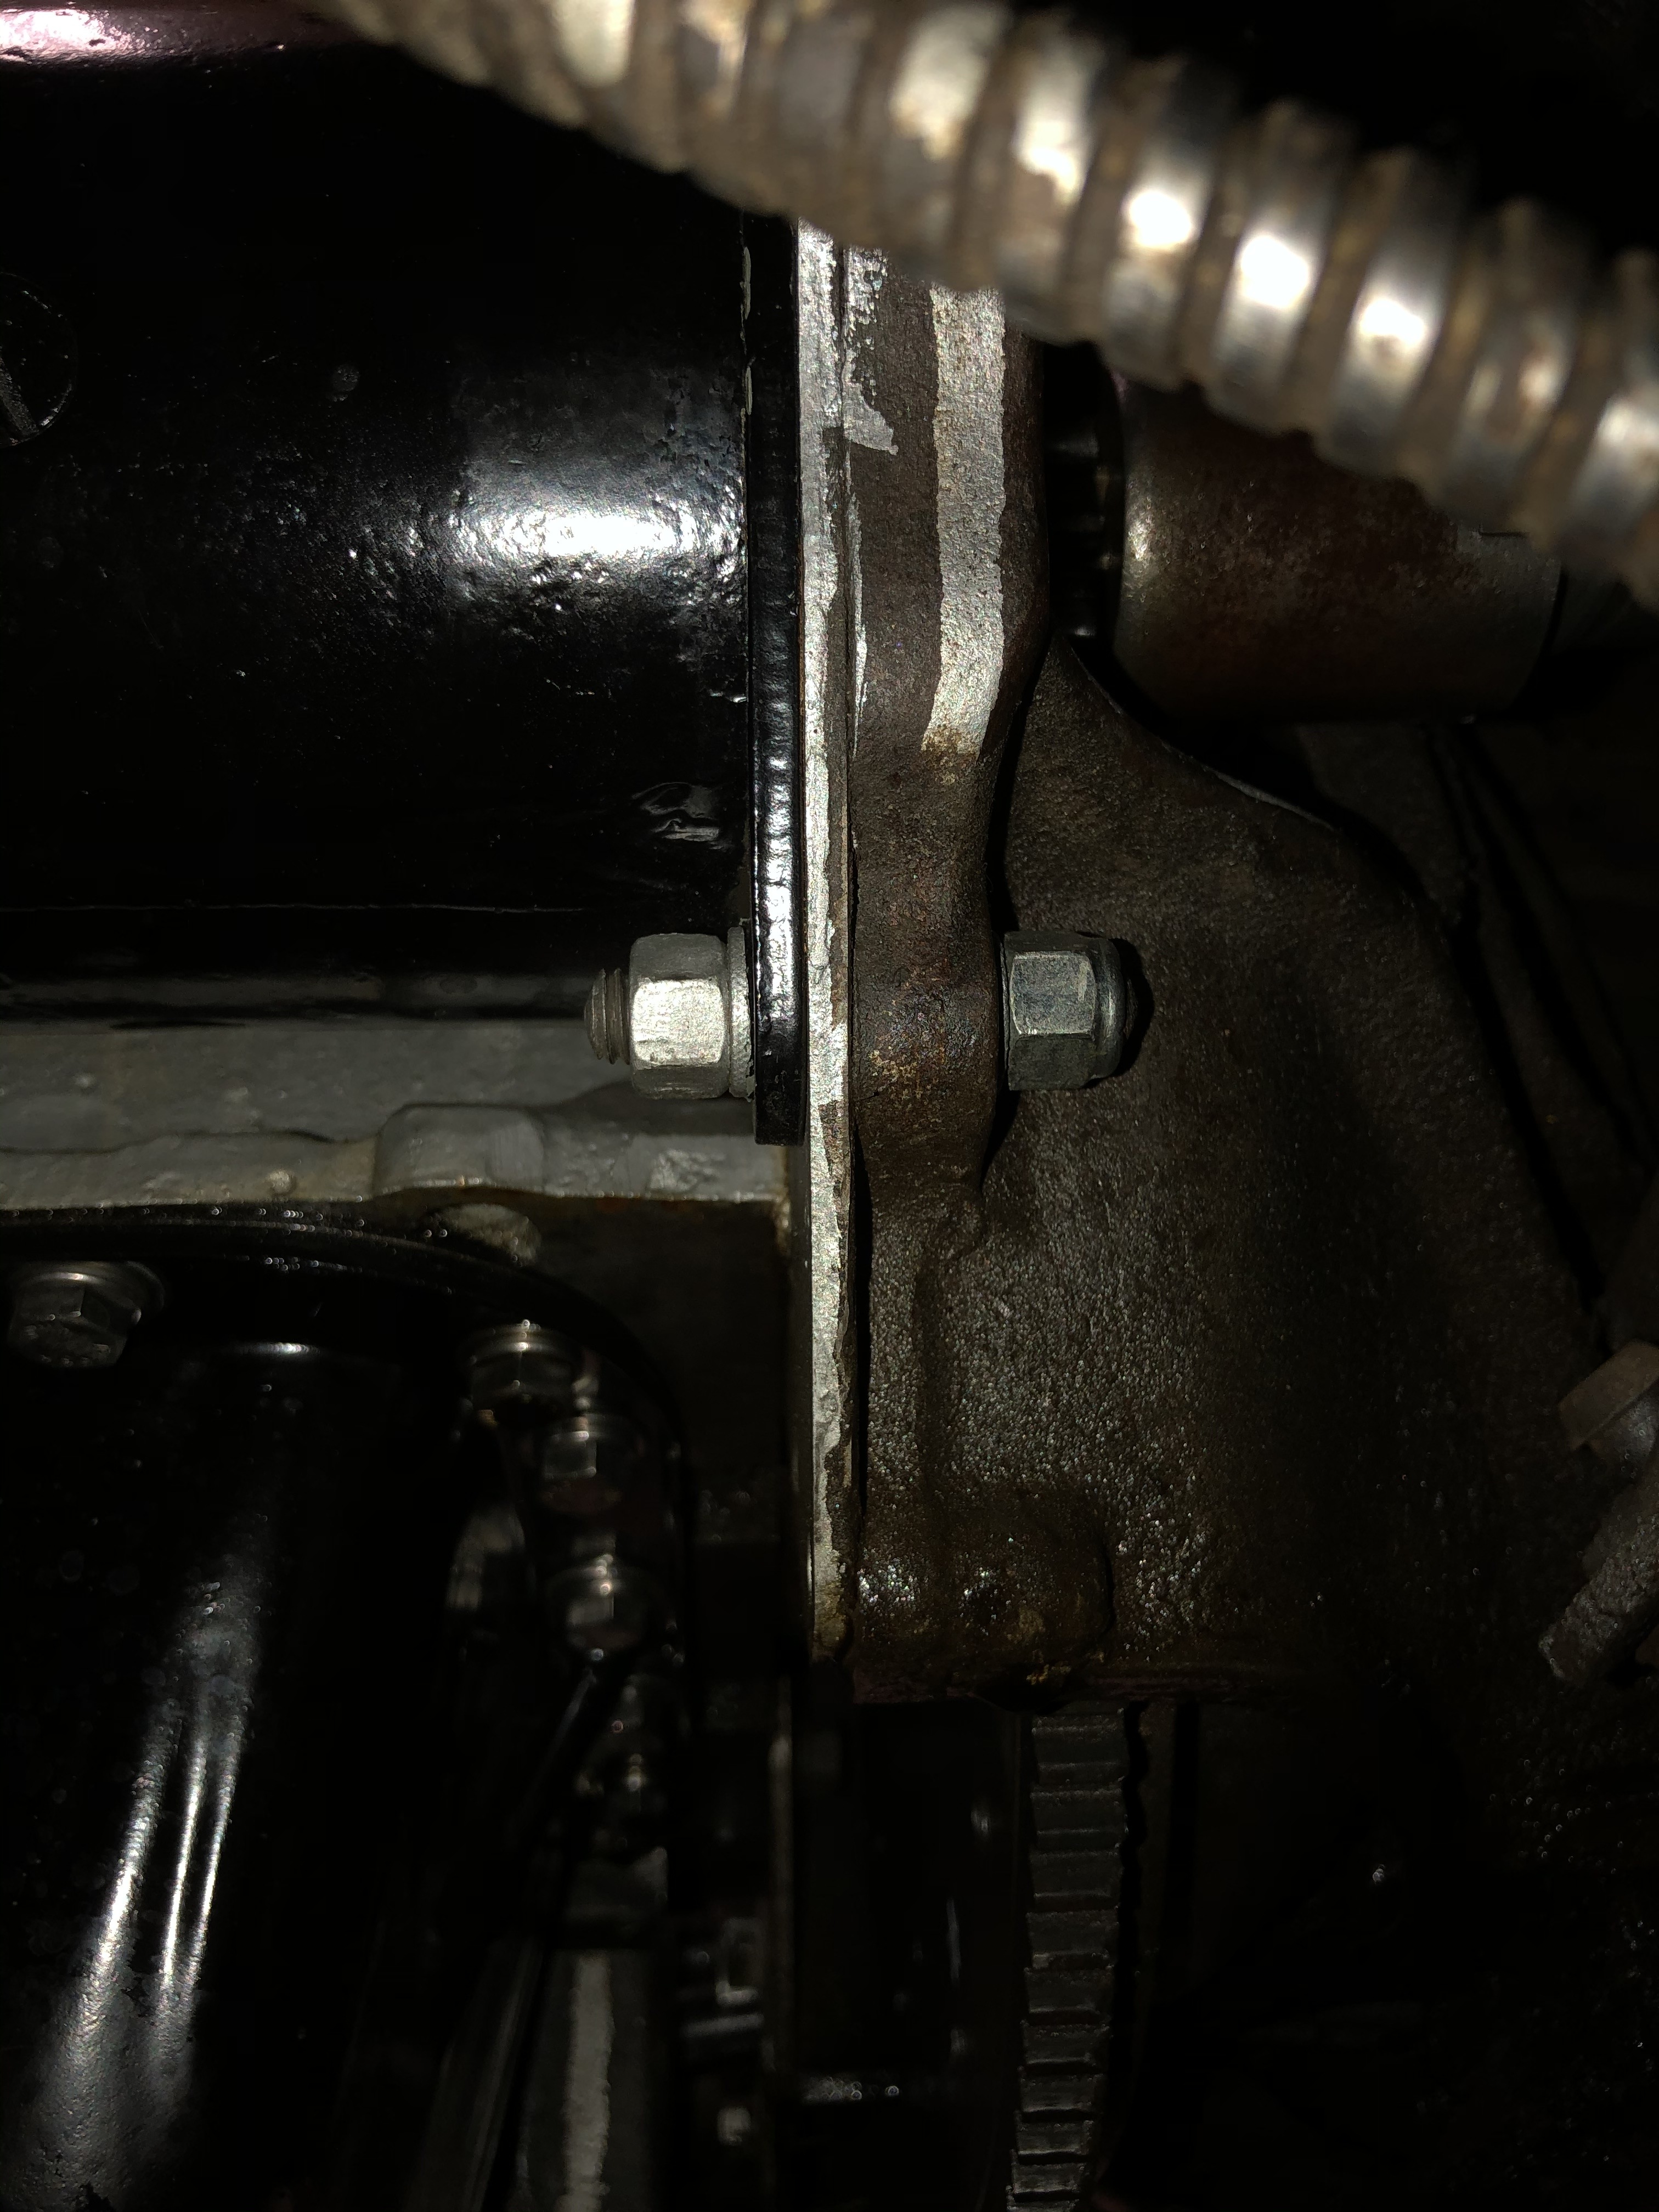
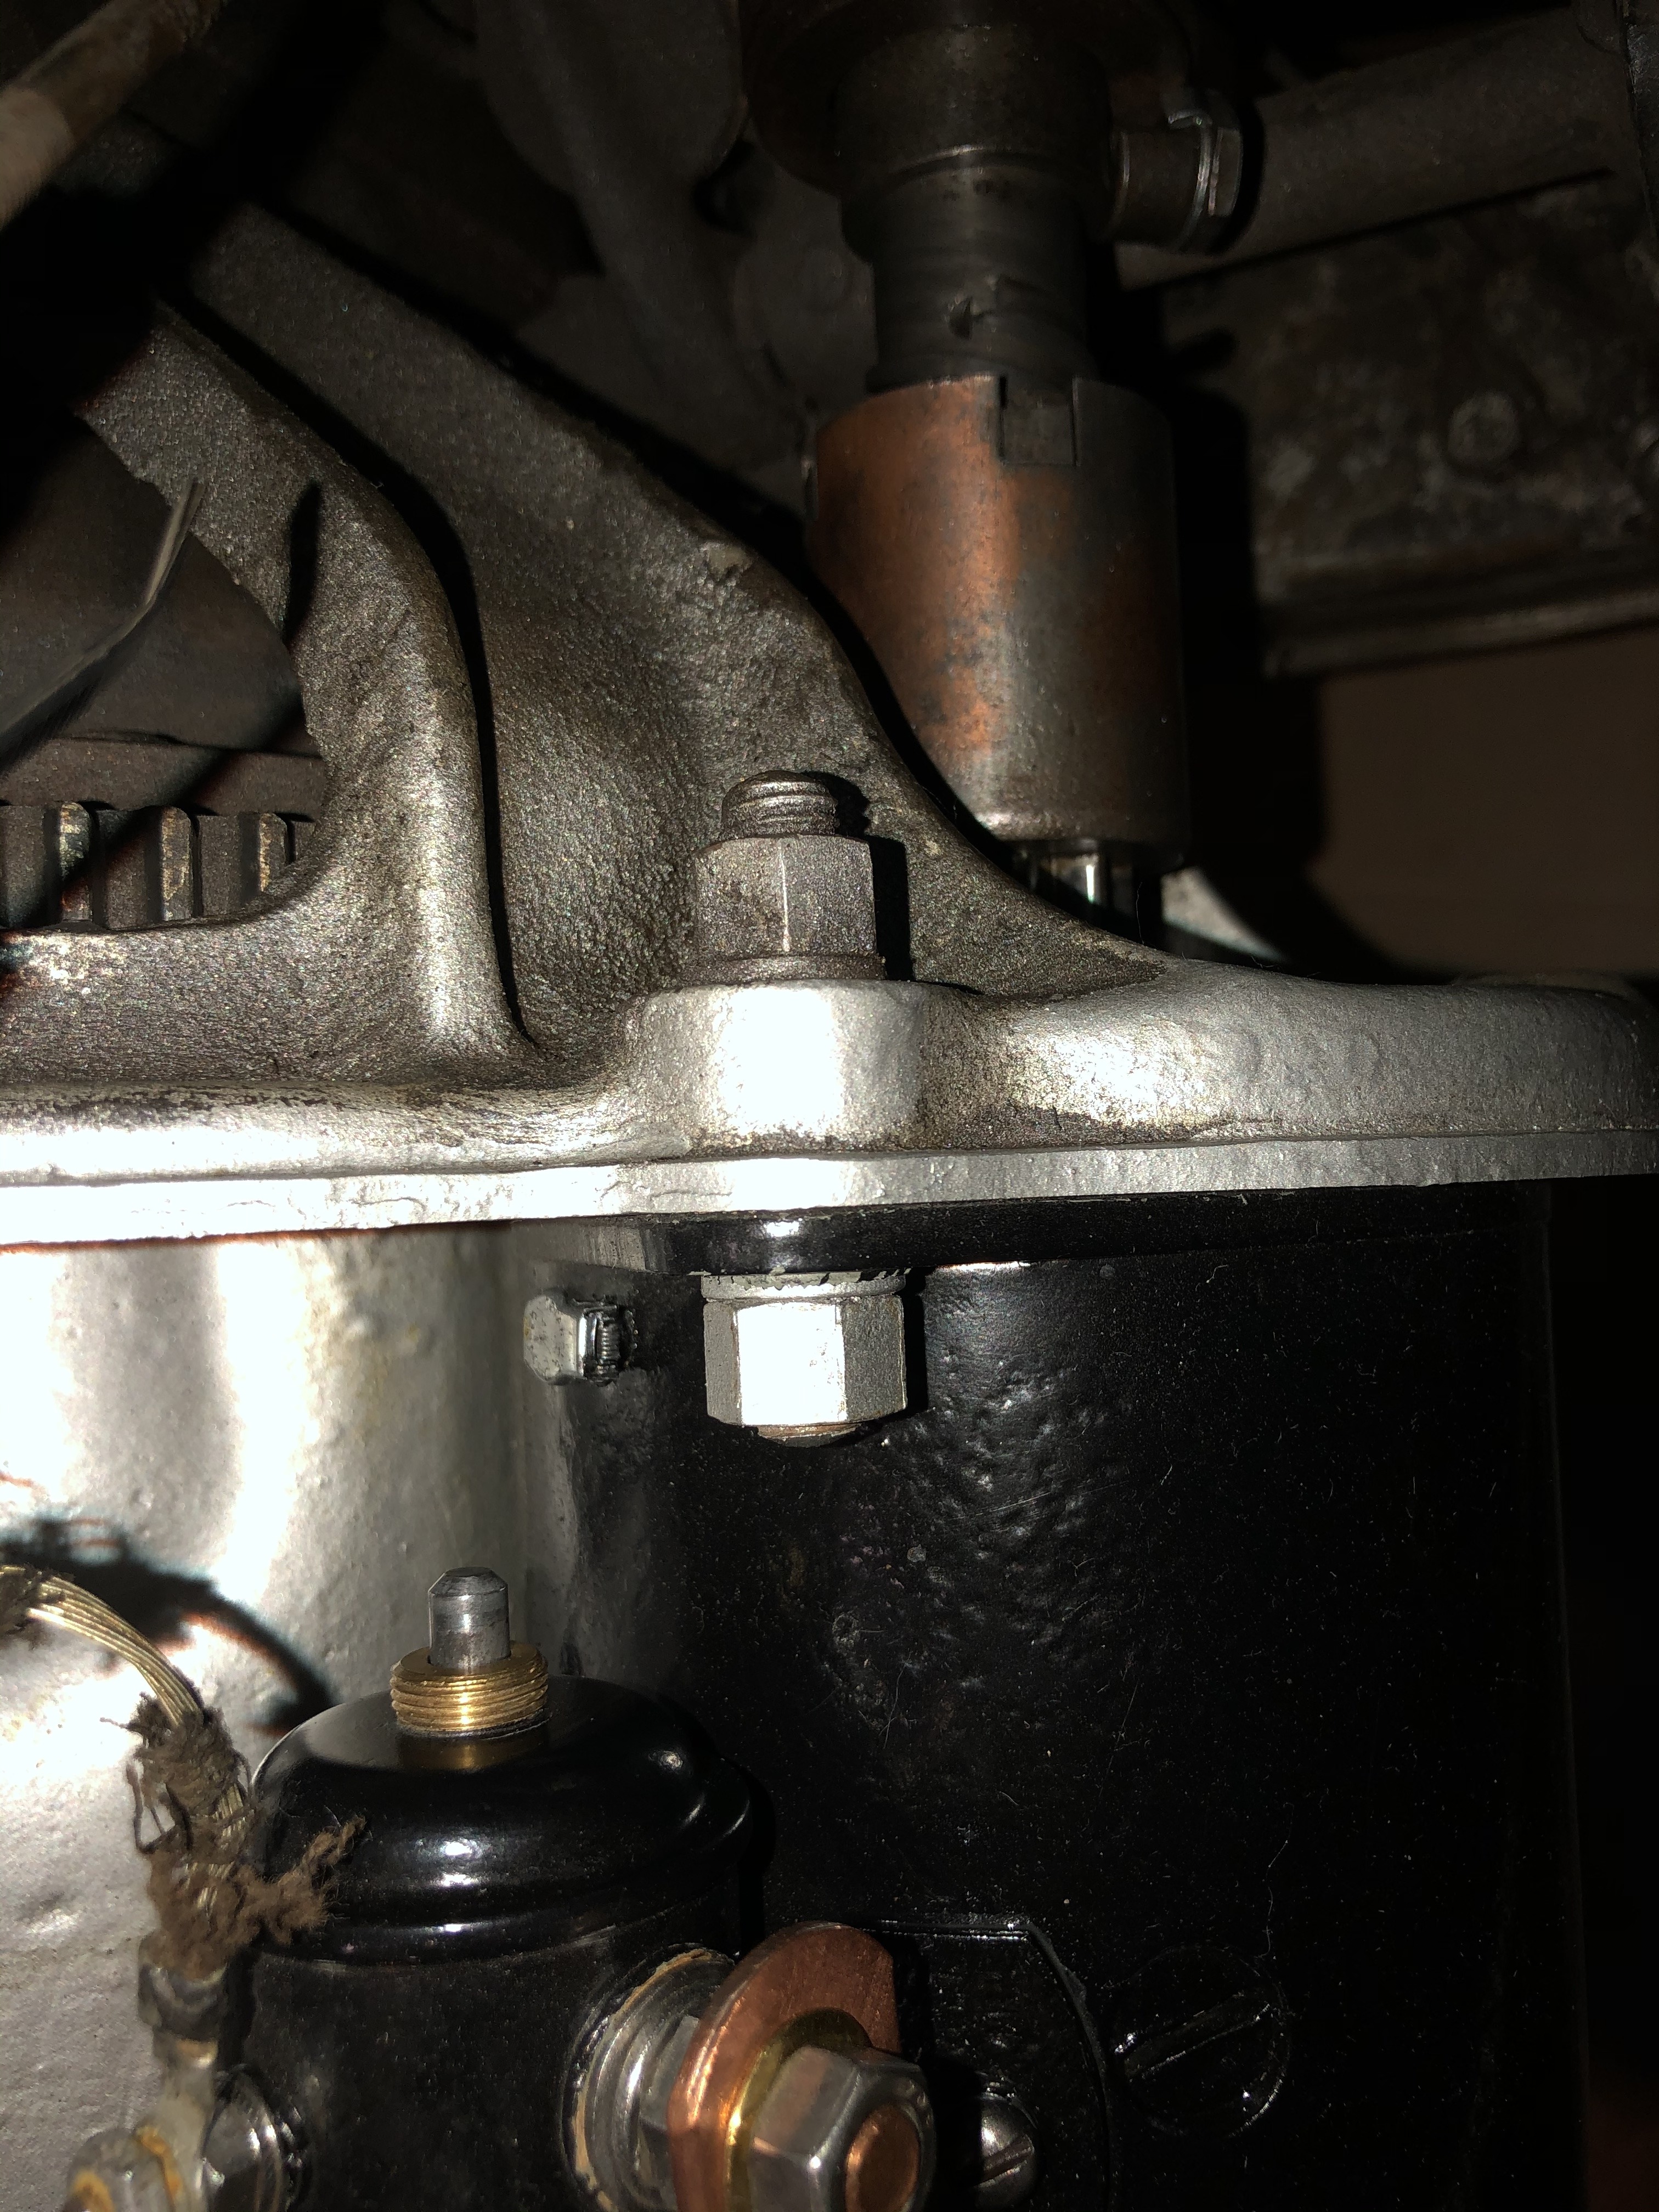
Will this be driven much, or just on and off the trailer? Hudson's special studs keep the bell housing and engine in line. 3/8 bolts will eventually lead to damage to the starter drive and flywheel ring gear. Trans must be pulled apart from the engine approx. 3 inches to install the studs. Fun when someone messes it up some time in the past.
These same studs were used through out the step down years so should be available0 -
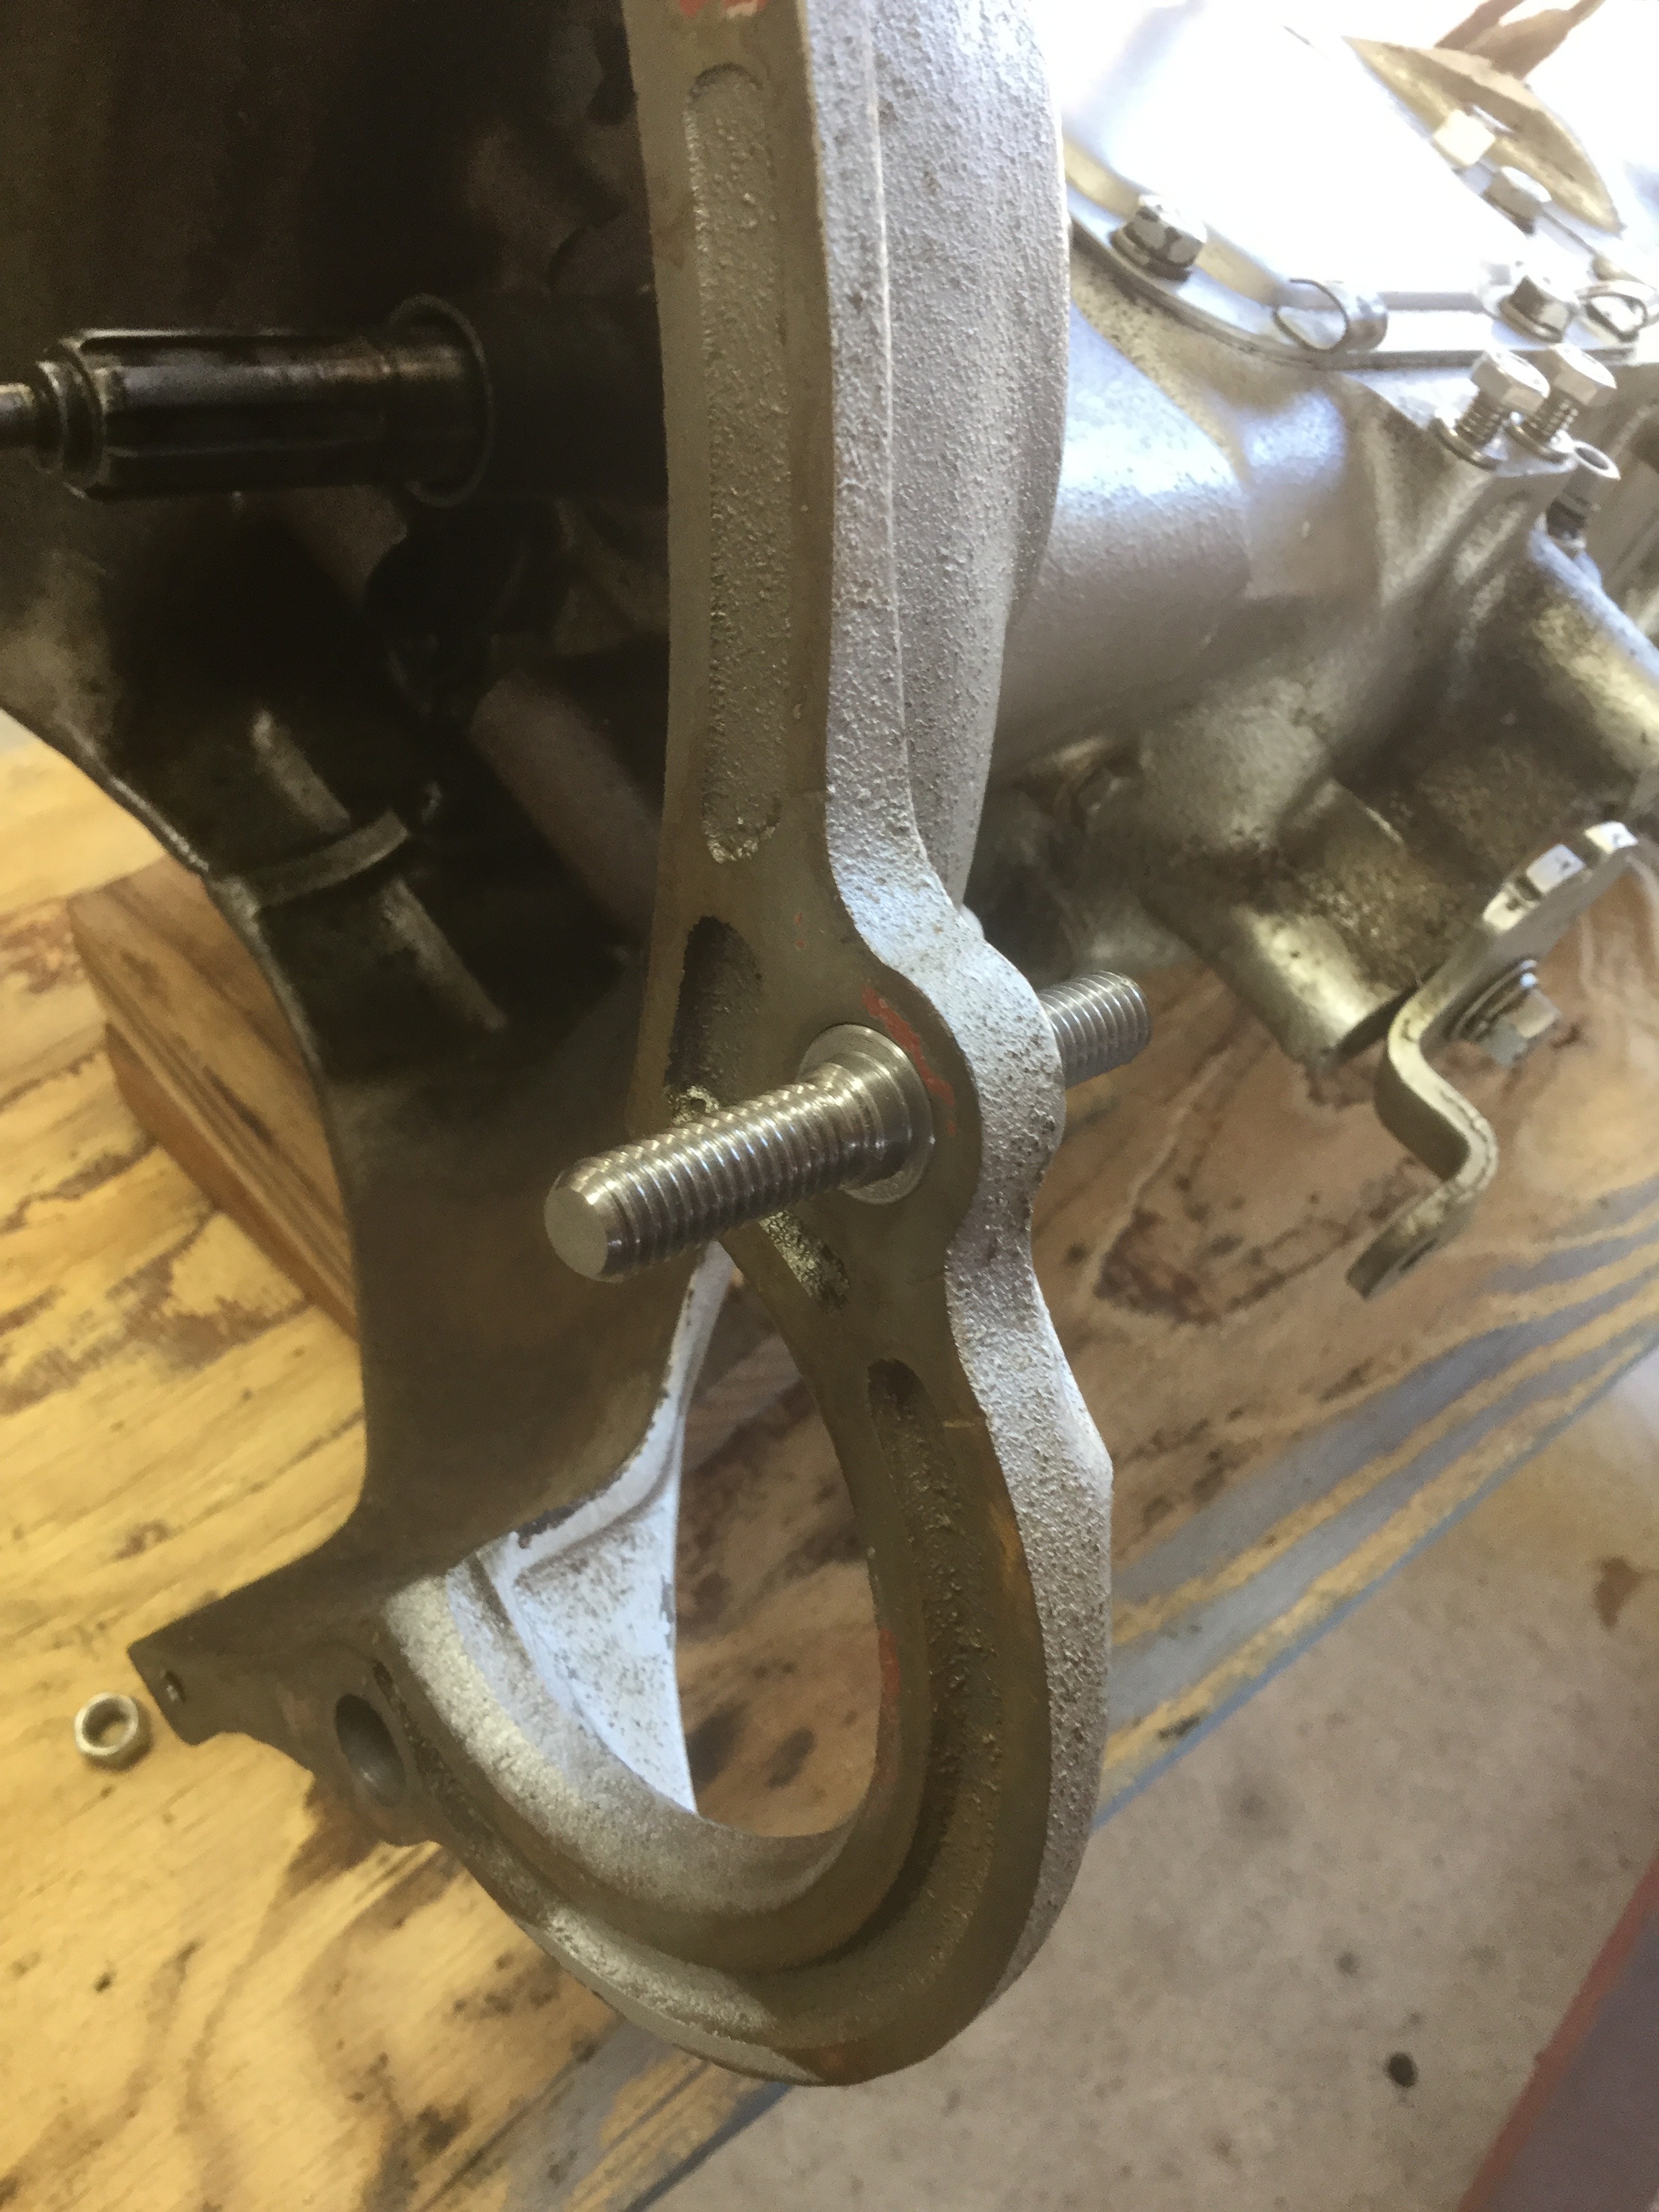
BigSky — the mounting flange on your ‘37 starter sure looks thinner than the flange on my ‘47. In any case, thank you for the pictures. I went ahead and machined a couple of studs based on the thickness of my flange
 I made the studs kind of long so, if needed, I could double nut them. Everything lined up and installed easily.
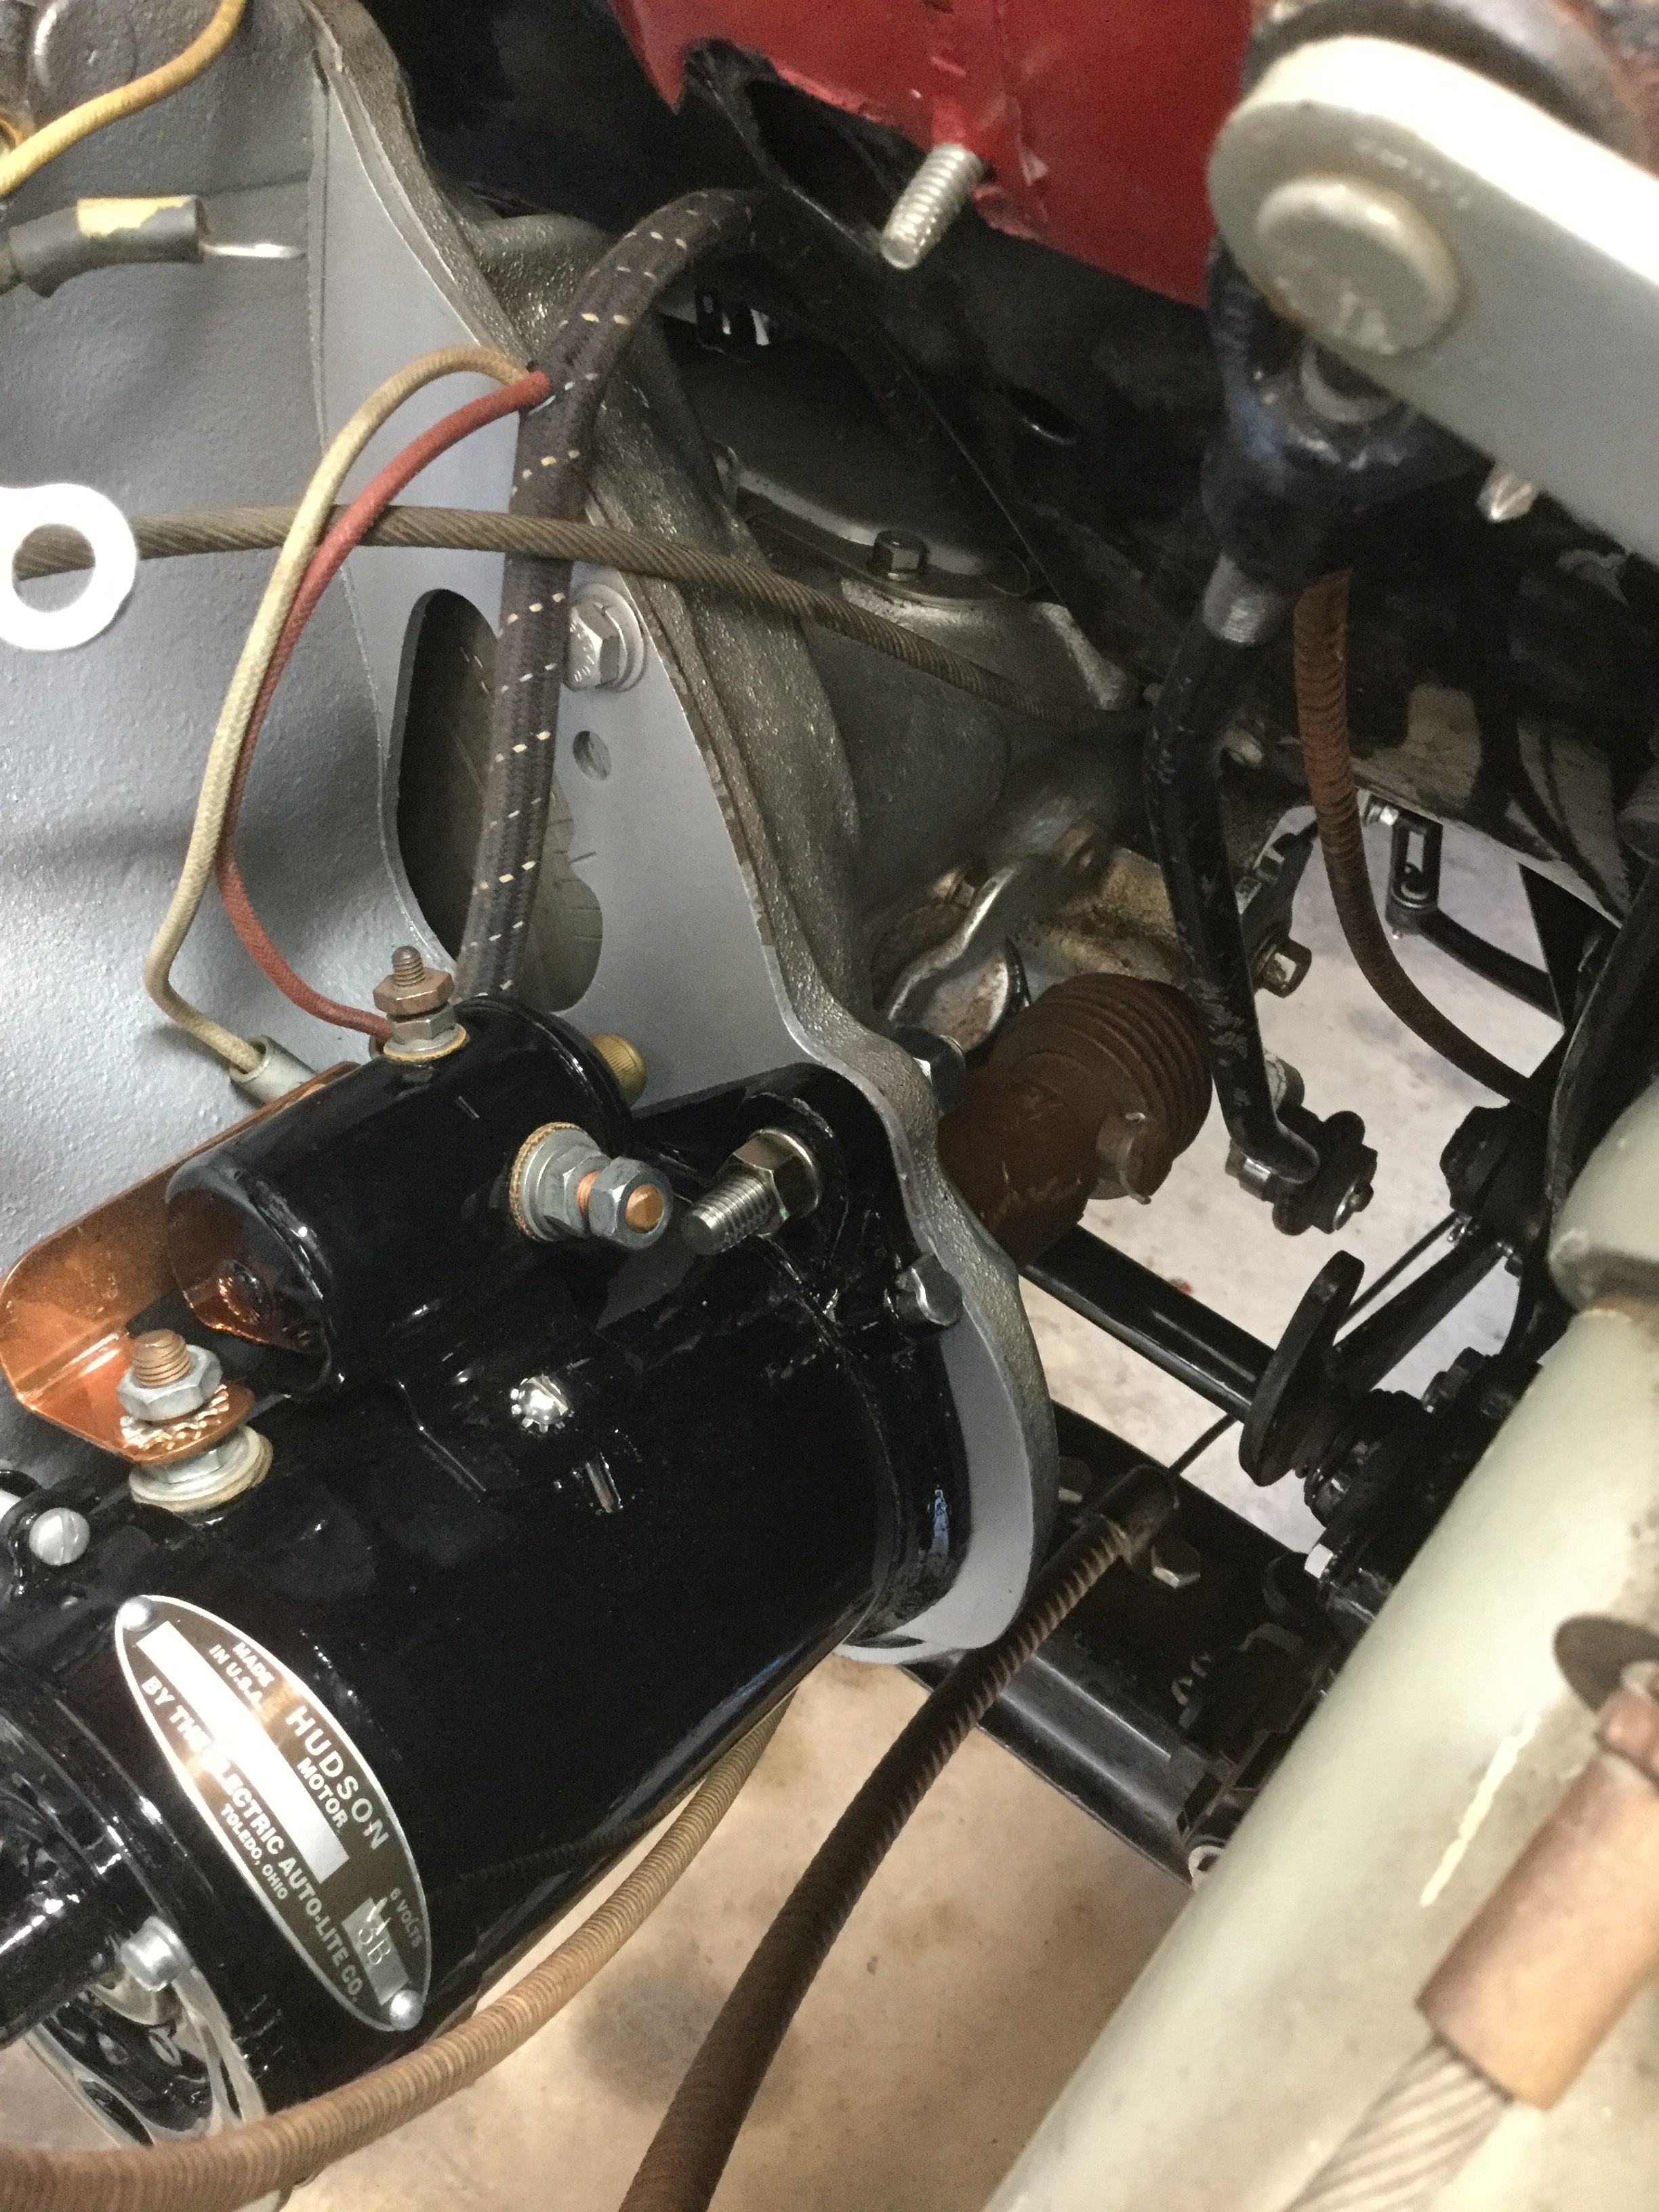 Ric West IN — I did not understand your post about separating the engine and transmission to install the studs. The shop manual makes no mention of that that I can find. I’m sure that what I have in there now will maintain alignment better than the 3/8ths bolts that came out.Tom0
 -
Good Luck0
-
A fine job, but totally wrong I'm sorry. The original studs have collars machined in the middle, which fit in the recess in the front of the bell housing to locate them in the correct position. You could get away with machining separate donuts (dowels) which fit around the studs and exactly into the recess in the housing, but you will still have to remove the bell housing to install them.0
-
Oh, and the studs are 3/8" both ends.0
-
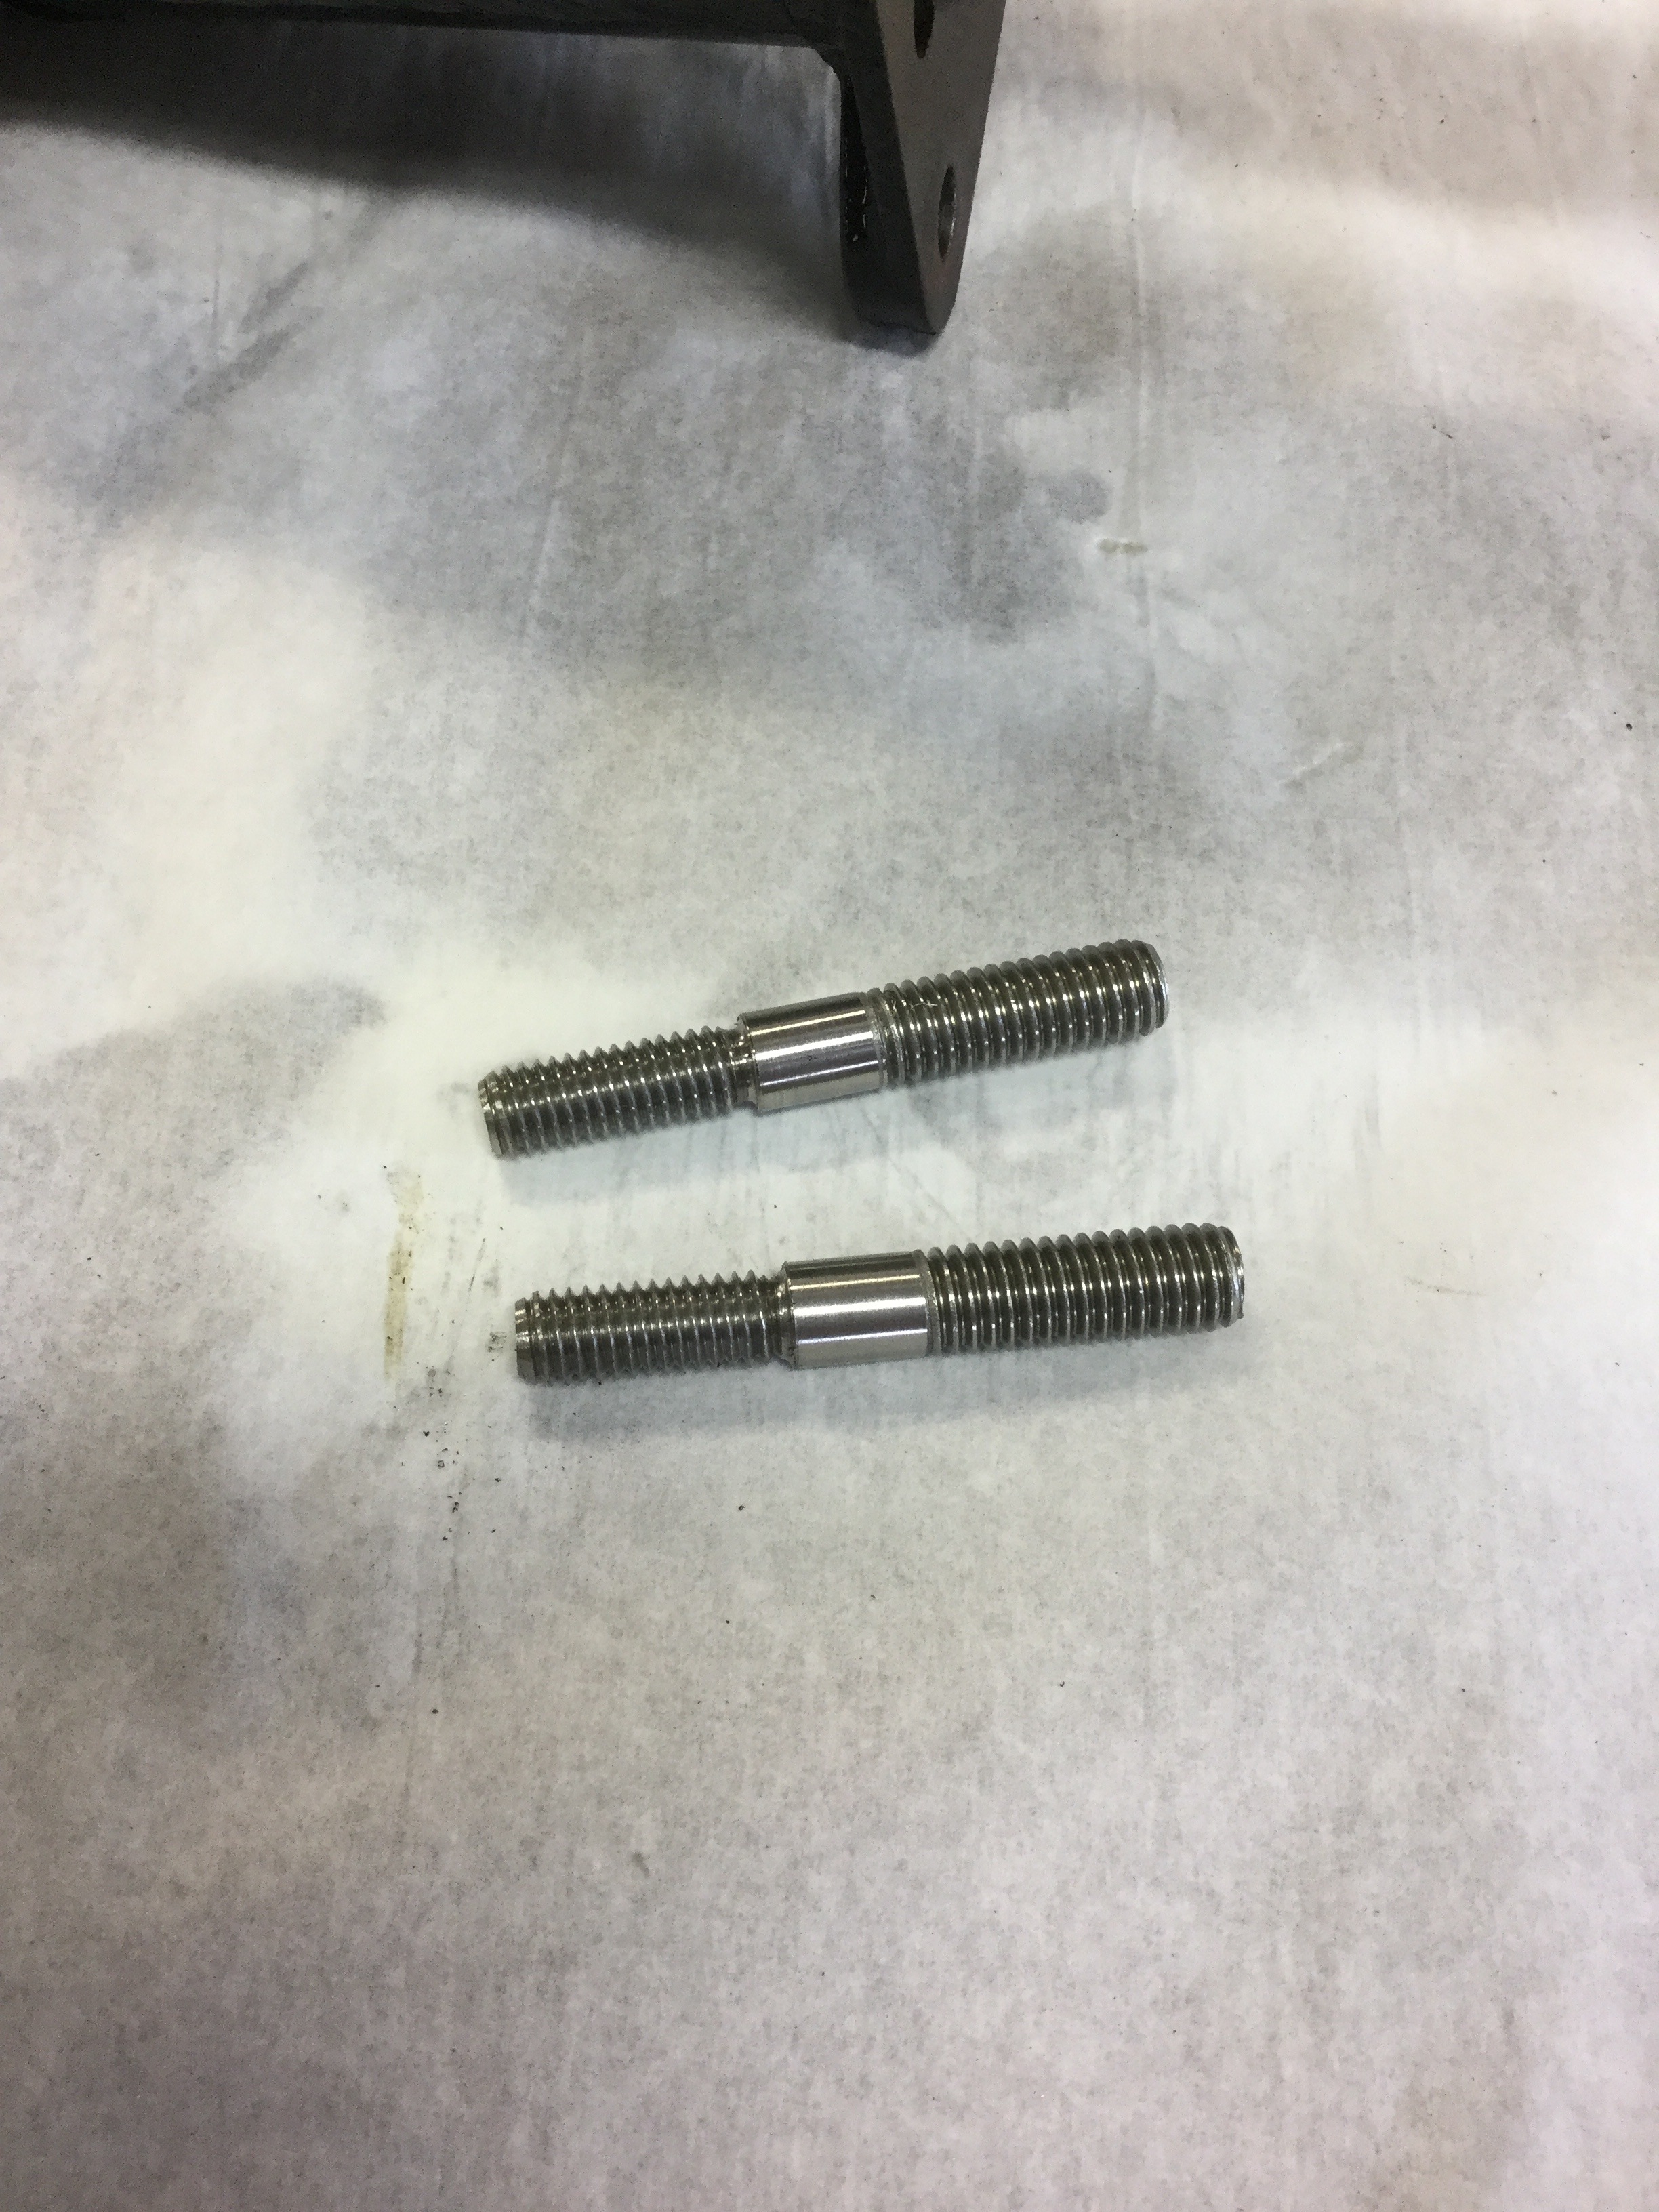
Photo is worth 1000 words. 2& 1/16" long, 3/8" threads each end, collar in middle is 1/2" diam by 4mm wide. Im sure many have cursed the stud
 0
0 -
Now I think I understand (finally). The main collar in the middle of the stud is sandwiched between the engine plate and the bellhousing? Do the smaller collars have a function and if so, what is their diameter?
Ric West IN— I really wasn’t trying to be flip when I said I didn’t understand. The whole process is clearer now.
Thank you everyone for the explanation and especially the photo. I will take the starter back off and get a strong light and dentist’s mirror and try to see how badly my bellhousing is damaged. The 7/16 threads that I thought were in the bellhousing really didn’t hold much. I guess some previous owner just drilled out the holes. The 7/16 threads on the big end of the studs I made just slipped right through the holes in the engine plate, so that has probably been “modified” also
Making the proper studs should be no problem.
Are good, non-wallowed-out ‘47 212 bellhousings and engine plates hard to come by?Thanks. Tom0 -
If the holes in the bell housing are still okay, that is, the 1/2" collars fit okay, then you don't need to replace the housing. Simply use hardened 3/8" washers each end of the studs.0
-
Here’s a follow-up. I had to take the engine and transmission back out of my pickup to address clutch issues (I’ll post a follow-up on a post about that when I have it back together)
Anyway I decided that, as long as it was apart, I’d go ahead and make proper starter mounting studs. They really were not hard to make, but were very tedious and time consuming. The diameter of the large collar is .600 (not .500) inches, and the only material I had on hand bigger than that was some 3/4 inch bolts. Once the whole thing was turned down to .600, the other two collars were turned to .425 and then both ends were turned to .373 so I could cut the 3/8-16 threads.What made it so time consuming was that the stock gets “whippy” in the lathe as the diameter gets smaller so I had to make real small cuts. It’s a good thing I’m a hobbyist AND retired. I’d never be able to make these things economicallyThanks again for the photo that put me on the right track
Tom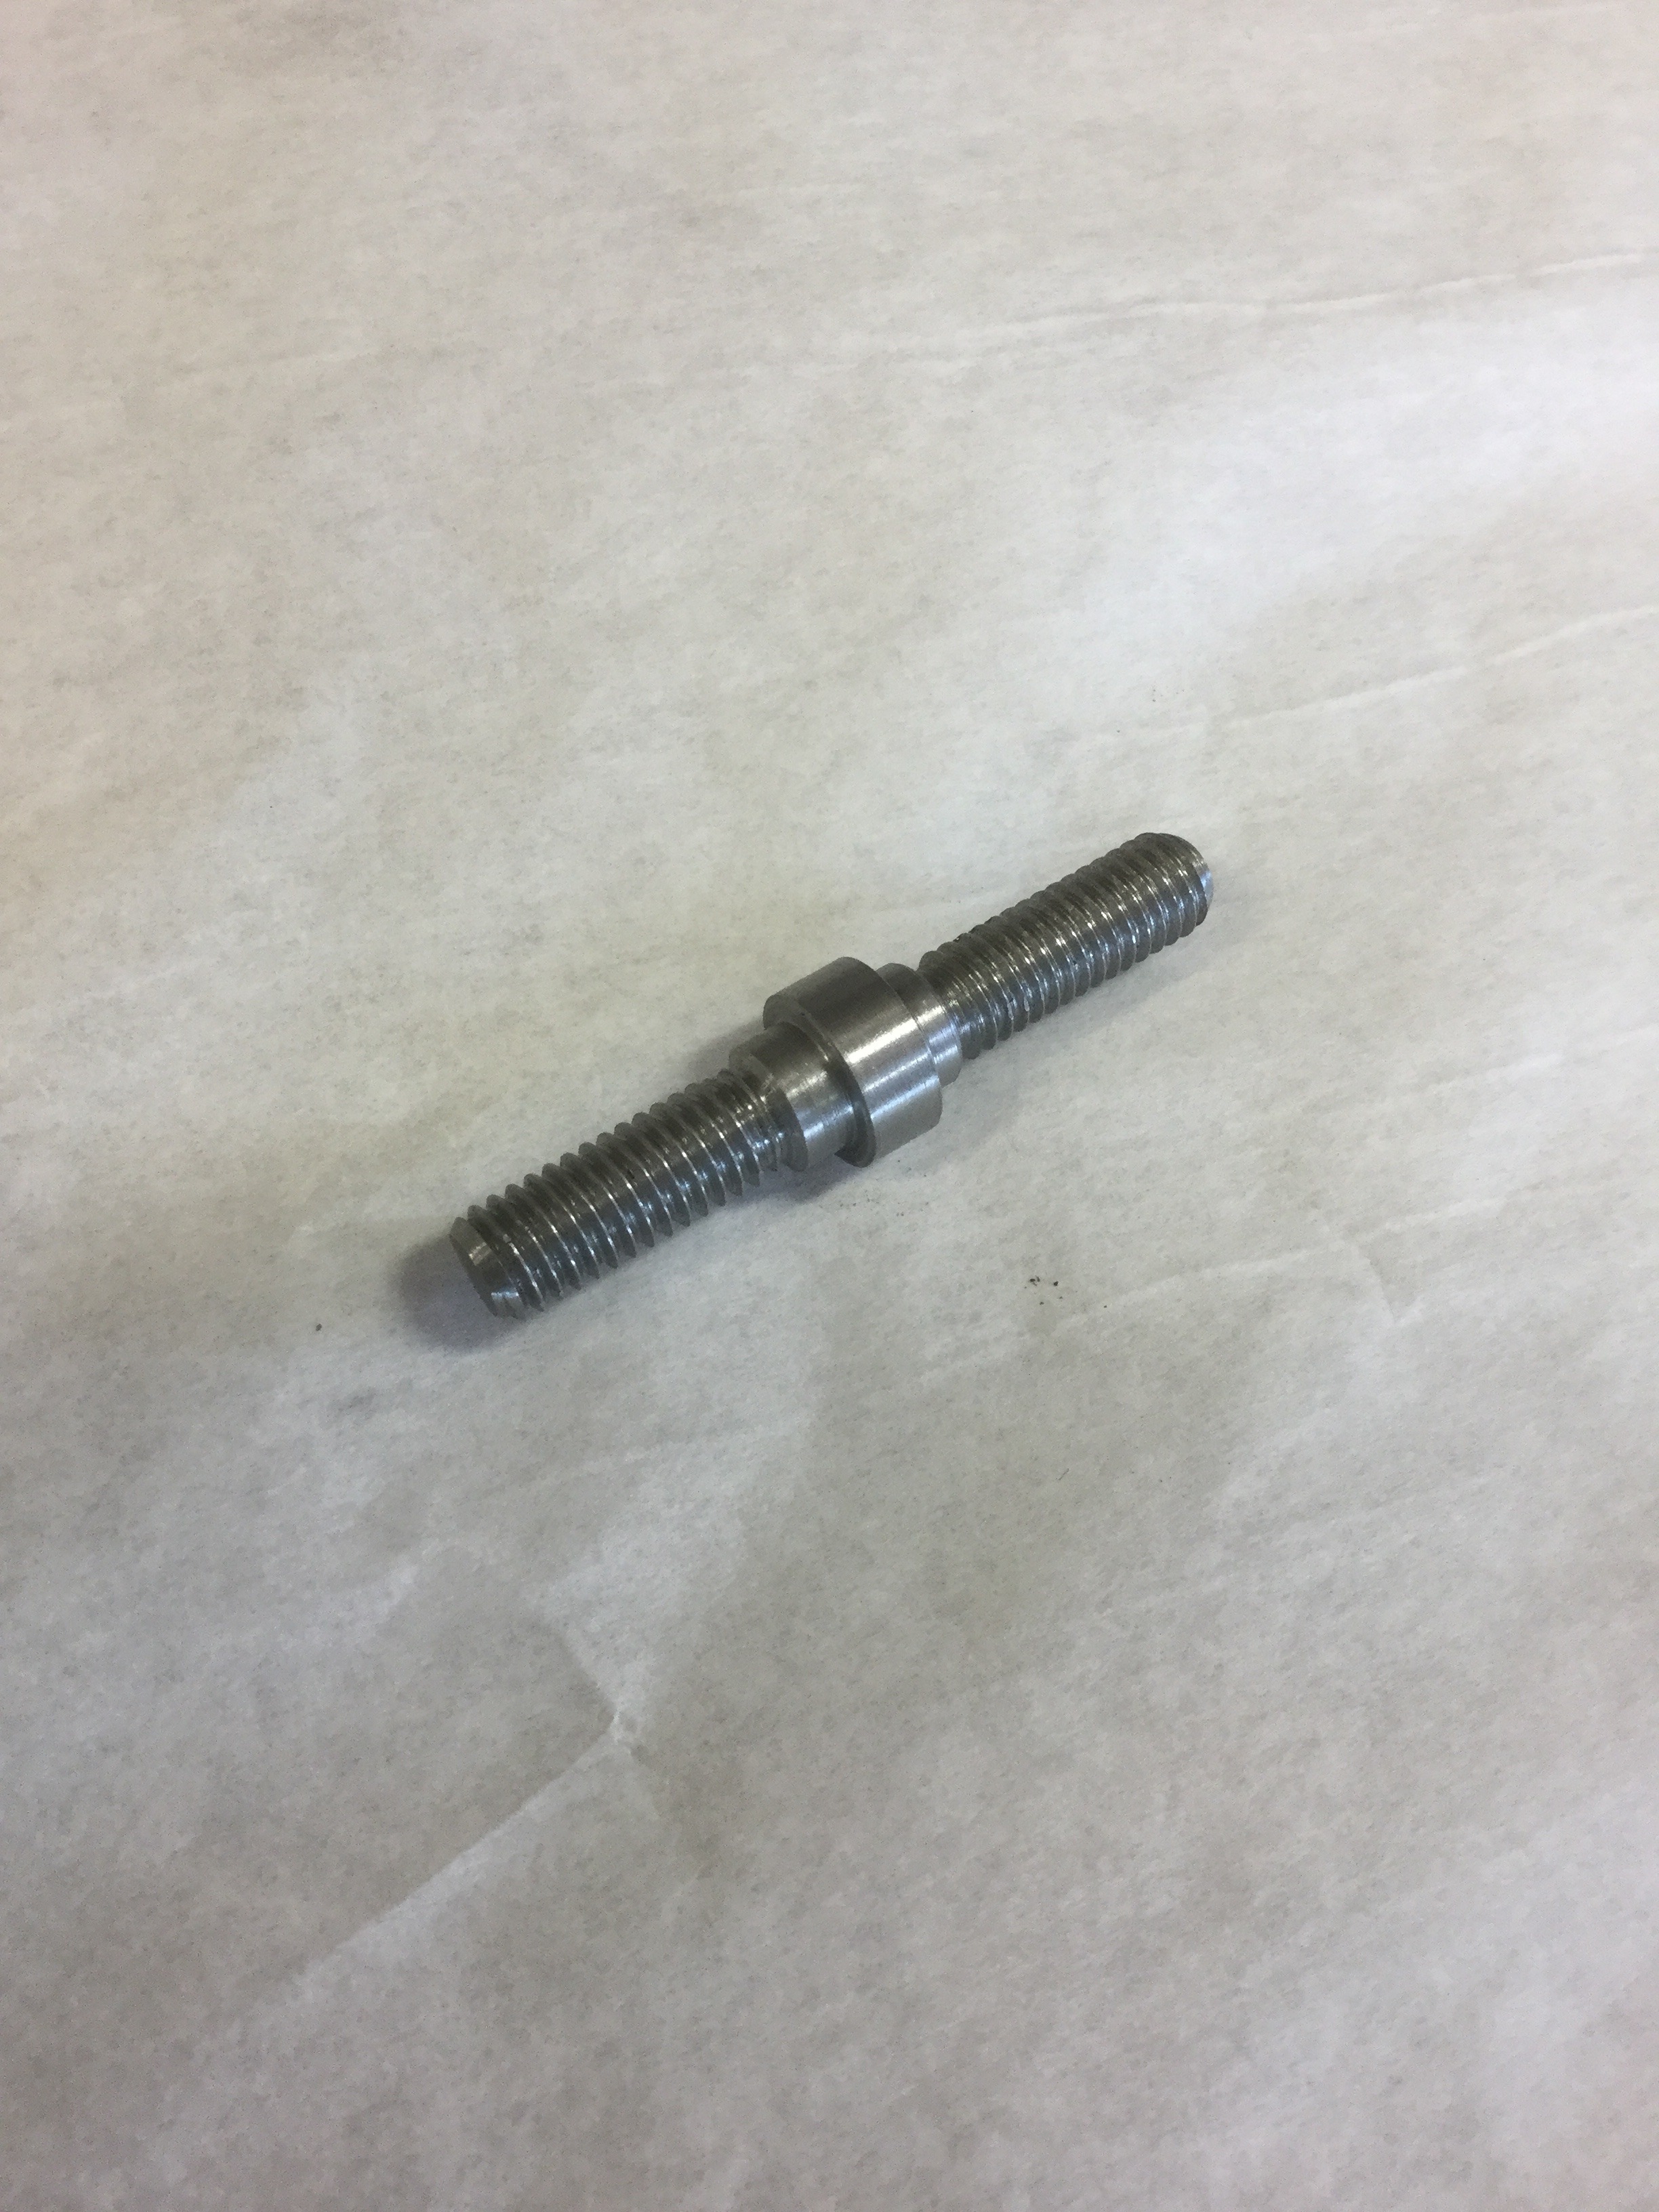
 0
0 -
Tom: great work and true restoration focus!0


Categories
- 37K All Categories
- 119 Hudson 1916 - 1929
- 21 Upcoming Events
- 100 Essex Super 6
- 28.7K HUDSON
- 595 "How To" - Skills, mechanical and other wise
- 995 Street Rods
- 151 American Motors
- 185 The Flathead Forum
- 49 Manuals, etc,.
- 79 Hudson 8
- 45 FORUM - Instructions and Tips on using the forum
- 2.9K CLASSIFIEDS
- 612 Vehicles
- 2.2K Parts & Pieces
- 78 Literature & Memorabilia
- Hudson 1916 - 1929 Yahoo Groups Archived Photos