A post to document my 46 pickup restoration.
longlivelance
Member
in HUDSON
I've been working on restoring a 46 Hudo pickup, which is my first restoration project ever. I did own a 47 pickup as a teenager, but it was in much better shape and did not require much work, so I didn't get much experience except for putting in a new wiring harness.
Now that I am a bit older, have some money saved, and, more importantly, a space to store and work on the truck, I am taking on my first real restoration project. I hope to learn as I go, but also to bring a Hudson back to life and give it some more time in our world.
I'm a little bit into the process and decided it would be good to start a thread to share & document the work, learning, and discussions around this restoration. So here it goes from the start to now.
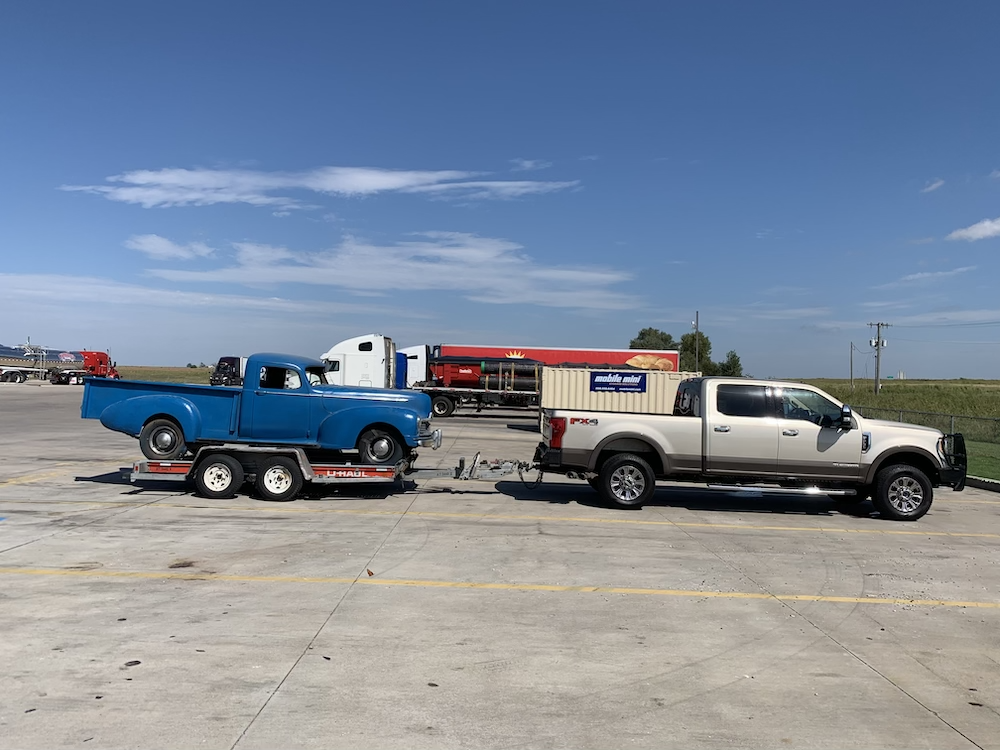
I purchased this truck towards the end of 2019 out in Wichita, KS, and trailered it home to Texas.
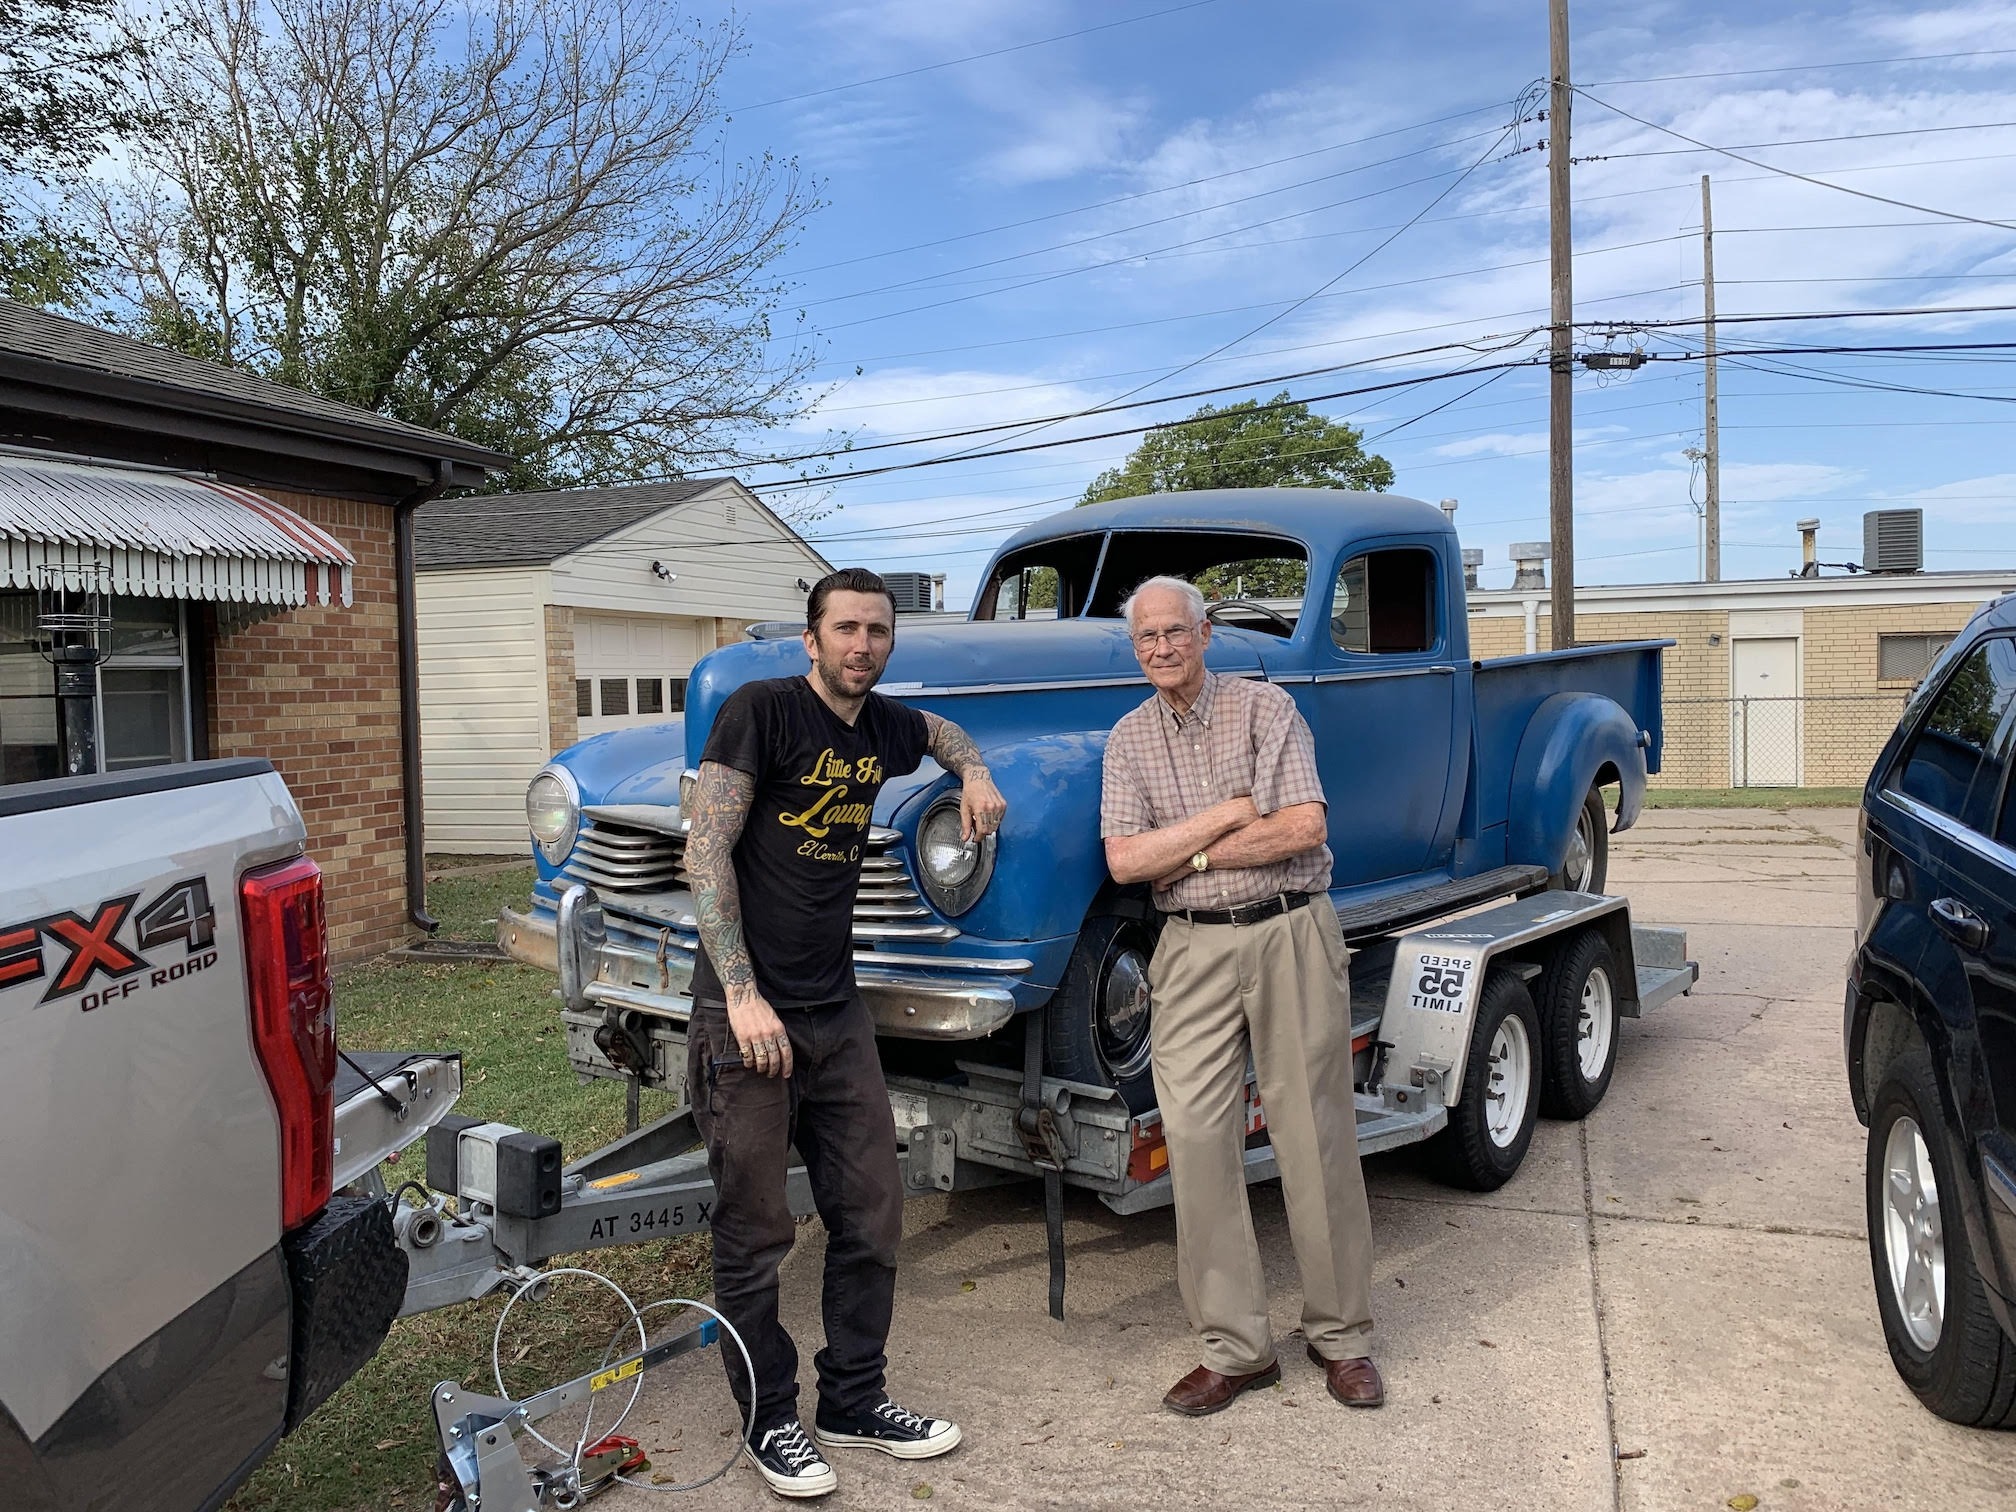
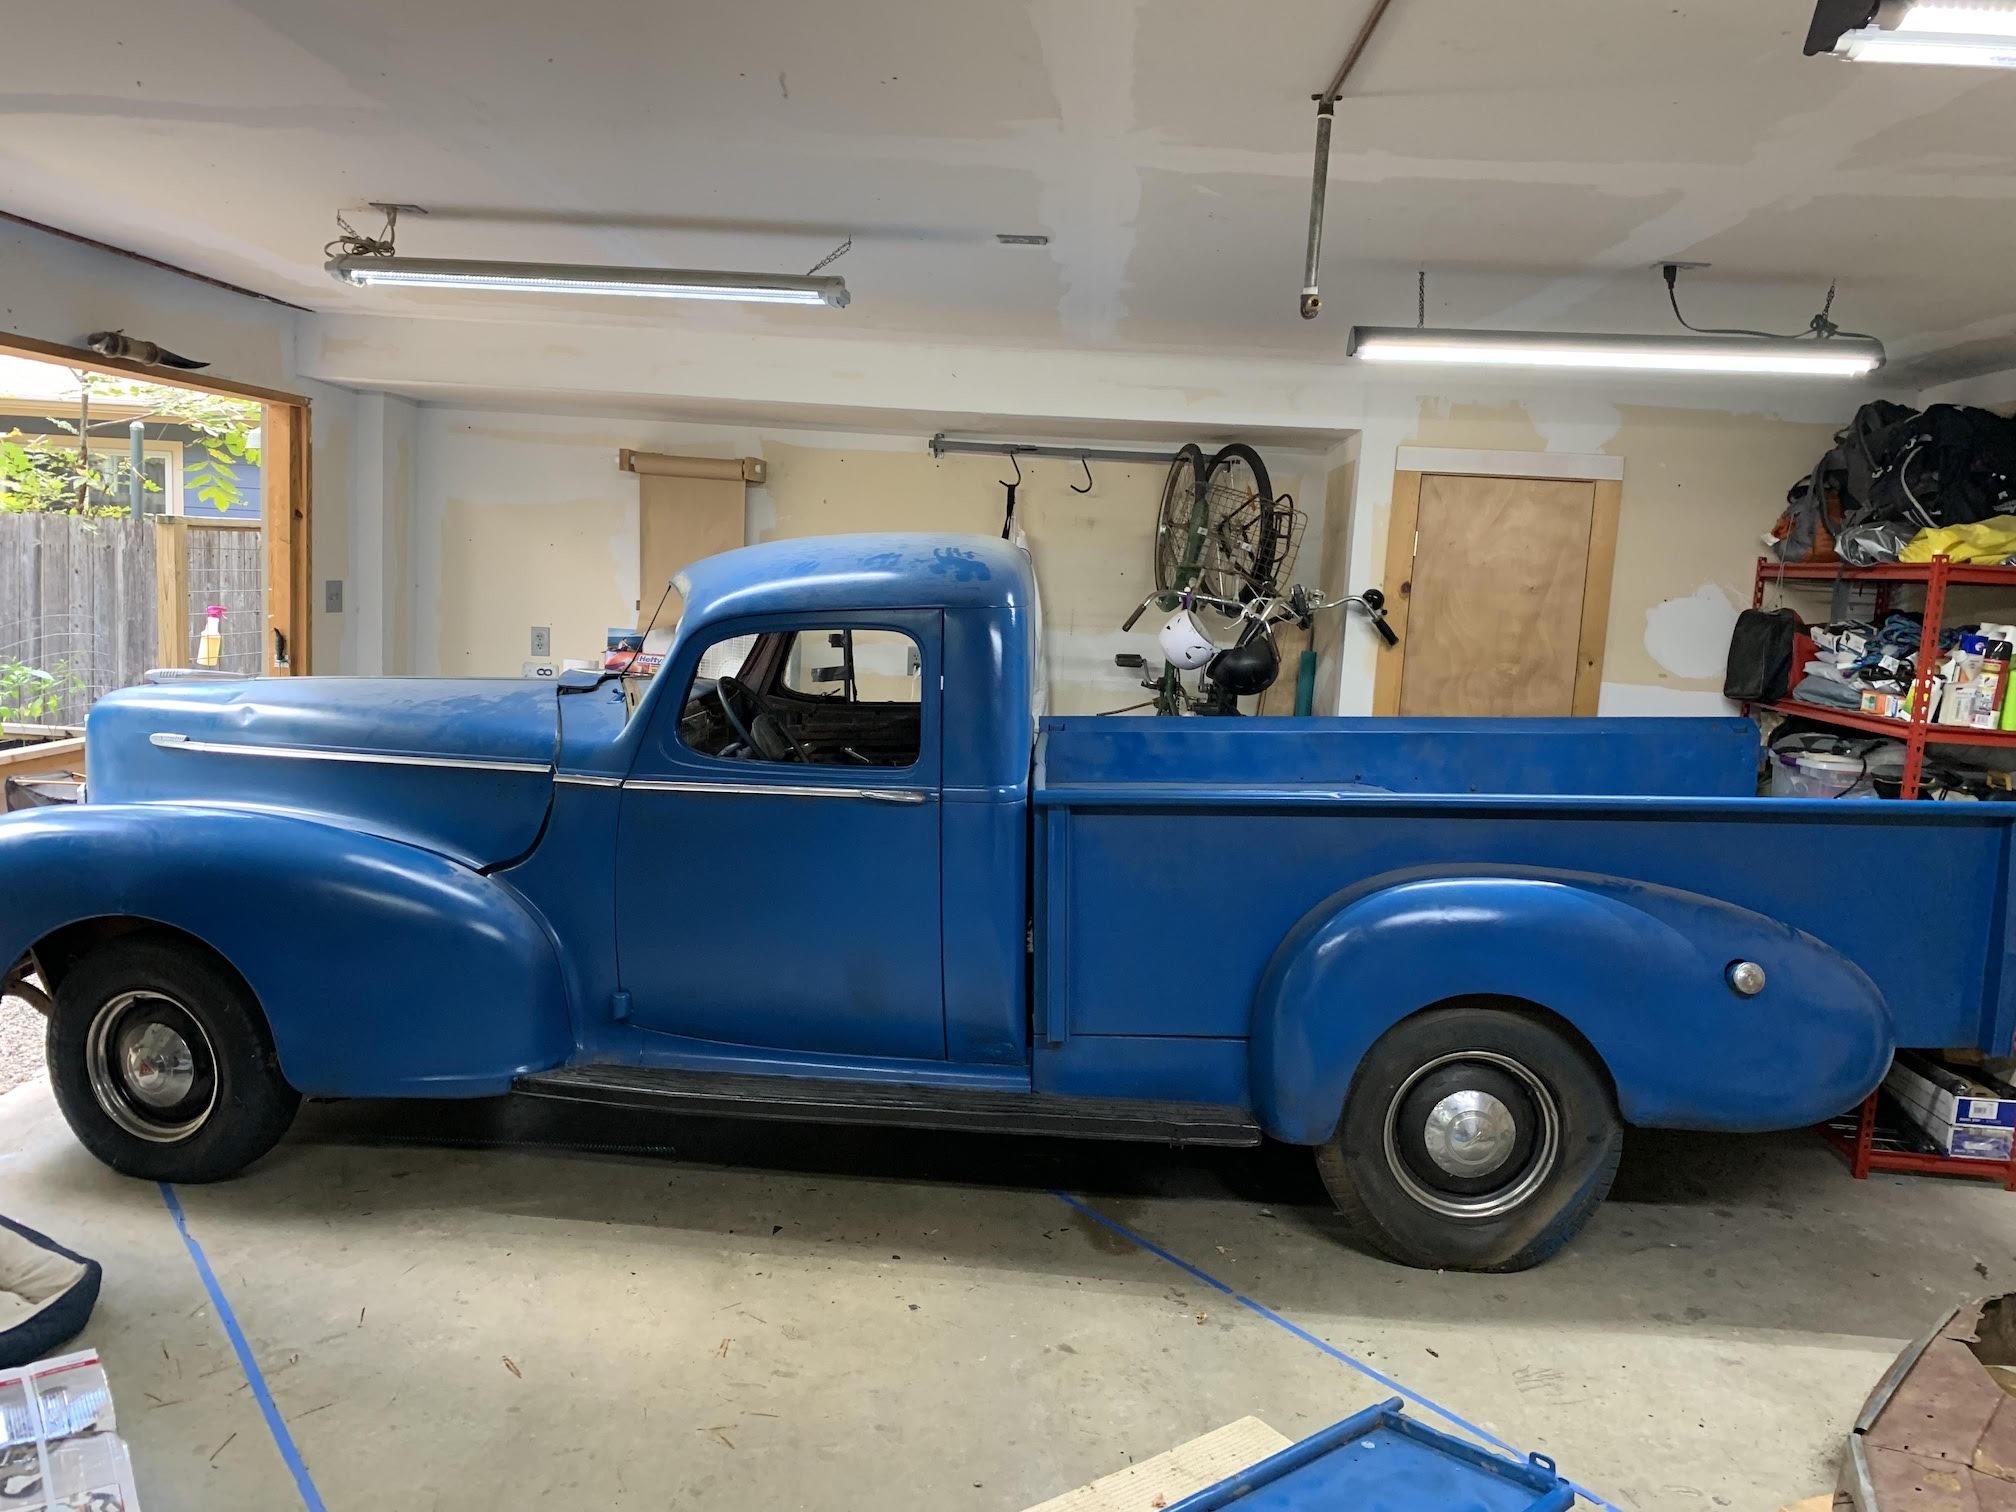
Once I got her home, the first thing I did was go through the motor. The condition was in surprisingly good shape for an engine that had not been started in who knows how long. The only real issue I found was a missing crankshaft pulley bolt and damaged screen filters in the oil pan.
I was able to clean up the receiving end for the bolt and get it installed. Lance Walker provided me with the bolt & Ken Cates supplied me with the special tab lock washer that goes around it.
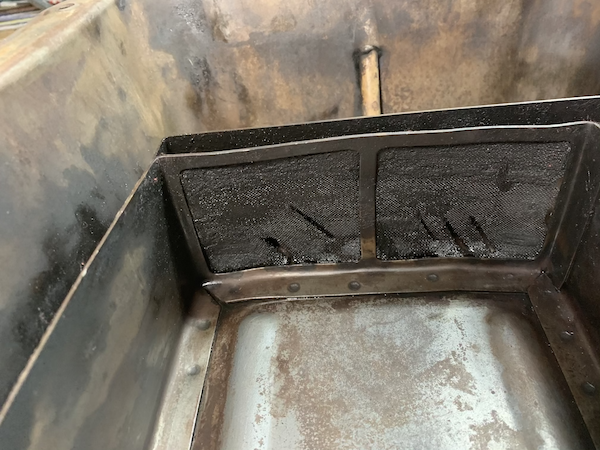
Here is the condition of the pan when I first pulled it. There were gashes in the filter screens, but no metal chunks or shavings anywhere, so I am not sure what could have caused them.
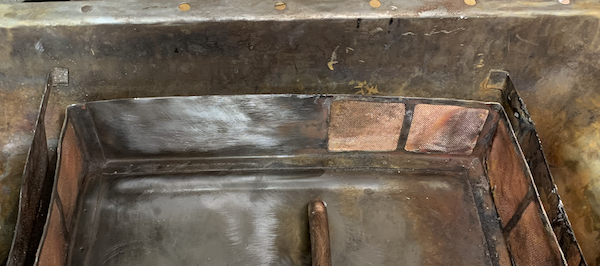
Here it is after I replaced the mesh. It was a total PITA, and my first time brazing anything. All in all, I think it came out decent.
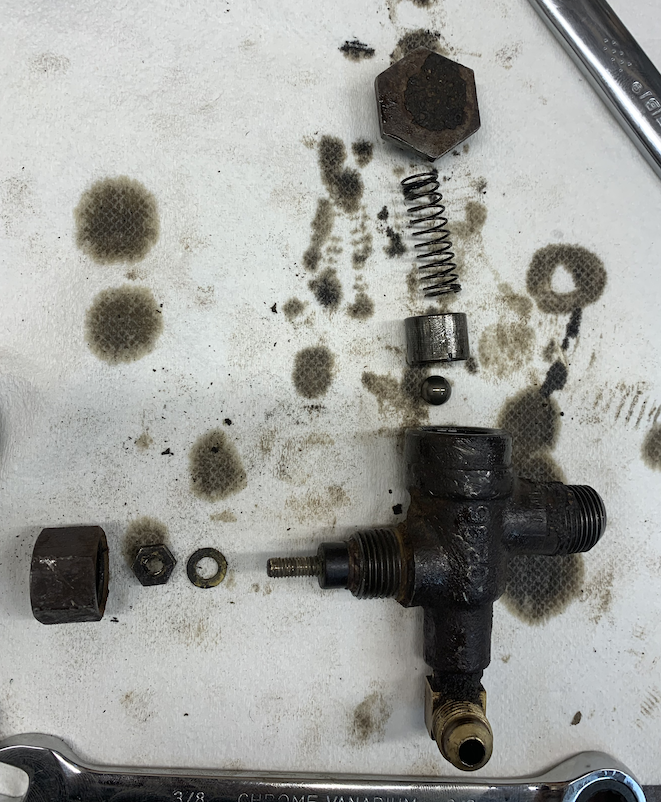
With the oil pan checked, cleaned, and repaired, I moved on to making sure oil was getting pumped. It was, so next, I rebuilt the sending unit and was satisfied things were getting lubrication, and it was safe to get the engine started.
It didn't take much to get her going, and the engine sounded pretty good.
https://www.youtube.com/watch?v=9TI4UTEH1cA
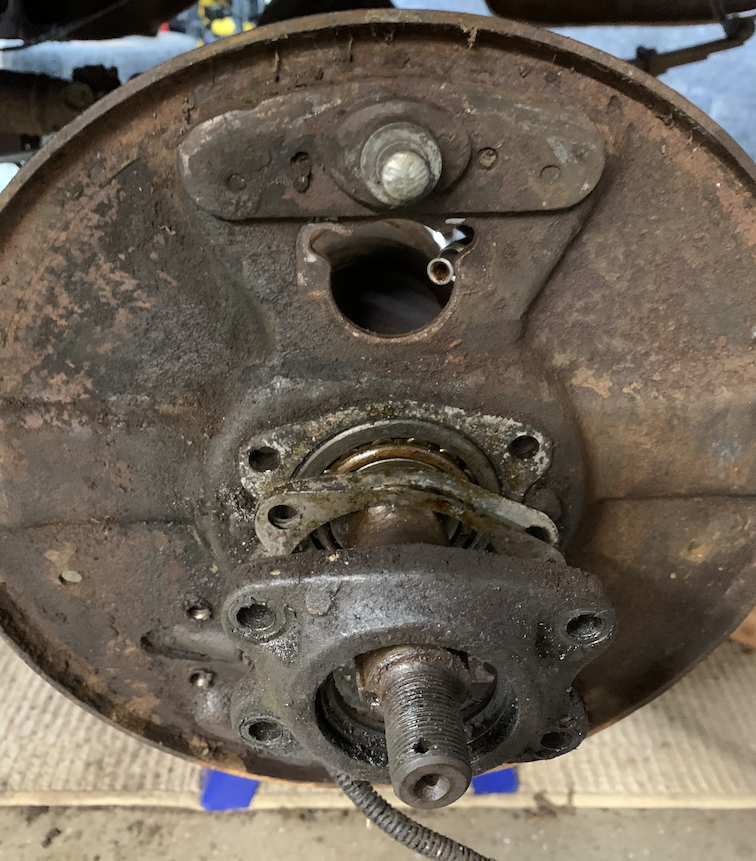
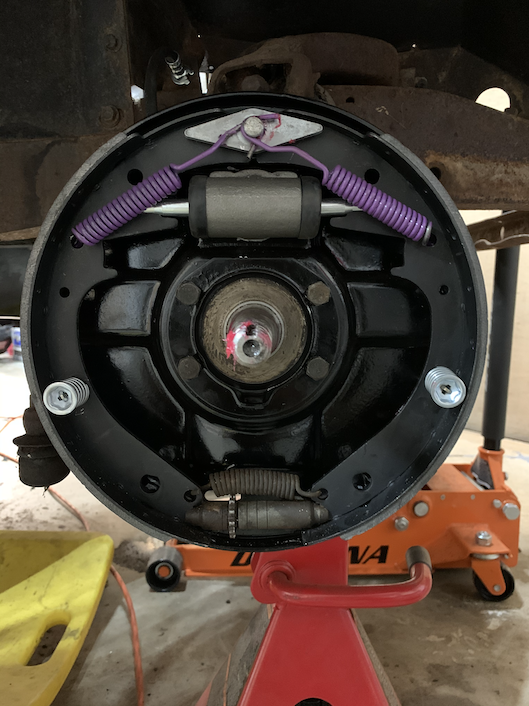
Now I wanted to drive it, so I moved onto braking. I found two of my drums had rusted all the way through. Al Saffrahmn & Lance Walker were able to help me with getting replacements. After tracking down the drums, and having them machined, we started on replacing lines, cylinders, shoes, and everything else.
Our local HET chapter here in Texas held a meet at my house where they taught me how to do brakes. Unfortunately, my parking brake situation was in pretty bad shape and totally seized. We managed to do the two front brakes, and with that, I had enough knowledge to do the rest on my own.
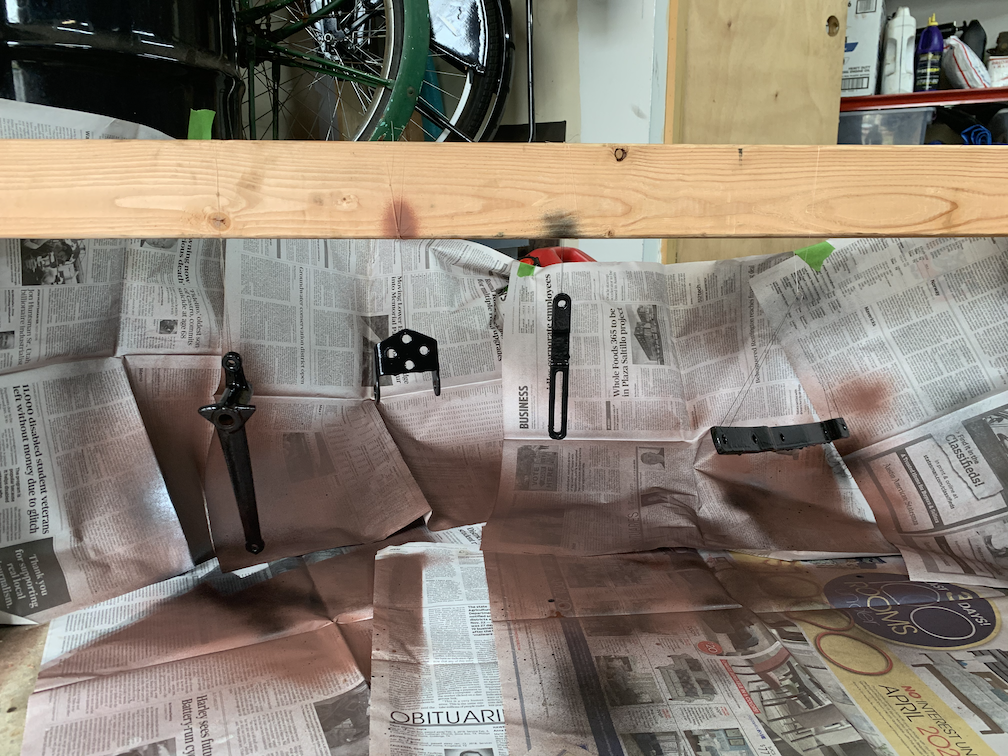
I removed all of the parking brake hardware and was able to free the cables with a few days of PB Blaster and some tugging. With the cables free, I cleaned up and painted all the hardware to be put back in, and finally, I was able to do the rear brakes. Thanks to all that came to that meet and helped educate me! I feel confident in my ability to take on any issue with the brakes now.
From there, I took it on its maiden voyage, and the brakes did what they're supposed to. Stopped the truck! The clutch felt good as well, and all gears engaged without issue. Now that I had a running truck that moved and stopped, it was time to start focusing on cleaning up the body and repairing what I could.
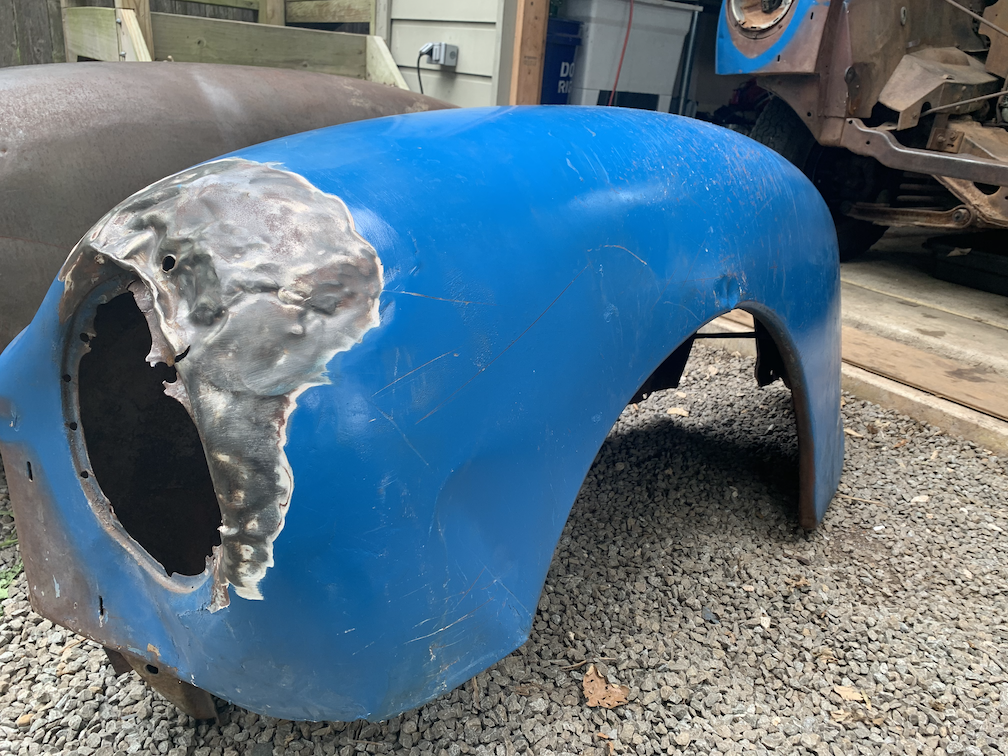
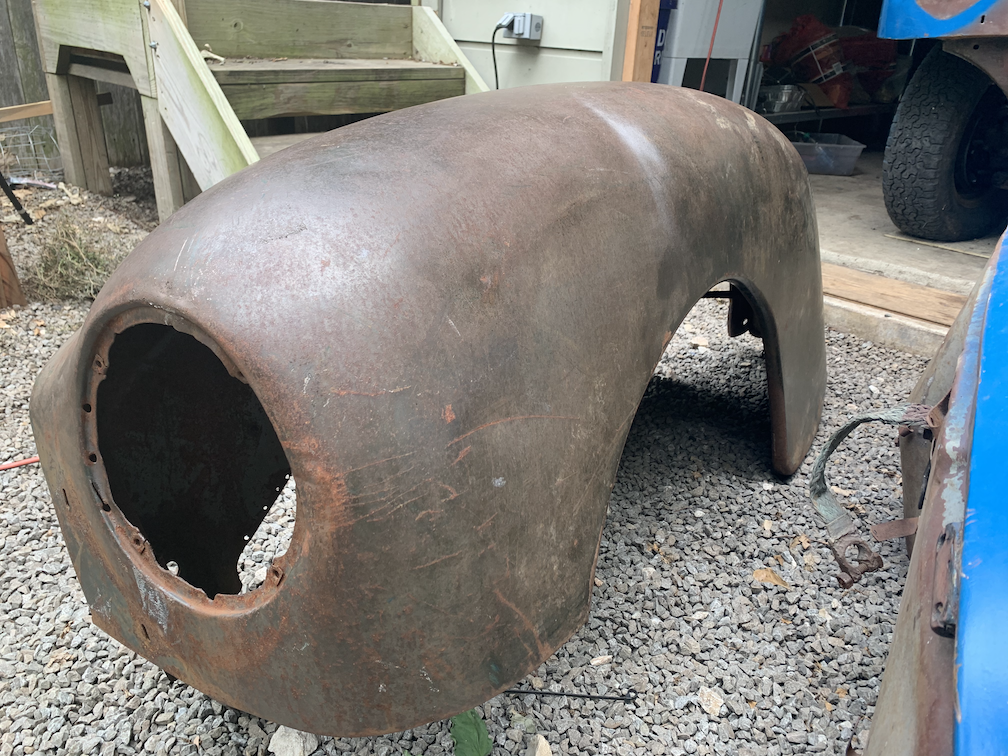
The front driver's fender was in extremely rough shape, and the metal was totally crumpled. I uncovered over 2.5 inches of Bondo covering it up. Yuck. Luckily, I was able to find a new truck fender, which I purchased and installed.
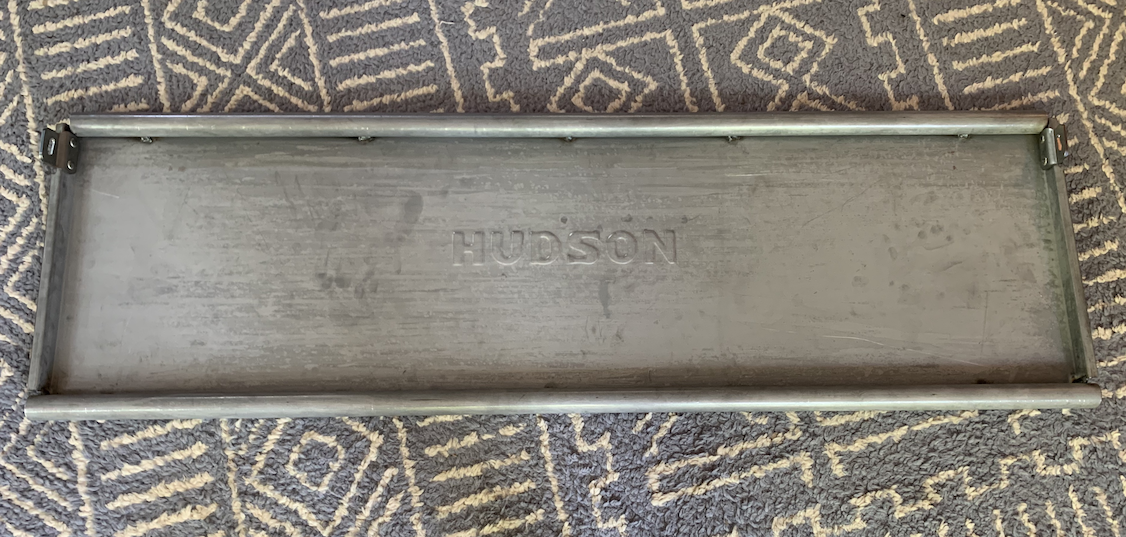
Next on my list, and where I am currently at with the project is sheet metal repair to the truck bed. It was pretty rough. I built a dolly to hold it and took it off the truck to start working on. Its tailgate was in very poor shape, but I was able to purchase a new one from Cary out in Utah. (On a side note, his father Glenn helped me purchase my first Hudson Pickup when I was 16. I can thank him for making my crazy dream of owning a Hudson pickup at 16 actually come true. So it is kind of cool to have a piece of that in my new truck as I believe he had these tailgates made.)
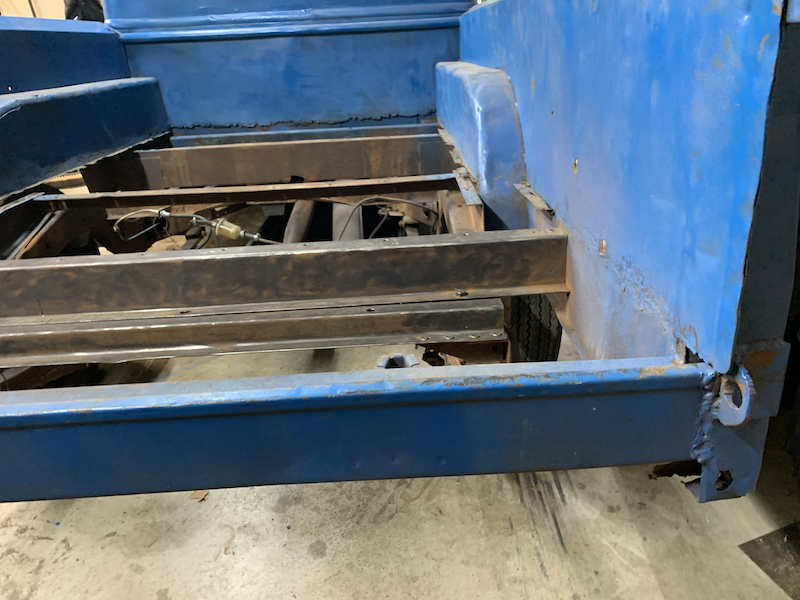
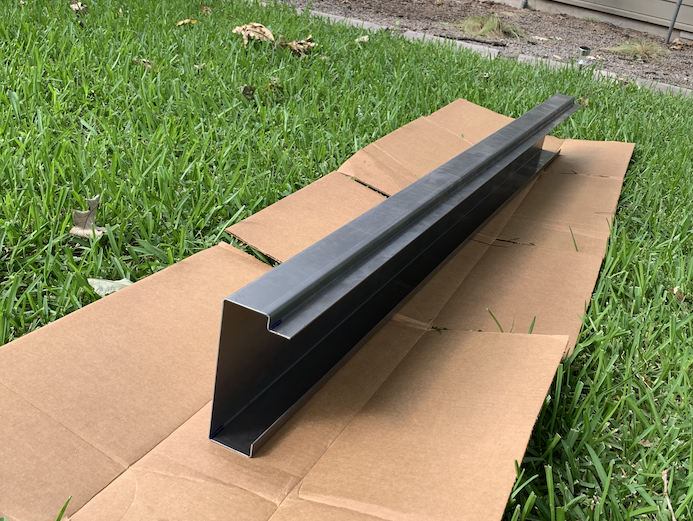
At some point, someone welded in a fix for the rear sill, which is not even close to what it should be. I had a proper one bent, and I plan to install it as I repair the bed.
But first, I want to repair the rust through on the front bed panel. I considered just repairing the rust, but the tubing and rest of the panel we're in bad enough shape that I decided to make one from scratch.
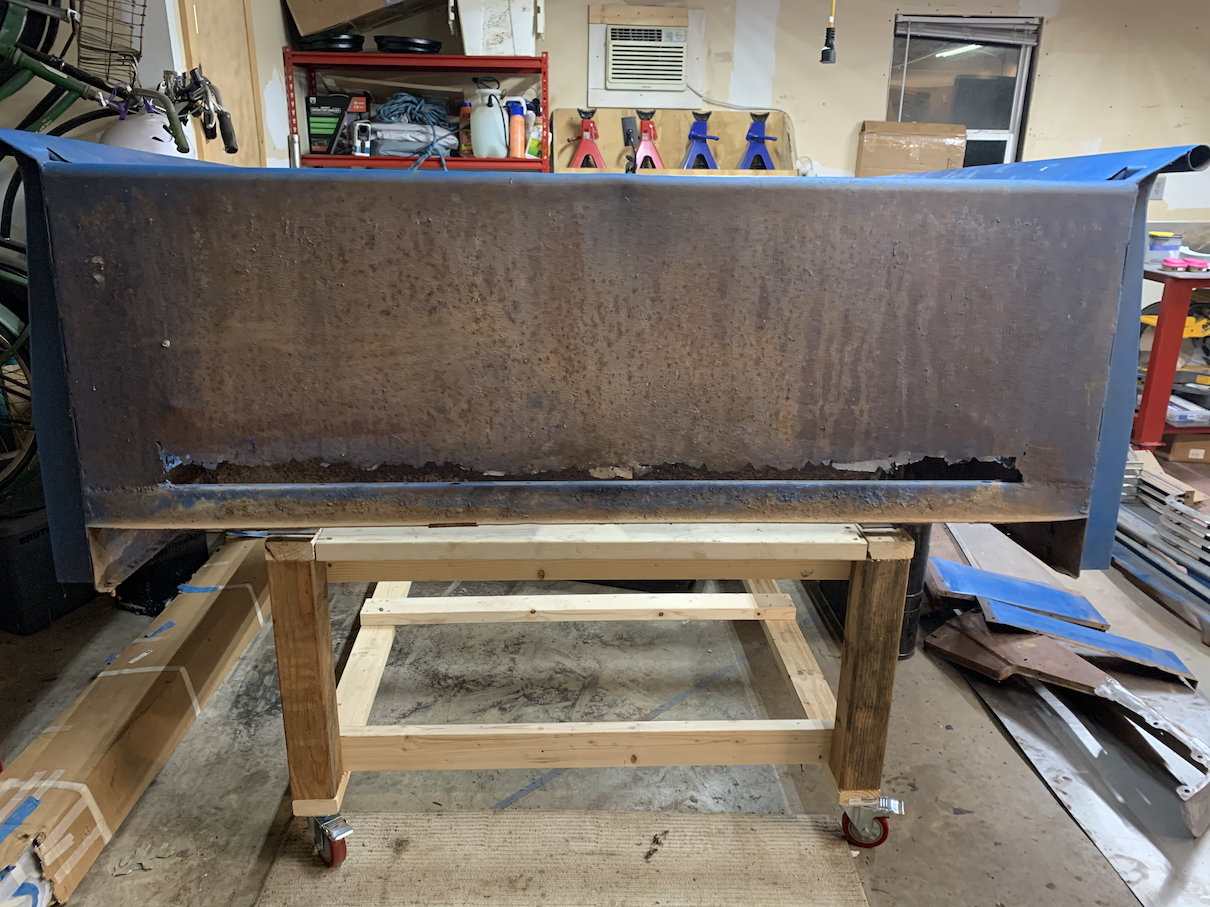
That is where I am currently and hopefully my next update on this thread will be that completed panel and its installation.


Once I got her home, the first thing I did was go through the motor. The condition was in surprisingly good shape for an engine that had not been started in who knows how long. The only real issue I found was a missing crankshaft pulley bolt and damaged screen filters in the oil pan.
I was able to clean up the receiving end for the bolt and get it installed. Lance Walker provided me with the bolt & Ken Cates supplied me with the special tab lock washer that goes around it.
Here is the condition of the pan when I first pulled it. There were gashes in the filter screens, but no metal chunks or shavings anywhere, so I am not sure what could have caused them.

Here it is after I replaced the mesh. It was a total PITA, and my first time brazing anything. All in all, I think it came out decent.

With the oil pan checked, cleaned, and repaired, I moved on to making sure oil was getting pumped. It was, so next, I rebuilt the sending unit and was satisfied things were getting lubrication, and it was safe to get the engine started.

It didn't take much to get her going, and the engine sounded pretty good.
https://www.youtube.com/watch?v=9TI4UTEH1cA
Now I wanted to drive it, so I moved onto braking. I found two of my drums had rusted all the way through. Al Saffrahmn & Lance Walker were able to help me with getting replacements. After tracking down the drums, and having them machined, we started on replacing lines, cylinders, shoes, and everything else.
Our local HET chapter here in Texas held a meet at my house where they taught me how to do brakes. Unfortunately, my parking brake situation was in pretty bad shape and totally seized. We managed to do the two front brakes, and with that, I had enough knowledge to do the rest on my own.
I removed all of the parking brake hardware and was able to free the cables with a few days of PB Blaster and some tugging. With the cables free, I cleaned up and painted all the hardware to be put back in, and finally, I was able to do the rear brakes. Thanks to all that came to that meet and helped educate me! I feel confident in my ability to take on any issue with the brakes now.


From there, I took it on its maiden voyage, and the brakes did what they're supposed to. Stopped the truck! The clutch felt good as well, and all gears engaged without issue. Now that I had a running truck that moved and stopped, it was time to start focusing on cleaning up the body and repairing what I could.
The front driver's fender was in extremely rough shape, and the metal was totally crumpled. I uncovered over 2.5 inches of Bondo covering it up. Yuck. Luckily, I was able to find a new truck fender, which I purchased and installed.


Next on my list, and where I am currently at with the project is sheet metal repair to the truck bed. It was pretty rough. I built a dolly to hold it and took it off the truck to start working on. Its tailgate was in very poor shape, but I was able to purchase a new one from Cary out in Utah. (On a side note, his father Glenn helped me purchase my first Hudson Pickup when I was 16. I can thank him for making my crazy dream of owning a Hudson pickup at 16 actually come true. So it is kind of cool to have a piece of that in my new truck as I believe he had these tailgates made.)

At some point, someone welded in a fix for the rear sill, which is not even close to what it should be. I had a proper one bent, and I plan to install it as I repair the bed.


But first, I want to repair the rust through on the front bed panel. I considered just repairing the rust, but the tubing and rest of the panel we're in bad enough shape that I decided to make one from scratch.

That is where I am currently and hopefully my next update on this thread will be that completed panel and its installation.
0
Comments
-
Your work looks great so far. My first car was a 46 Hudson pickup as well. Take your time. Do it right. (It looks like you are) Please keep updating your progress. I, for one, will be watching closely. Thanks for sharing.0
-
Looking good.
0 -
Yes, thanks for sharing and as stated above your work looks great so far. Looking forward to following your post.0
-
I was thinking the entire truck was similar to the cobbled rear sill but it looks pretty good in the photos. Get a new front panel bent at your sheet metal shop. The top roll is just a piece of tubing welded to the panel. I might have a pic of when I did mine. Hopefully the bottoms of your bed side panels are good metal, mine were not great but repairable. If they are rusted badly you may need to get some U shaped lengths made to replace where the wood inserts. I like what you are doing0
-
Thanks all! It has been a journey so far and a lot of fun learning. I've appreciated all the advice and guidance I have received from the club and fellow Hudson lovers.
The bed sides are mostly good metal. There are a couple of rough spots that I will replace when I put the rear sill in. All the rough metal is in that area. I will also need to re[air or fabricate the wheel wells as they are very rough.
I just about finished the front panel for the bed. All that is left is some patients and detail clean up. But overall it came out a lot better then I expected it too, being this is the first time I have fabricated anything on my own.
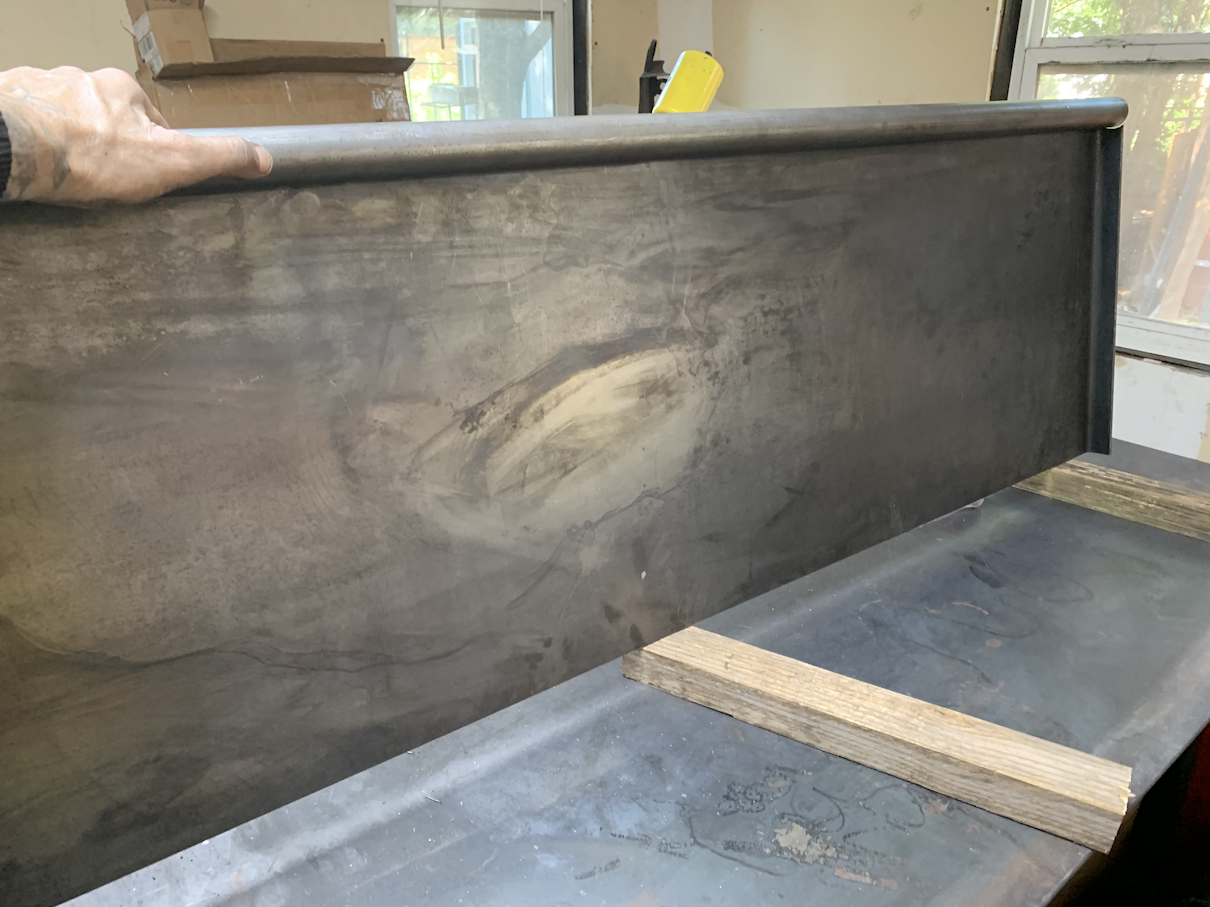
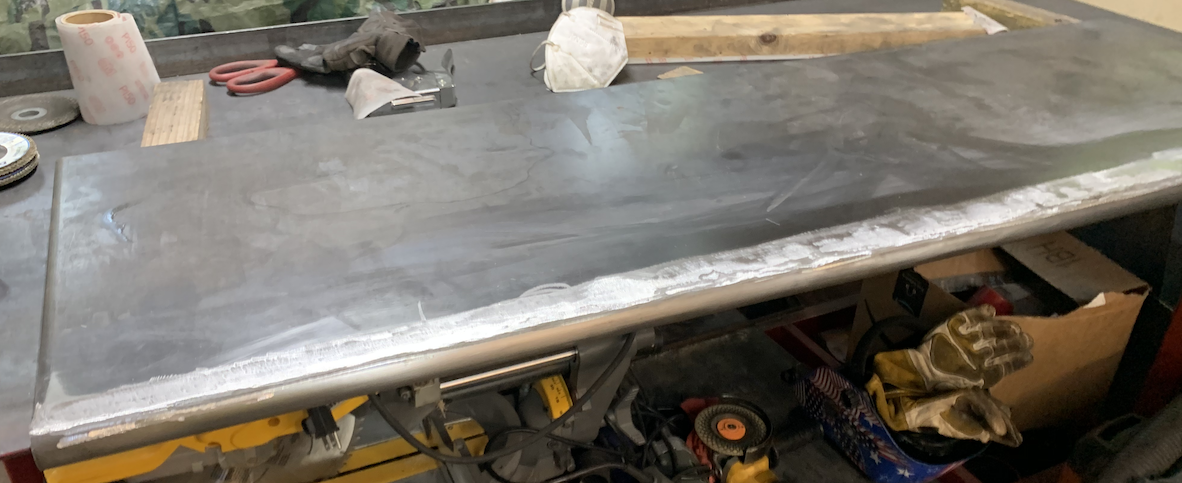
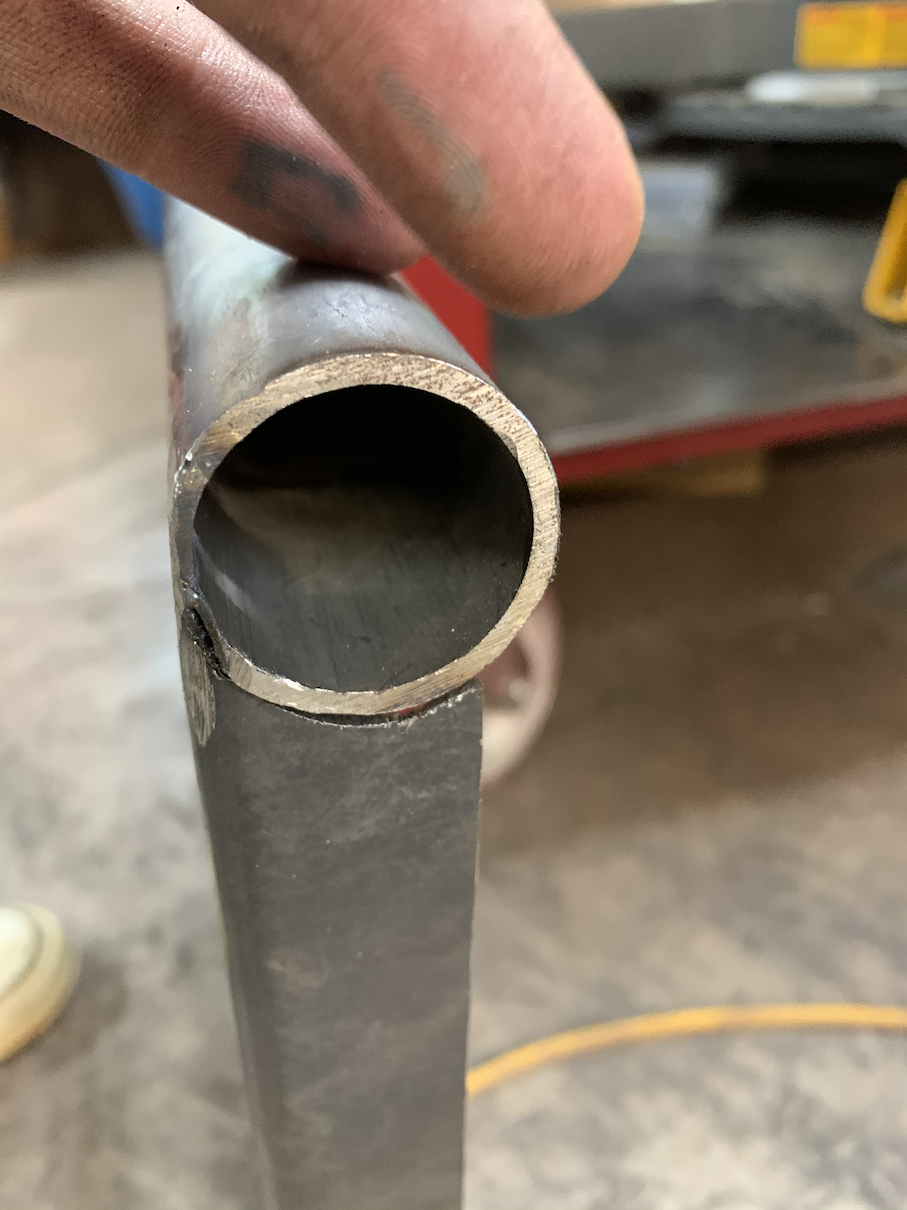
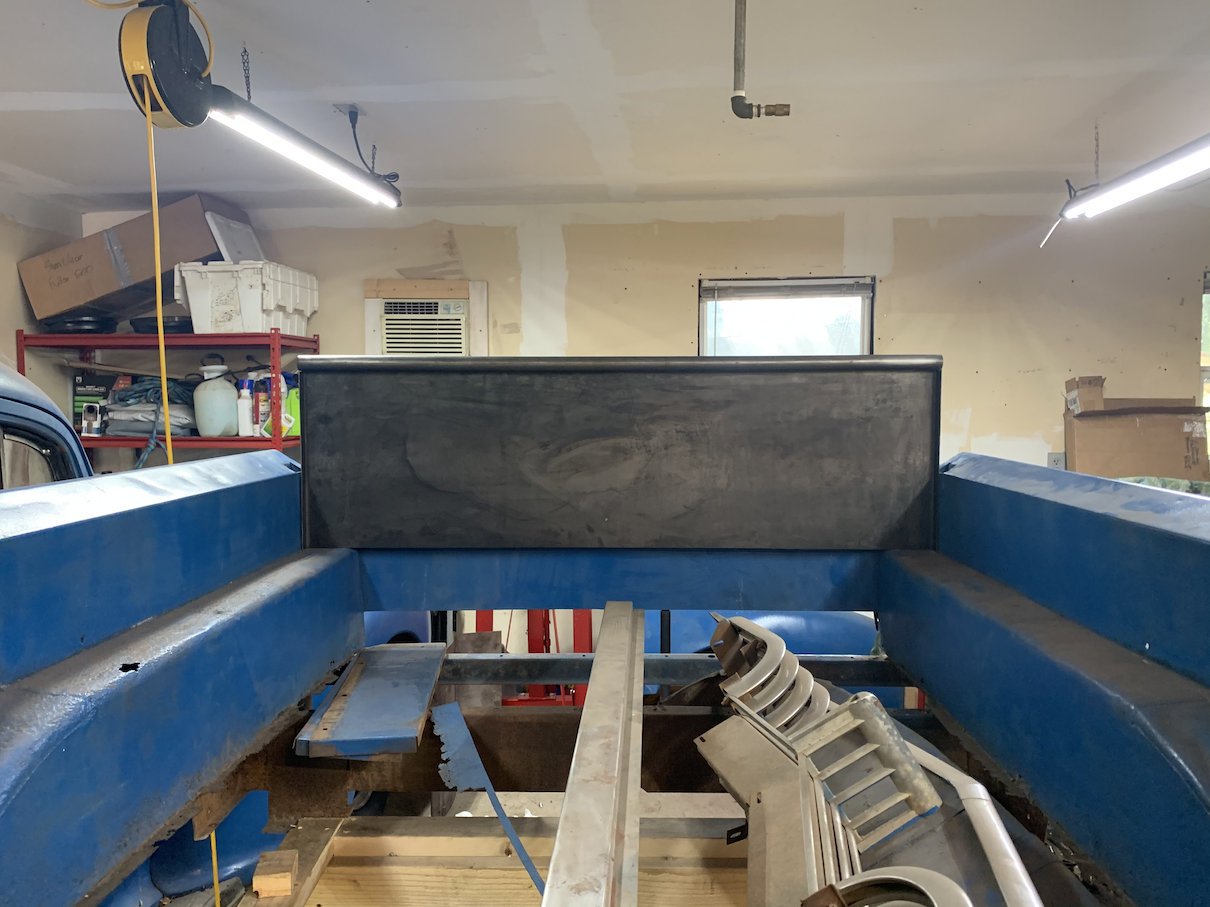
Now to remove the old panel and to put the new one in.0 -
Nicely done!
 Keep the photos coming.
0 -
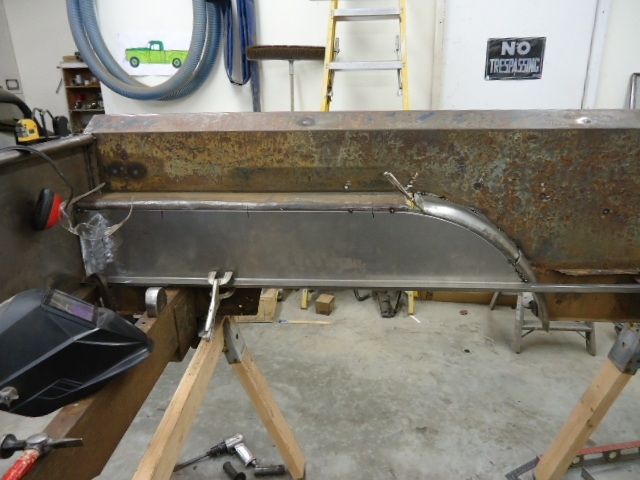
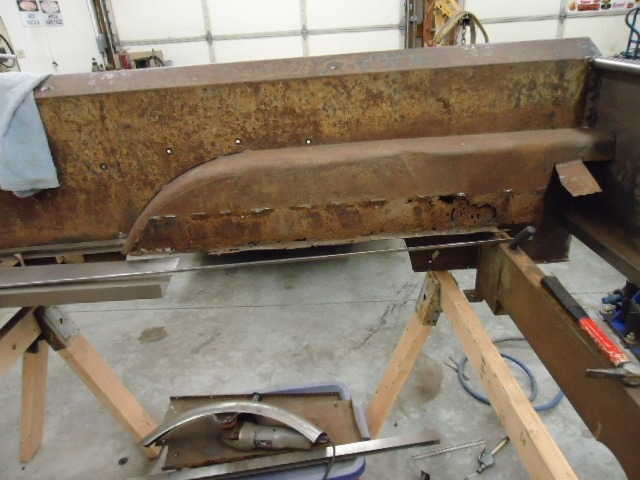
That is same method I used on my front bed panel. It makes for a nice repair. The wheel wells were very rough on mine so I bought a trailer fender to repair the curved part at the rear. It is 16 or 14 gauge material then cut it in half. Then cut one of those halves in half lengthwise this gave me a right and left curved back panel. The fender was about 14 inches wide which made the 7 inch pieces perfect to replace the rusted parts. I will try to find photos of this. Not as much detail as I thought but it shows the basic idea
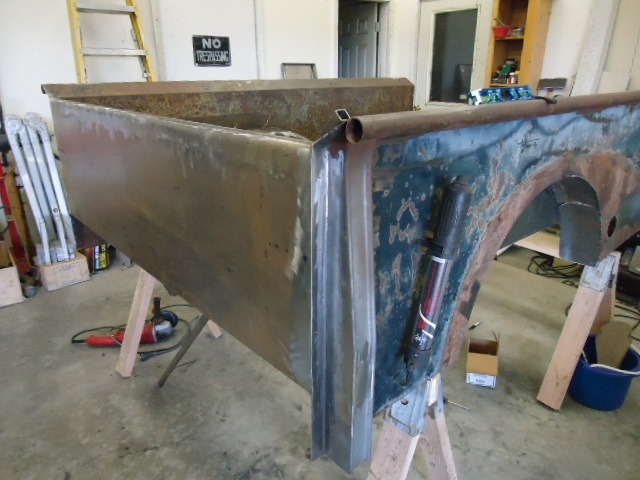
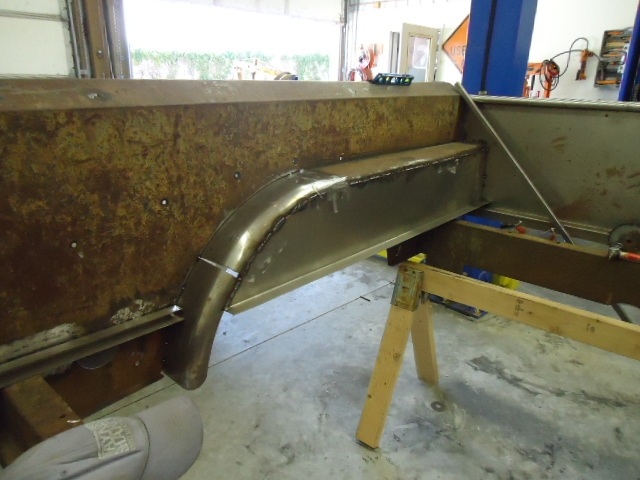 0
0 -
Trailer fenders are a great idea that had not crossed my mind. Looking around I can see that is a perfect starting point for the wheel wells! Thanks for the tip.
Thanks also to Bent Metal for sending me a ton of photos that I have been and will be using during my repairs. Super helpful.0 -
Great work, thanks for sharing it all. Enjoy watching the progress.
0 -
Project looks like some high quality work, thanks for posting progress. I would be interested in the old fender, tailgate and parts you take off, post them up for sale there could be some one else interested in the usable pieces as well.0
-
If I have any spare parts at the end of the project, I'll definitely list them here and in the WTN if I do not need them.
There is a tailgate currently listed in the WTN at a good price.
I built one wheel well. I had to get creative and do a lot of hand bending as I do not have a brake big enough to handle them. It came out better then I had expected, but my clamp slipped when hand bending the large diameter bend, and it is obviously off a bit from that as you can see in the photos of it being test fit. My goal with hand bending the large diameter is to replicate the factory pattern as best I can.
I'll try and make the right side wheel well next, correcting the mistakes I made this first go, and see how that comes out, then likely redo the left one if it is any better. Or at a minimum, try and correct the error on the first one as best I can.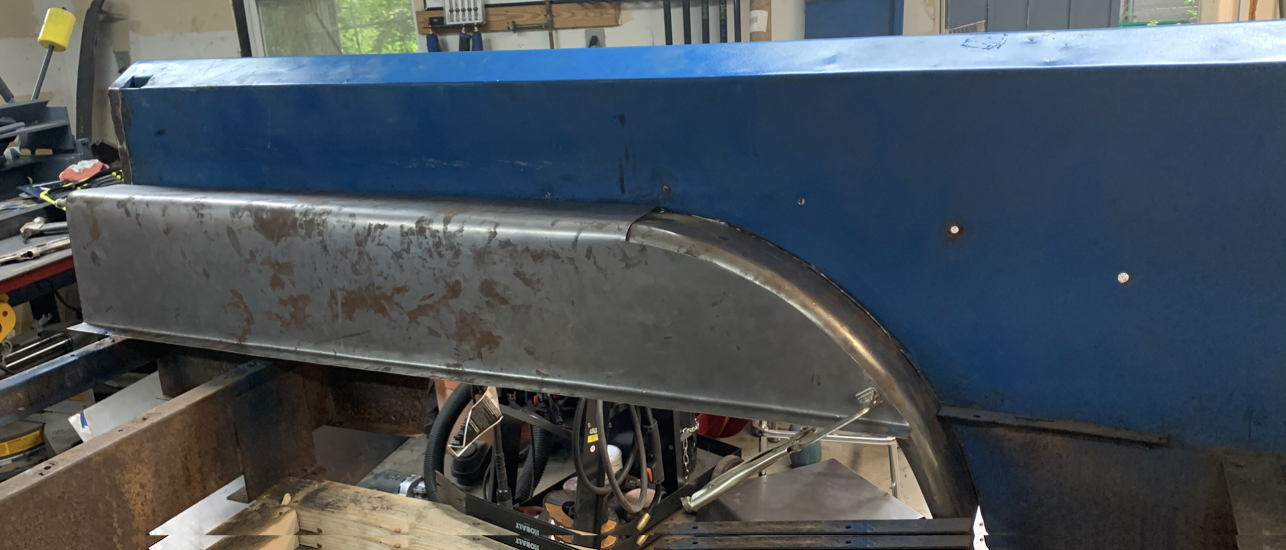
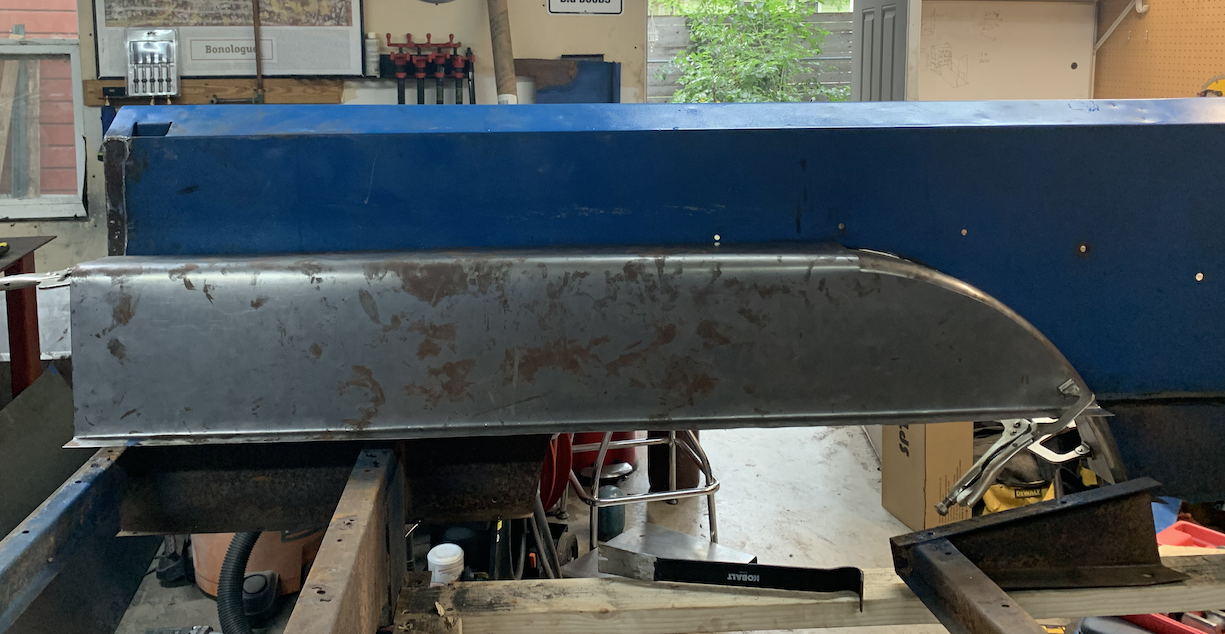
Hopefully, the next post will be of two completed wheel wells and all the bed panels welding into place.0 -
It looks like a little hammer and dolly work can fix that especially once you get a few tack welds holding parts in place. So far looks pretty good0
-
I am finally able to get back on this project! Been a good while with health and the other things that get in the way of a project like this, But, not planning on giving up.
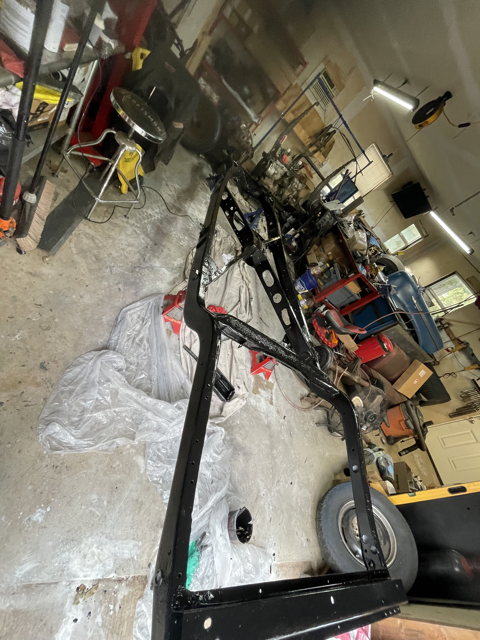
I pulled the body this weekend, and the frame is in decent shape! After welding some supports inside the body, I removed the bolts to the frame and got it off on my own using my engine hoist with a little adapter that I built.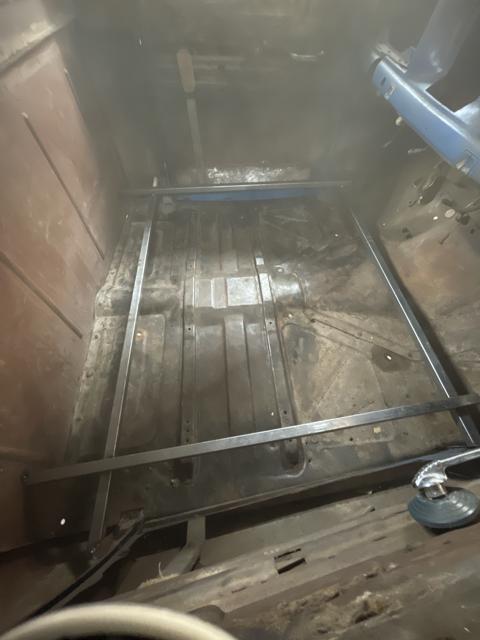
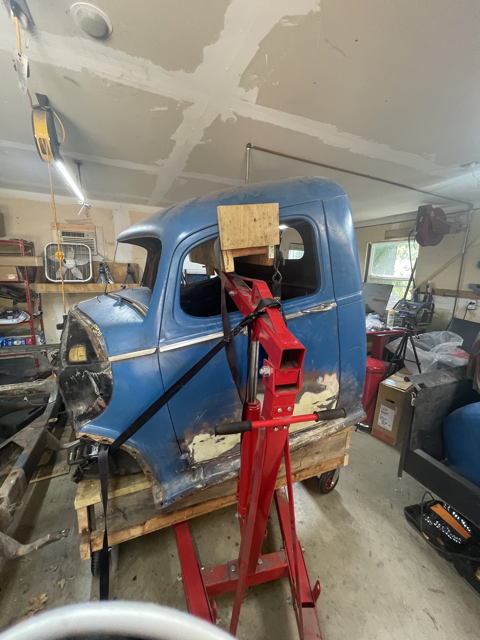
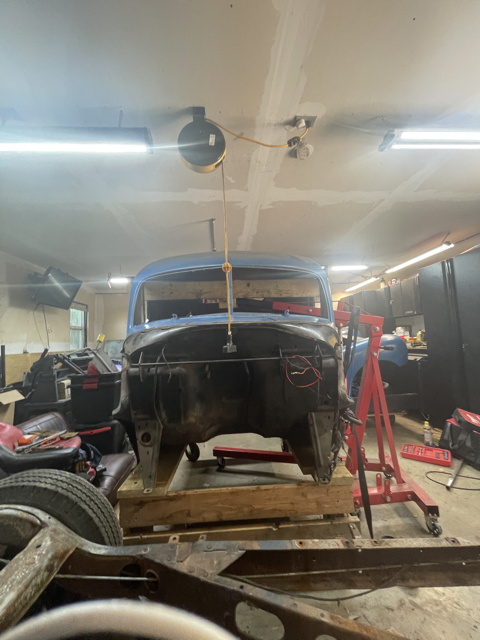
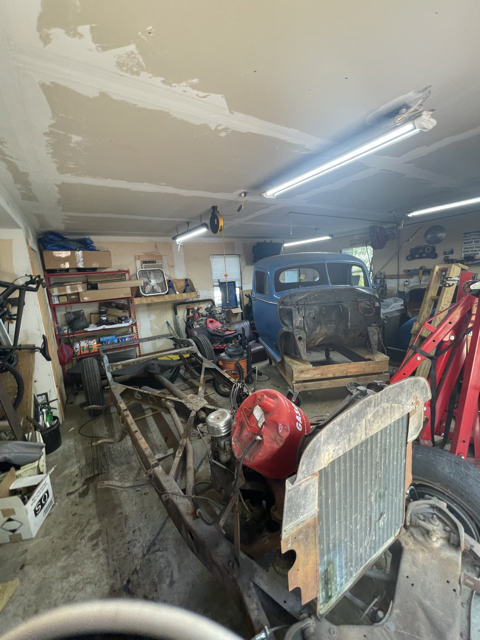
I'll clean the frame up and get it painted. Then I want to swap a 262 twin-h engine I have for the 212 in there now.
Slow and steady...
0 -


0 -
I'm still working on this truck. Building confidence and skills to complete the job. I finally got around to painting the frame, and now the rebuilding process can begin! After repairing a few minor rust throughs in the frame, I used Mastercoat permanent rust sealer with their AG111 satin black. Overall, I am very pleased with the outcome and excited to start refreshing the suspension and getting this truck going in the other direction of the build. It is only up from here.
0
Categories
- 37K All Categories
- 116 Hudson 1916 - 1929
- 21 Upcoming Events
- 96 Essex Super 6
- 28.6K HUDSON
- 576 "How To" - Skills, mechanical and other wise
- 995 Street Rods
- 151 American Motors
- 181 The Flathead Forum
- 49 Manuals, etc,.
- 78 Hudson 8
- 44 FORUM - Instructions and Tips on using the forum
- 2.8K CLASSIFIEDS
- 609 Vehicles
- 2.2K Parts & Pieces
- 78 Literature & Memorabilia
- Hudson 1916 - 1929 Yahoo Groups Archived Photos
