Trunk latch and seat belts and rear wheels

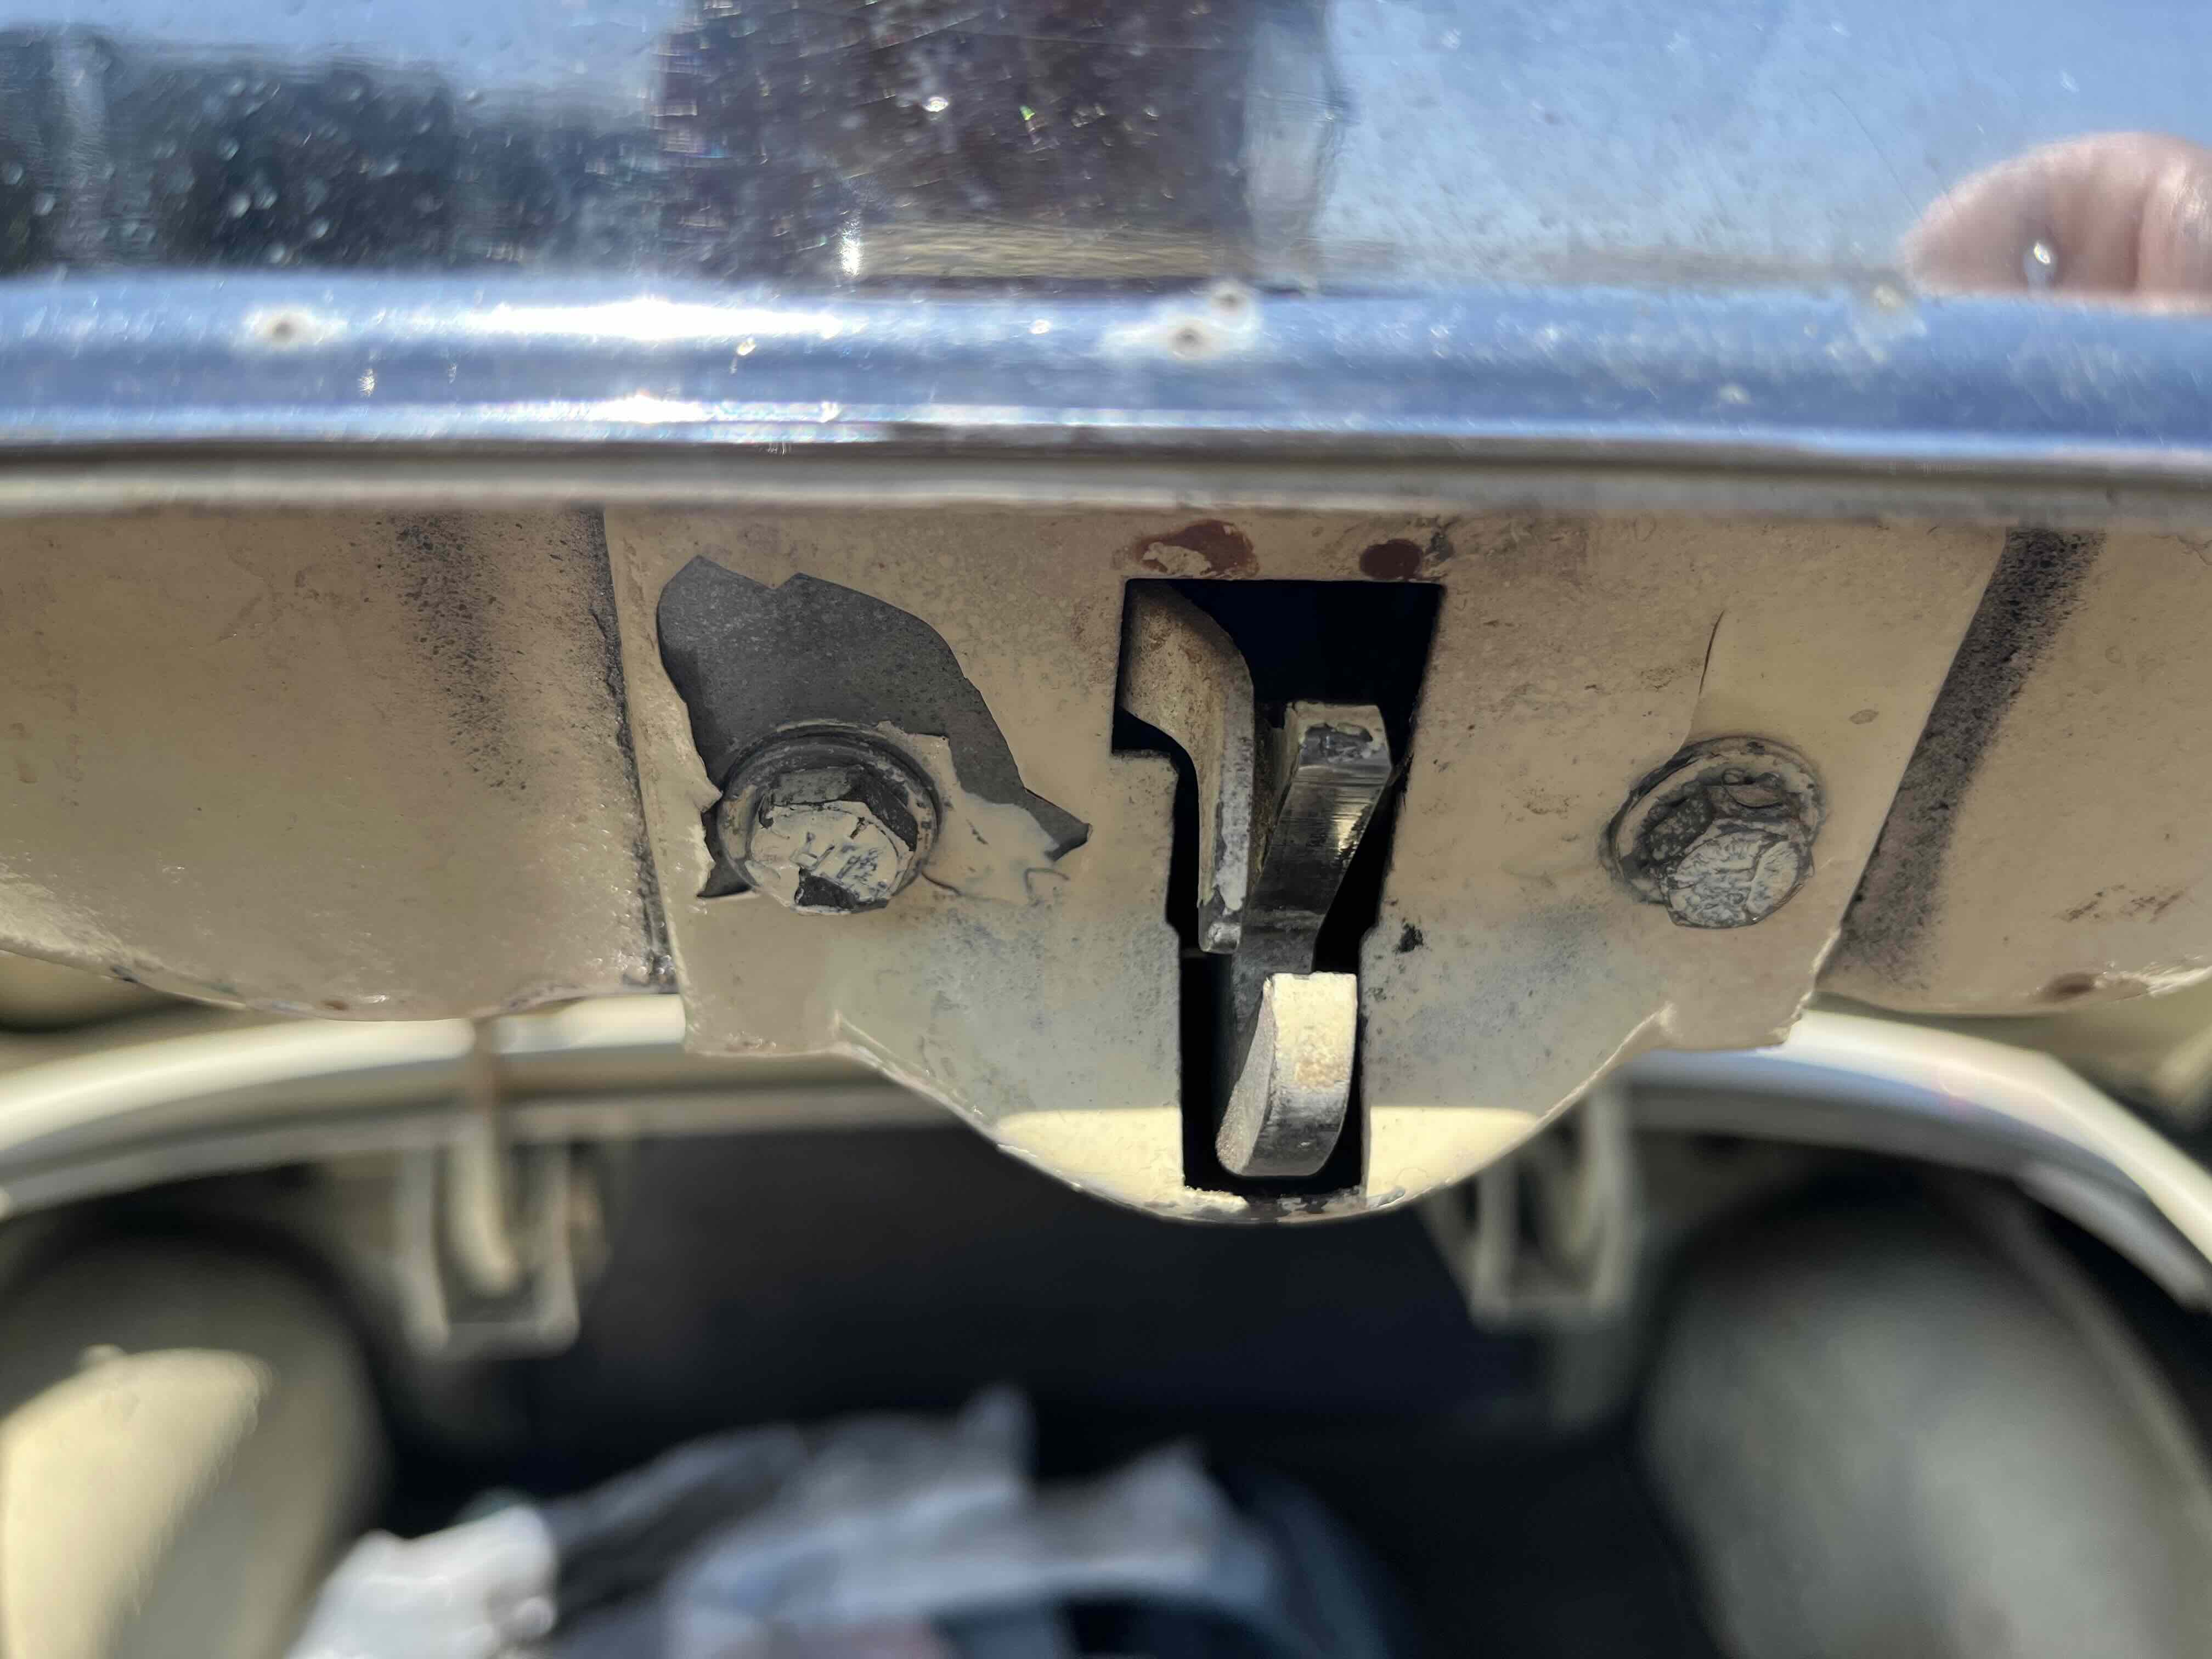
Proud owner of a 1953 Hornet, whose trunk won't latch. Any advice? The bar at the other end is extended upward as far as it will go. It seems that the latch on the trunk itself (pictured) might be recessed too far. Not sure what to do - nothing bent or broken has been identified.
Second question: I want to install lap belts and have read previous postings in the forum. This seems pretty straightforward to drill 2 holes and install a plate and bolts. Has anyone done this and is it a simple as it appears?
Finally: the stepdown design makes 2/3 of the rear wheels inaccessible. How do you access the lugs (and the valve stem) on the rear wheels.
Many thanks from a newbie.
Comments
-
That latch looks like it may be "latched". Put the key in the lock and turn it, and see if the latch pops down. Then try to close it.
You do know how to take off the fender skirts, right? Those must come of first. Then most of the lugs and valve stem are accessible. If you want to remove the tire, you must jack up the body with the factory jack to clear the body. It's tight.
0 -
Agreed with MikeSheridan on both trunk latch and fender skirts. With the skirts off and the axle fully dropped, you should be able to reach all five lugs without turning the wheel. The valve stem is another matter, you may need to rotate the wheel to access it.
Keep an eye out if you upgrade your wheels and tires. Many club members max out at 215-75R15 or 225-75R15 tires before they're unable to remove the wheel with the factory jack on the side of the road.
On seat belts: sounds like you're already on the right track. It really is that easy. I have three belts in front and three in rear on my '53 Hornet. The rears are all attached to two holes beneath the cushion using sturdy grade 8 bolts and hardware. Up front, I bolted my lap belts in to the steel seat itself. It is very strong. To feel more confident the seat wouldn't then be the weak point, I bolted my front seat in with grade 8 hardware as well. I found my rear belts need to be a little longer than my fronts in order to reach and have the same amount of adjustment across the lap.
Hope that helps!
0 -
Thanks a million, Mike. Alas, the latch is not in the closed position (I have flipped the latch several times and then released it with the keys). Something else isn't working. I'm not an engineer, but cannot for the life of me figure out how to make that latch work (the mechanism by which the receiving end flips the latch).
I do not know how to take off the skirts, and it is not obvious looking at it. Is the skirt only the 6" high chrome trim?
0 -
Thanks, ATC. The only issue that I see is that the floorboard is up underneath a cover that will need to be removed (looking up from the bottom). Any advice on where to drill the holes without hitting anything precious?
0 -
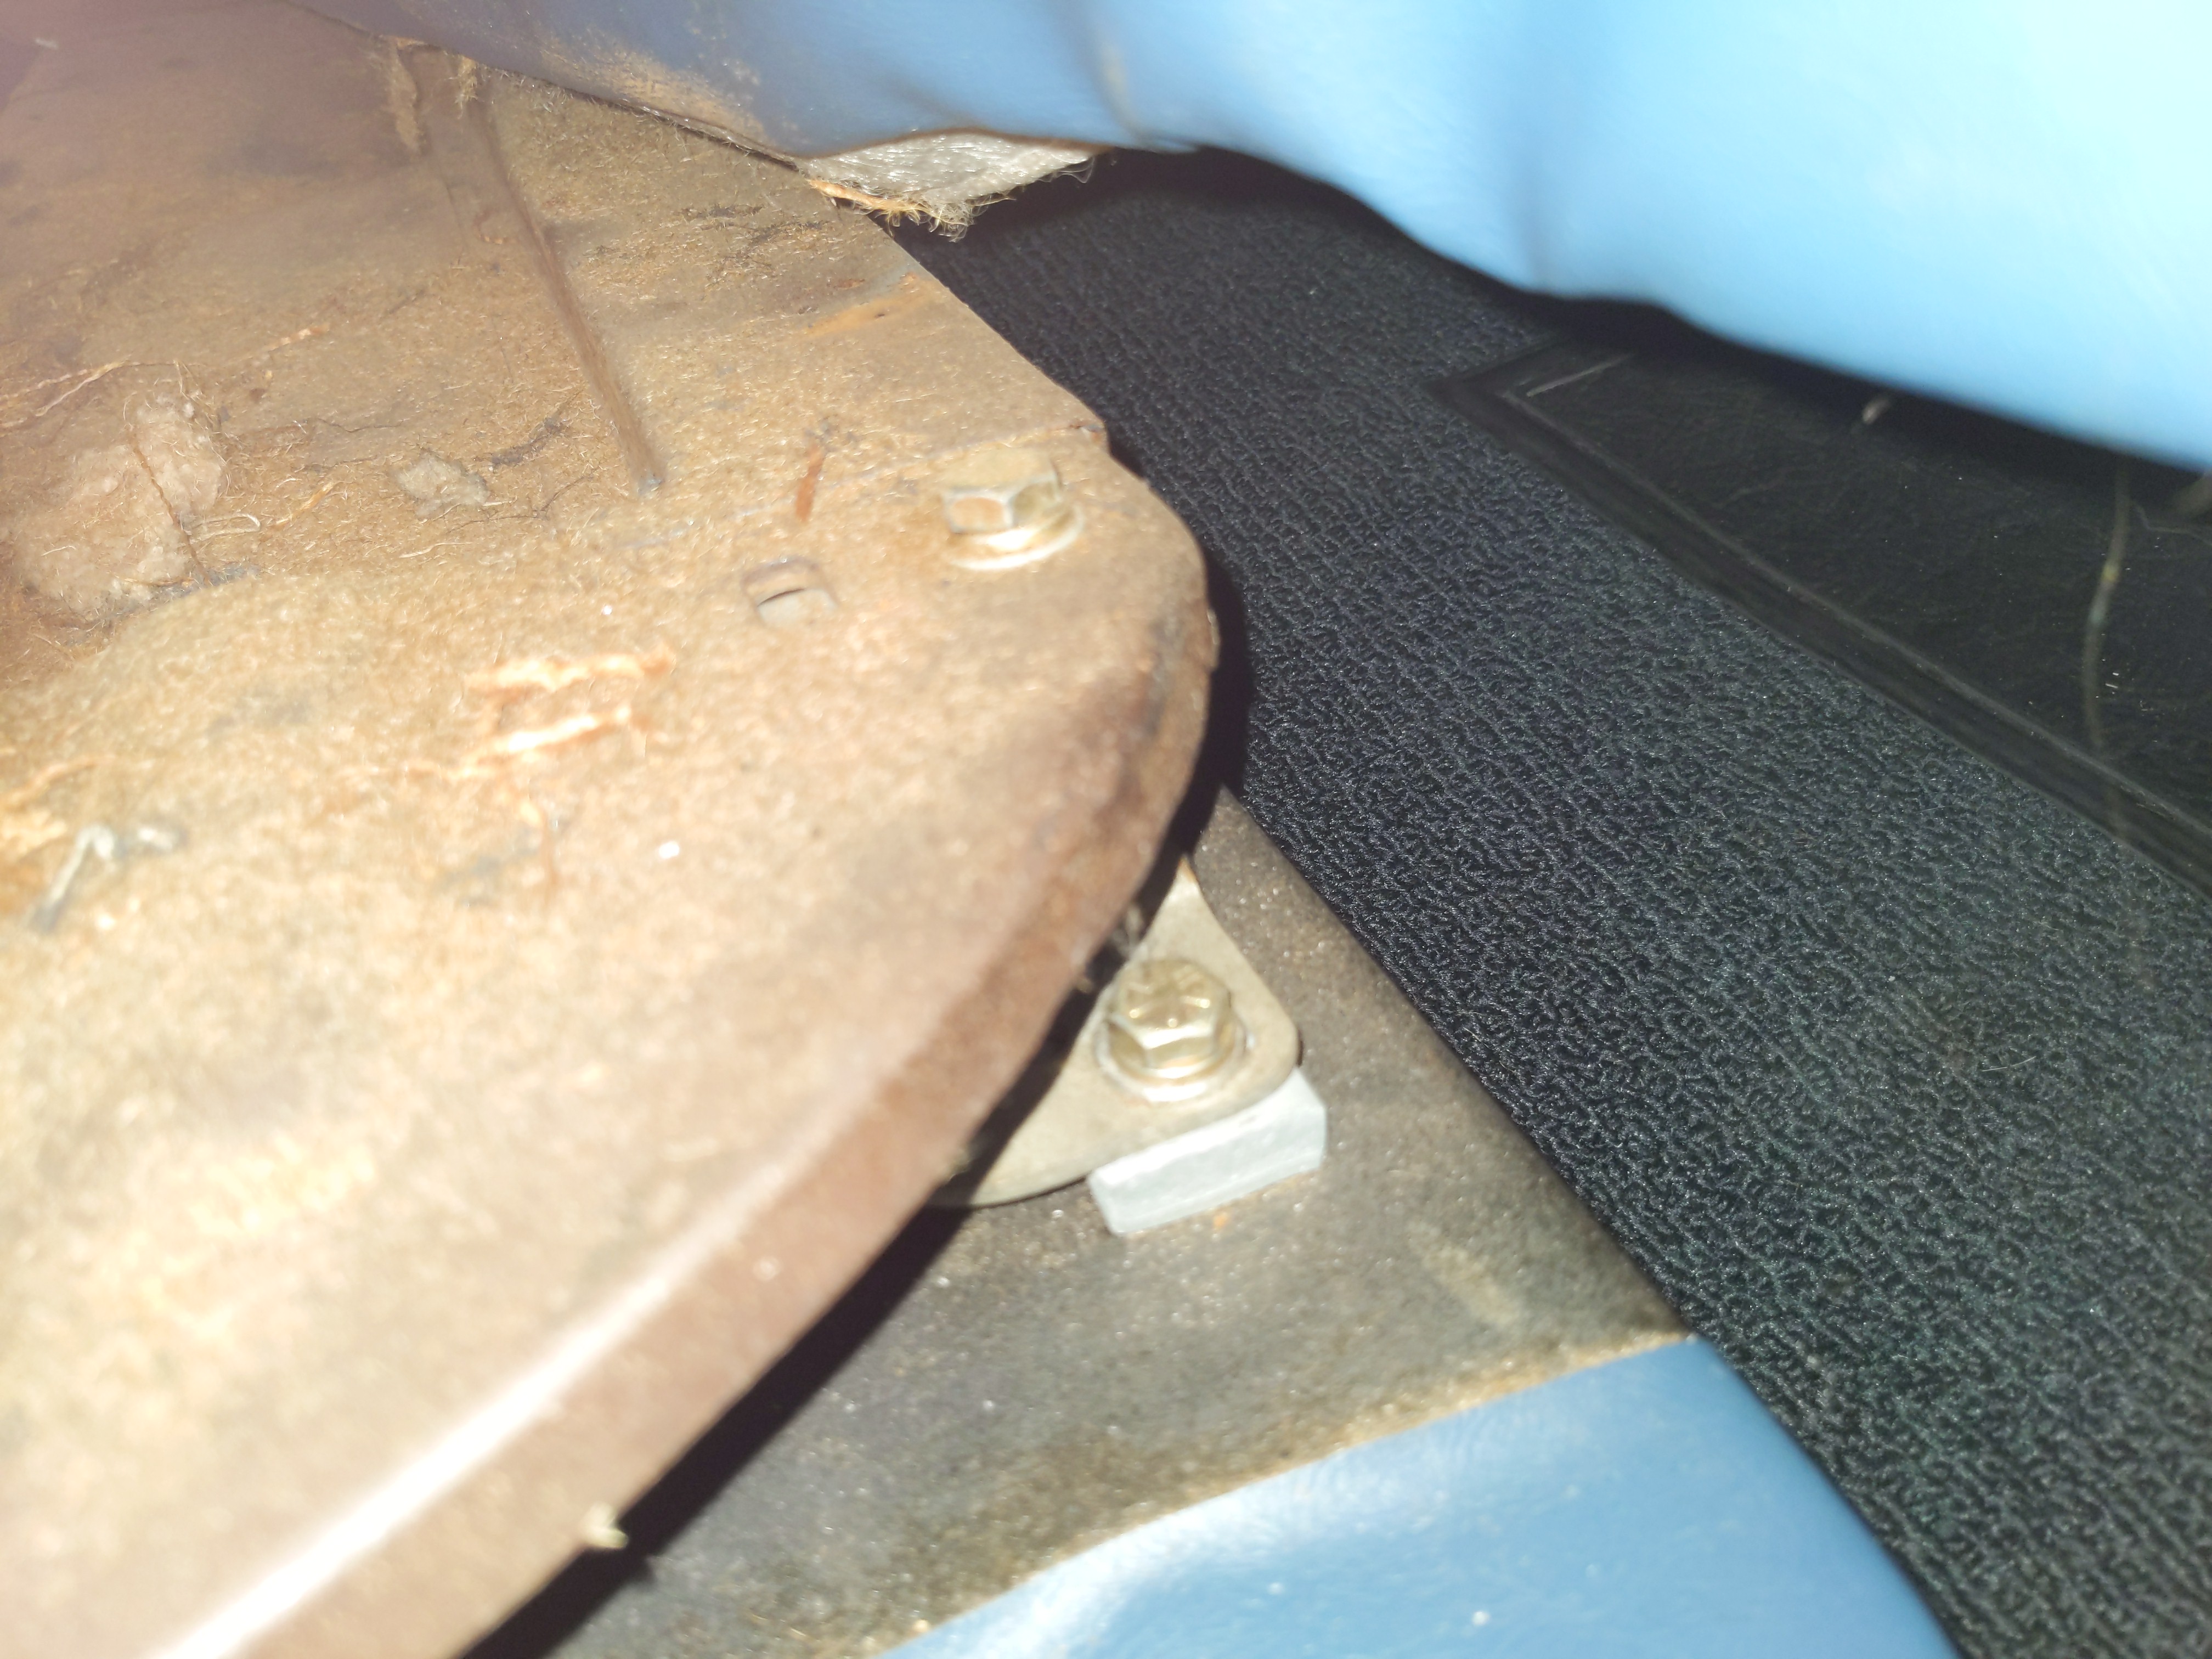
I installed lap belts in my 51 Commodore and posted photos of where
i mounted them a while back. You can probably search for the post with the photos.
0 -
Reach up under the skirt, about 3 inches from it's ends. You will feel a heavy wire loop. Pick this up slightly and move it back to clear the little cradle it sits in. Then, let it down. The skirt will come loose and can be removed. This wire loop may have corrosion and dirt holding it in, depends on how long it has been since the skirts were removed.
0 -
I actually did not drill holes through the floorpan. I made my holes through the seat front seat bottom and the rear seat back. I can take some pictures if you can't find 29sptphaeton's
0 -
Get someone to get in the truck with a flashlight and see where the problem is. Make sure there is someone to open the trunk just in case it closes.😊
0 -
"...the latch is not in the closed position (I have flipped the latch several times and then released it with the keys). Something else isn't working. I'm not an engineer, but cannot for the life of me figure out how to make that latch work (the mechanism by which the receiving end flips the latch)."
Try this! Prop up an iPhone and flashlight in the trunk, put it in video mode to see what's going on. Use someone else's iPhone, you certainly don't want to lock yours in the trunk!
Hope this helps.
0 -
Thanks, ATC. I did a search and could not find this post. Any photos would be super helpful!
0 -
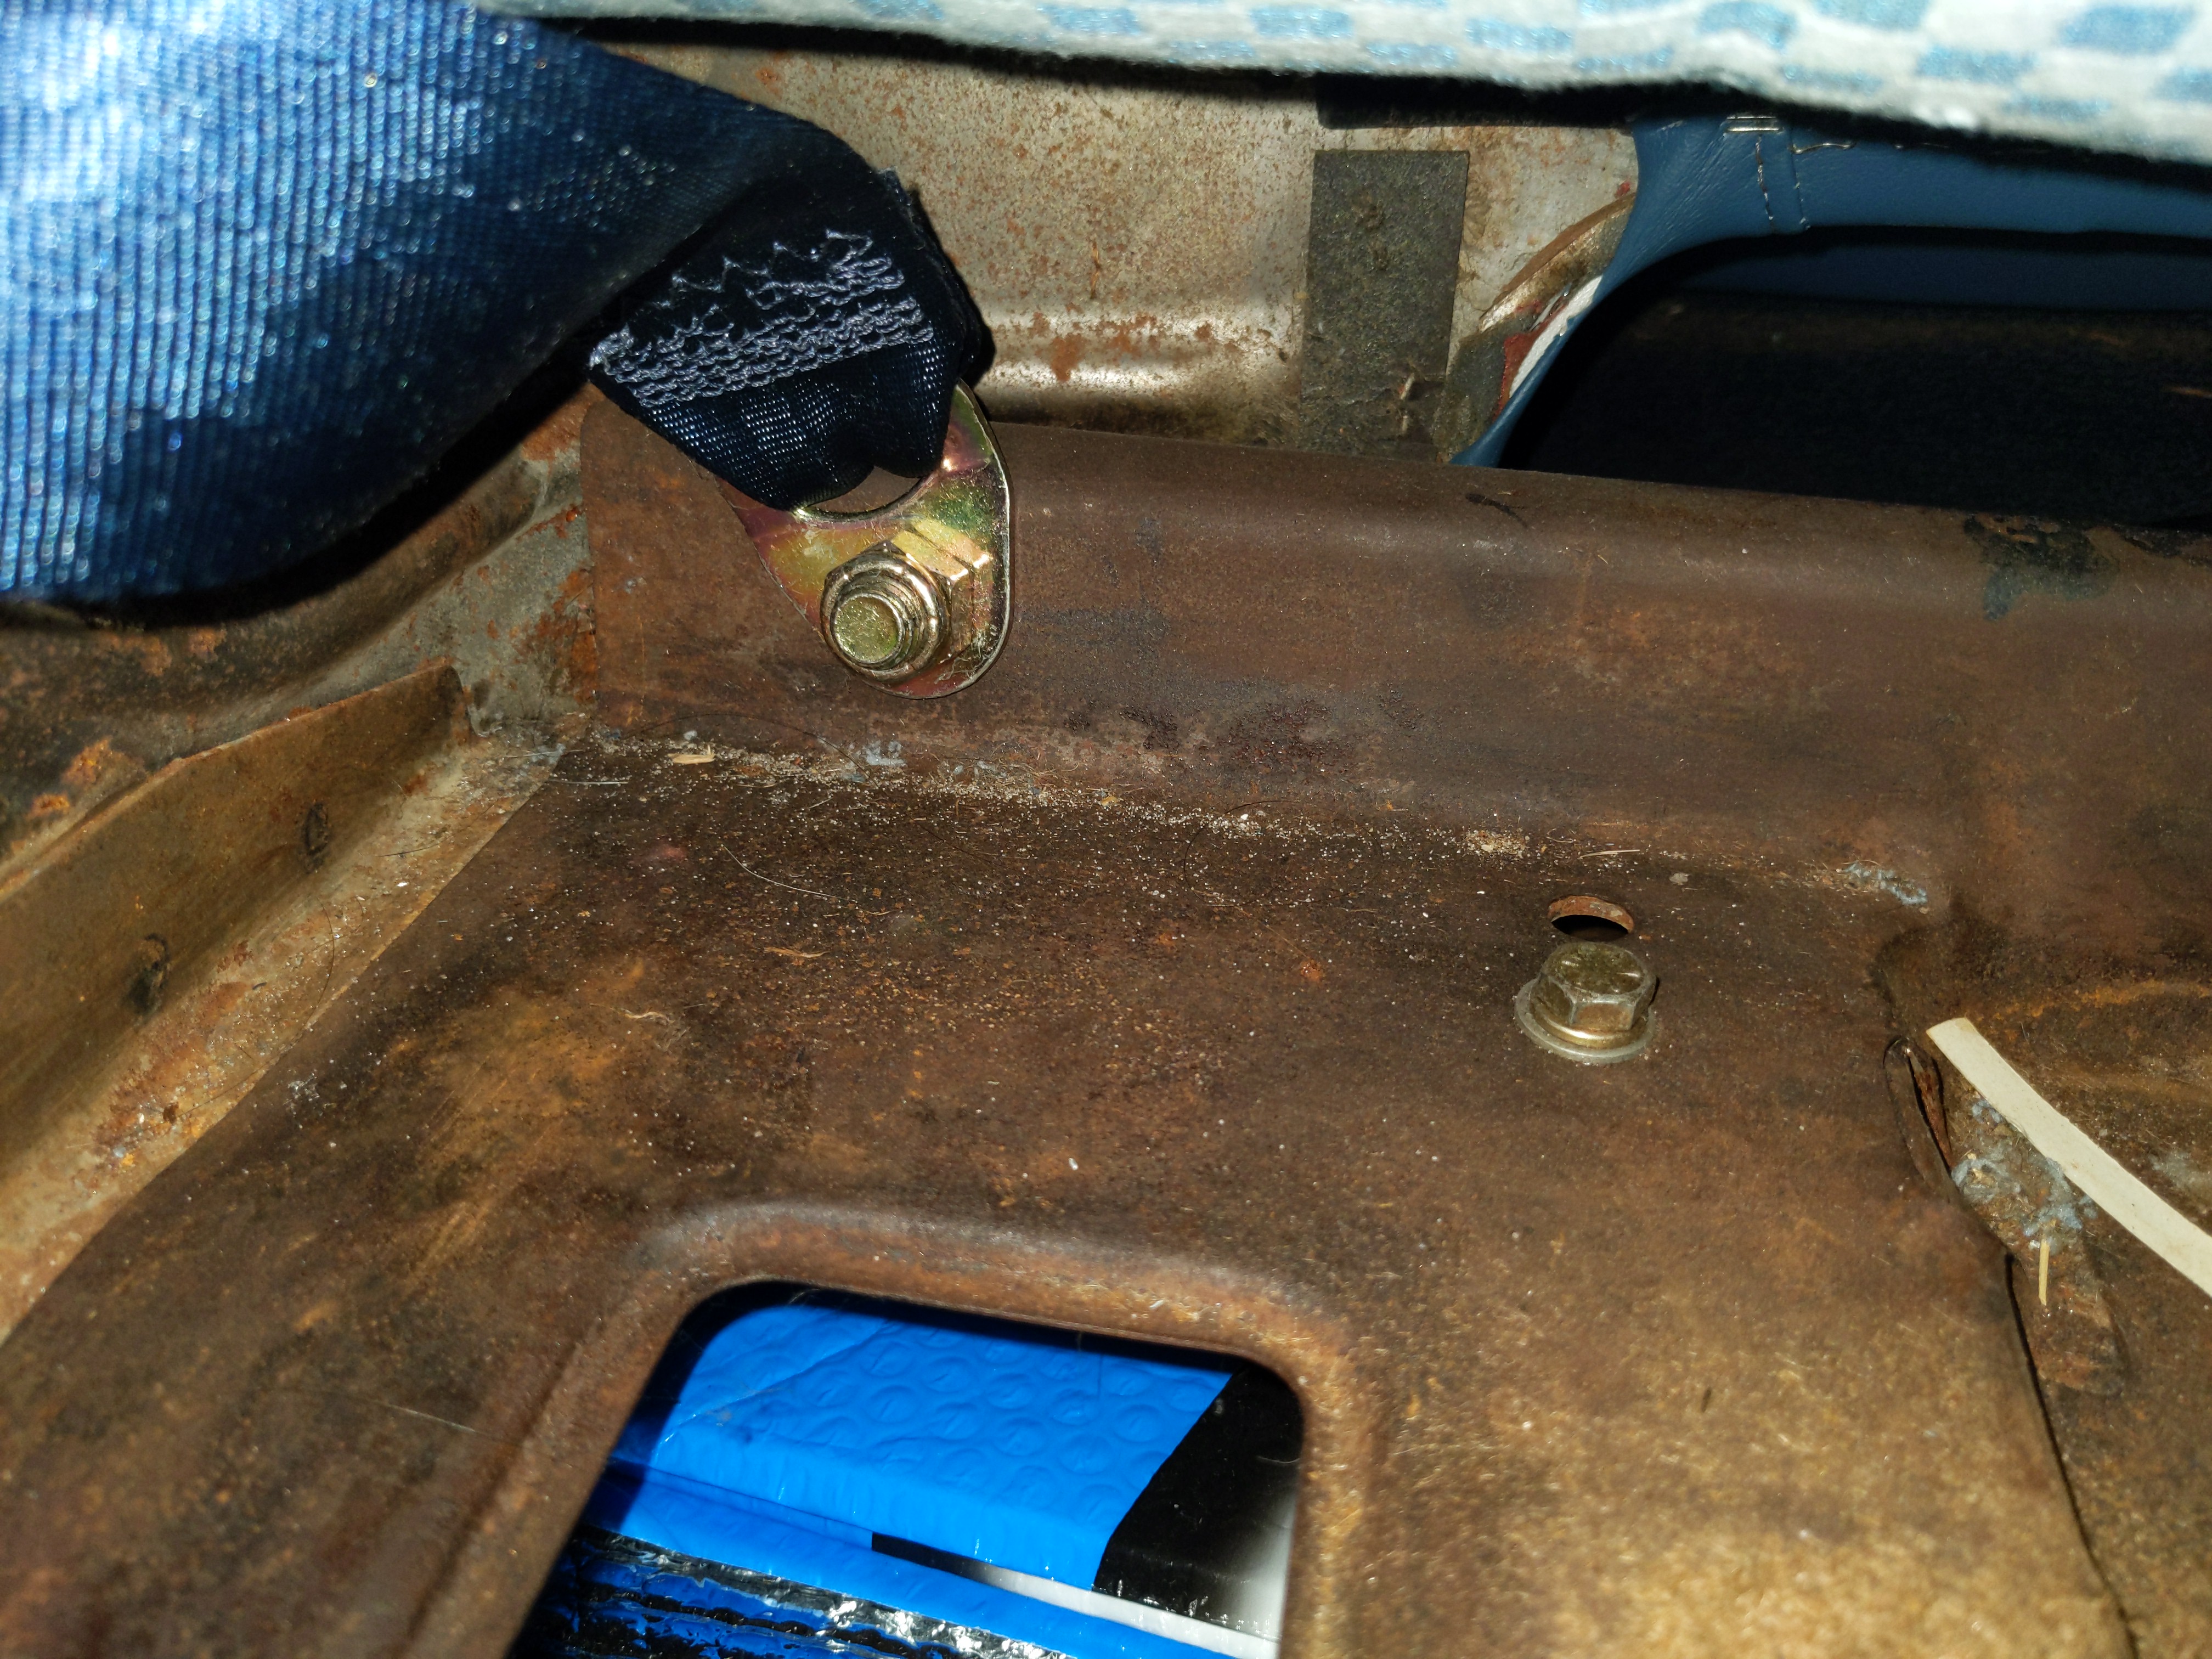
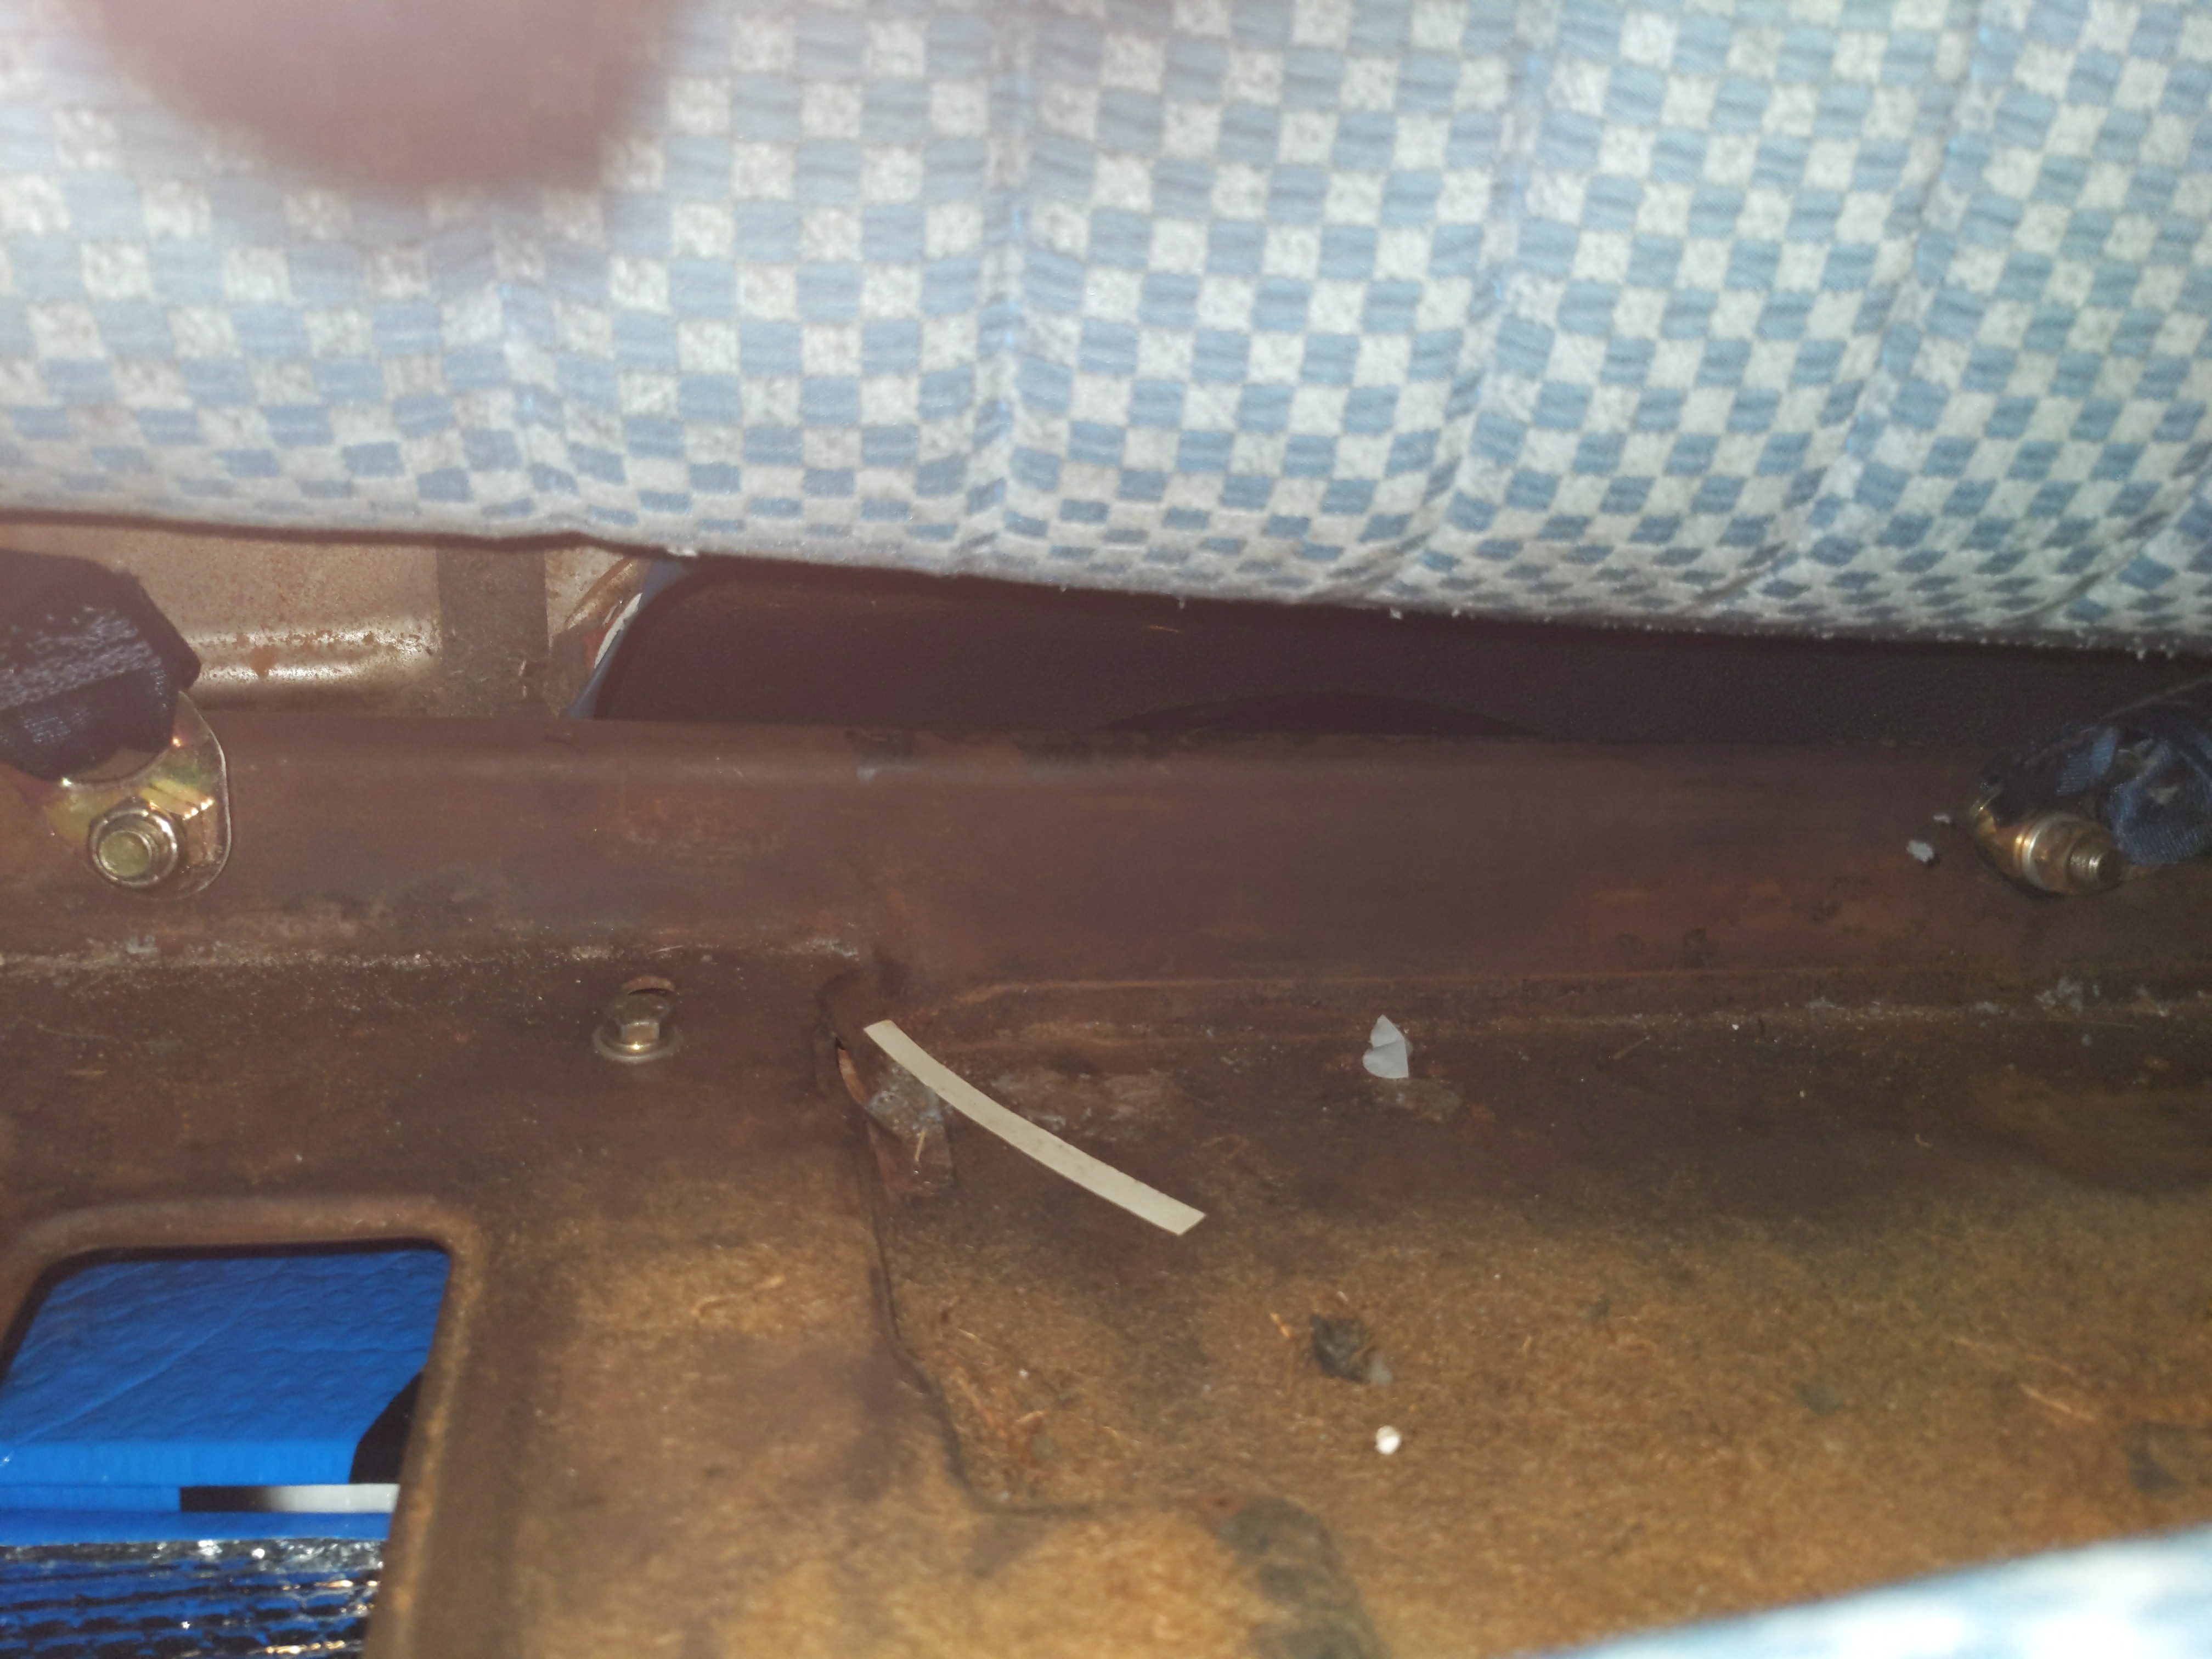
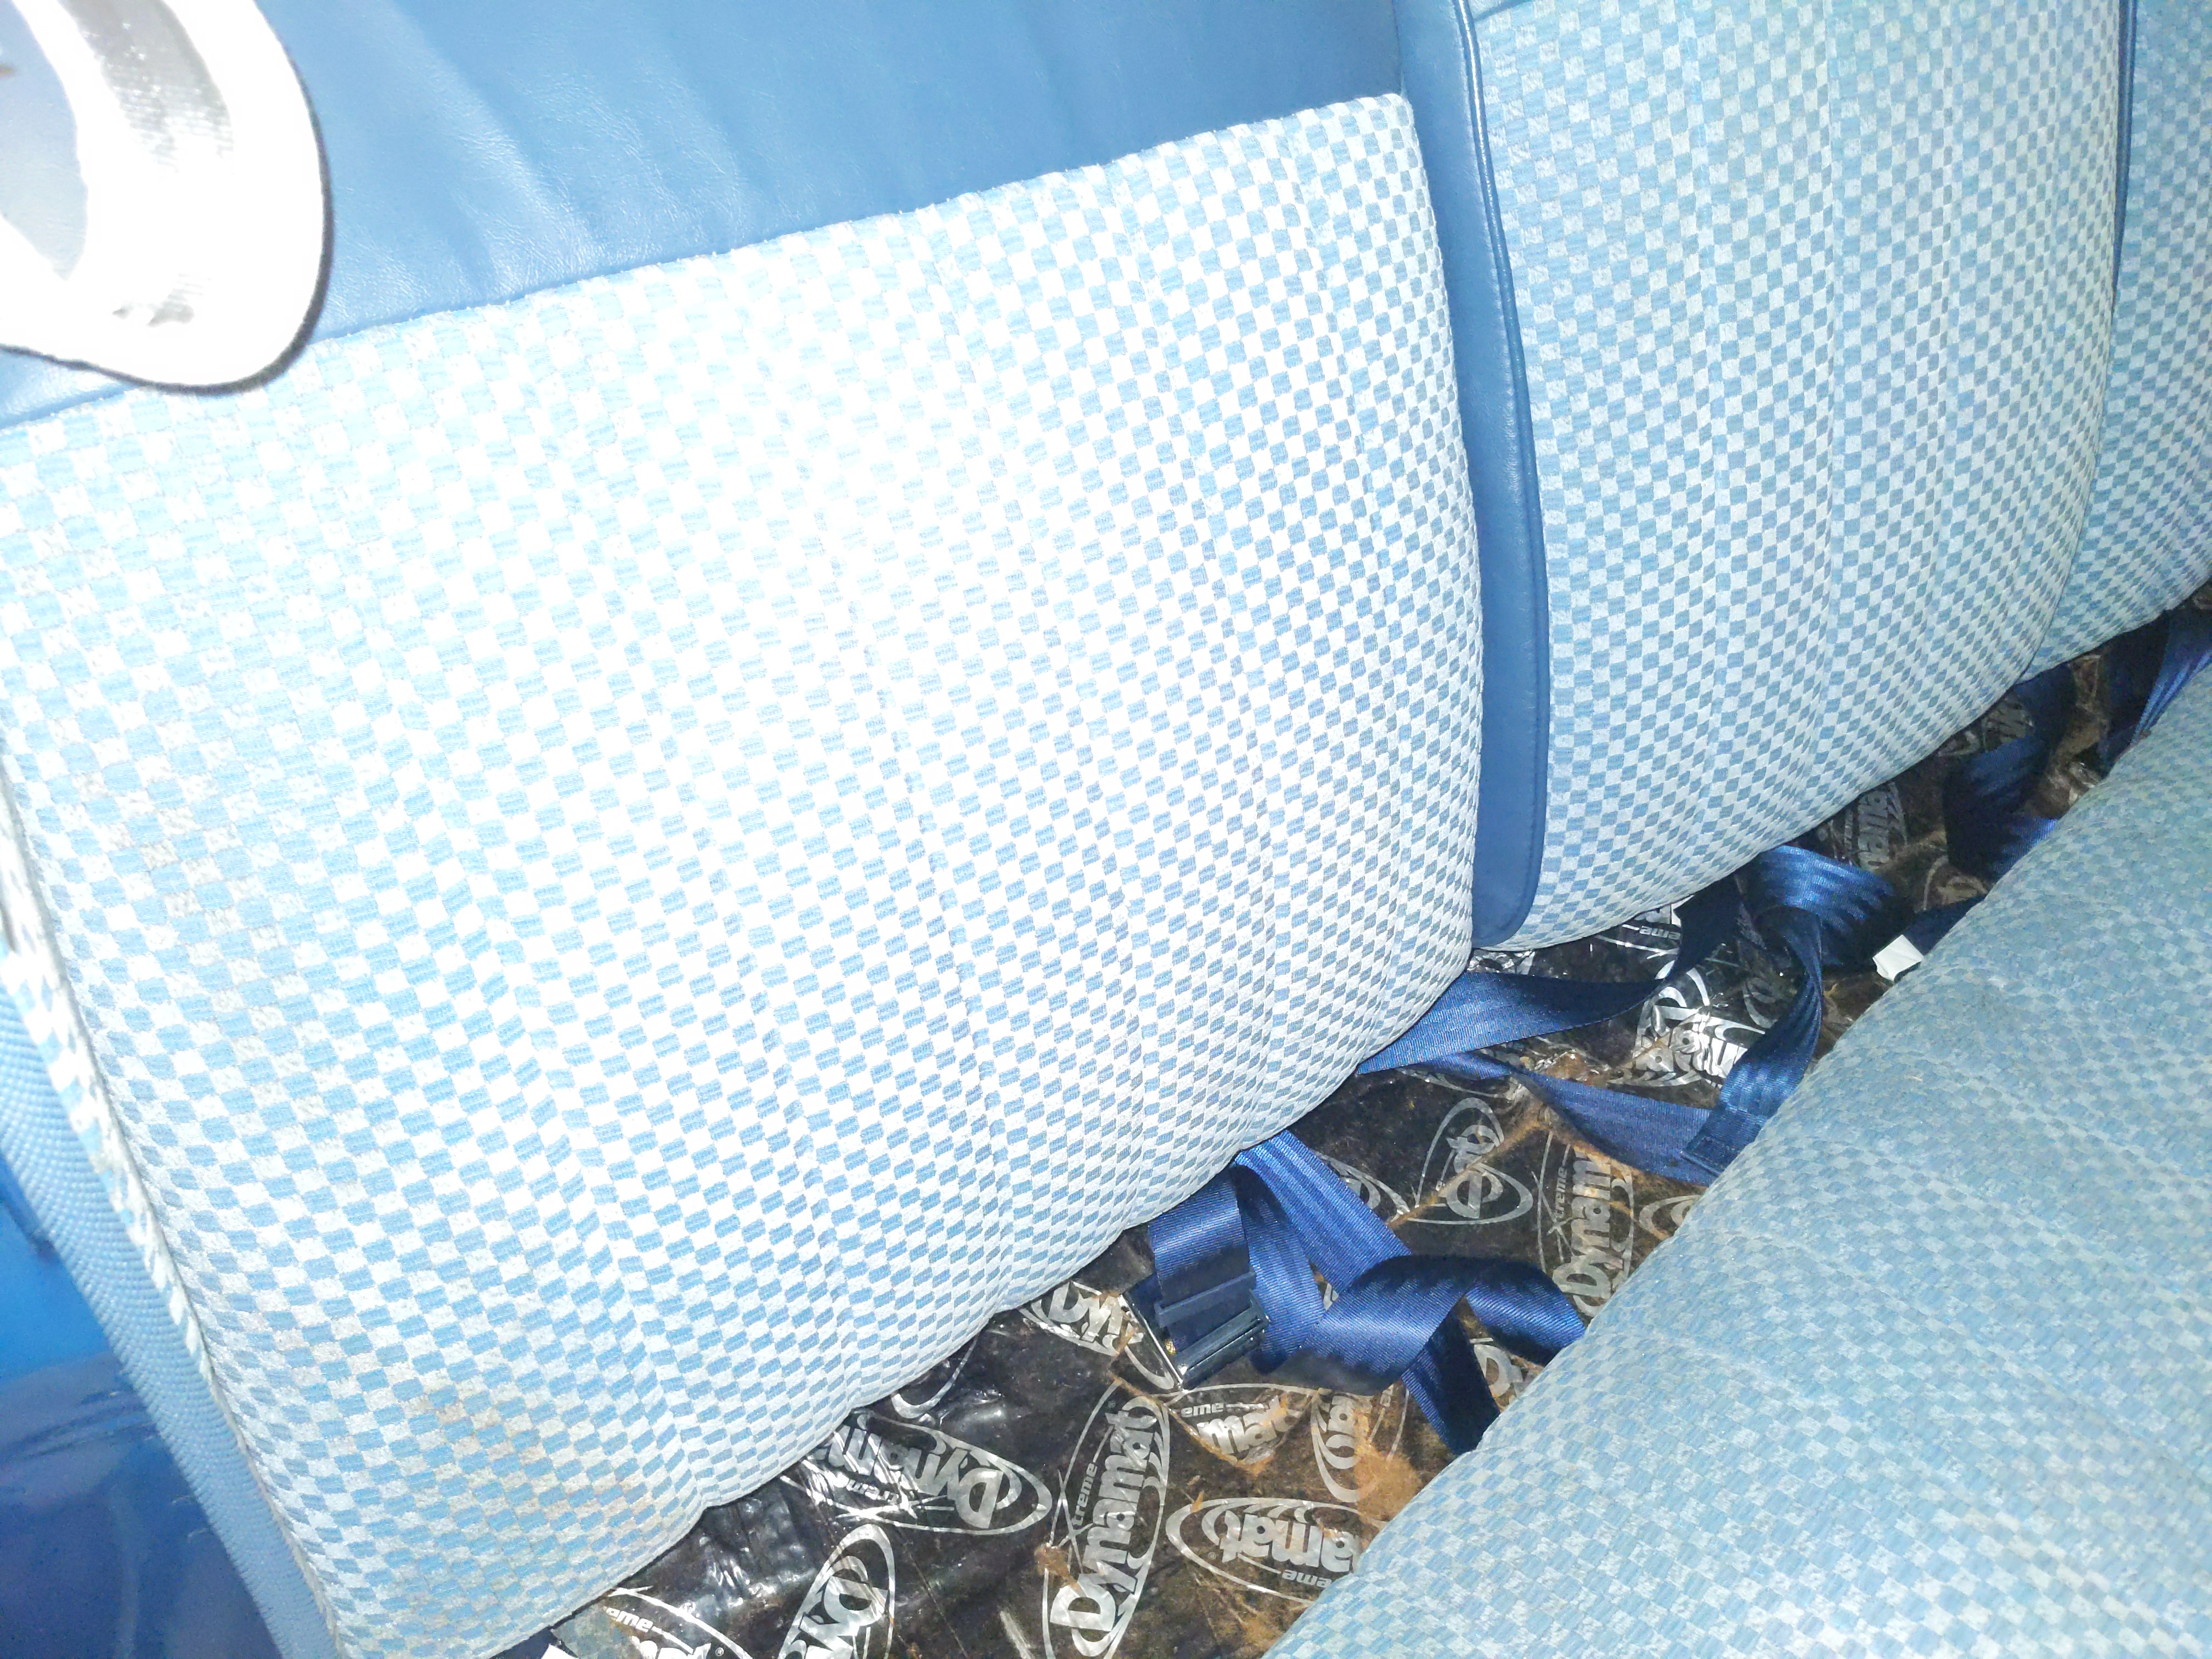
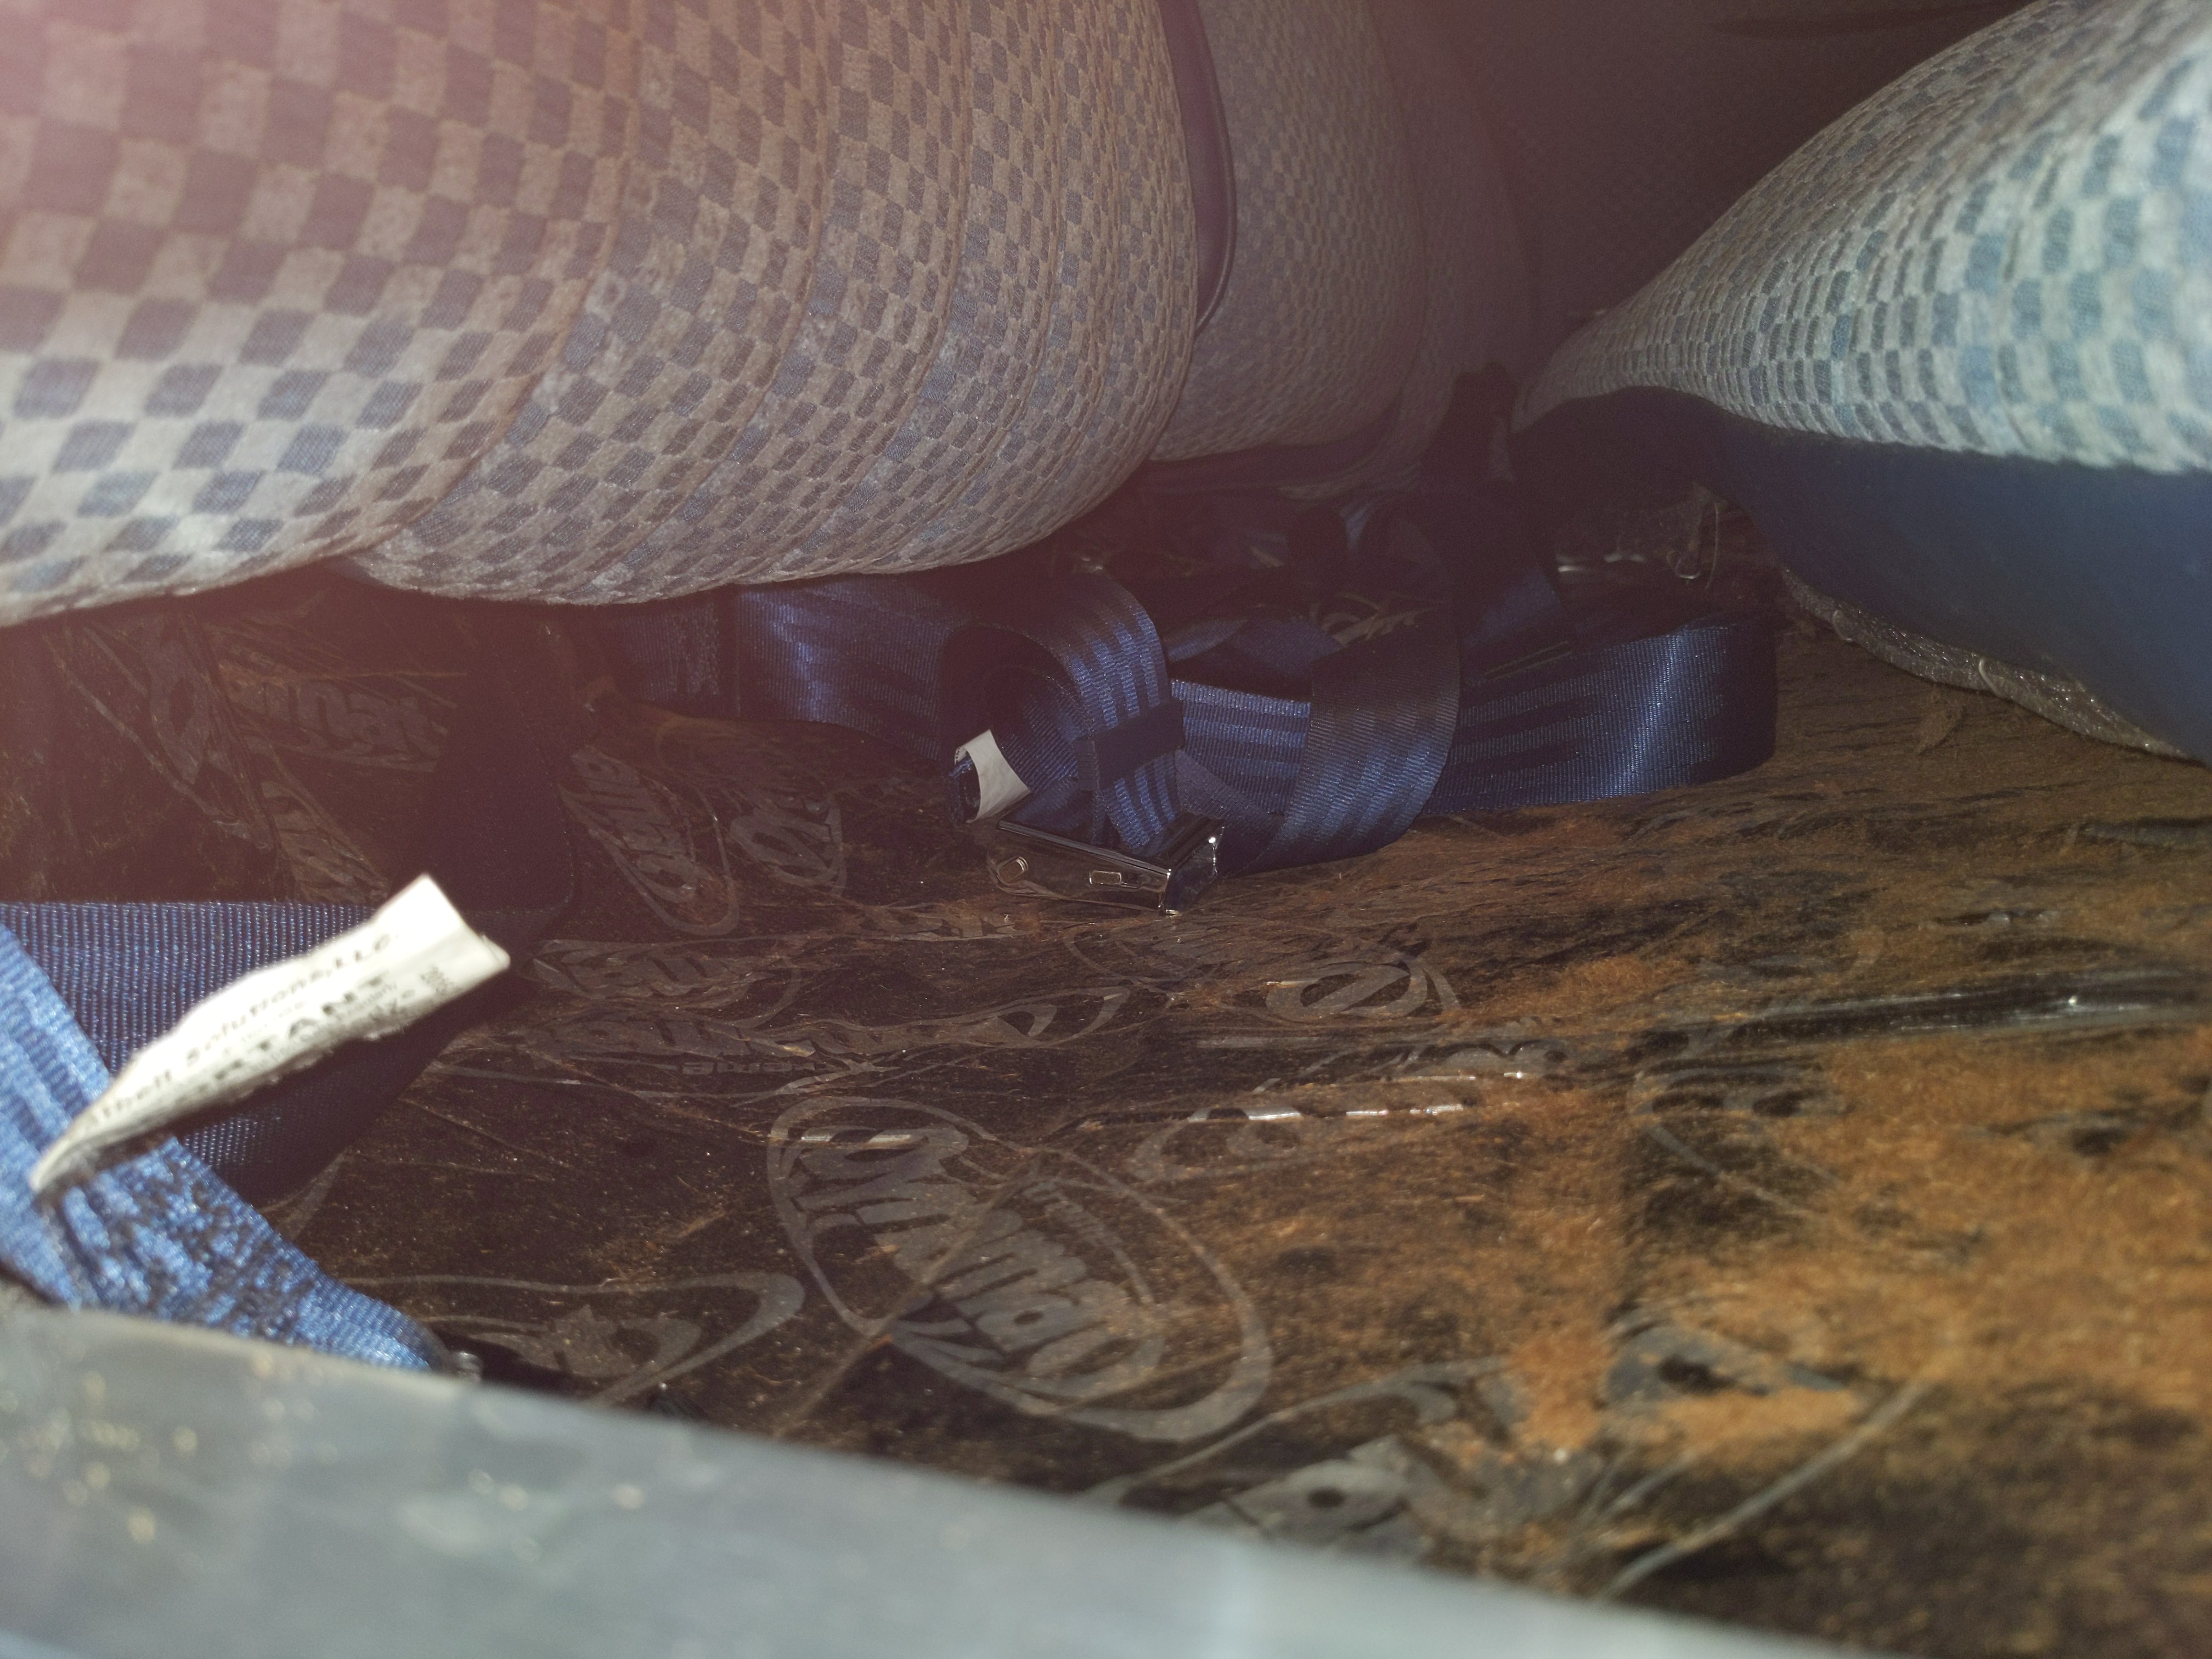
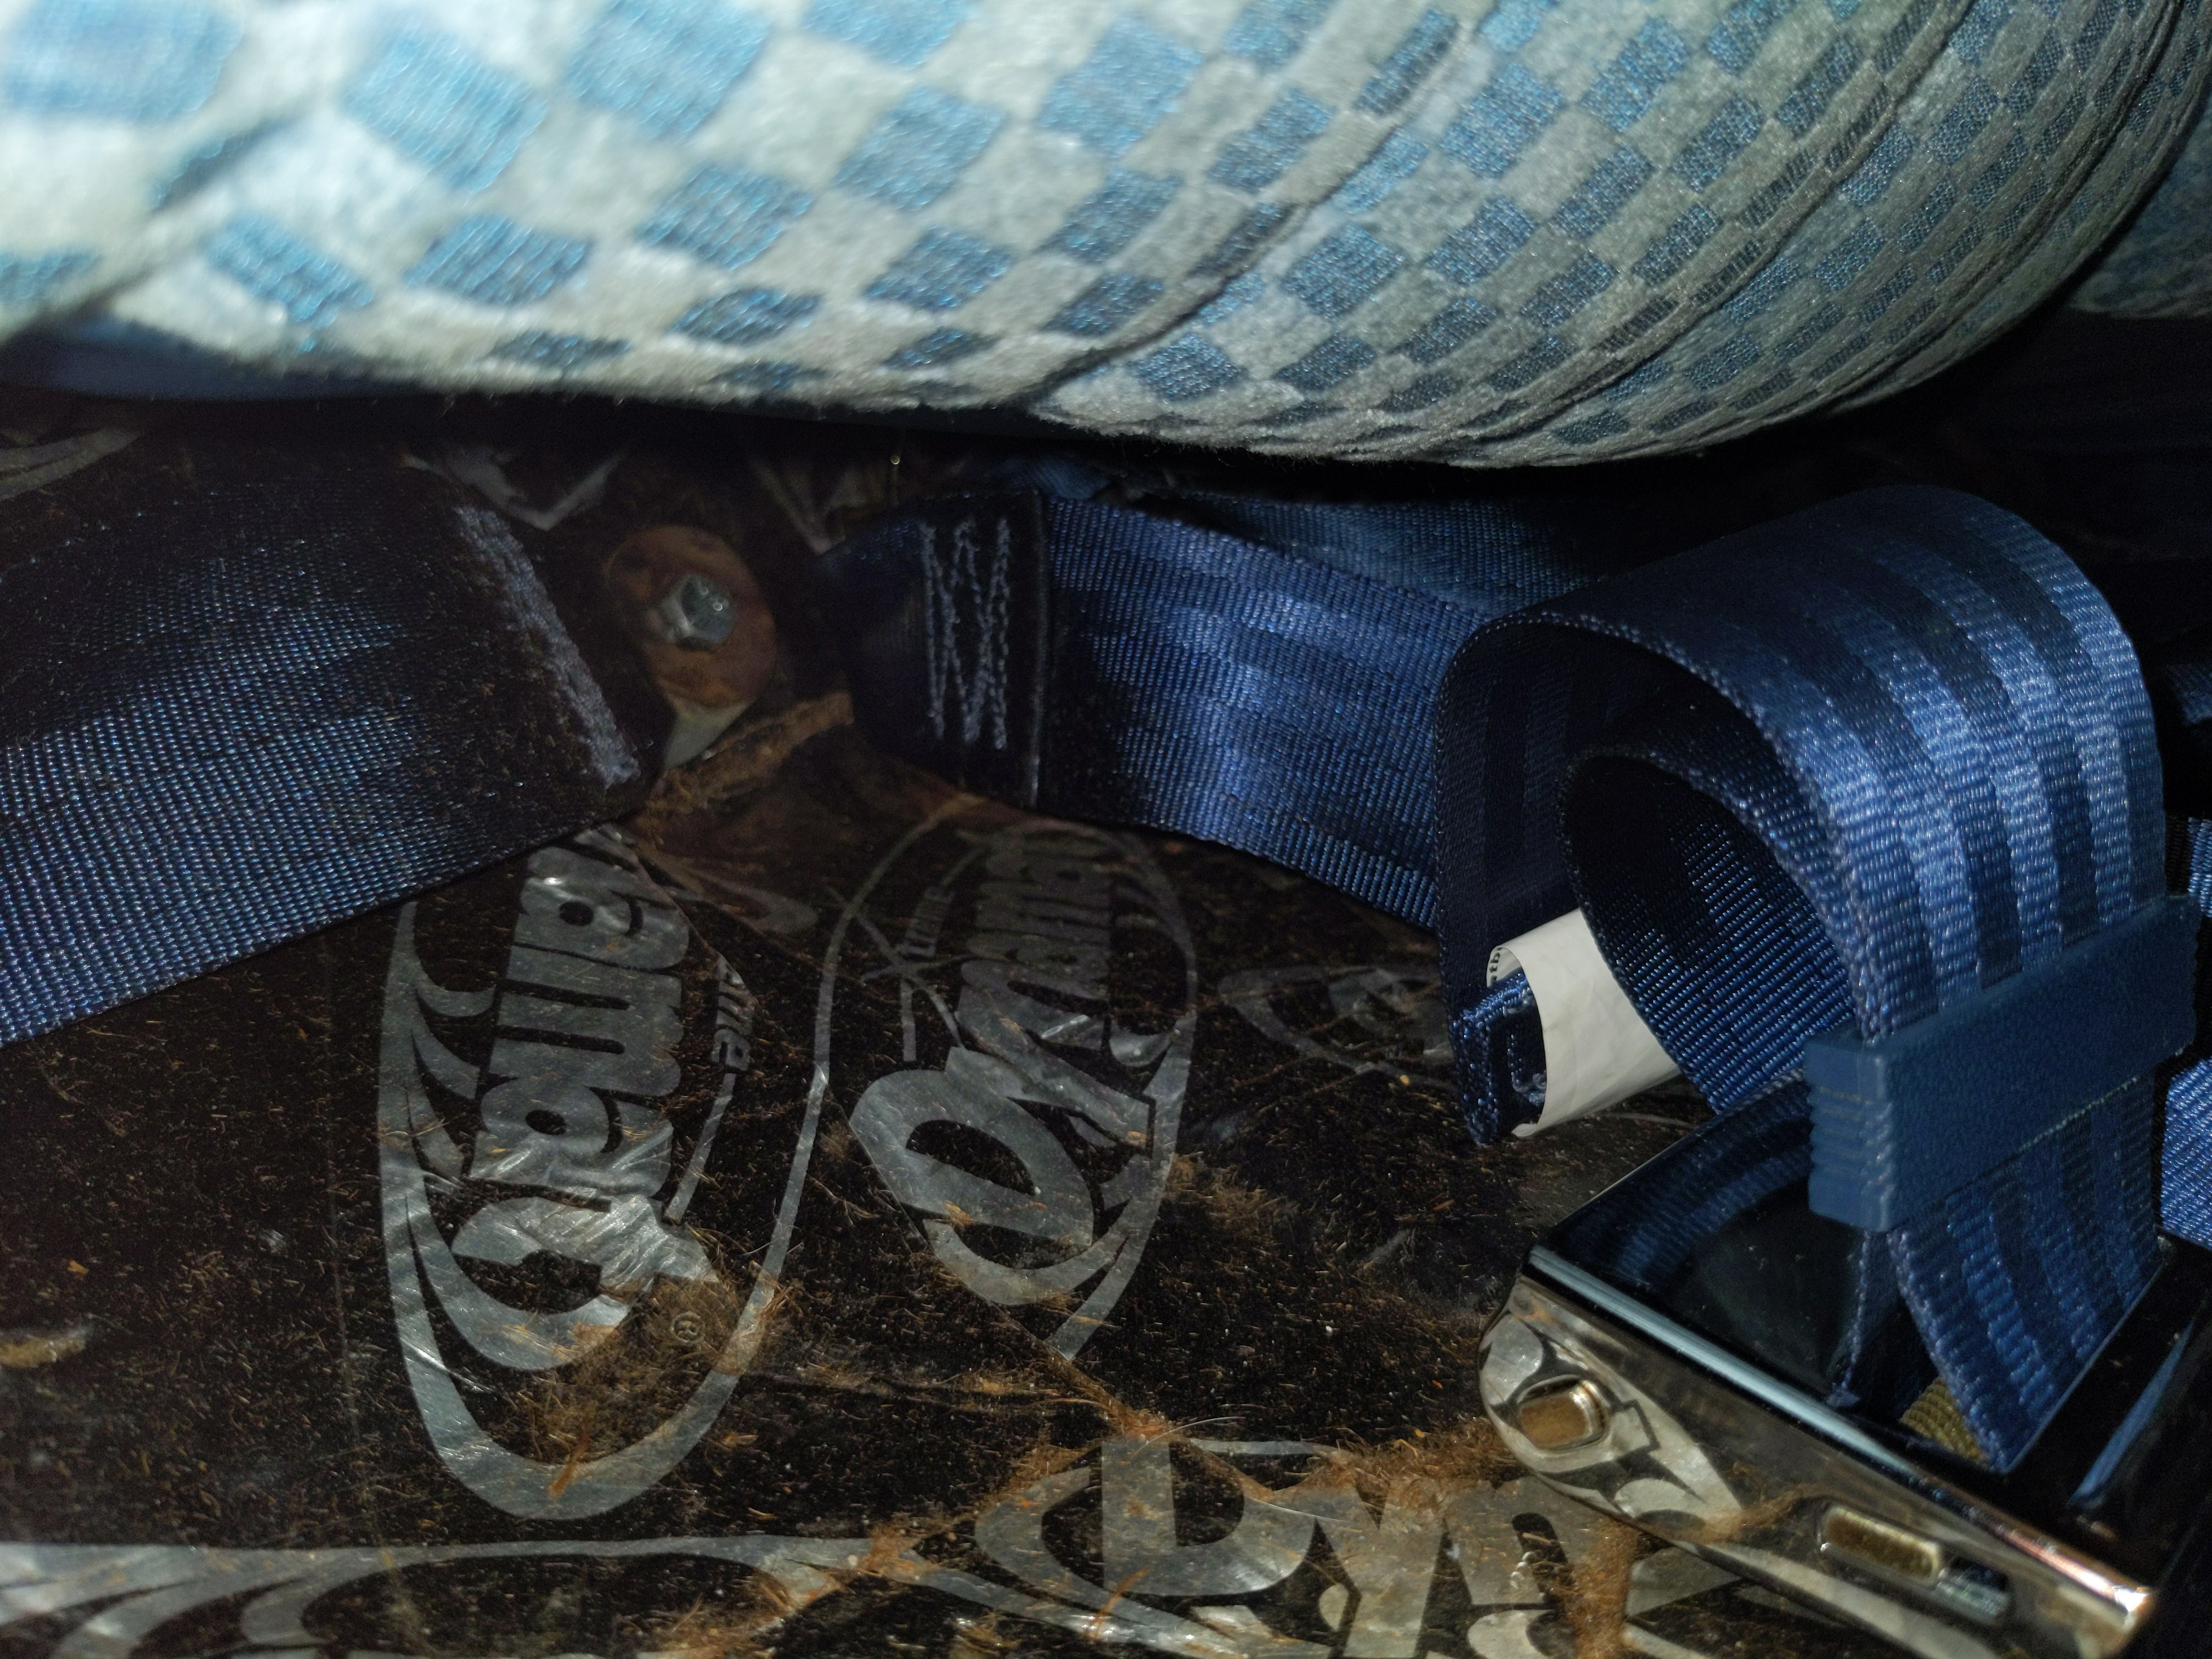
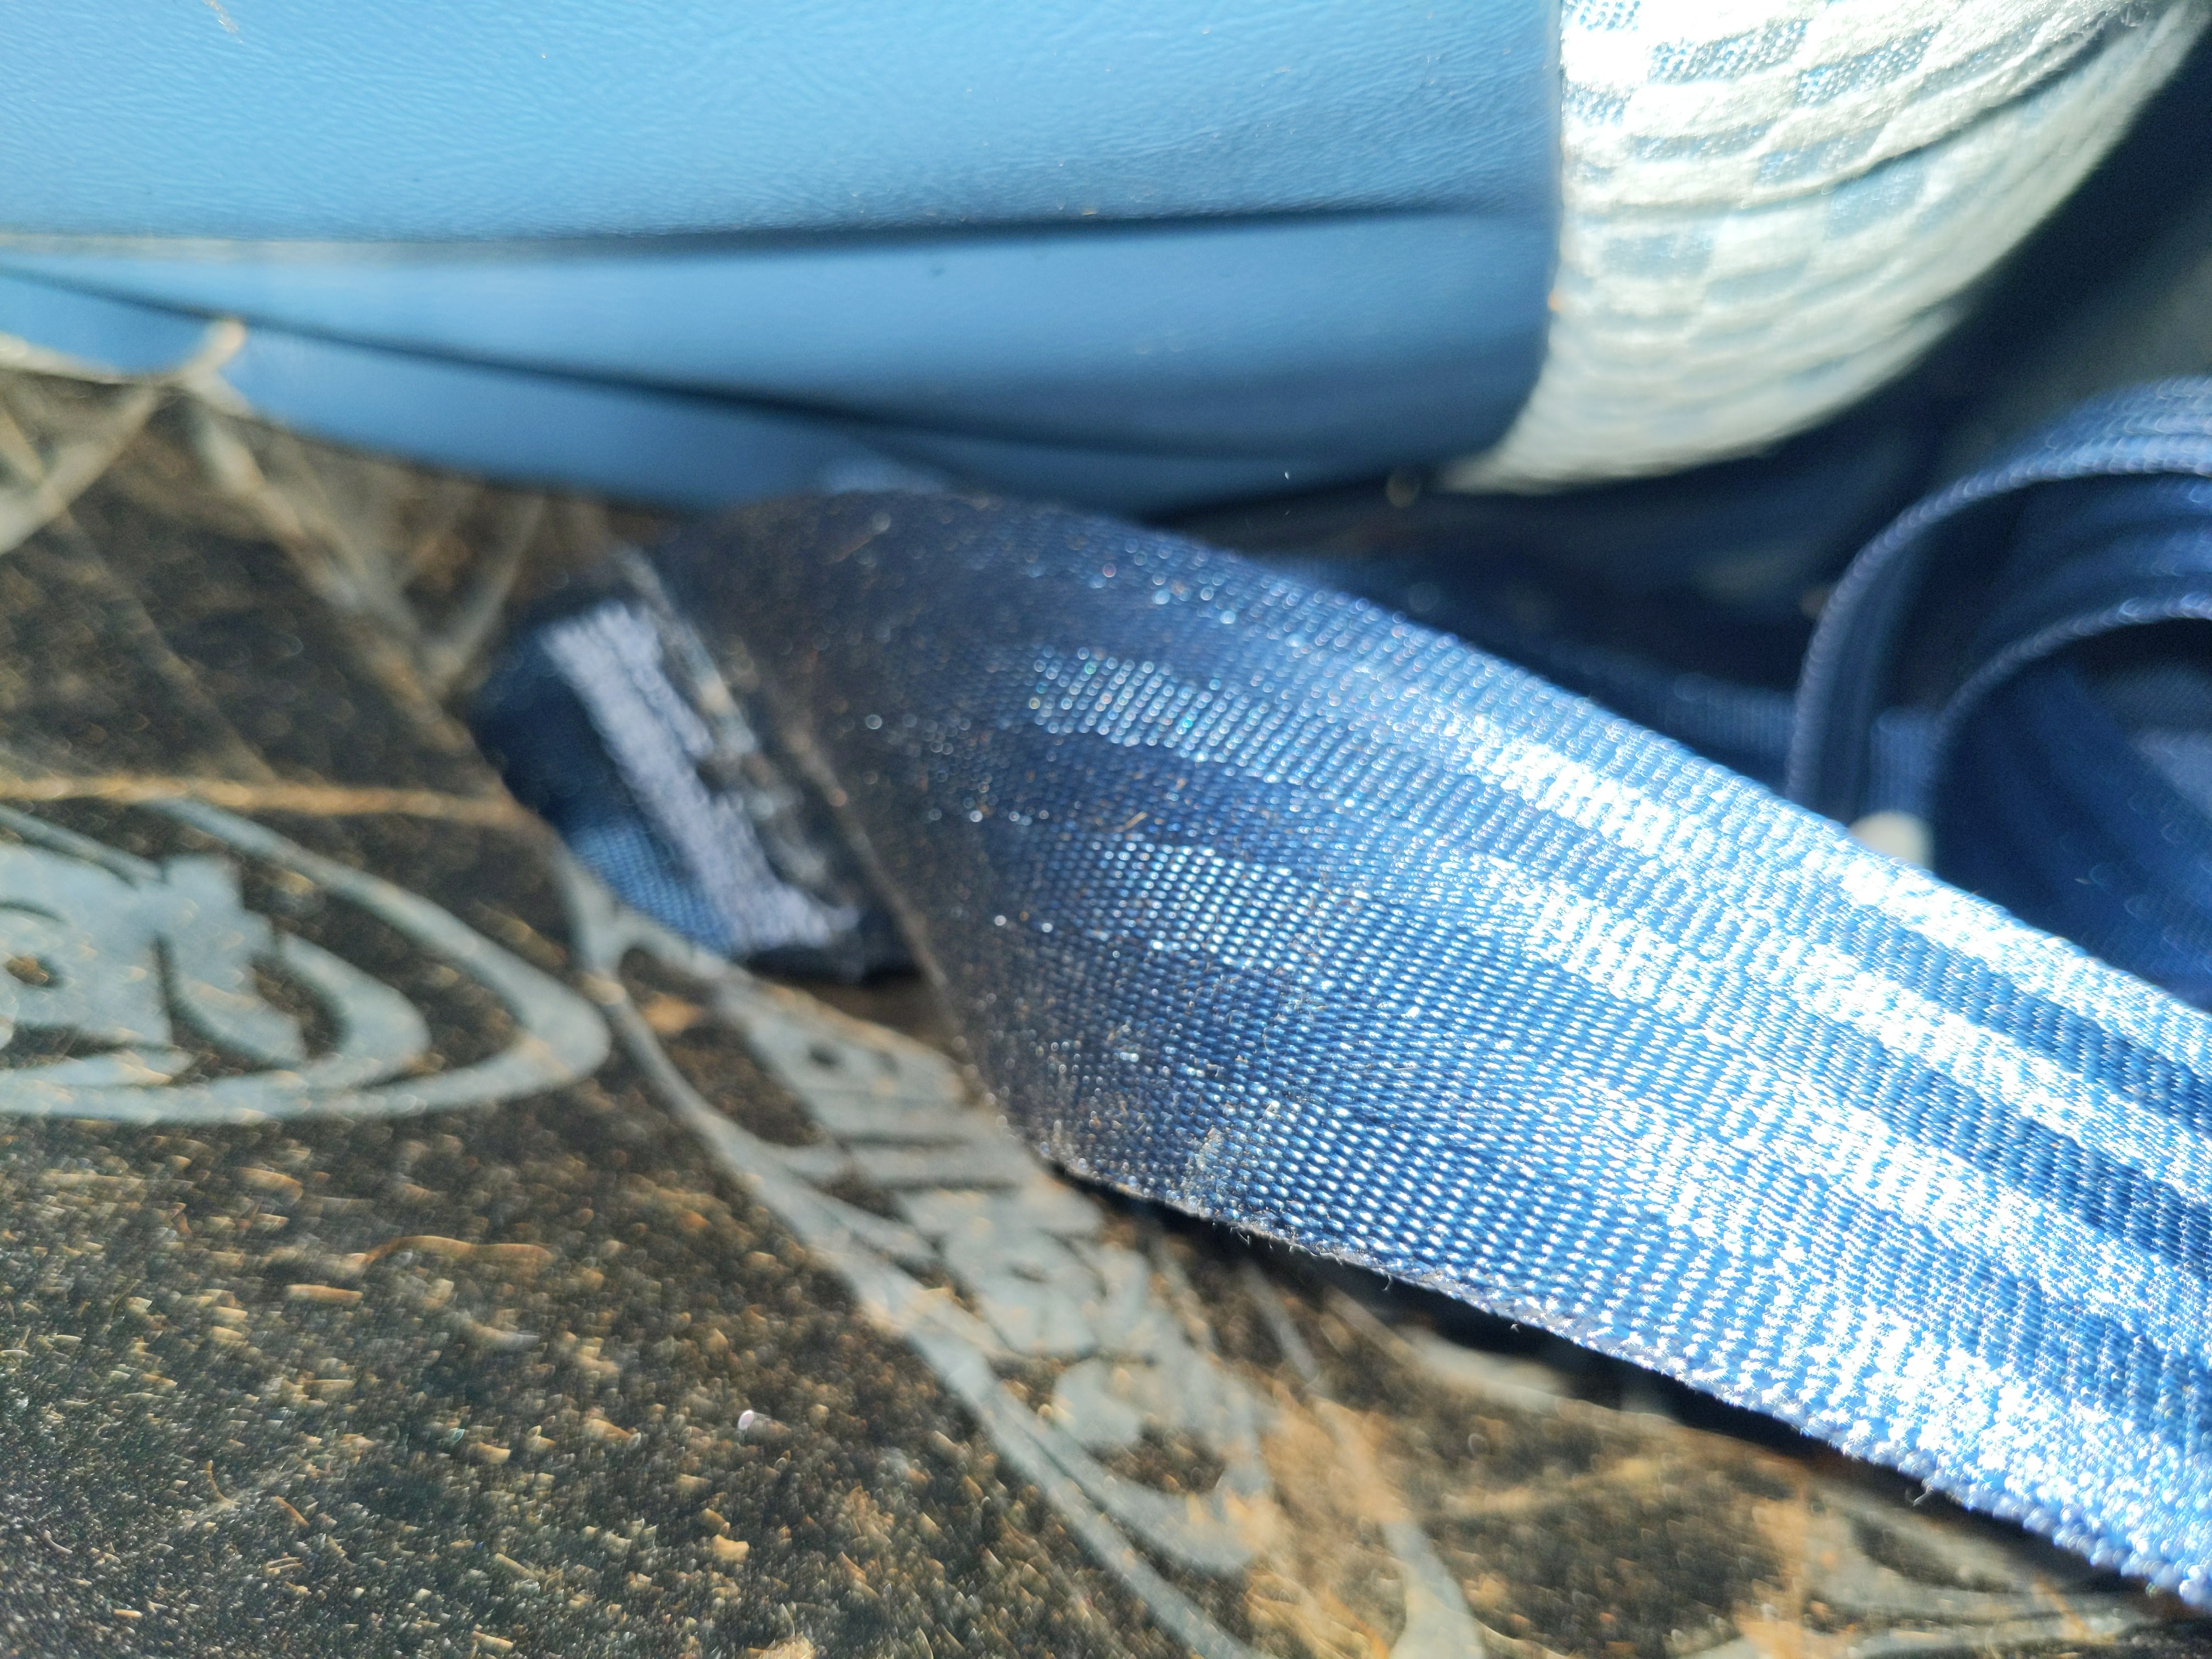
Hey @dgeist sorry for the wait but I finally got around to taking some pictures.
For the front seat, there is a lip at the back of the bottom of the bench platform. It curls up from the floor toward the upper cushion, and if you pull off the bottom cushion you have good access to it. I drilled four holes along this lip. The two outers have one belt each while the two inners do double-duty with the center belt. I used grade 8 fasteners, as I stated before, to hold them into place. I also replaced the stock seat mounting hardware with grade 8 stuff. What's nice about this approach is the belts stay the right length as the seat is adjusted forward and backward. The belts I used are about 2.5ft long, buckle side.


 0
0 -
For the back seat things were a little trickier to reach. I drilled two holes through the seat back right beneath the rear cushions. I still have three sets of belts back there using just the two holes; the outermost belts are the longest. On average they're about 3ft long. Same deal with the hardware. It works well and I haven't had any issues with it; once the cushion is back in place, you can't tell where the belts are coming from.
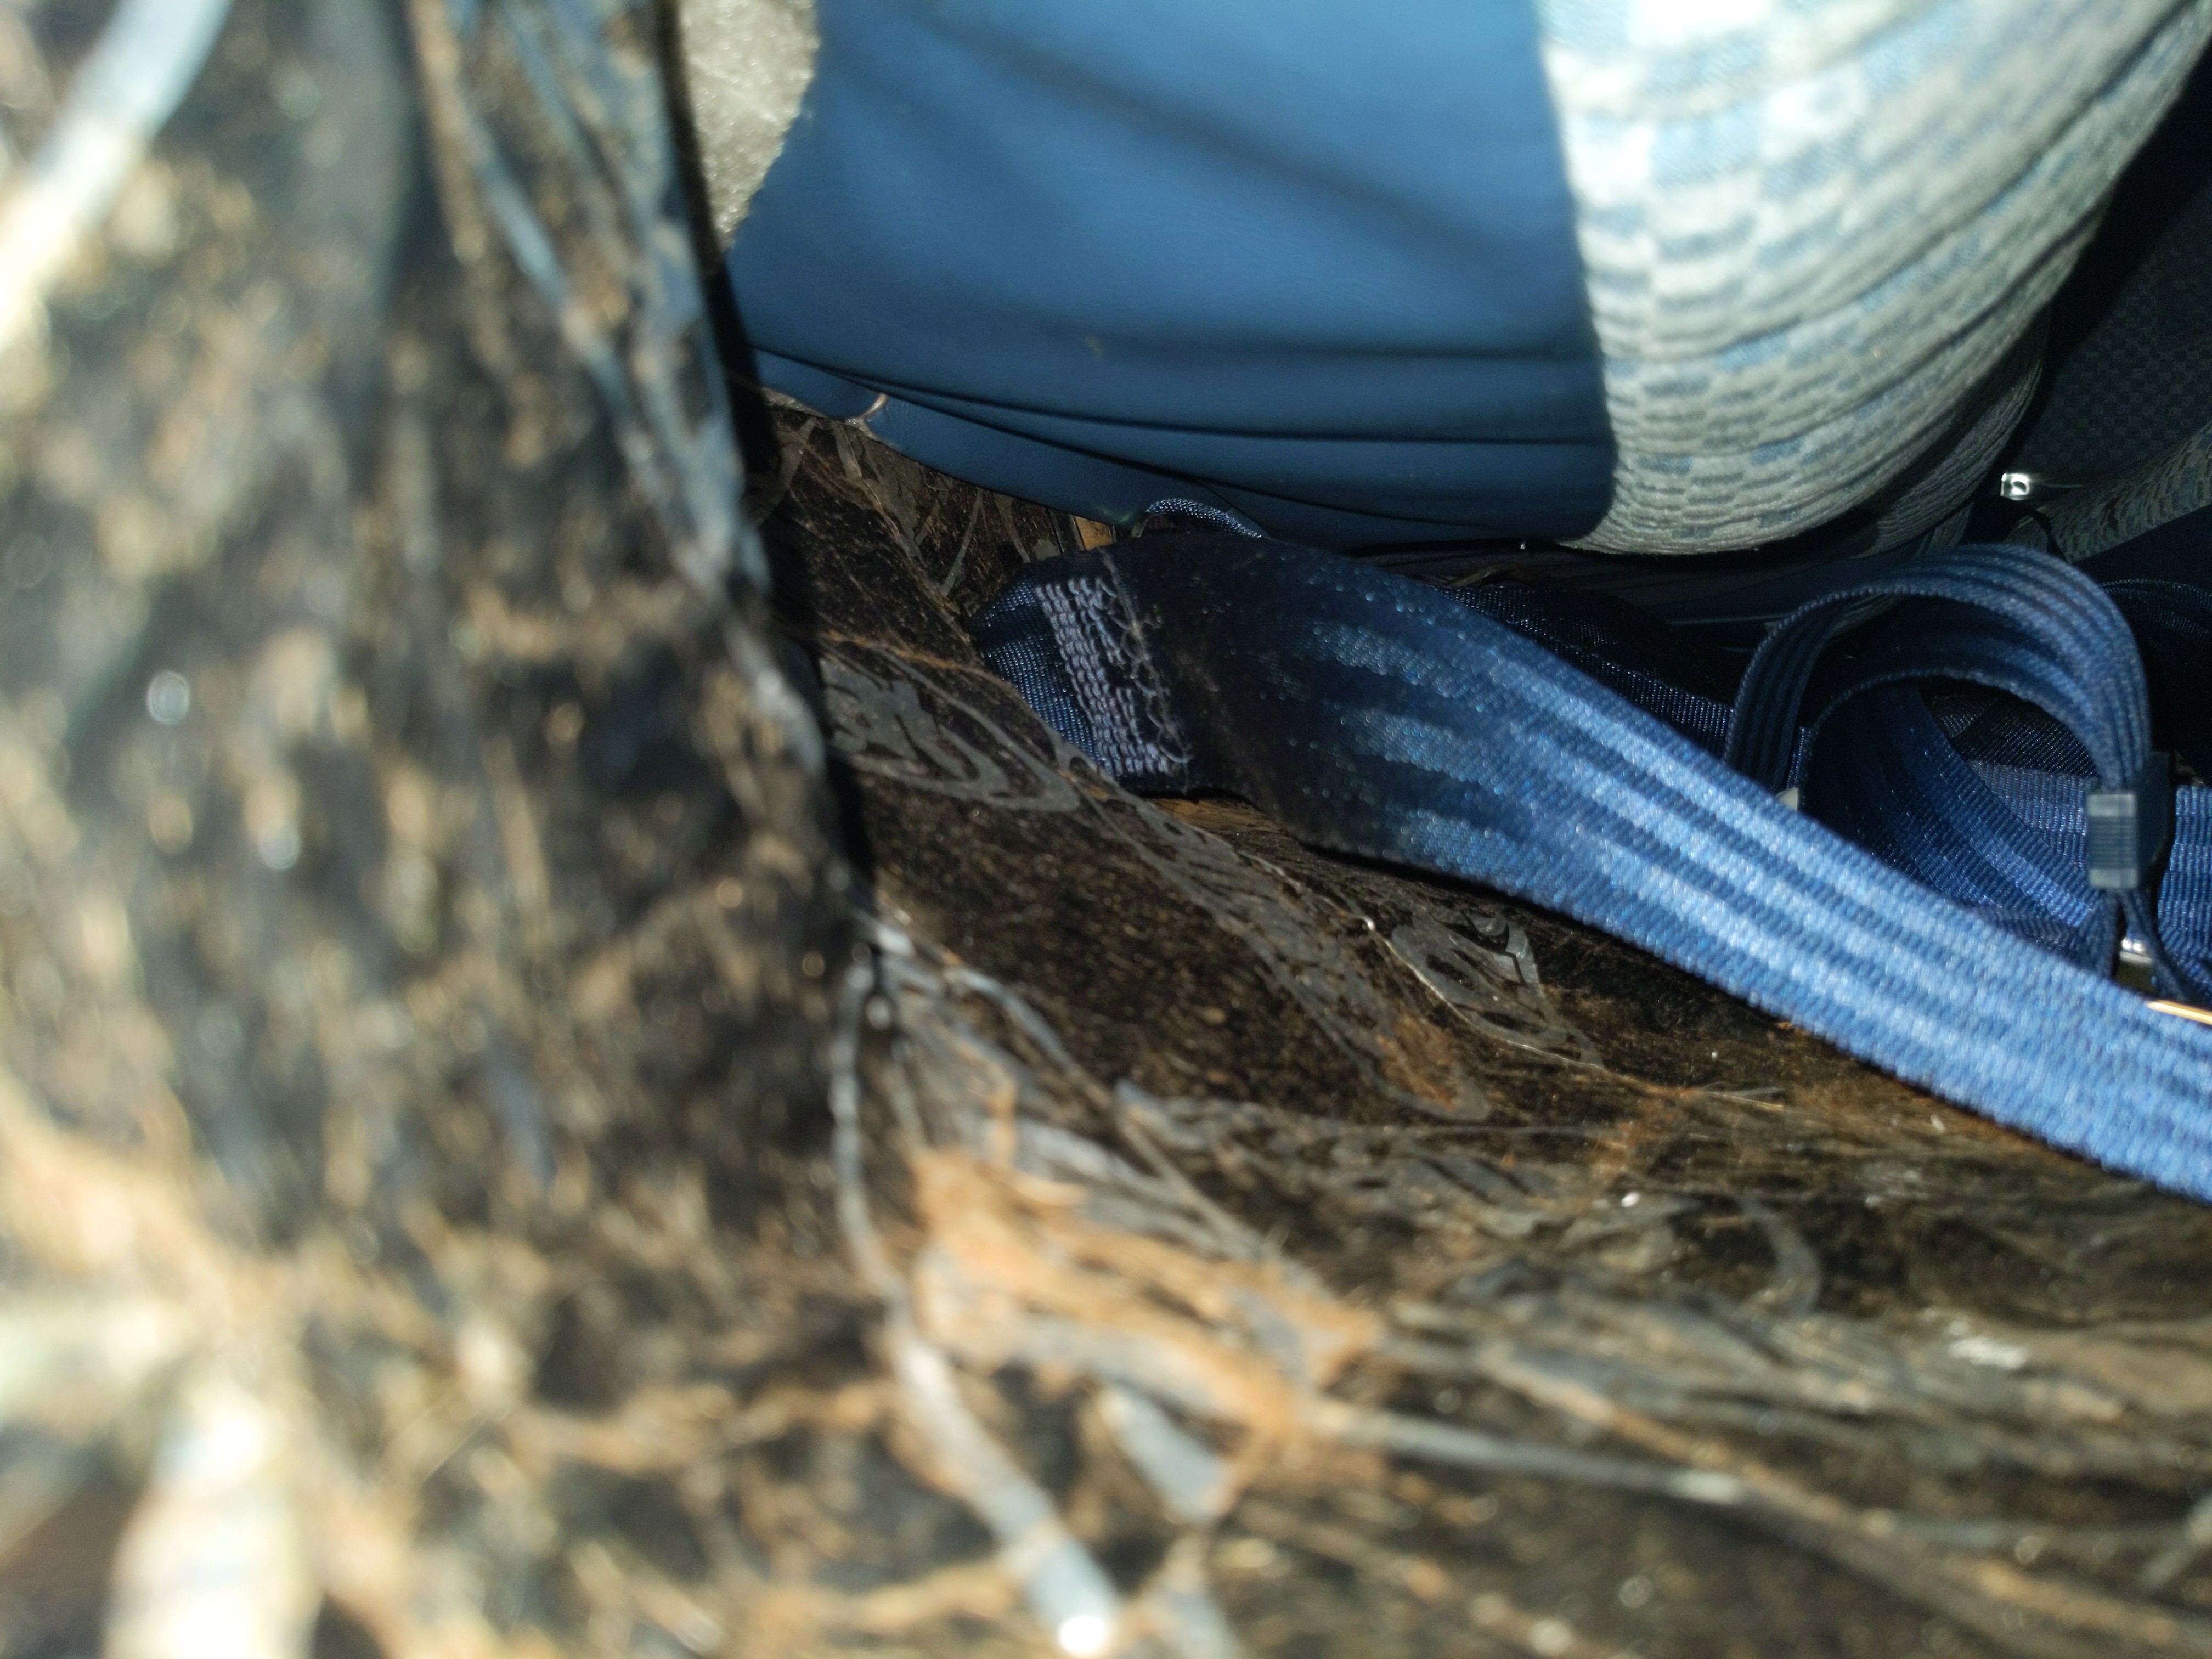
Hopefully these pictures help. Let me know if I can take any others!
0 -
Did you get you skirts off?
0 -
Lay under the car and you can see the heavy loops that hold the skirt on.
0


Categories
- 37K All Categories
- 119 Hudson 1916 - 1929
- 21 Upcoming Events
- 100 Essex Super 6
- 28.7K HUDSON
- 595 "How To" - Skills, mechanical and other wise
- 995 Street Rods
- 151 American Motors
- 185 The Flathead Forum
- 49 Manuals, etc,.
- 79 Hudson 8
- 45 FORUM - Instructions and Tips on using the forum
- 2.9K CLASSIFIEDS
- 612 Vehicles
- 2.2K Parts & Pieces
- 78 Literature & Memorabilia
- Hudson 1916 - 1929 Yahoo Groups Archived Photos