Fitting new sheet metal

mrsbojigger
Senior Contributor
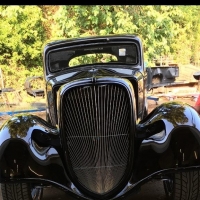
After some tweeking the new sheet metal panel that I made fits.
Peace,
Chaz
Peace,
Chaz
0
Comments
-
Looks good, Chaz! I've been working on some body work on my 34 coupe as well. What type of car are you working on? Walt0
-
That looks really nice! Can you show us pictures and explain the process of how you made it?0
-
I'm working on a '51 Hudson and converting it from a 4-door sedan to a 2-door hardtop. If you look real close you can see where I made a new panel over the rear end inside the trunk to take into account that I have "C" notched the frame under it. I can now lower the car within 2 1/2" of the ground if I choose to do so.
Oh Gee! As for making panel, it takes some equipment to do it. I used an english wheel, a tipping wheel, a shrinker/stretcher, normal body hammers and some welding to get the finished product but is was worth it. It looks like it's OEM.0 -
Here is an additional panel I made. Some have seen this shot already. It is the recessed panel to allow for the LS1 engine to fit comfortably and also makes it easier to install and take out. I started of by making a plywood buck and worked the sheet metal over it using a mallet and a "slapper". To get such the tight curve that I wanted I used my shrinker and also took quite a few tucks in the metal.
The tennis balls? I put them on the sharp edges of the car so when I'm working around the car I don't hurt myself as often.
Peace,
Chaz0 -
FYI
You still need a special Talent to do that nice of panel work even with 'shaping' tools .. My press brake is two pcs of angle iron clamped in vise so naturally I avoid intricate panels. The power brake Unit template type cut out on the firewall is also neat.
Great workmanship...0 -
I think that kind of work is interesting and your results are outstanding. I would like to see step by step with photos of how you did it. Are the outer pieces made with a hammer form?0
-
i have the exact same repair to make to my '51, interesting to see your take on it.0
-
Dear Bent Metal (real name here please)
I'm sorry but I have no "in progress" photos of building the back panel. I have so many projects going at one time and I am always switching back and forth between them. I work alone as I do with all of my artwork. The problem is that if there is someone else present that usually means I'm not working. It's difficult for me to work and take photos by myself. If I'm on a roll I don't want to stop.
As for the Hudson project, the center piece was made by using a brake to bend the first 2 bends to form a U-channel leaving enough at the top to form the reverse channel for the weather stripping. I then used my primative (manual/foot) shrinker to get the correct curves I needed. Next I used a tipping wheel to get the two last bends.
Basically it was the same for the 2 outer pieces with one exception. I made the channel for the weather stripping pieces separate and welded them together with the larger flat pieces. Hope the explanation helps.
I made the kick shrinker units. The part in the photo is a fender for my Radio Flyer wagon that I use to haul around my TIG welder.
Peace,
Chaz0 -
The sheetmetal work above looks great, but now you've got me curious to see your full fendered Radio Flyer
")
Matt0 -
Hey Matt,
The wagon is a work in progress. Right now I am concentrating on the Hudson, BUT here is a photo of it in it's original form. So many things to create, so little time. It's not only functional but a piece of Funky Art. Specs: A completely self contained rolling rig for my Miller Dynasty 200DX TIG welder. All hoses, cables, foot controller, gas bottle and tools are in it. I made an underslung compartment so I could roll up the cables into it and my wife walked by and said, "That looks like an udder on a cow". Shazam! A moment of inspiration! I went to our local feed store and purchased 4 rubber teets that are used for feeding calves and attached them the the "udder". The rig also has a cow bell under the tongue of the wagon and also it's own nursing calf. It also has it's own Texas license plate with reflectors on it for safety.
Lots of fun building it!
Enjoy and Peace,
Chaz0 -
That's great. Let me know if you're parting with the calf after it's weaned. I 'll need to tote a welder eventually
Too funny!
Matt0 -
Beautiful looking work Chaz!
I really should have rebuilt my entire back panel on the 49 in a similar fashion - but I just scabbed it in!
How where the interior support brackets? Are you having to re-create those as well?0 -
Dan,
I'm not sure what you are calling interior support brackets. Do you mean the parimeter frame? Please clarify!
Peace,
Chaz0 -
mrsbojigger wrote:Dan,
I'm not sure what you are calling interior support brackets. Do you mean the parimeter frame? Please clarify!
Peace,
Chaz
That would be the internal braces that go from what I'd call the center rear rollpan you re-created to the filler that the quarter panel bolts to (It's the brace(s) you have to work around to get to the taillights)
You can see in this progression of pictures what mine looked like :eek:
The braces I made aren't real elegant, but I did them completely by hand, with my cheap bead roller, shrinker-strecher, hammers and my hands and knees to make the compound bends - sure would have been nice to have an english wheel and a planishing hammer when making those!


 0
0 -
Oh, I see! No, Have not made those yet. Mine are in the same shape your originals were. Any insites on making them will be appreciated. I am planning on using 19 ga. crs.
P.S. You did quite well with yours.
Peace,
Chaz0 -
mrsbojigger wrote:Oh, I see! No, Have not made those yet. Mine are in the same shape your originals were. Any insites on making them will be appreciated. I am planning on using 19 ga. crs.
P.S. You did quite well with yours.
Peace,
Chaz
19ga seems a little light - is that what you used on the panel?
I'm using used sheet metal but mic'd it out at 16ga on the patchwork I am doing.This picture I posted shows the old brace and the roughed out new one before I made the final fit,
The biggest challenges I had were
1. with the bead roller I have and doing it by hand (and by myself) it was too difficult to make an exact pattern on the access holes in the brace - so I took a little "poetic license" when making mine by making the left hand holes a larger to still be able to get at the taillight bolts - thus eliminating the smaller square hole next to the trunk latch.
2. Compound curves on top of the cut-outs and bead edges was difficult - and was bent across my knee, hammered and dollied and then used the shrinker/strecher to pull around the edges in or out as needed.
These images show how the backend curves of the Hudson affect the shape of the braces - the second images you can see the braces laying "flat" in the bead blaster and note the compound curves.
 0
0 -
Dan,
I'll take your advice and go to a heavier metal. I have lots of that around here. I didn't realize I would be dealing with a compound curve though. Well nothings been easy so far so why should these pieces be any different.
Thanks,
Chaz0 -
mrsbojigger wrote:Dan,
I'll take your advice and go to a heavier metal. I have lots of that around here. I didn't realize I would be dealing with a compound curve though. Well nothings been easy so far so why should these pieces be any different.
Thanks,
Chaz
I believe the brace also ties in the rear pan to filler panel and the rear lip of the unibody for structural integrity so - worth taking the time and rebuilding these the best you can.
I sure wish there were Cheap stamping methods to make parts like this. Well - I should restate - the stamping of parts is cheap in comparison..it's getting the dies made that are expensive.:mad: Probably about 10k for a set of dies that could stamp both sides for this brace alone.
Although all this metal working is fun and all - I'd sure like to have a car that was "not so rusty" next time I do a custom. I'm sick everytime I look at the 50 - It's not perfect rustwise but it's lightyears (or is that rustyears?) better than the 49.
I think at this rate I'll have to re-disignate the 49 As Rambos Ride I and the 50 as Rambos Ride II - I gotta get the old boy into one of these cars under its own power!0 -
Well Dan,
Those 2 braces had been totally out of my mind. I had forgotten about them. Like you, there have been so many other things that HAD to be done on other parts of the car. BUT there has been progress on the old girl (Lola). Just remember! The first time you take it out for a spin it will all be worth it.
Rambo will thank you too with a big smile on his face.
Peace,
Chaz0 -
You guys are doing fantastik jobs, keep it up. Thank God, my back pcs are in real good shape. Wish I lived closer, would love to see this all in person,lol.
Bill0 -
bluenash wrote:You guys are doing fantastik jobs, keep it up. Thank God, my back pcs are in real good shape. Wish I lived closer, would love to see this all in person,lol.
Bill
Qudos on the great job. I have an unrusted rear section that came as a spare part with my Commodore. I had been willing to sell it but after looking at this thread, I think I will keep it. Who know what I might buy next?0


This discussion has been closed.
Categories
- 37.1K All Categories
- 121 Hudson 1916 - 1929
- 21 Upcoming Events
- 101 Essex Super 6
- 28.7K HUDSON
- 595 "How To" - Skills, mechanical and other wise
- 995 Street Rods
- 151 American Motors
- 185 The Flathead Forum
- 49 Manuals, etc,.
- 79 Hudson 8
- 45 FORUM - Instructions and Tips on using the forum
- 2.9K CLASSIFIEDS
- 612 Vehicles
- 2.2K Parts & Pieces
- 78 Literature & Memorabilia
- Hudson 1916 - 1929 Yahoo Groups Archived Photos