Redneck Hudson

While I have been taking alot of time working on the stroker project, my Dad lost patience and started a rebuild of his own using the good parts I had that weren't slated for the stroker project. Of course I got involved, I wanted a stock 308 for the Wasp anyhow.
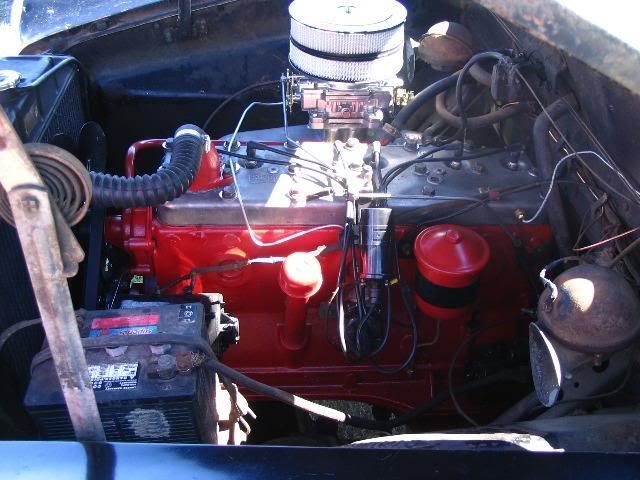
As usual, the engine needed alot of attention. New Dale Cooper pistons, bearings, gaskets, stock valves and guides. Nothing fancy on the interior besides holding some tight tolerances on the machining. The machinist we've used several times in the past didn't let us down. Its not a ground breaking build by any means, but Hudson through and through.
Our goal was to make the Redneck Roundup, which was this past Saturday,a local show for pre '64 cars that pretty much caters to the Do it Yourselfers etc. The '49 isn't pretty, but it sure does run good. I had lots of visitors and they came to see one thing, which we didn't disappoint them - they wanted to see a Hudson flathead engine. We had one for them to see!
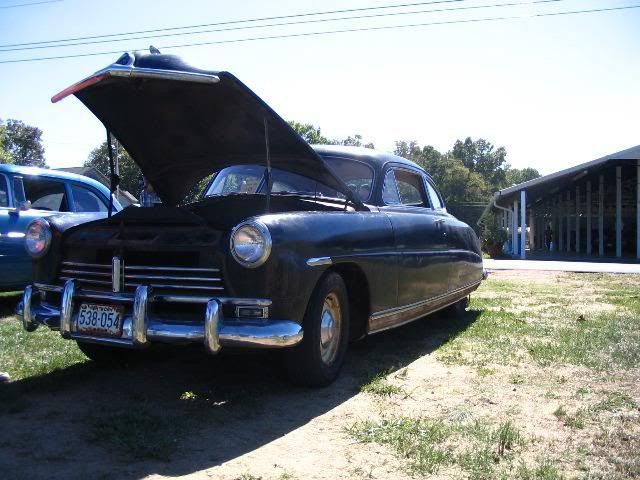

We drove the new engine to the show, it had just fired up on the Thursday before. Purred like a tiger all the way there and back. The Headers sound nice.
Mark
As usual, the engine needed alot of attention. New Dale Cooper pistons, bearings, gaskets, stock valves and guides. Nothing fancy on the interior besides holding some tight tolerances on the machining. The machinist we've used several times in the past didn't let us down. Its not a ground breaking build by any means, but Hudson through and through.
Our goal was to make the Redneck Roundup, which was this past Saturday,a local show for pre '64 cars that pretty much caters to the Do it Yourselfers etc. The '49 isn't pretty, but it sure does run good. I had lots of visitors and they came to see one thing, which we didn't disappoint them - they wanted to see a Hudson flathead engine. We had one for them to see!
We drove the new engine to the show, it had just fired up on the Thursday before. Purred like a tiger all the way there and back. The Headers sound nice.
Mark
0
Comments
-
How's that aluminum head working out for you?0
-
dwardo99 wrote:How's that aluminum head working out for you?
The jury is still out on the aluminum head.
We did use one of Cooper's "Best" head gaskets that come so highly recommended.
Another thing we did, was to make a set of installation sleeves such as the mechanical proceedure manual calls for.
The sleeves consist of a 7/16th stud that sticks out beyond the head a good 1 1/2". Over this headless stud, a machined sleeve slides over the stud that has the inner diameter of the stud, and the outer diameter of the head's bolt hole. The sleeve also fits inside the bolt hole cuts in the head gasket. You install two of these guides in the block after laying down the head gasket, slide the machined sleeve over the stud and use the sleeve to position the head gasket and hold it still while lowering the head. The head then slides over the outer diameter of the sleeve (Dad did his homework here as the sleeve shaved out some corrosion from the head bolt holes) and install the remainder of the head bolts.
Once we had all the head bolts tightened up to about 25 ft/lbs, we unscrewed the guides and eased them out of the block. The head gasket never moved under the head, which I suspect is the main culprit in head gasket failures.
Also, I religously cleaned out each head bolt hole in the block with a tap till the tap came out clean. I mean all the way down until I ran out of tap or hit an exhaust/intake runner. The head bolts were also cleaned until they looked polished. I did not want any misreadings on the torque wrench due to difficult thread interface. I went from 25ft/lbs to 50, then sequentially torqued the head down in 15ft/lb increments till we hit 85 ft/lbs.
So far, so good. I feel like we've given the head its best chance at holding - that still doesn't mean it won't leak eventually. We're going to retorque it soon after another heat soak.
We'll see
Mark0 -
Mark will we see that Hudson and Hudson family at Pigeon Forge? Looks like this will be a big one. B.K.0
-
Hello Mr. Kemp! I hope you have been doing well this summer.
I can't really say about the car. Some driveline issues still exist.
Mainly, the 4.10 early type rearend and the fact somebody replaced the original U shackles with some aftermarket type that I don't really like.
The Redneck Rumble was a 60 mile trip, one way. Good break-in run and nothing we had to worry about breaking the 55 mph speed limit in. Which is where the low gearing seems to like it best. Pigeon Forge may be a stretch for it with the unknowns that exist behind the clutch.
In any event, I'll try to make it if just for the day on Saturday.
Mark
I'd like to drive down0 -
Mark, are you using the Uncommon dry clutch you got off of me?0
-
Nope, I'm not.
Its a NOS disk from JC Whitney and a good original pressure plate/flywheel I had on hand. The throwout bearing is less than would be desired. I have a Dr Doug outfit that will likely go on the back of that engine when I install the newly refurbished top shifting T-86.
I'm leaning toward the Wilcap outfit as linked here recently for the stroker. Steve never gave me the information on throwout bearing application etc for the outfit from Uncommon Engineering. But, I do not like the 1/2" setback required for the use of that outfit. If one were installing it on a 55-56 engine/crankshaft, it would be the berries to retrofit back into a stepdown chassis and update to the dry clutch. This would elminate your 1/2" crankshaft problem as used with the stock backplate.
That is, if you could get the clutch disk/ pressure plate/throwout bearing/ etc that was intended for the flywheel arrangement inside the stepdown bellhousing. I still don't have that info.
Mark0 -
Is that an early 2 barrel aluminum hudson intake (48-49) with a 4 barrel on it?0
-
hudsonkid wrote:Is that an early 2 barrel aluminum hudson intake (48-49) with a 4 barrel on it?
Its a really early Clifford 4 barrel intake. It actually has "HUDSON" cast into it and was cast with the appropriate bosses/flanges to be mounted on an original exhaust manifold.
I think Jack was trying to blow one by the NHRA inspectors at the time. Hence the "HUDSON" rather than "CLIFFORD".
Mark0 -
Hudsonator, Are you running a 500 or 650 cfm Edelbrock 4 barrel? I want to do this conversion on my wasp and just about have all the major pieces.
How's it run with this setup?0 -
hudsondad wrote:Hudsonator, Are you running a 500 or 650 cfm Edelbrock 4 barrel? I want to do this conversion on my wasp and just about have all the major pieces.
How's it run with this setup?
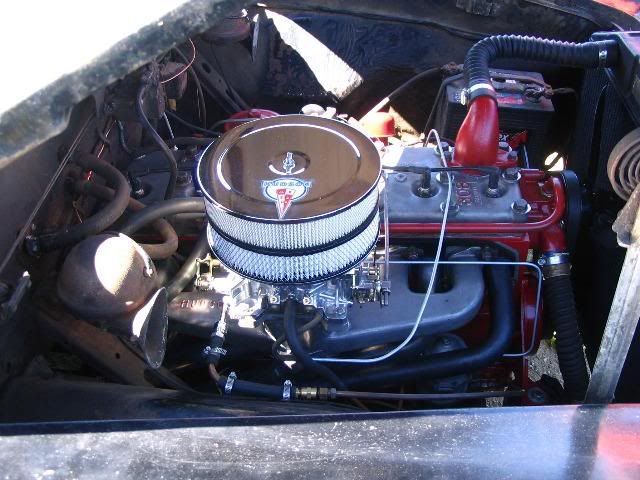
Its a 500 cfm Performer, Model 1404. It came from JEGS, they went on sale with rebuilt 500's selling for about $150.00 just after I ordered this one.
It runs GREAT. I would advise buying the jetting kit for it when you buy the carb. I also had float height issues "out of the box", which caused it to flood and leak fuel into the primary venturis after you shut the engine down.
I have rejetted it 4% leaner in the primaries, with a little more to go. The rejetting kit comes with all the metering rods, primary jets, secondary jets, and step-up springs you'll need. The carburetor itself comes with one of the best owner's manuals I've had in my hands - ever! Its comprehensive and makes jetting changes very easy to understand. Most of the jetting changes and all the step-up spring changes can be made without taking the air horn off. This has become one of my favorite carbs to mess with, I only wish I had come in contact with them sooner.
One more thing about using these on a Wasp. This engine will eventually make its way into a Super Wasp much like yours. The linkage you need is for the single WA-1 from either a Wasp 232 or Pacemaker. They have a fulcrum that is stock, integral to the coil bracket, and pulls across the head. If you'll look at the pictures of my linkage and carb orientation, its a "pull" outfit. The Super Wasps have a "pull down" linkage in the center of the engine just rearward of the coil. On a Super Wasp, this pulls the WGD linkage and causes it to rotate similiar to a Hornet. On the Wasp/Pacemaker with the 232, it pulls down on one leg of a fulcrum that causes a rod to pull across the head and tug at the WA-1. So, all you would need to do is replace your current coil bracket with the one from the Wasp/Pacemaker with single WA-1 and fabricate a rod to go from the fulcrum to the carb. Easy-peasy and All Hudson.
One of these days Jim Guinn will send me the Pacemaker WA-1 linkage to do just what I've described to you. In the meantime, and until the stroker is done - I'm gonna run this engine in the '49!
Its really strong and torquey, a very road mannerly engine. I'm getting 15 mpg out of it with a 4.10 rear gear and non-OD. I think that could be improved on, as I'm not finished with the jetting just yet.
Mark0 -
Thanks for the info and pics. I picked up a new 1404 at Carlisle about 2 weeks ago and cut down a twin h rod that mounts on the head so I can pull the linkage across like they do with the WA-1s. Also want to try the clifford shorty headers and X pipe as I assume they'll fit short wheelbase. If they don't, I guess I'll be cutting down an old set. Sounds like I should pick up the jetting kit. Thanks again.0
This discussion has been closed.
Categories
- 37K All Categories
- 117 Hudson 1916 - 1929
- 22 Upcoming Events
- 98 Essex Super 6
- 28.6K HUDSON
- 581 "How To" - Skills, mechanical and other wise
- 995 Street Rods
- 151 American Motors
- 181 The Flathead Forum
- 49 Manuals, etc,.
- 79 Hudson 8
- 44 FORUM - Instructions and Tips on using the forum
- 2.8K CLASSIFIEDS
- 610 Vehicles
- 2.2K Parts & Pieces
- 78 Literature & Memorabilia
- Hudson 1916 - 1929 Yahoo Groups Archived Photos