new front stub frame in my '49 brougham
Comments
-
Okay....got a little more time in on the Hudson yesterday.
Trying to get clearance for the steering rods at full suspension travel. So I trimmed out the lower side of the frame in front of the suspension and welded in a piece of box tube.
Here it is all trimmed out: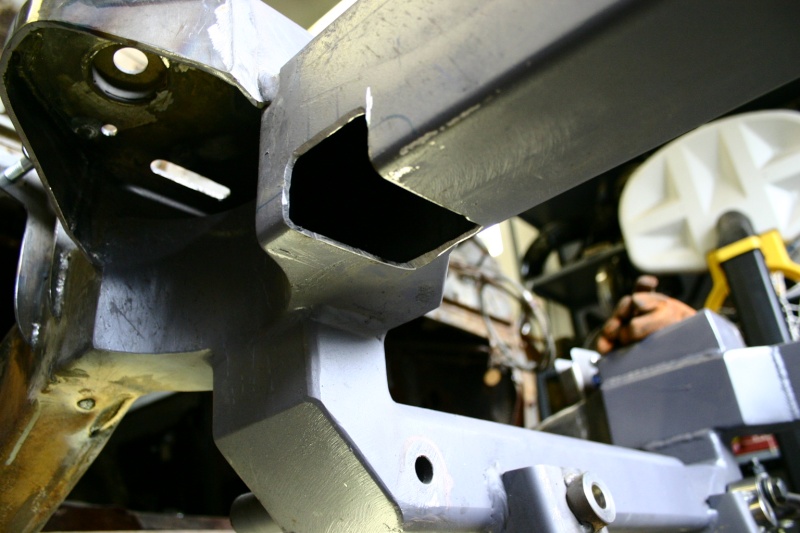
Next, I marked the piece of tube to trim out: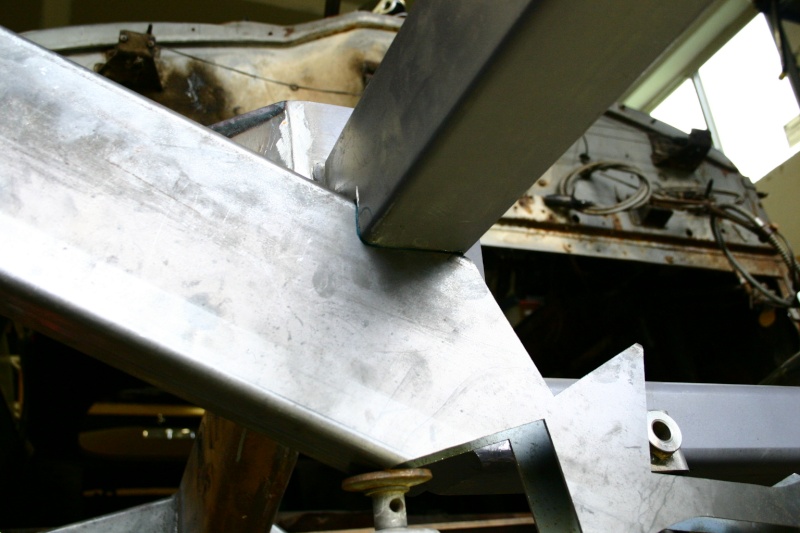
Here it is trimmed and tacked in place: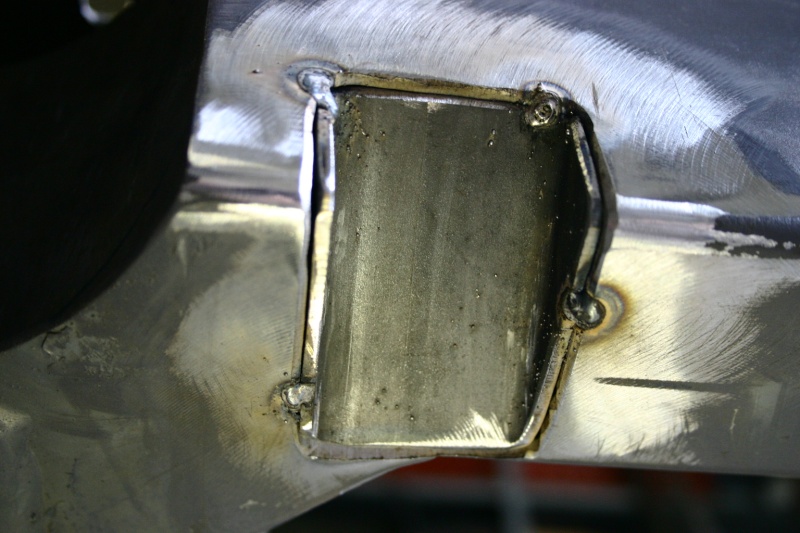
Here it is welded in and cleaned up.....then for extra strength to replace the area I sliced out, I added a piece of 1/2" bar next to it. Here the bar is tacked in place and ready to be welded: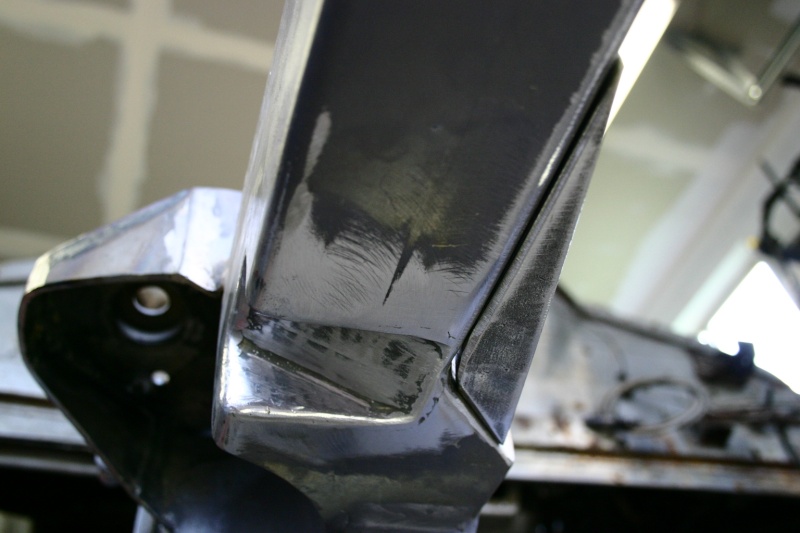
And here's the picture from above after welding in the piece of bar stock: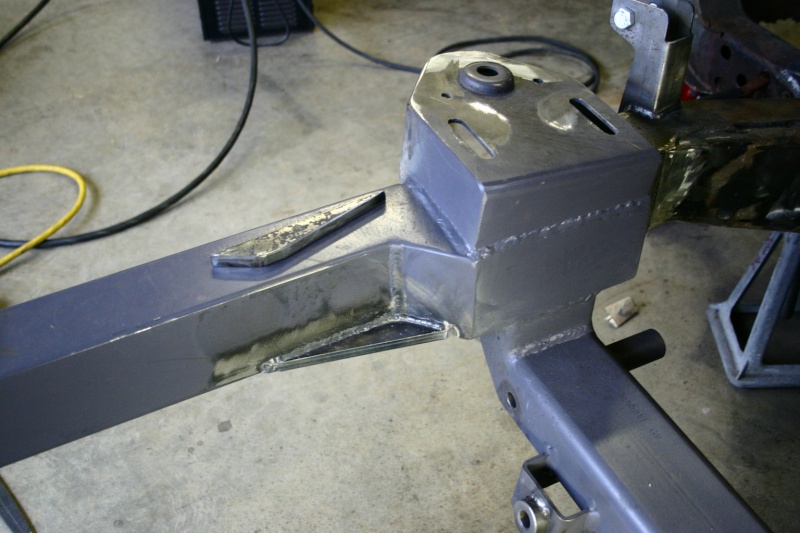
So, now I need to do this to the driver's side, weld in the engine mounts, paint and reassemble, and I'll have the entire front suspension installed!!!! Then on to the triangulated 4 link in the back.
Lee0 -
Okay....here's a little "status report" on my brougham. I finished "channeling" the frame for the tie-rods coming out of the rack on the driver's side. Then a buddy came over and graciously lent a hand to get the engine positioned for welding in the engine mounts. So we put the oil pan on the block with a few bolts and set it on the crossmember, then bolted up the bellhousing and the tranny. After some leveling and sliding around we had it located where we wanted it and I could then trim the engine mount tabs and tack them in. Here's a few pics....
We tilted the engine back at 5 degrees.....here's an angle shot: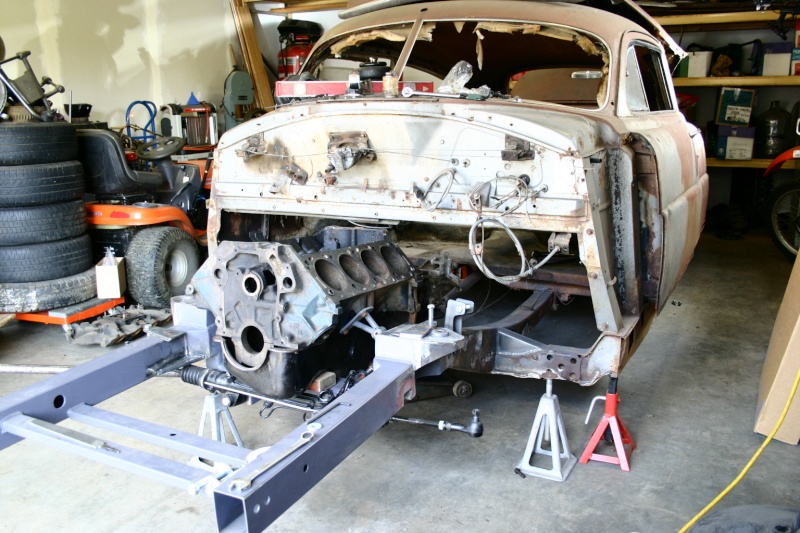
Here's a shot from the back seat!!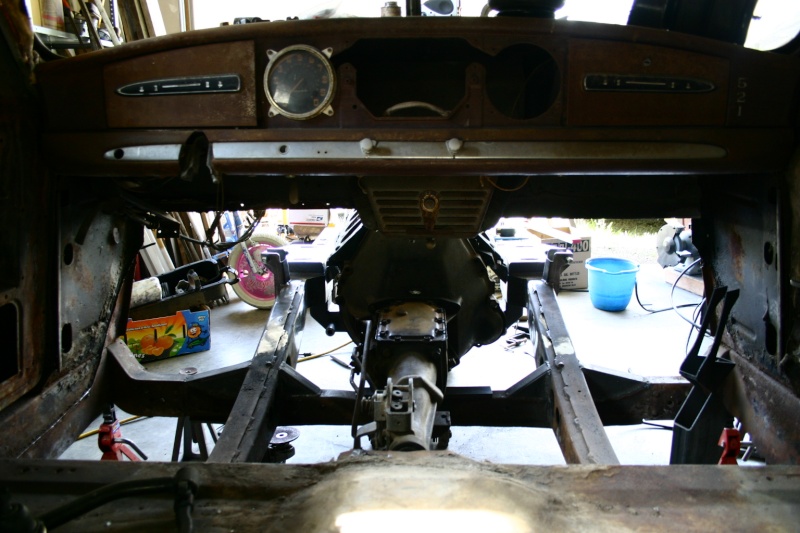
Here's the tabs trimmed and tacked in: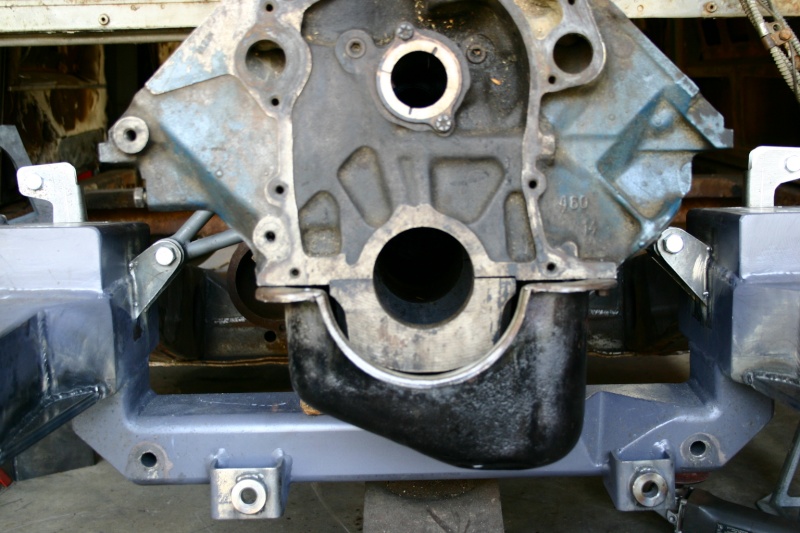
So I then pulled the engine out and finished welding in the tabs: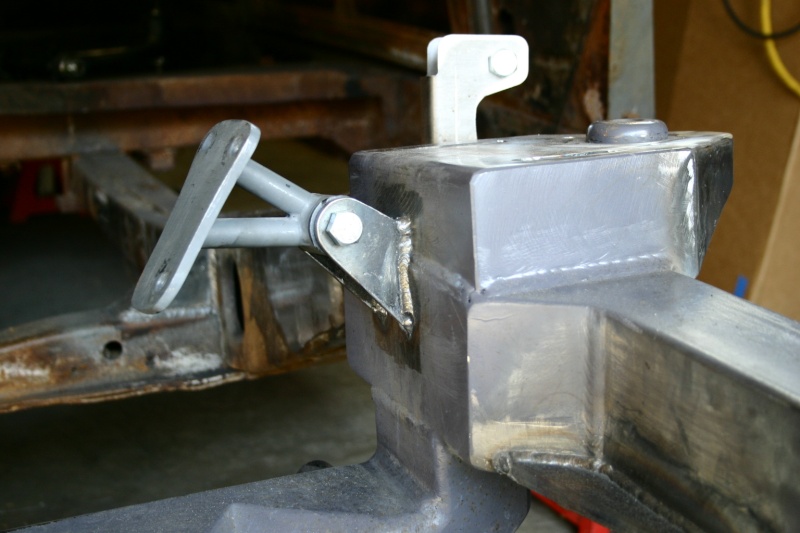
Then I gave it all a "once over" with some sand paper, wiped it down with lacquer thinner and gave it a fresh coat of RUST BULLET. Its almost ready to "final assemble" the front suspension.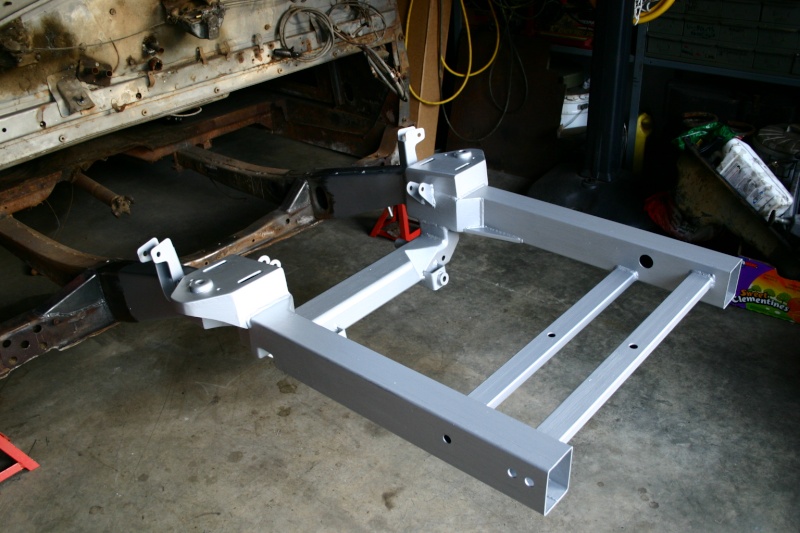
All for now......I really love the Rust Bullet. Its super sticky and seems to totally seal the surface. So now, I need to finish painting a few things, then assemble it all....then move to the triangulated 4-link in the back!!!!
Take it easy!
Lee0 -
there is some very nice welding there
going to look clean and crisp and have nice lines
Mike0 -
LOOK MOM....NO JACKSTANDS!!!!
Okay....the front is all final assembled!!!! Here's a few pics of the assembly process.
First I had to sweat some copper fittings and get the airbags "air tight"....still not sure if they're air tight...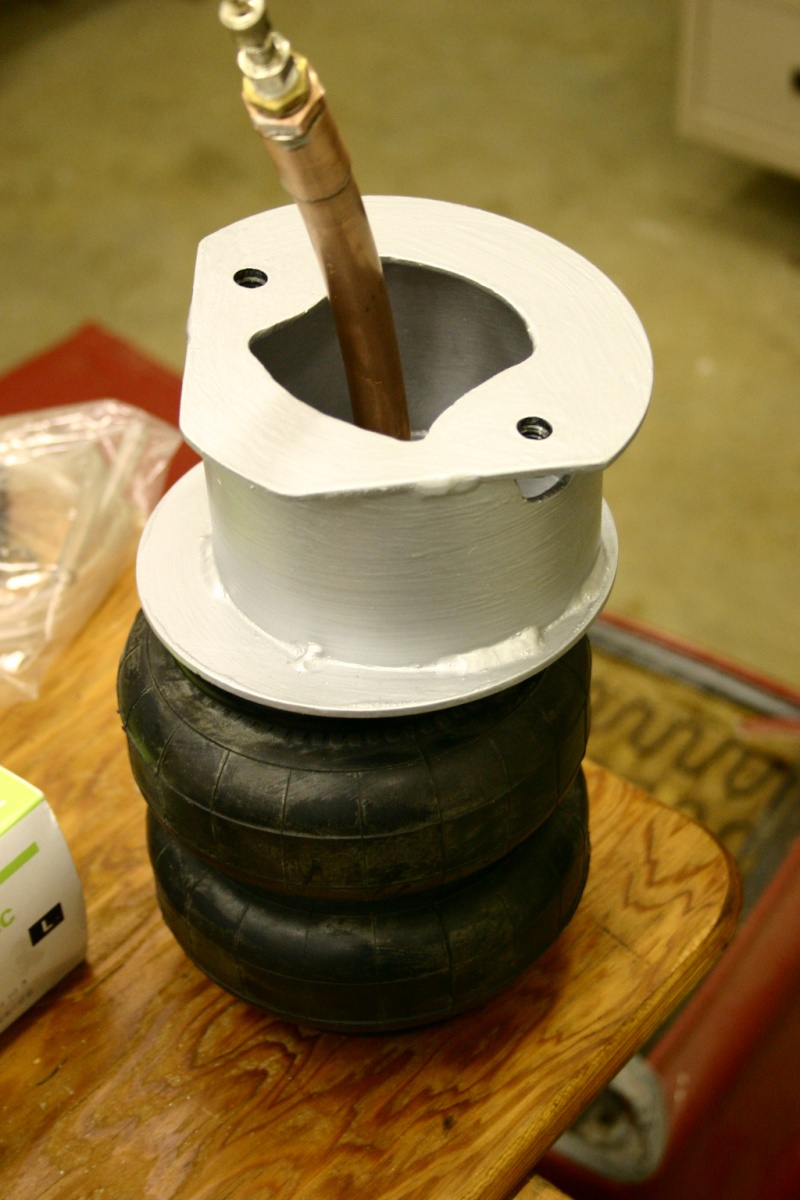
Then I put the bag assemblies into the spring hats and bolted on the lower arms: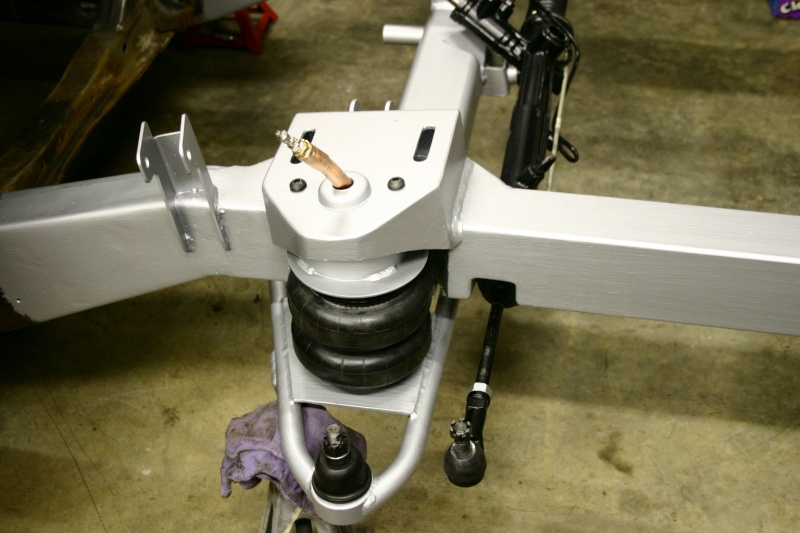
Here's the complete right hand side: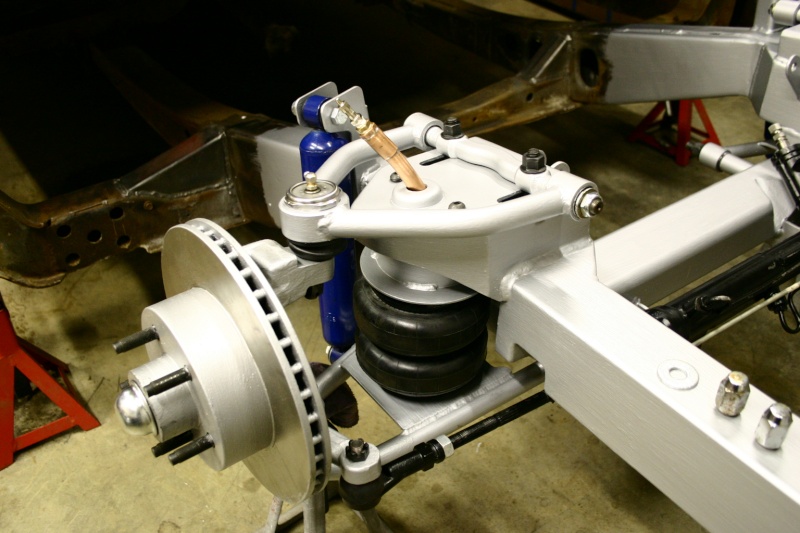
Here's the whole thing: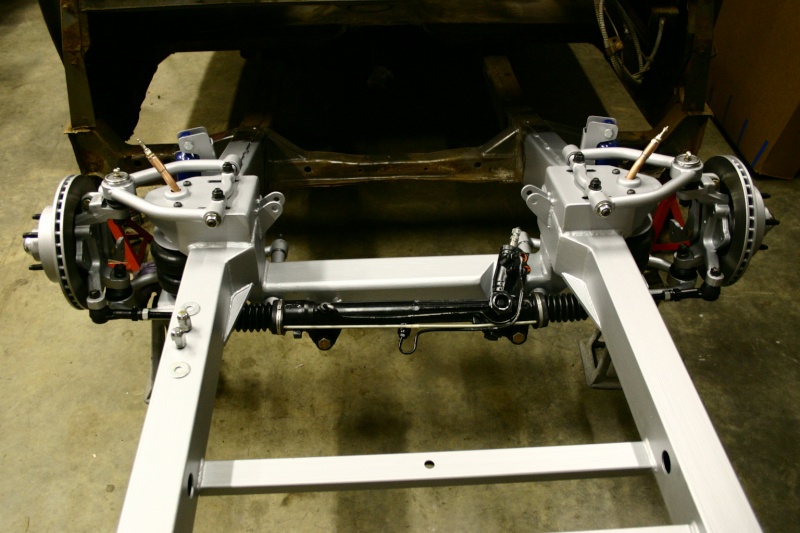
And here it is supporting it's own weight with air in the bags!!!: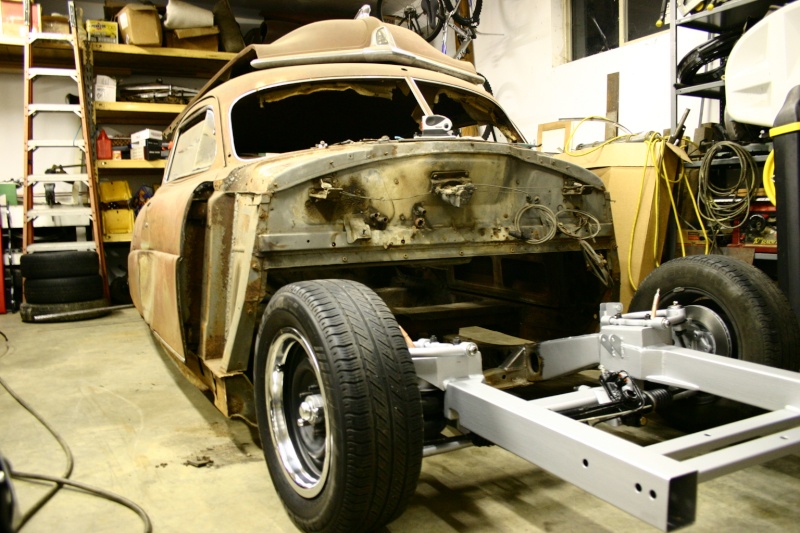
Now it's time to finish removing some of the remaining trim inside, roll it out in the driveway and pressure wash the whole thing. Then I can turn it around, push it back in the shop and start on the triangulated 4 link!!
And with that, I'm concluding this "stub frame" post. Thanks everyone for the input and comments. Stay tuned for the 4 link install :-)
Lee0 -
A real class set-up Lee! Wow! Beautiful!
Jay0 -
Looks great Lee! Before you conclude, how about a shot with the bags delfated for us?0
-
hudsoncustom wrote:Looks great Lee! Before you conclude, how about a shot with the bags delfated for us?
Sure....sounds fun. I might be laying frame with these smaller tires, but we'll see what it looks like! I don't smoke, so I won't be able to set a pack of camels down next to it for reference....how about a beer can :-)0 -
lsfirth wrote:Sure....sounds fun. I might be laying frame with these smaller tires, but we'll see what it looks like! I don't smoke, so I won't be able to set a pack of camels down next to it for reference....how about a beer can :-)
Only if you crush the beer can with the car while its lowering 0
0 -
jsrail wrote:A real class set-up Lee! Wow! Beautiful!
Jay
Okay Jay....it's your turn :-)
Your's should be a piece of cake since you got it all from Fatman!!! Too bad we don't live closer we could team up on it :-)
I wanna see some progress!!!
Lee0 -
hudsoncustom wrote:Looks great Lee! Before you conclude, how about a shot with the bags delfated for us?
Okay...by request here's a few more shots with the bags in action
showing the clearance at ride height and aired-out.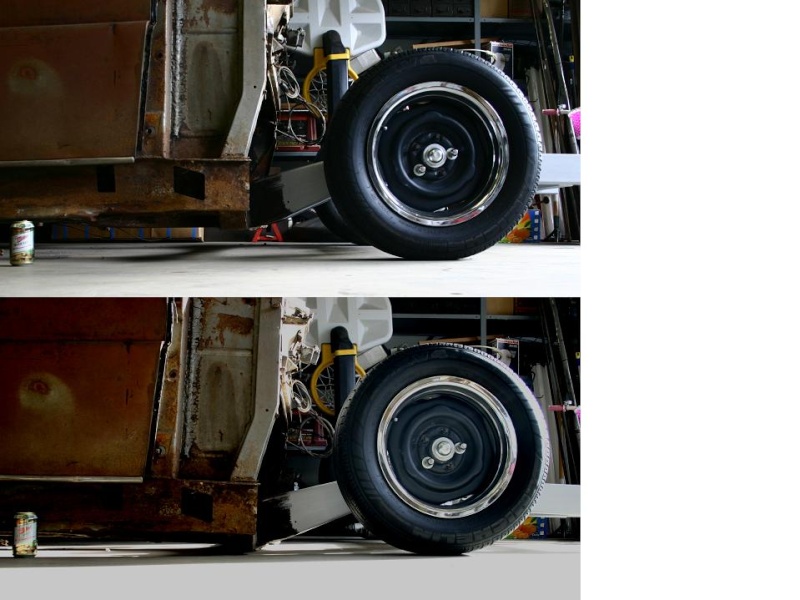
yep....this one's for Dan....that's a can under the frame in the lower picture!!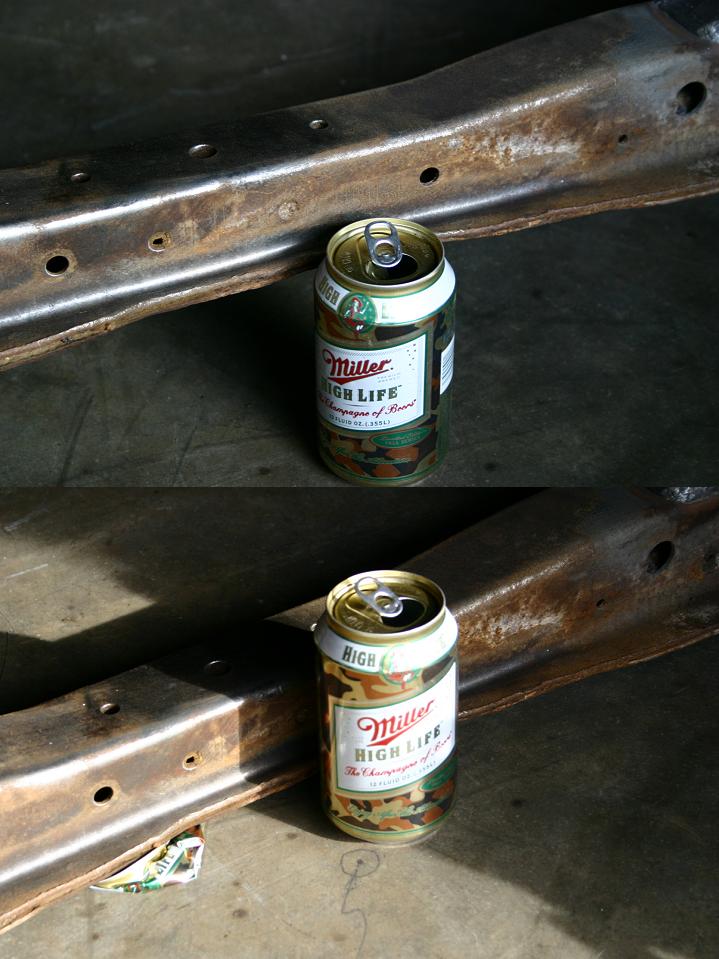
And here's a couple more shots of the suspension at max drop.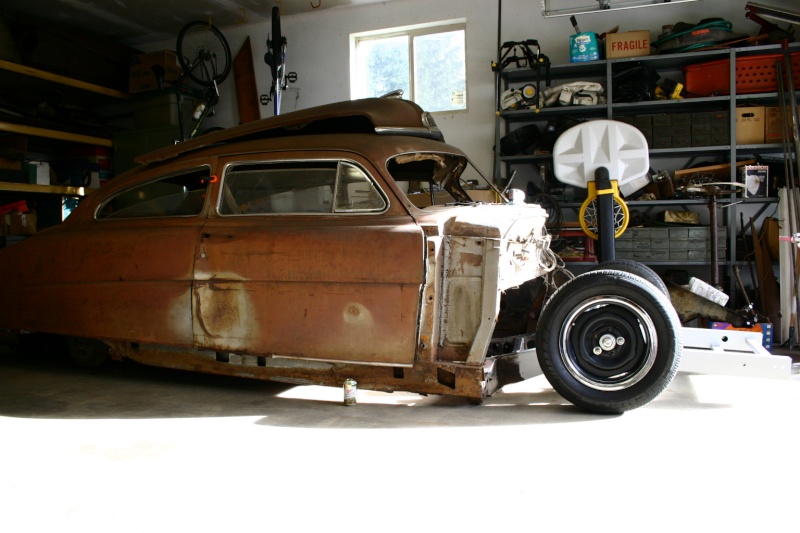
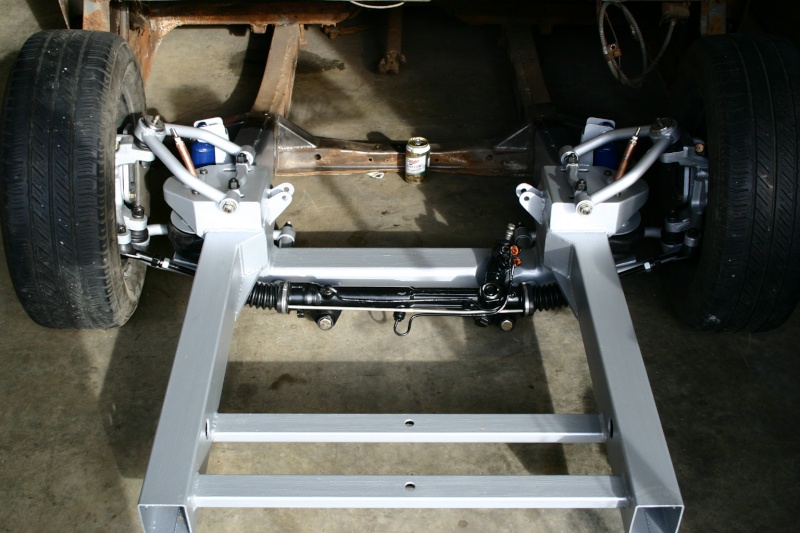
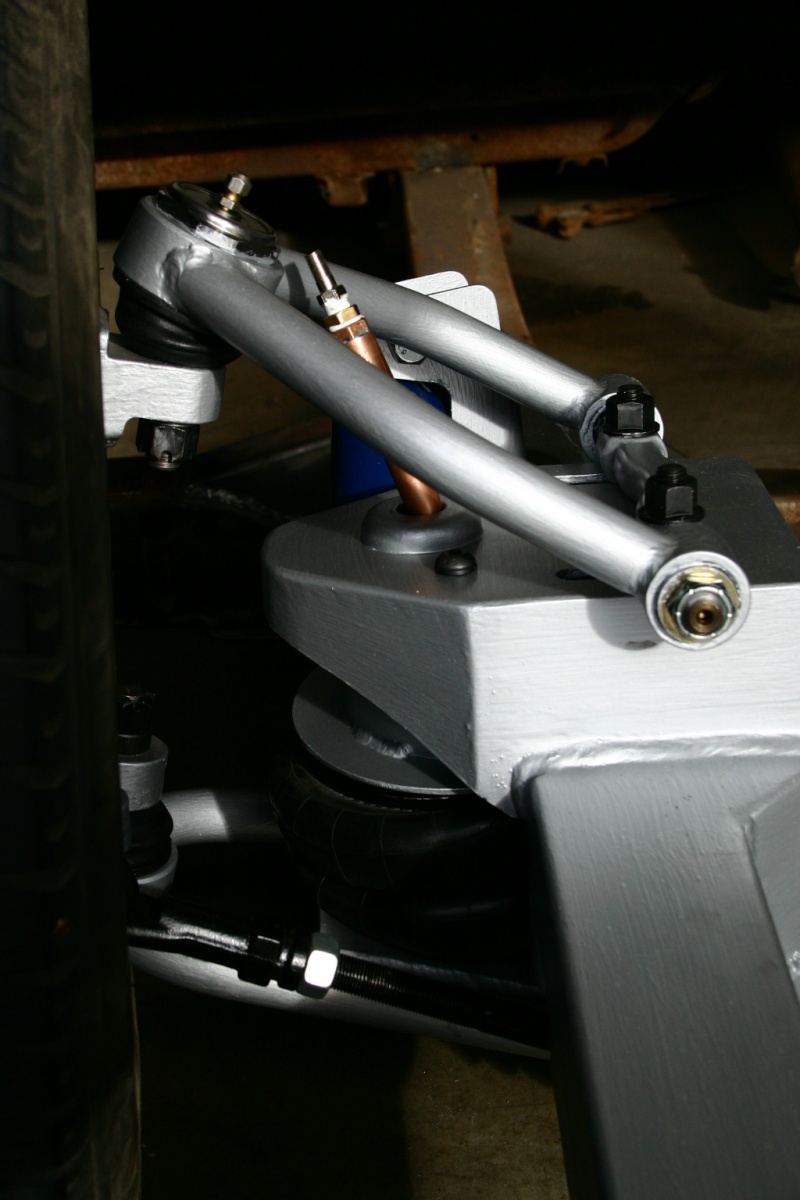
Okay......on to the back end :-)
Lee0 -
I'm still trying to finish my son's Dodge! But yours is sure encouragement for me to get going on the Pacemaker. Sure a great job Lee, maybe I can fly you out here for one or two days to help me get the Fatman stub on? Or will your wife kill you? LOL0
-
jsrail wrote:I'm still trying to finish my son's Dodge! But yours is sure encouragement for me to get going on the Pacemaker. Sure a great job Lee, maybe I can fly you out here for one or two days to help me get the Fatman stub on? Or will your wife kill you? LOL
That's a killer Dodge....your son is gonna be proud to drive that around some day.
Yeah Jay...too bad we don't live down the street from each other....That would be fun teaming up on your pacemaker!! With our 4th kid due to be delivered in a week, I'm not going anywhere soon :-)0 -
HUDSON 308 askss a question
By the way... there was a guy running around St. Paul with a '52 Hornet a few years ago with the front chunk of a '69 Cadillac frame grafted in. He claimed the size and location of the frame rail stubs were just about perfect. I'd love to know how a Duster/Aspen/Volare clip would fit.
The answer is the ASPEN clip does fit. Check with Charlie Harris of Springfield NE. He is in the HET roster... his 1950 Pmaker convertible was clipped with an Aspen clip. The car is running a 318 with mopar automatic. Check with Charlie for details0 -
WildWasp wrote:HUDSON 308 askss a question
The answer is the ASPEN clip does fit. Check with Charlie Harris of Springfield NE. He is in the HET roster... his 1950 Pmaker convertible was clipped with an Aspen clip. The car is running a 318 with mopar automatic. Check with Charlie for details
I saw that car a few years ago, very nice setup. The 318 fit well, looked very clean, fit well. He drove from NE to FL and was having a blast!0 -
faustmb wrote:WildWasp wrote:HUDSON 308 askss a question
The answer is the ASPEN clip does fit. Check with Charlie Harris of Springfield NE. He is in the HET roster... his 1950 Pmaker convertible was clipped with an Aspen clip. The car is running a 318 with mopar automatic. Check with Charlie for details
I saw that car a few years ago, very nice setup. The 318 fit well, looked very clean, fit well. He drove from NE to FL and was having a blast!
Matt: Charlie purchased that car during the 1976 Youngstown Ohio, HET Nationals. My family and I also attended the nationals and stopped at your parents place on the way to my parent’s home in NY. You, and your siblings and parents also attended the HET nationals and had just returned in the 1950 Hudson.
Later that week, on Charlie's behalf I picked up the convertible from the late Jim Many in Delmar. Driving the car was an exciting in the least, scary at the worst. It needed lots of front end work and as I drove the hi-crown roads the car constantly jumped one side of the road to the other. After discussing the condition of the car with Charlie via telephone, we mutually decided to park it at my parents awaiting his retrieval.
On our way back home to Nebraska, we stopped again to visit your family. As we drove home we encountered Charlie, his son and brother at the first west bound Ohio toll booths. Driving Charlie’s Caddy convertible and carrying a tow bar they were making a three day round robin run from Omaha to upstate NY to retrieve said errant convertible.
After much effort, Charlie could never get the car to handle like he wanted and finally elected to swap the drive train and frame stub to Mopar.
The last time I saw Charlie and the car were at the Sweet Hearts and Orphans meet at Waxahachie Texas several years ago... he was returning from the Florida meet you mentioned in your post. Funny how these cars get around.0
This discussion has been closed.
Categories
- 36.9K All Categories
- 113 Hudson 1916 - 1929
- 20 Upcoming Events
- 92 Essex Super 6
- 28.6K HUDSON
- 574 "How To" - Skills, mechanical and other wise
- 995 Street Rods
- 151 American Motors
- 178 The Flathead Forum
- 49 Manuals, etc,.
- 78 Hudson 8
- 44 FORUM - Instructions and Tips on using the forum
- 2.8K CLASSIFIEDS
- 608 Vehicles
- 2.2K Parts & Pieces
- 77 Literature & Memorabilia
- Hudson 1916 - 1929 Yahoo Groups Archived Photos

