308 engine rebuild
Chris Smith
Expert Adviser
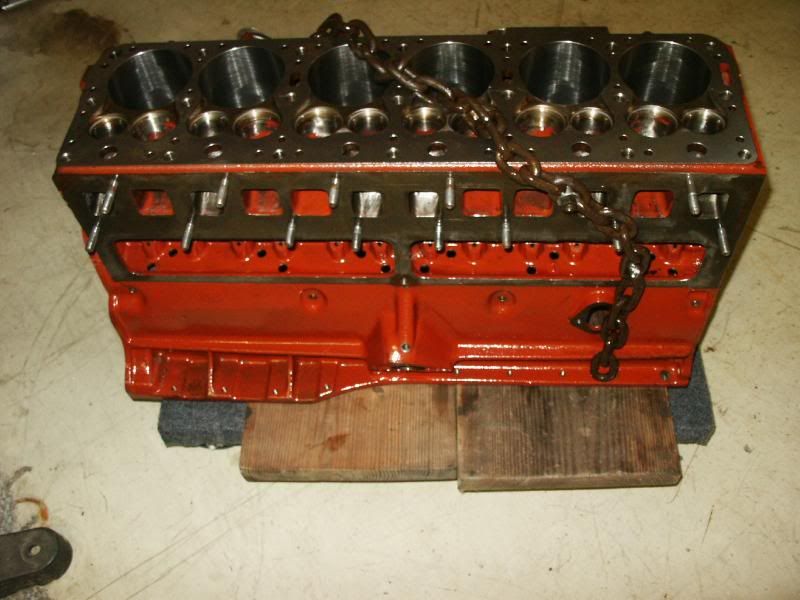
Got my block back from the machine shop a while back and decided to do a little work on it today. I deburred, cleaned and painted the crank case area with red insulating varnish. Looks good and should keep the oil clean longer. I used corks, rubber plugs, plastic solo cups, grease and masking tape to keep the paint off areas that you would not want painted.
0
Comments
-
Looks great!0
-
Seems they were done that way at the factory between the foundry and machine shop. Every non-machine surface on my 55 engine was painted. Yours looks like a much better job though.

 0
0 -
Chris, That's beautiful
I'm just curious, what are the round openings in the web just under each main bearing for (per arrow below)? 0
0 -
Beautiful! lease continue to post pics and text of your rebuild, very helpful0
-
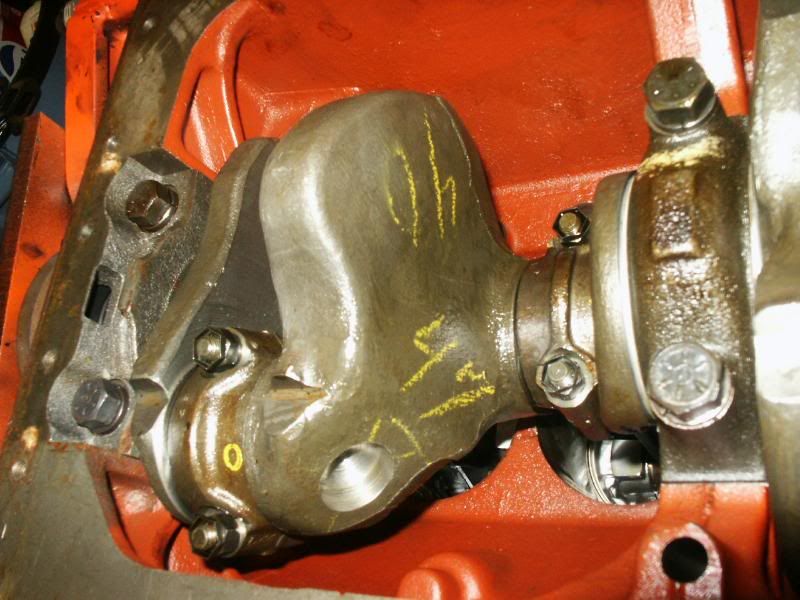
Back on the engine today. I got out my engine cleaning brushes and scrubbed the oil galleries. I then washed the whole thing down with hot soapy water and dried it with compressed air. I installed the cam bearings with a tool I borrowed from my best bud. I marked the bearing with a marker pen and marked the block so the oil hole in the bearings would be properly indexed with the oil gallery in the bearing saddles. The bearings are beveled on one side to ease installation. I unwraped my reground and polished crankshaft from its long rest in shrink wrap. I then pre fit the crankshaft. I used plastigage on the main journals and torqued the caps to 75 lbs. Looks like I have 2 thou clearance and that should work for a medium performance build. I took some pictures to document my restoration.0
-
Looking Great!
You better put a good lock on your garage door and some cameras looking for smoking Hudson's casing your neighborhood :P0 -
Hi Chris That is a awsome job you are doing on your 308 engine. My engine looked that nice when it was installed . The guy doing my painting didn't cover the front and sprayed over spray every where. Kind of disheartening. Remember to install a 318 Dodge rear main seal that fits like a glove. Our car is progressing . Hudsonly Ray0
-
Ray, check with a paint store near you about overspray remover.0
-
Chris,
Nice work, it looks great! I just wanted to share with you what happened to me when I rebuilt my engine. I took my reground and nicely oiled up crankshaft out of the plastic, and carefully and cleanly put it into place without any further cleaning of the crank itself. Then a friend asked if I cleaned out the cross-drilled oiling holes on the crank after getting it back from the machine shop. Turns out my next door neighbor was the guy that ground the crank, and he said I should clean it up with small brushes and brake cleaner before installing it. Of course, I'd already installed it, but I did find out that if you're very careful, you can remove the crank only without removing the rods/pistons. Anyway, I was curious what would come out after cleaning the crank holes, and I used a clean pan and filtered it through a towel, and there was quite a bit of small metal filings that came out! These would have been deposited directly on the bearings at first start-up. I've known people that have taken out new bearings right away because of this. Hopefully, you won't have this experience. Good Luck!0 -
I did think to clean those oil passages at the last minute. There was no metal but plenty of black gook that came out. I used paint thinner and bore brushes, then folowed up with long cotton swabs. What I did screw up on was not putting the threaded studs back in the rear of the crank before putting the rear main cap on. Doh! Can't be done with the cap on, and I did such a bitchen job of packing and sealing the cap. I've got the lifters cam and crank in the block now. They both turn with little effort. So far, so good. I'm wondering if I degree the cam on this engine? Not like the typical push rod v8 im used to.0
-
some more pictures0
-
Lookin' good, Chris! Not sure about the picture of the boxer . . . was that intentional?0
-
Hey Chris What camshaft are you using in your engine. I used a 31 10 40 with a Randi
maas timming chain set. Ray0 -
Rl, loaded that boxer picture by mistake and could not figure out how to delete it after I discoverd it. Ray I have the 372 lift 254 duration grind. I also have a roller timing chain, 7x size stainless valves and new guides. I just popped for a new set of valve springs after testing my old ones. They had less than 60 pounds seat pressure at the installed height.0
-
more progess on the Hornet. I plan to install the engine in the car in the next few days. I went ahead and did my version of Singh grooves on head before installing it.0
-
very nice Chris!0
-
Today, I am not planning to rebuild the 308 engine on the 54. But I do have to say your work Chris gets me excited to pull it and do it anyway. I expect sometime in the next 20 years I will have to do it.0
-
Looks great, Chris.0
-
Great work Chris, nice big garage too. Richie0
-
Super nice! Looking forward to seeing more.
 0
0 -
Gave me some great ideas; on the oil filter is it from Chrysler-6, canister-style ?0
-
Your Hornet Mtr Rebuild looks Great, as well as your nicely organized garage....
0 -
Concerning my keen interest and cursory research on the Somender-Singh (pronounced "sing") groove (s), I wanted to use a 232 head on my 308 rebuild, and now I believe I can so as to avoid any detonation. My plan is to modify the 232 head to emerge as real groovy with 2 grooves, each chamber, equally spaced and angled towards levee between valves. The "sing" groove (s) apparently make engines idle smoother and slower, run quieter, allows for less "advanced" timing for the same octane fuel, improvement in carb jet setting (smaller openings), 15-18% gain in fuel mileage, cleaner combustion chambers which could lead to less air pollution/emissions and less frequent oil changes, more torque and power, engine runs cooler and the positive list goes on-and-on. misc YouTube videos explain more0
-
0
-
Chris, just wondering if you have measured the squish, between piston (TDC) and the head, during a trial fit just to see what it measured.
Read somewhere where someone put a .065" roll of solder on center of piston, torqued head down over head gasket and rolled crank and piston past TDC; removed the head and with a caliper measured the solder depth; ideal guide might be somewhere between .030-.035"0 -
"The Mystery of Detonation", explained
http://www.ktm950.info/how/Orange Garage/detonation/Detonation_101.html0 -
I got the engine/transmission dropped in the car Saturday morning. I posed the headers on the engine to see how they will fit. I think they look really good. I can see big expense at the muffler shop in the future though!0
-
ZOOM IN, the previous set of fotos to head w/Singh grooves; notice the fartherest chamber to the right; it appears that the lower portion of the Singh cut is ?possibly? inside a water jacket or is it something else? Also, 5 of the 6 chambers appear to be suspect of something dark within the Singh groove. Any ideas?0
-
Just a rust spot....??0
-
Today I sent my 232 head off to have the Singh grooves cut into it. If you examine the dark ink lines (photo), that is where they will be cut; it's possible, for added insurance, that they will also continue along the ceiling of the combustion chamber and lead for ~ 1" towards the levee between the valve seats.0
This discussion has been closed.
Categories
- 37K All Categories
- 113 Hudson 1916 - 1929
- 21 Upcoming Events
- 94 Essex Super 6
- 28.6K HUDSON
- 576 "How To" - Skills, mechanical and other wise
- 995 Street Rods
- 151 American Motors
- 180 The Flathead Forum
- 49 Manuals, etc,.
- 78 Hudson 8
- 44 FORUM - Instructions and Tips on using the forum
- 2.8K CLASSIFIEDS
- 608 Vehicles
- 2.2K Parts & Pieces
- 77 Literature & Memorabilia
- Hudson 1916 - 1929 Yahoo Groups Archived Photos


 http://www.youtube.com/watch?v=eHV-ANmN0ns