New project 1941 BIG BOY
Comments
-
Making good progress on the 41.
Parts done:
the trans rear crossmember
Mounted the master cylinder assy with driverside only bracing
alum radiator mount in front of fender X bracing
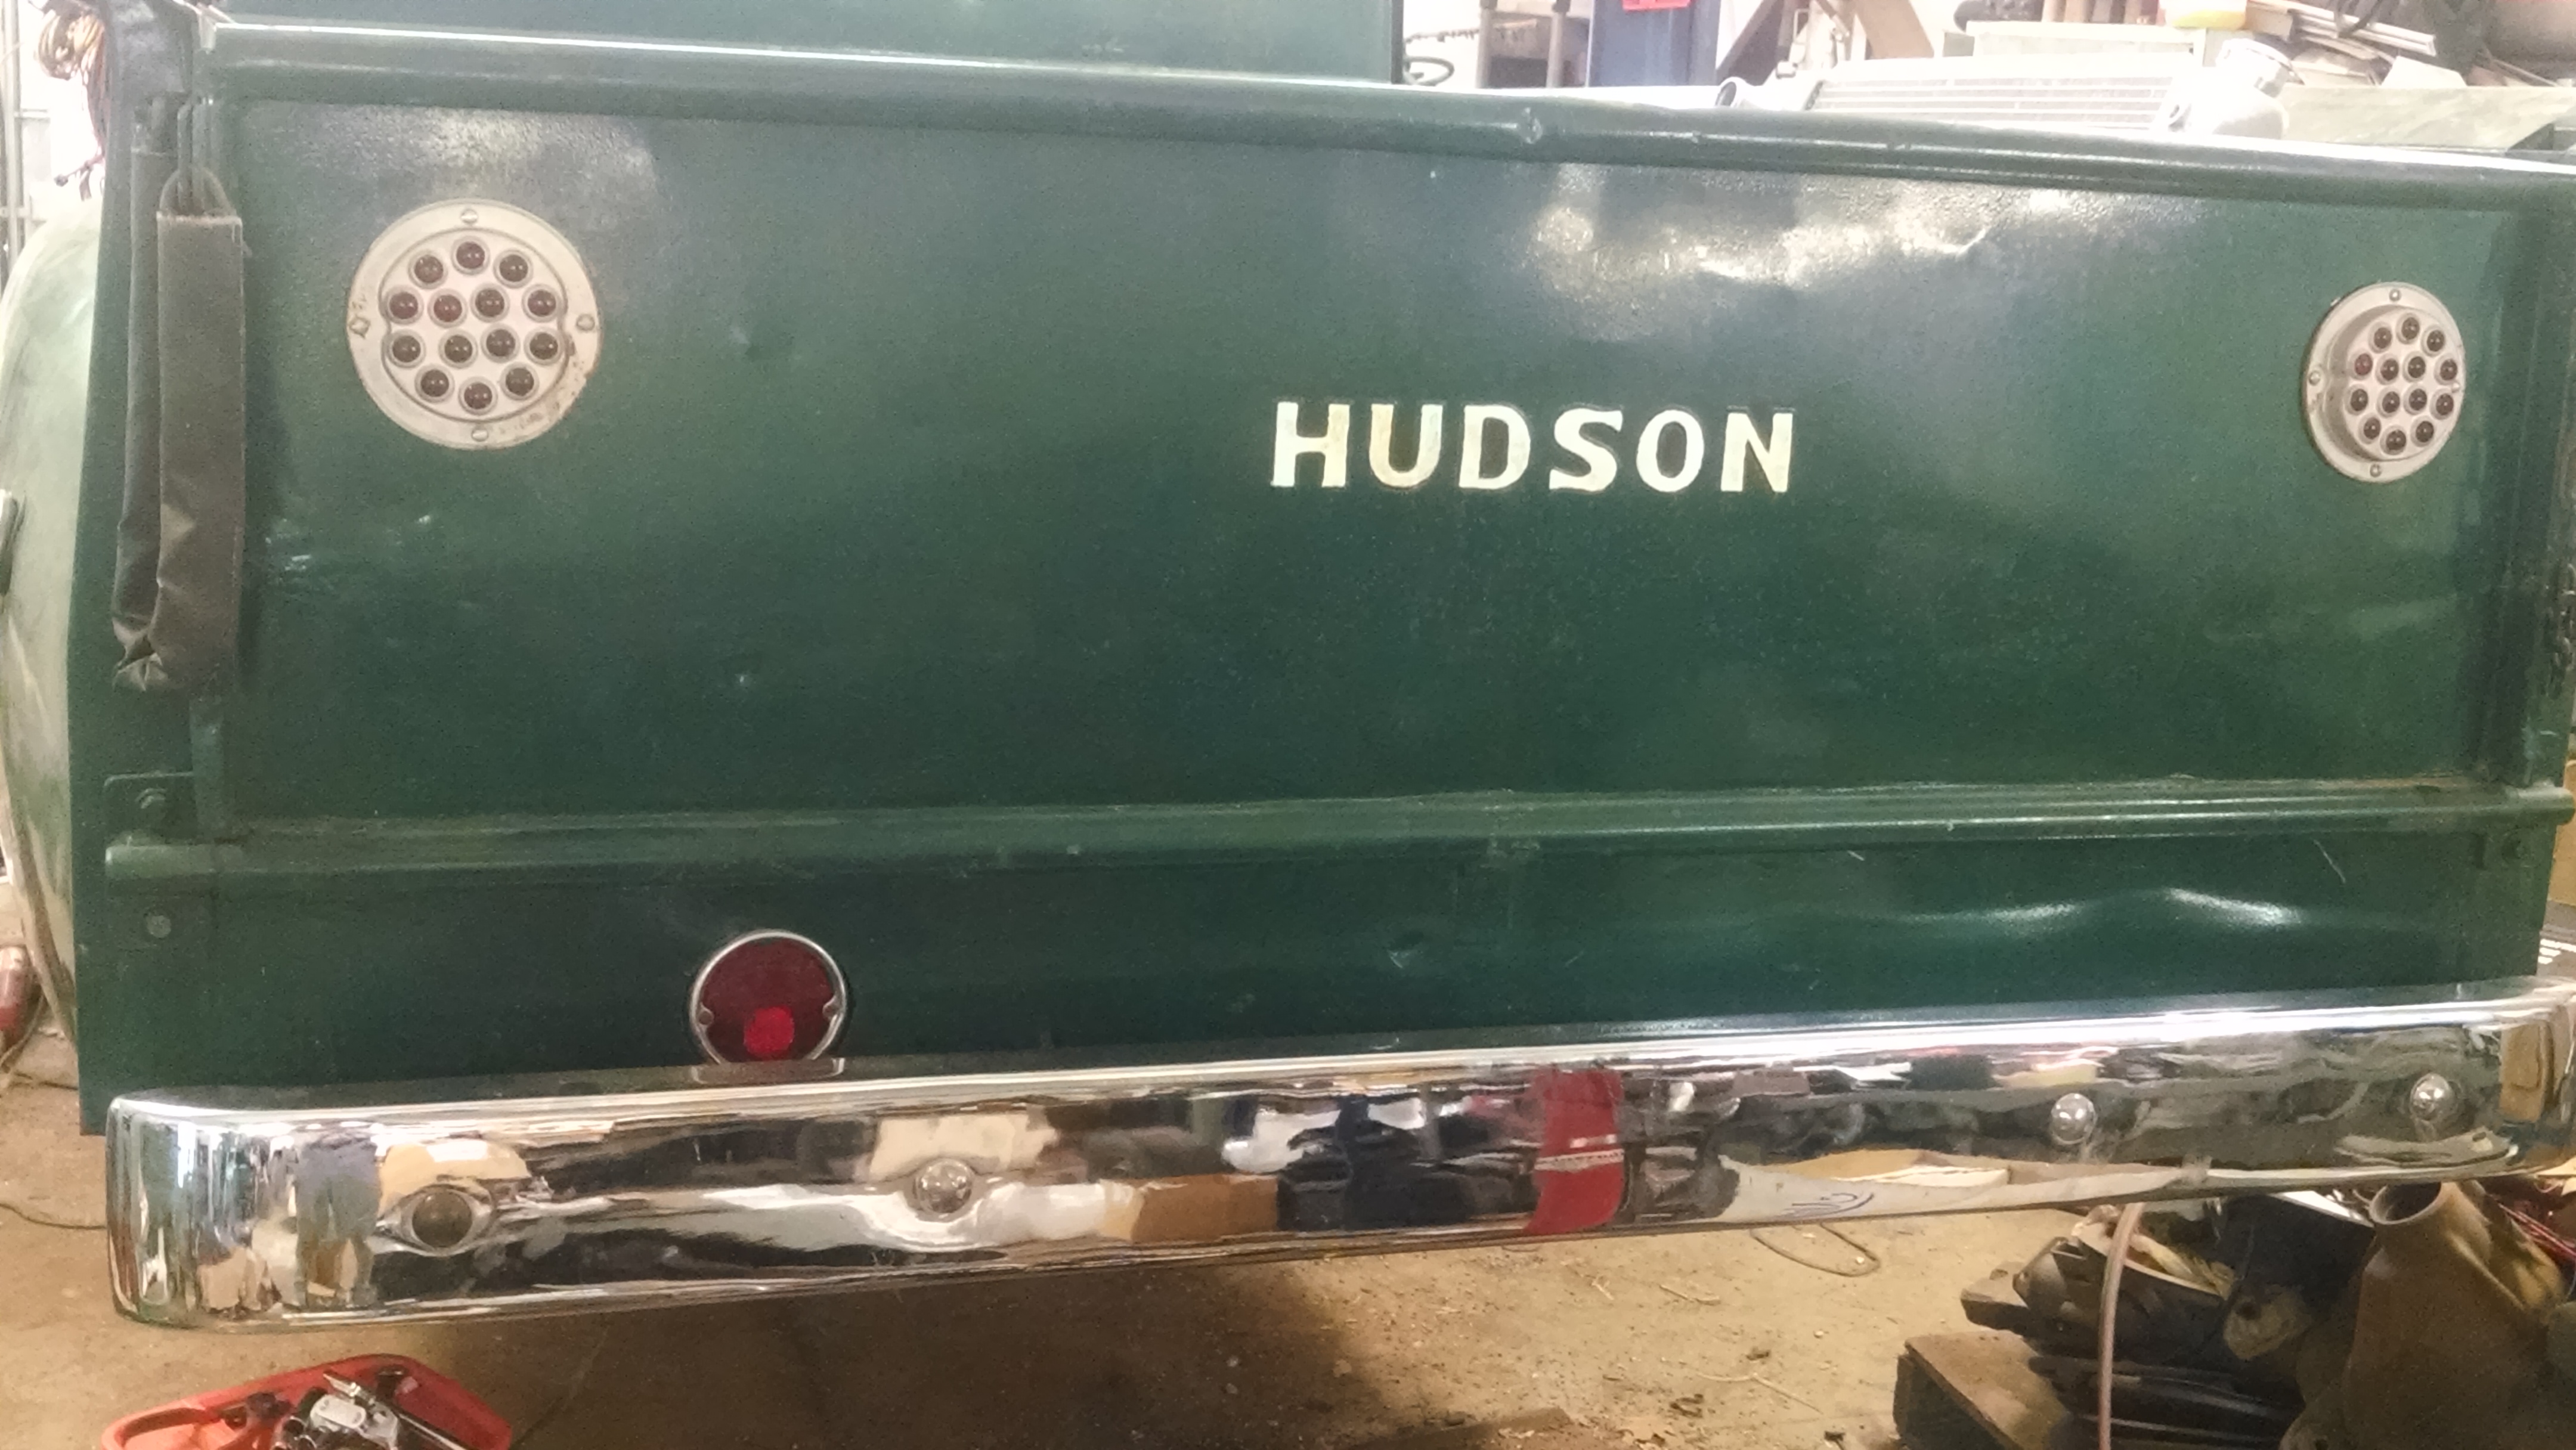
56 Ford truck rear bumper installed
Stainless fuel line
Removed fuel tank to clean it ( nasty) Had a mouse nest in it and plenty of rust. Full of vinegar now.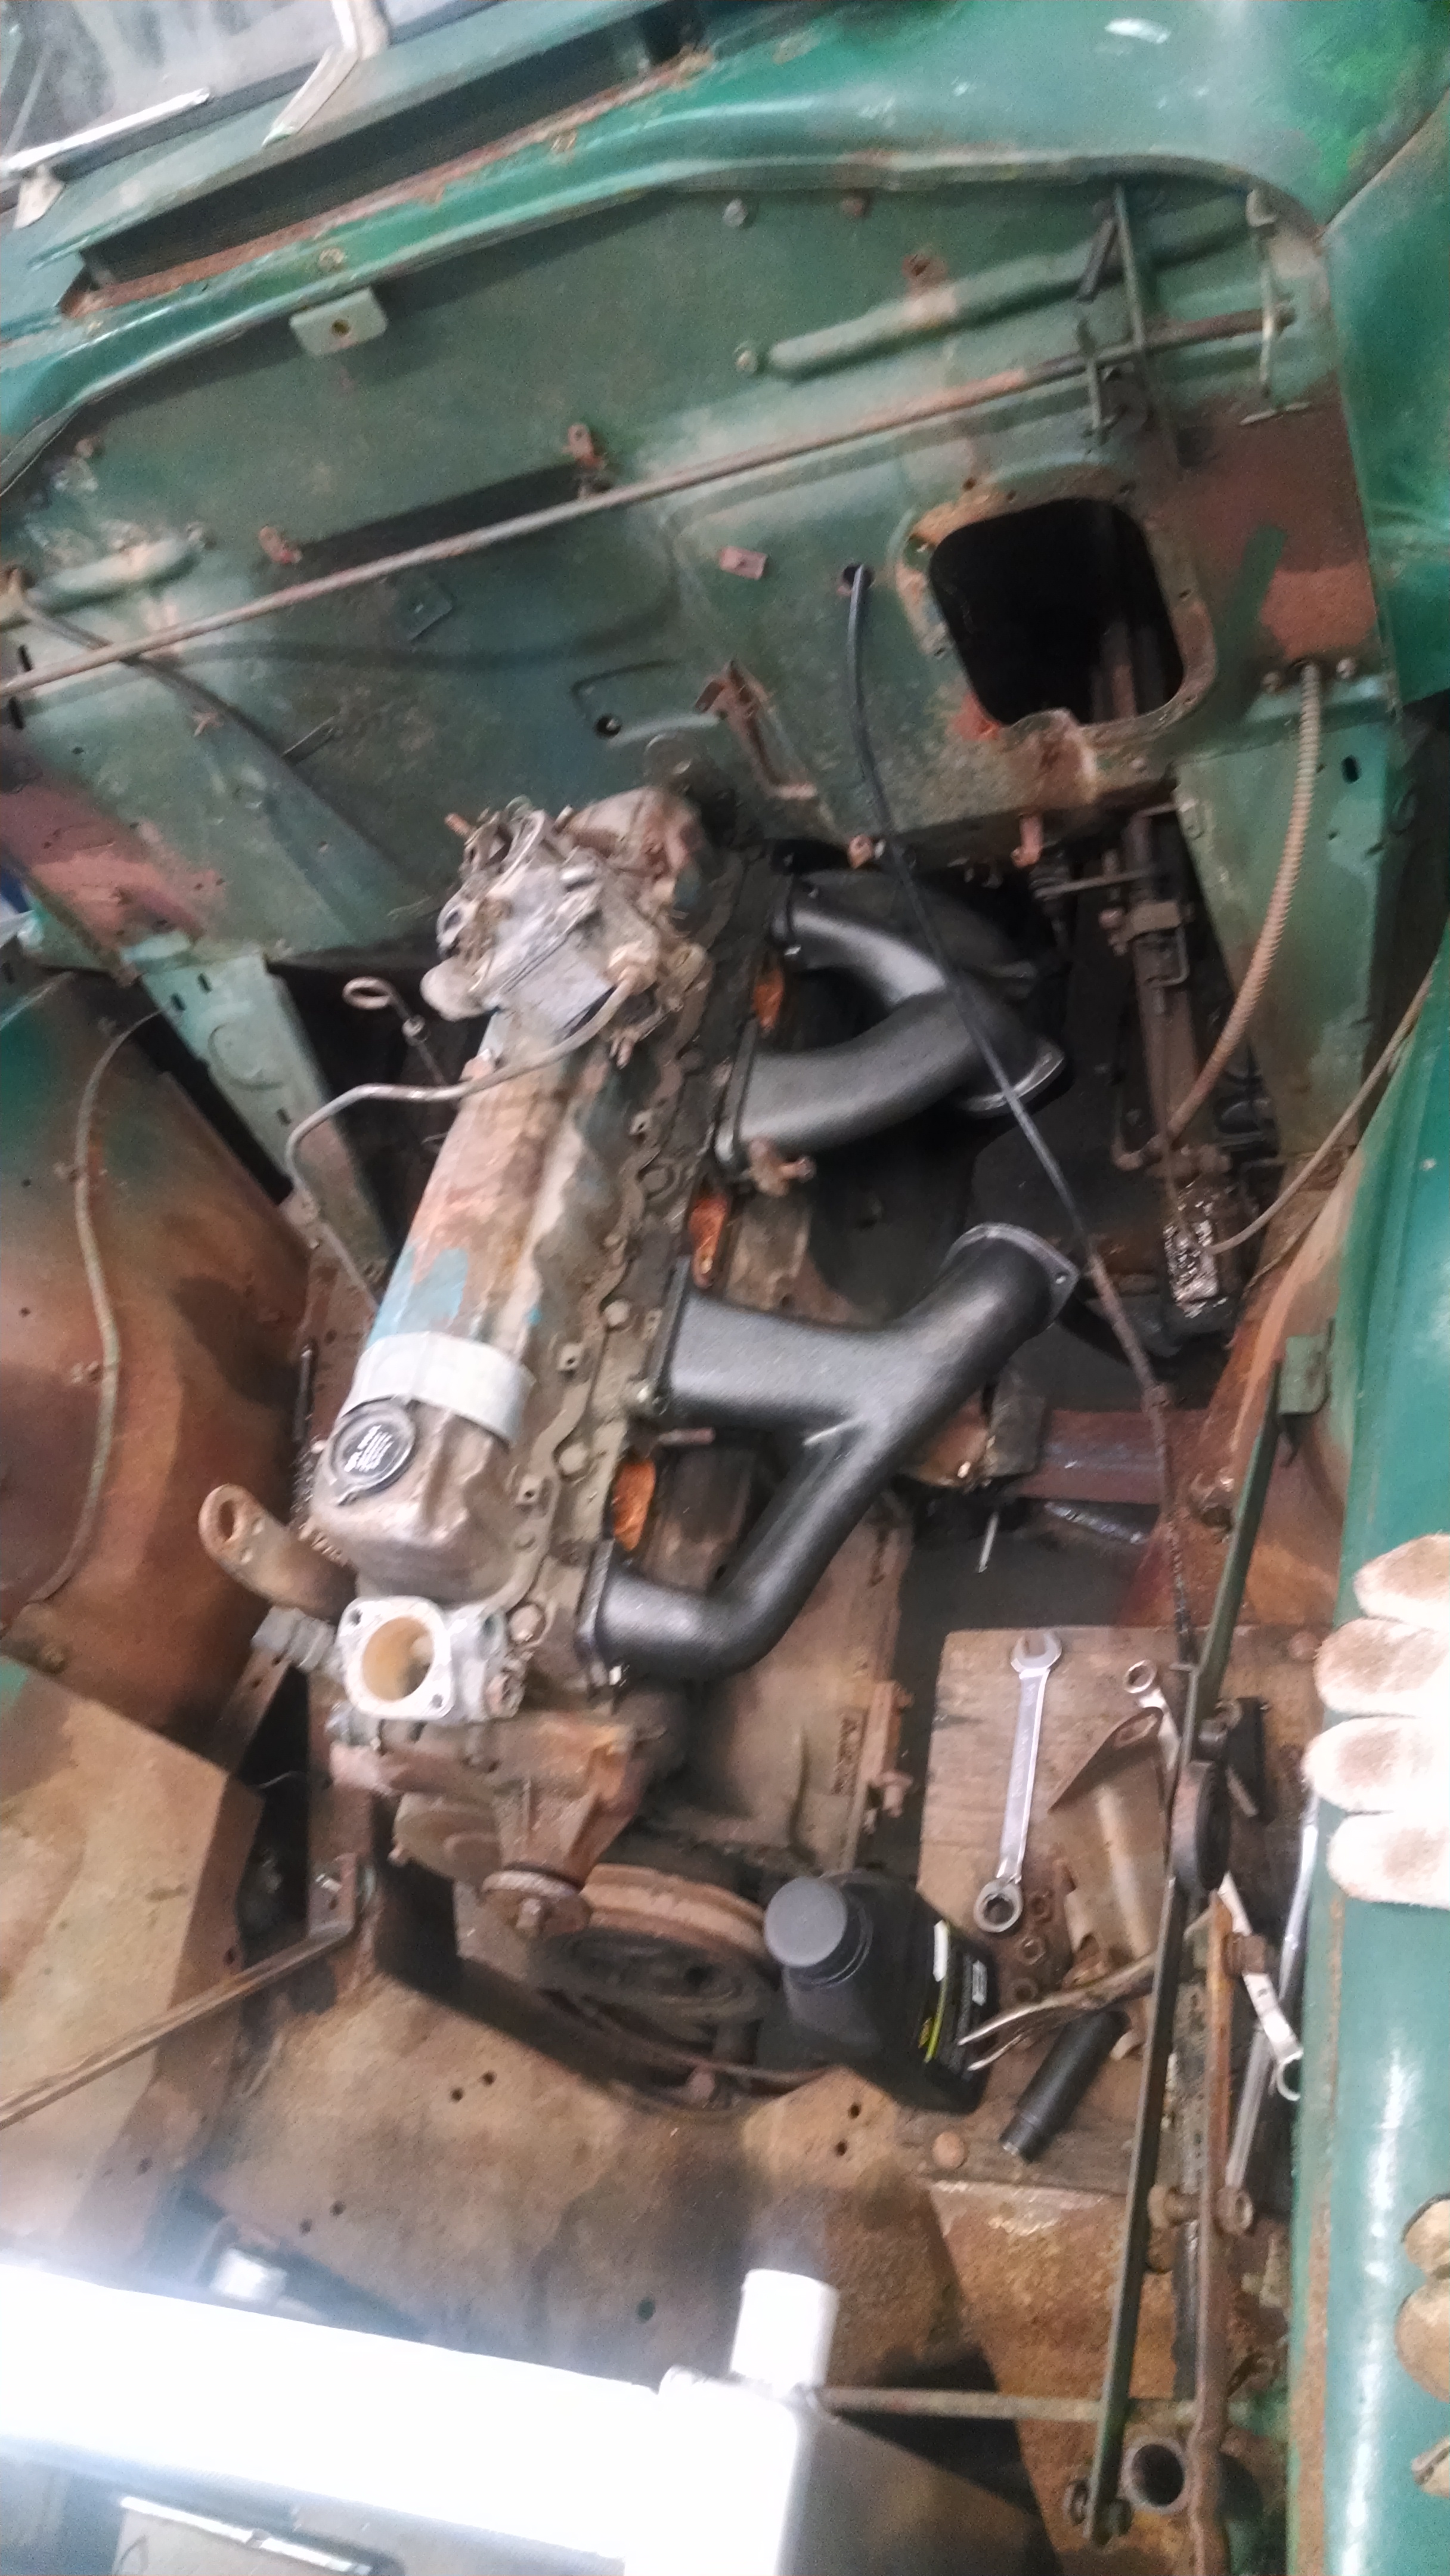
 1
1 -
-
Tried to look at photos. Got message: This photo is currently unavailable.
0 -
FYI
Glad that you put a rear bumper on...I suggest adding another tail light then add turn signals using a couple small lights availabl;e at Truck Stops inserted in each side of the grille, if you dont have Hudson front Fender lights.
Vintage Turn Sig Switche Kit are available on Ebay that have a roller that touches the steer wheel to 'cancel'....Somer even have a 4Way Flasher swithh....
0 -
Actually putting on a pair of tail lights. We want people to see us stop. For the headlights, bought a pair that have a marker incorporated into a single headlamp. No extra holes to drill.
We now have functioning brakes!
As I said before. The center steering arm has no grease zerk. Pulled it out and drilled a place for zerk on the side. It won't take grease. Find out there is a solid hardened sleeve inside for the inner bearings. Decided to drill a passage thru the center steer bolt and drilled a outlet between the inner bearings, added the zerk on top of the bolt and greased it. We will see if it worked.
We have the seats lined up from a 2010 Chevy Full size van.
Pulled the dummy motor and trans and prepping the runner to drop in.
Mounted a small piece of plywood to fasten the new fuse box and start wiring it up. It went on the drivers side cowl, left of the park brake.
Fuel tank is sparkling inside. With 6 gallons of vinegar, 2 cups of beebees and 1 quart of broken side window glass thrown in and mixed in a special way. I mounted it to my tractor rear tire while on jack stands. Sealed the tank and ran the tractor in forward and reverse for 1 hour. The tank actually soaked for 2 days. Next coating the inside with epoxy to seal and prevent rust.. Also rinsed the vinegar out and also once with baking soda to disarm the vinegar.
It will be running soon.0 -
Interesting that the '41 didnt have a Zerk... Must be Hudson figured the Bushing needed to be greased occassionally because '46 & '47 have fittings...
0 -
There are 2 screw terminals on the ignition switch. They work with the key. What is the single wire going into the switch?0
-
Center/black wire is power feed from the fuse block.0
-
Thanks, Rick.
Ohmed it out again. You are correct. I am using a 20 circuit American Autowire harness. It really aids in a clean accurate install. This ignition switch does not really fit into the picture. Maybe with it running relays to limit the current flow thru the OEM switch. Hmmmm. I would like to use the dash mounted started switch.
0 -
We have not progressed much this summer.
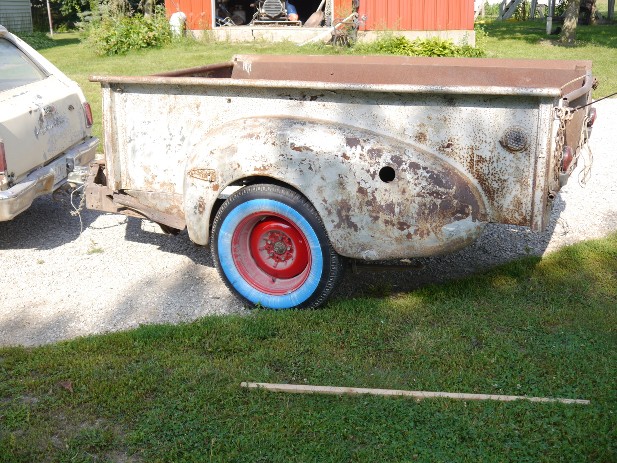
We did pick up a neat thing yesterday. A matching Hudson trailer.
A friend of mine spotted it one day driving thru a small Iowa town. He got the info and passed it on over to me. We bought it for 100.00.
Went last night on the way back from Joplin Mo. I had installed a trailer hitch on my 65 Chevelle wagon but not the lighting circuit. We brought 2 tires that are going to be used on our 41 Pickup . We greased the rear axle bearings, installed the tires, put a hitch on it and chains. For lights ( we drove at night) I used magnetic lights simply hooked to a drill battery laying in the box.
https://imageshack.com/a/5Yuq/11 -
That trailer is kool! Will look pretty sweet behind your truck once you get it done.
-Scott
0 -
No image0
-
Fixed it. This site is hard to post on.0
-
 0
0 -
Progress has been slow.The boy and I are are just too busy on everything involved in LIFE. Here is a link to my 41 Hudson Bigboy photos. There may be photo's there to help other members
https://imageshack.com/a/5Yuq/10 -
Ok, we are working on it again. Putting a new wiring harness in it.
Adding turn signals to the front and rear.
For the front, we used a new design headlight with a turn signal built in. Also added some small vintage park lights just off of the bumper on the front.
For the rear we used flat mount LED's for brake and turn. Separate vintage lights for the backup units.
Question, has anyone used a mid 60's GM rectangular wiper motor to drive the original wiper setup?
0 -
Tom, There are expensive Motors available but Ive installed $43 Electric Wipers in my ' 37 & '47 in less than 2 hrs from JC Whitney. Remove the vacume Motor and utilize the Link and spring set-up. Then buy a single Spd Electric Motor and install a 1x1 x .125 pc of angle across the original mount then drill a center hole and two end holes for the electric Mtr. The Motor has a shaft that needs shortened then thread for the Hudson Link.Ive used Red Loctite and never a problem for Yrs. Its single Spd but works well using the original L & R Wiper Arms . If want more Travel lengthen the Link. I hook an inline Intermittent switch on one, the other I used a link to the original switch. The only drawback you sometines have to toggle to park. I dont think Whitney carries them anymore but Pronto & Amazon do. Amazon even has a Self Parking Motor now for $57...
0 -
Thanks for the tip. Last night , I sized up using a 60's GM rectangular motored unit. I will use the existing vac box all bolted together to keep everything alligned and install the GM box to the left of the heater ducting. The GM box will attach with 1 rod to the existing arms and operate like a dream with a "park". These came in 1 or 2 speeds. I am using a 1 speed.
0 -
Take pictures as you do it please.0
-
Will do.
Tonight , started by pulling the vac motor and disassembling it to remove the rotten flapper. Only need the shaft in the case to keep the arms in alignment. Pulled the 2 transmissions out and lubed. Also adjust the chain tension. Did not know it could be done till I tried.
0 -
The boy and I are back to making progress on the Big Boy.
American Autowire kit almost fully installed. Modernized it with full turn signals and brake lights. and backups. Put in headlights that have turn signal built into them. Also added a additional set of vintage running lights to the front bumper. Used a KW bolt on turn switch.
Fitted it up with newer 2009 Chevy full size van seats with cut bases. Much more comfy. These cabs are much smaller than modern trucks.
Hope to have it running in the next few weeks.
Factory shifter was modified to operate the 700r4.
0 -
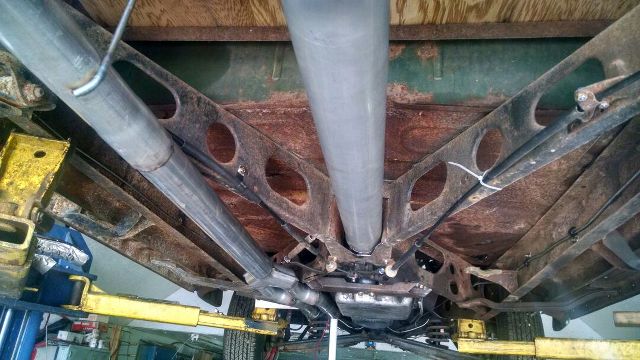
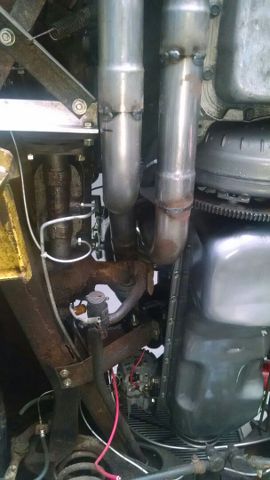
Bent the trans cooler lines tonight, actually getting pretty good at doing line work.
Also cut pieces for the exhaust to fit up. Get some pipes expanded on Fri and it should be complete this weekend.
Small things left, then let's this baby rolling.
0 -
More progress
The exhaust is installed
Gas Tank
Fuel line
Some pics


 0
0 -
She is a runner! Today we did the finishing touches on the ignition and associated wiring. Topped off the vital fluids and fired right up on the first try. The boy was certainly surprised. Gave a 20 minute run time for the cam breakin and gave the trans it's first front and back go.
Now we can at least drive it instead of pushing it.
0 -
Congratulations! Nothing like firing her up for the first time.0


Categories
- 37.1K All Categories
- 120 Hudson 1916 - 1929
- 21 Upcoming Events
- 100 Essex Super 6
- 28.7K HUDSON
- 595 "How To" - Skills, mechanical and other wise
- 995 Street Rods
- 151 American Motors
- 185 The Flathead Forum
- 49 Manuals, etc,.
- 79 Hudson 8
- 45 FORUM - Instructions and Tips on using the forum
- 2.9K CLASSIFIEDS
- 612 Vehicles
- 2.2K Parts & Pieces
- 78 Literature & Memorabilia
- Hudson 1916 - 1929 Yahoo Groups Archived Photos