Project creep, Valve guides, valve job, etc
Comments
-
By the way, thanks for posting all of your findings. I'm sure many are enjoying and learning from your posts.
Hmm, had to go back and edit, lost some of the post?
Russell,
I feel my goal of driving it this summer is
"creeping" away from me.
The more I document, the more I learn. I love getting feed back from those that have BTDT.
Not trying to rewrite the book. Just adding my foot notes.")
As for the valve back cut, it is a performance improvement like they did with all the 7X mods. Just little things that add up to make better performance.
By doing multiple angles on the valves and on the seats, it allows the air and fuel mixture a smoother transition from one direction to another.
Note how the flow has to go from the side of the block, turn 90* up and then another 90* to the cylinder.
Any modification that can be made to reduce the amount of restriction to that flow will help.
Think of it like the relief cut in the block but on the valves.
0 -
In for a penny, in for a pound.
Decided with the need to do a cam swap it would be easier with the block upside down so I don't have to hold the lifter up whit it goes out and back in.
And I figured it would be best to check the clutch now instead of getting the engine running and find out the clutch is bad.
What helped convince me is when I found out that the manual trans cross member is not removable and the trans has to be lifted thru the floor to service the clutch.
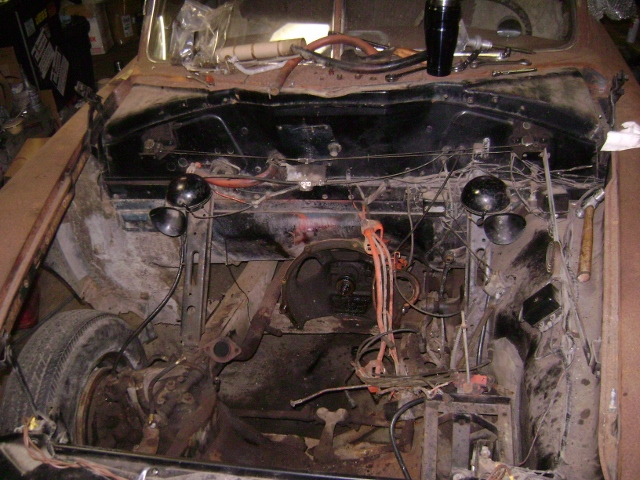
So the engine came out.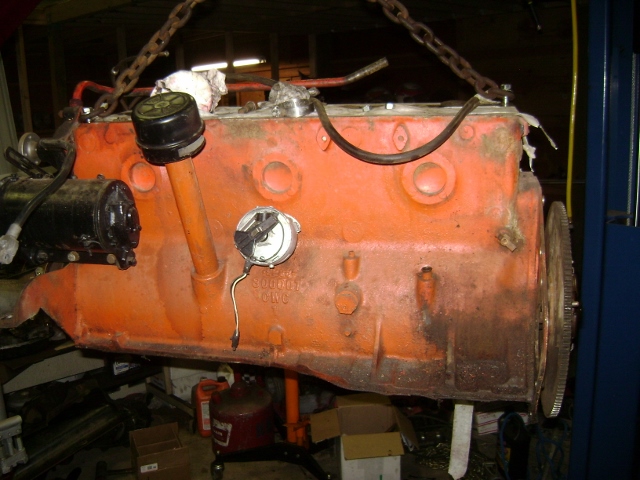
Before I go too far, after we dragged this home we did get it running. The clutch was stuck and would not disengage. So we stuck the rear diff on jack stands and started the engine in gear. Then just held the clutch in and did some quick stabs of the throttle until the clutch released.
So it did work enough to take it out for a test drive.
So back to the tear down.
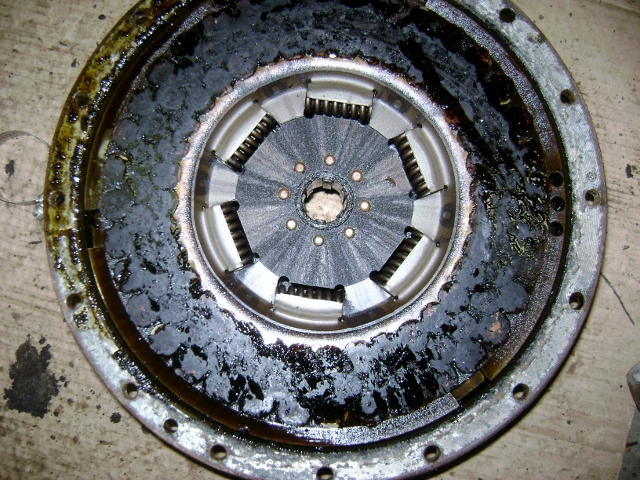
We removed the pressure plate, disc and flywheel.
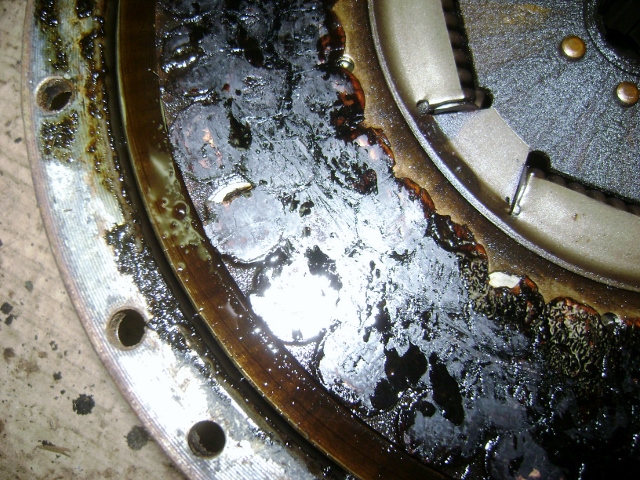
Since this is my first wet cork clutch, maybe you guys can look at it and let me know how they are supposed to look. The flywheel and pressure plate surfaces look perfect other than some discoloration where the disc sat for so long.
Right now the plan is to order up a new clutch, throw out bearing and gaskets.
I also noticed when I removed the flywheel there was no gaskets between the crank and flywheel.
I swore I read it was supposed to have a gasket to prevent leaks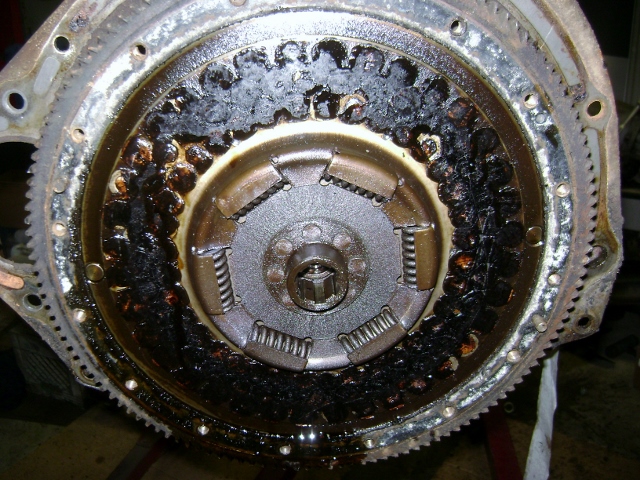
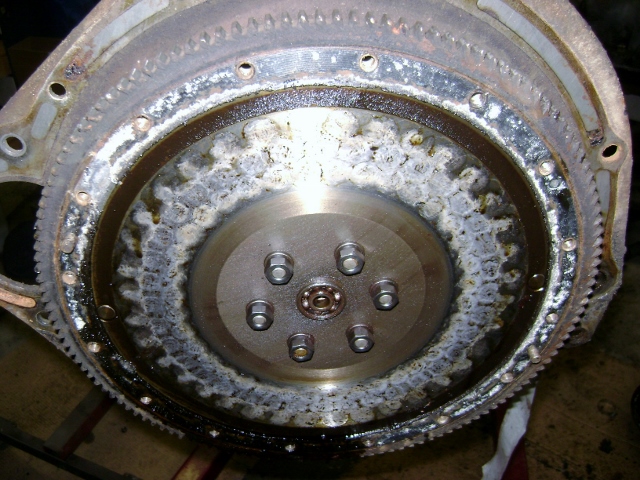
It also looks like someone got carried away with the hammer when they installed the rear cam plug. 0
0 -
No gasket. Just a sealer like Permatex. It's a metal to metal joint. Be careful with that throw-out bearing. Chances are you'll never find a new replacement. Few exist. The original is probably fine but will need to be carefully disassembled, cleaned, re-lubed and assembled. I have done that to many with good success so far. Don't chuck it 'cause it's rough or noisy......you may wish you still had it. Seals are available from Ron Fellows or possibly others but so far, I've not seen a source for new bearings.
Ugly clutch disc but not uncommon. You have now officially entered the unique world of Hudson Cork insert, wet disc clutches. Your Northwest Chapter Newsletter is aptly named "The Cork Clutch". I'll send you a copy if you don't yet have yours.....strings attached, of course.
My clutch is uglier'n your clutch! Note the welds at the spring-center joint.
Frank0 -
53 Jetman also has a stash of NORS Though-out bearings with inner and outer seals as original, $ 78.00 post-paid by USPS Priority Mail.
Jerry
0 -
FYI
At the rate your going you will be driving this Hudson this summer....The slight variance on the Manifold edge will be asorbed by the thick Intake Gasket. Do run a Thermostat....Buy the modern Large OD Ford Thermostat (Delco #3043320 equivlent) then drive a 1" 'Cup Type' Soft Plug into the opening (located just underneath the top of the Gooseneck housing) to Block off the stock Internal By Pass. However, drill a small center Hole in that soft plug and a couple small holes in the Thermostat flange too.
Someone probably rebuilt the motor since it didnt have any knocks or smoke so maybe the rings & brgs are okay, but since you have it out and tore down probably should ck and/or replace them.
The oil pan Pick Up Tube has an O ring that goes Above the pan gasket upon re-assembly.
Dont despair, every part needing replaced is available for your motor....
0 -
Bill , maybe it's time to add a Part 2 ? takes a long time to load. Thanks for all your efforts to post the blow by blow.0
-
I know I'm coming in late on this, and many of you are way more advanced mechanics than I, but I do have a suggestion re how to remove/install the valve springs themselves, a job I've had to do several times during my 308 rebuild (don't ask). That spring compression tool you show in the pic is perfect. To remove the spring, compress just enough to clear the top of the screwed-down lifter. Then, while levering the compressor toward you, a simple hook tool engaging a loop of spring can pop the spring out without damage. Putting back in is easier. Place the spring in and up, and with the compressor closed place the bottom of the spring on the tool, catch the tip of the tool barely engaged on the block surrounding the lifter bore, and lever up while beginning to compress spring, allowing spring and tool to slide into place together. Now everything is set to insert valve, plate and keepers.
Dave0 -


This discussion has been closed.
Categories
- 37K All Categories
- 119 Hudson 1916 - 1929
- 21 Upcoming Events
- 100 Essex Super 6
- 28.7K HUDSON
- 595 "How To" - Skills, mechanical and other wise
- 995 Street Rods
- 151 American Motors
- 185 The Flathead Forum
- 49 Manuals, etc,.
- 79 Hudson 8
- 45 FORUM - Instructions and Tips on using the forum
- 2.9K CLASSIFIEDS
- 612 Vehicles
- 2.2K Parts & Pieces
- 78 Literature & Memorabilia
- Hudson 1916 - 1929 Yahoo Groups Archived Photos