35 T tappet adjustment
Comments
-
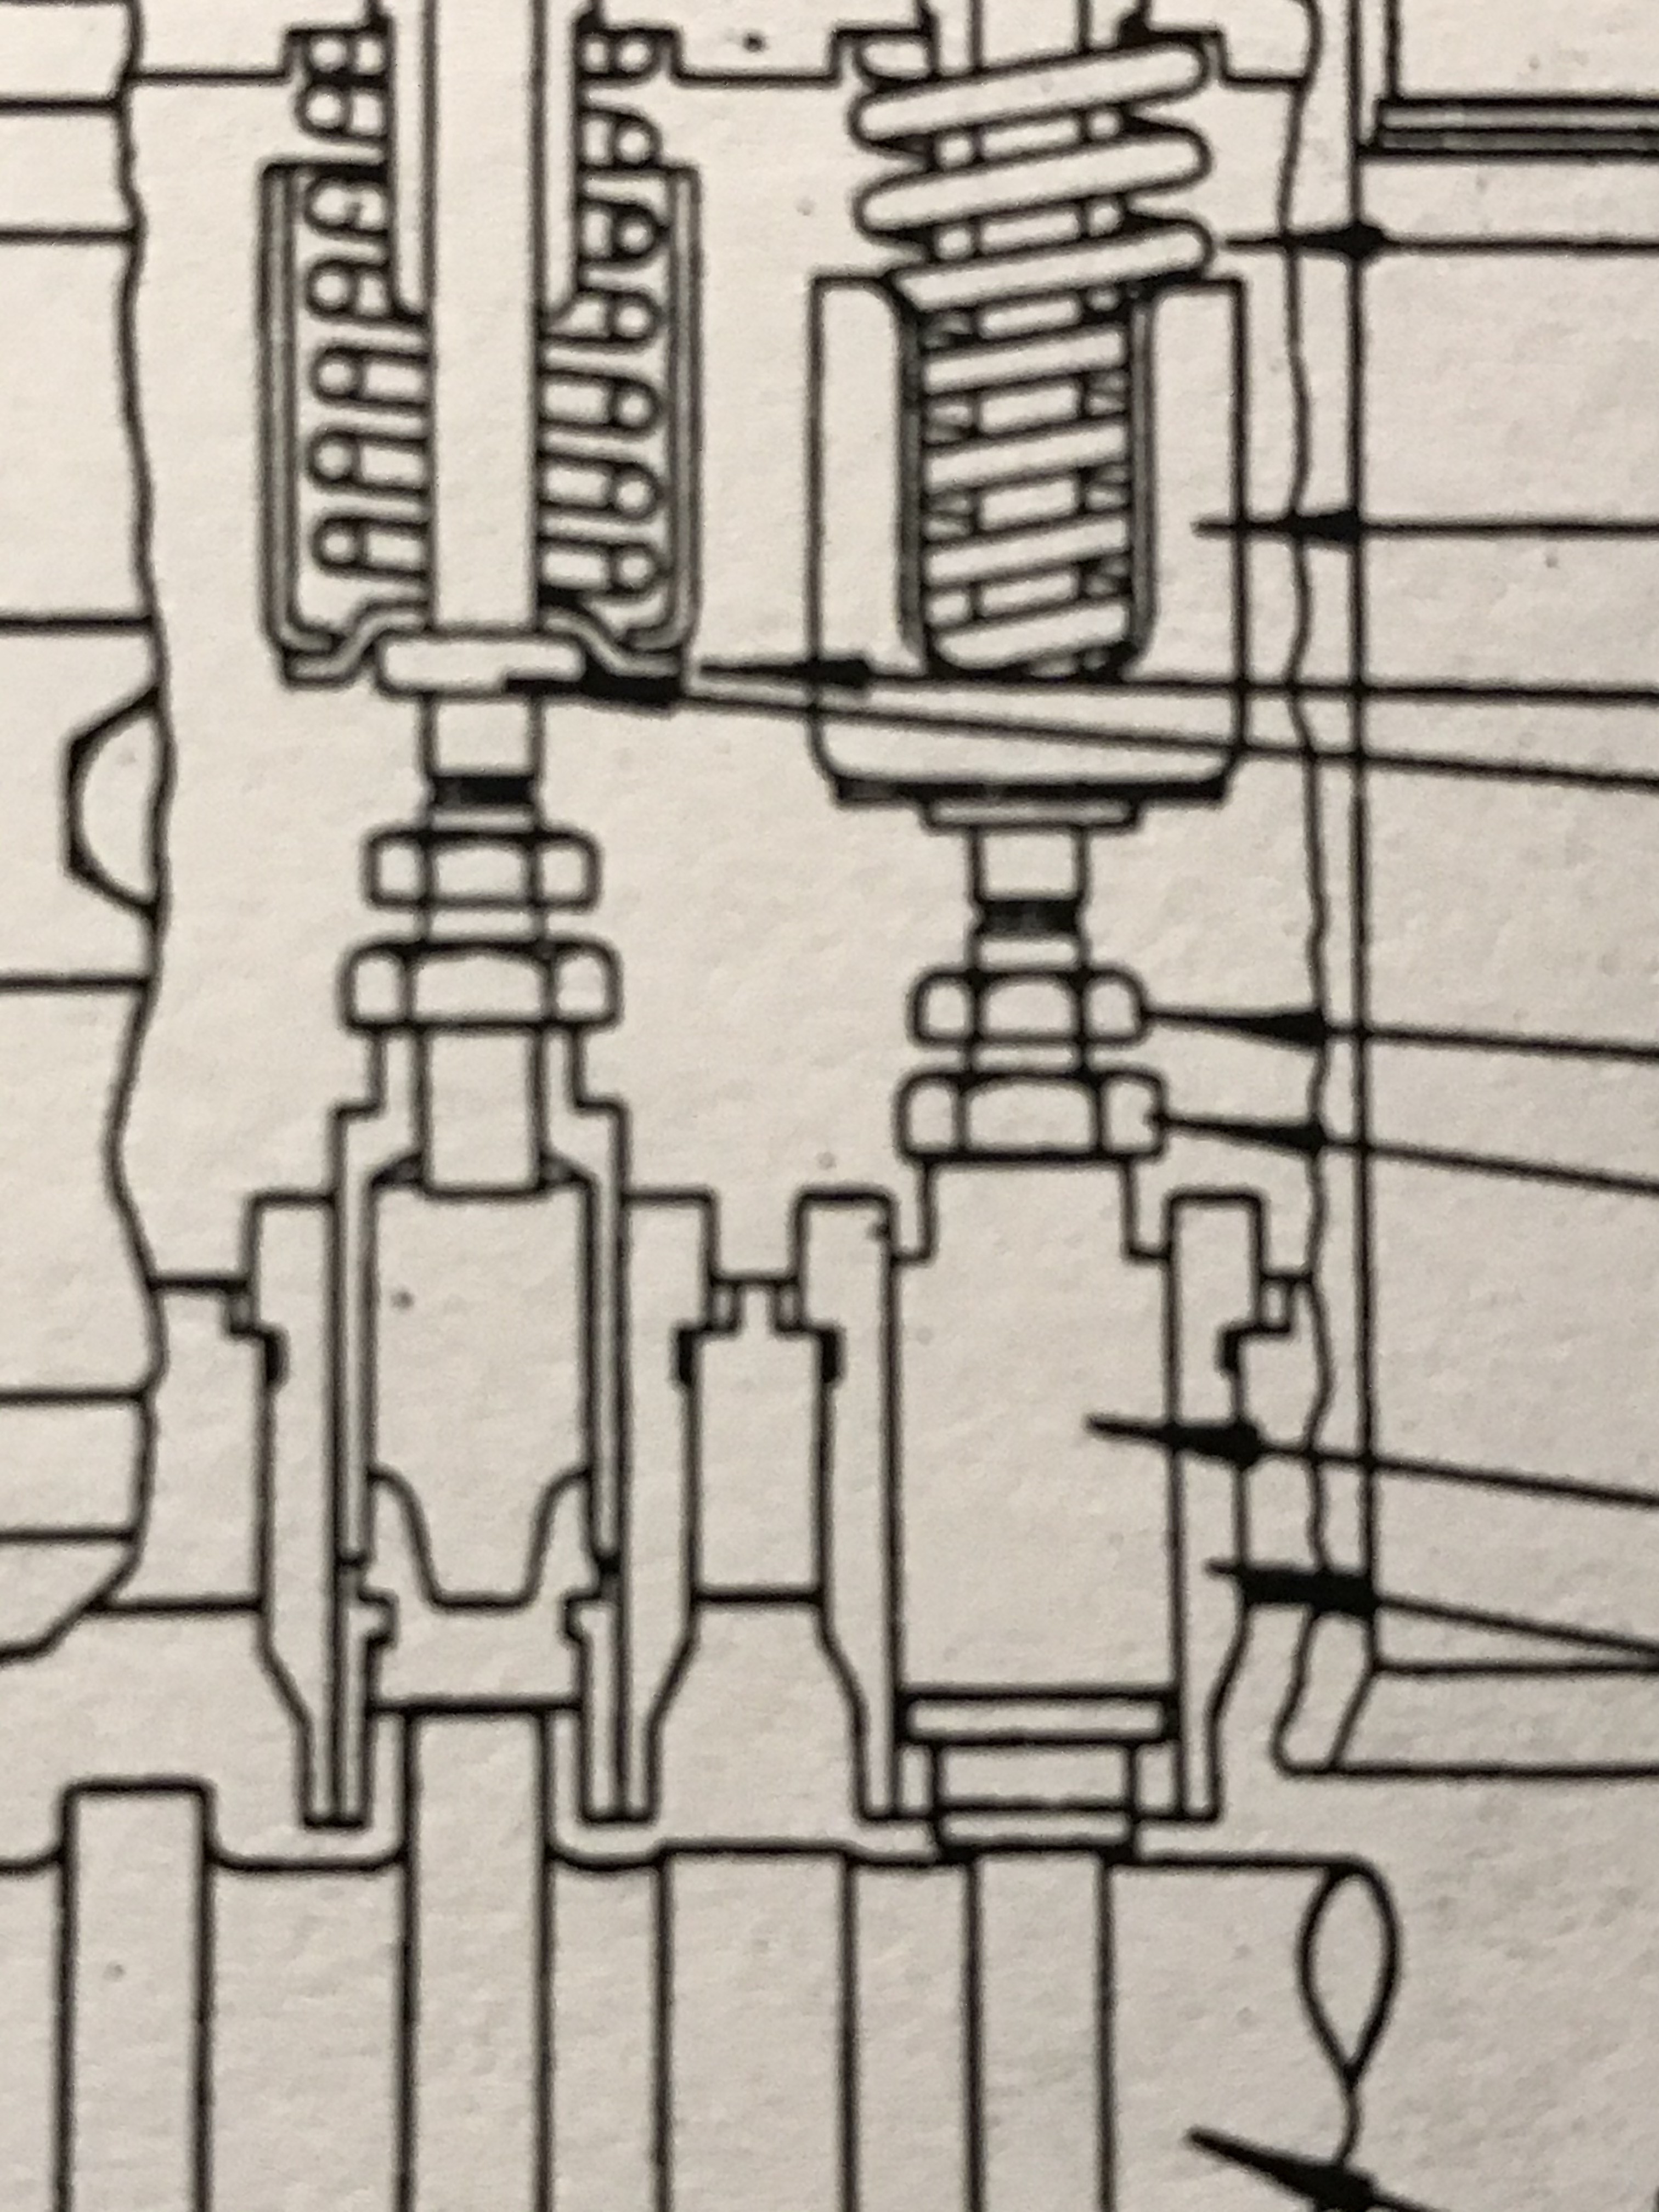
1/2" A.F. is th3e size you need. An important point is that you insert both spanners at the same time, and tension them against each other to undo the lock nut. Do not try and undo the lock nut on it's own as you are liable to break the sides off the guide. There also flats on the lifter which you can put a spanner on to hold it.0
-
Thank you Geoff. The procedure manual says to adjust the tappers with the engine hot and running. Is this actually how it’s done?0
-
That's the way I always did it on my '37. Of course, you have to remove the inner fender and the wheel, and then you need to scrunch up in there to do the job. And get used to the pair of wrenches jumping up and down while you're trying the rotate them separately. And then there's the fun of sliding the feeler gauge in and out while the valve stem is carrying it up and down...
But I think it takes a lot less time to do it when it's running, because you don't have to keep rotating the engine by hand to find that magic spot where you can measure each valve's clearance. After awhile you get right into the rhythm of it, and you go right down the line adjusting all 12 in no time at all.0 -
Finally getting to adjusting the tappets.
Having never done this just wanted to check I understand the procedure.
1) Set engine so #1 is at TDC on compression stroke so both valves are closed.
2) Loosen the lower jam nut.
2) Rotate the upper nut on the tappet to set the correct clearance between the tappet and valve stem.
4) Tighten the jam nut.
5) Set #2, #3, #4, #5 & #6 to TDC on compression stroke and repeat.
If anyone can verify it would be appreciated.
Tom
0 -
Most accurate way is to start with No. 1 exhaust valve open, and adjust No. 6 exh. then following the firing order 153624 turn the engine 1/6 of a turn until the next valve opens, and do it's opposite number. Then repeat with No. 1 inlet valve, and do the inlets. And an important point, do NOT just lean on the lock nut to undo it, as you run the danger of breaking off the skirts of the lifter guide. There are flats on the lifter itself, and you must fit a spanner over these flats and hold as you undo the locknut. Want to know how I found this out? The hard way. As Jon points out it is possible to do it with the engine running, but I prefer this method.0
-
Geoff, Can the adjustments be made with the spark plugs remove so the engine turns over easier?0
-
Yes, that makes it much easier, without bounce-back due to compression. With plugs removed you can usually use the fan belt to turn the motor.0
-
Are there numbers for adjusting the tappers when the engine is cold?
regards, Tom0 -
.007 inlet and .012 exh.0
-
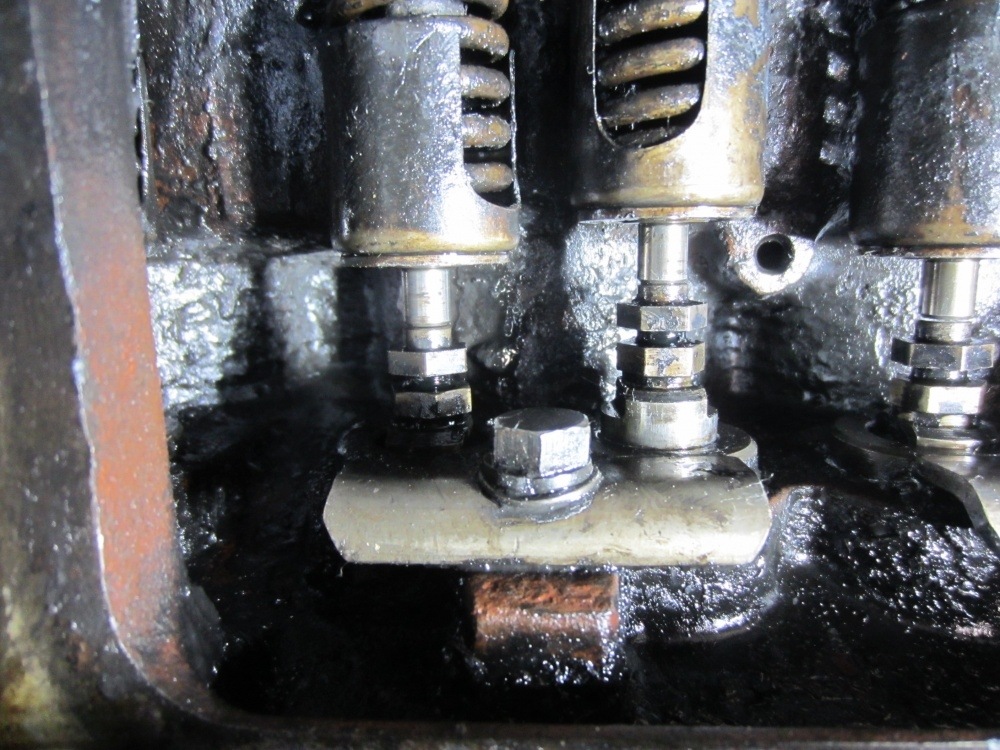
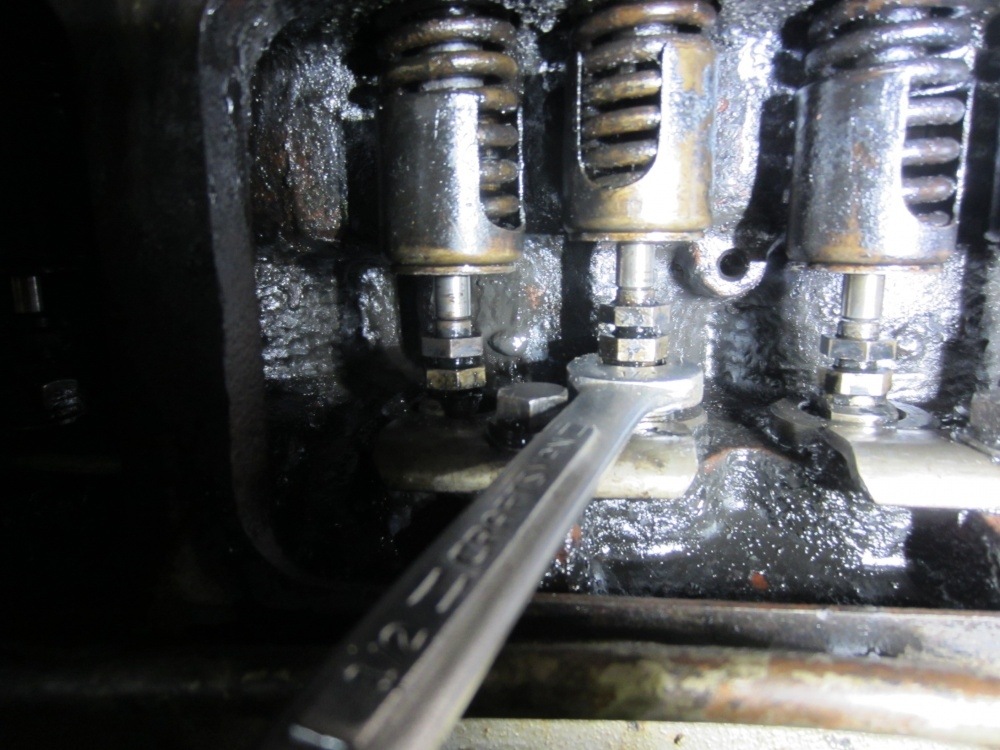
Geoff, Just to confirm. I've attached a pic showing the wrench on the flats of the lifter with the valve slightly raised toward opening. The lifter to the right of the one with the wrench appears to be in the fully closed position and the flats on the lifter are barely visible. Does this look correct? Should the lifter be this low in the closed position? The first pic W/O there wrench.
0 -
You should consider getting two 1/2” tappet wrenches. They have a thinner profile so you can use them simultaneously and are longer then standard wrenches for ease of useI got mine off eBay and a quick check before posting this shows quite a number of them currently for sale0
-
Toddh, I have a set coming from eBay. Should be here this WED.0
-
They should not be this low. Indicates wear on either the cam or lifter. Noisy tappets are not necessarily because of wide clearance, but can be indicative of wear on the lobe or the lifter.0
-
Oh Boy, that’s not good. I’ve been chancing a problem with a rough idle. Replaced the ignition bits which improved it but still not satisfactory. Figured the next thing would be the tappets. First I'll go thru and check the existing clearances.
So to do any adjustments would require having the lifter raised/slightly open so the wrench fully engages the flats then loosen the jam nut. Then back then crank slightly to fully close the valve, make the adjustment, advance the crank to expose the lifter flats and tighten the jam nut. Does that sound feasible?0 -
I would do a compression check first, then check the tappet clearances as they are, and that should tell you something. All compressions should be within 5-10 lbs overall. Actual reading depends on cranking speed, ring and valve condition, and temperature, and will vary between 70-100 lbs usually, depending on those factors. but they must all be equal.0
-
Tappets are usually done up tight. If you want to adjust with the motor running it may be easier to semi loosen the tight ones that are way out of specifications with motor not running. I always hope I will get lucky with a few. While setting the tappets is not hard with practice and getting the right feel, but I always feel I could be plus or minus 1 thou out because of wear. If you have to replace a lifter here is something interesting.0
-
The saga continues. I might add that I know just enough to be dangerous as they say.
Probably should have combined this thread with my other thread “35 T running rough”.
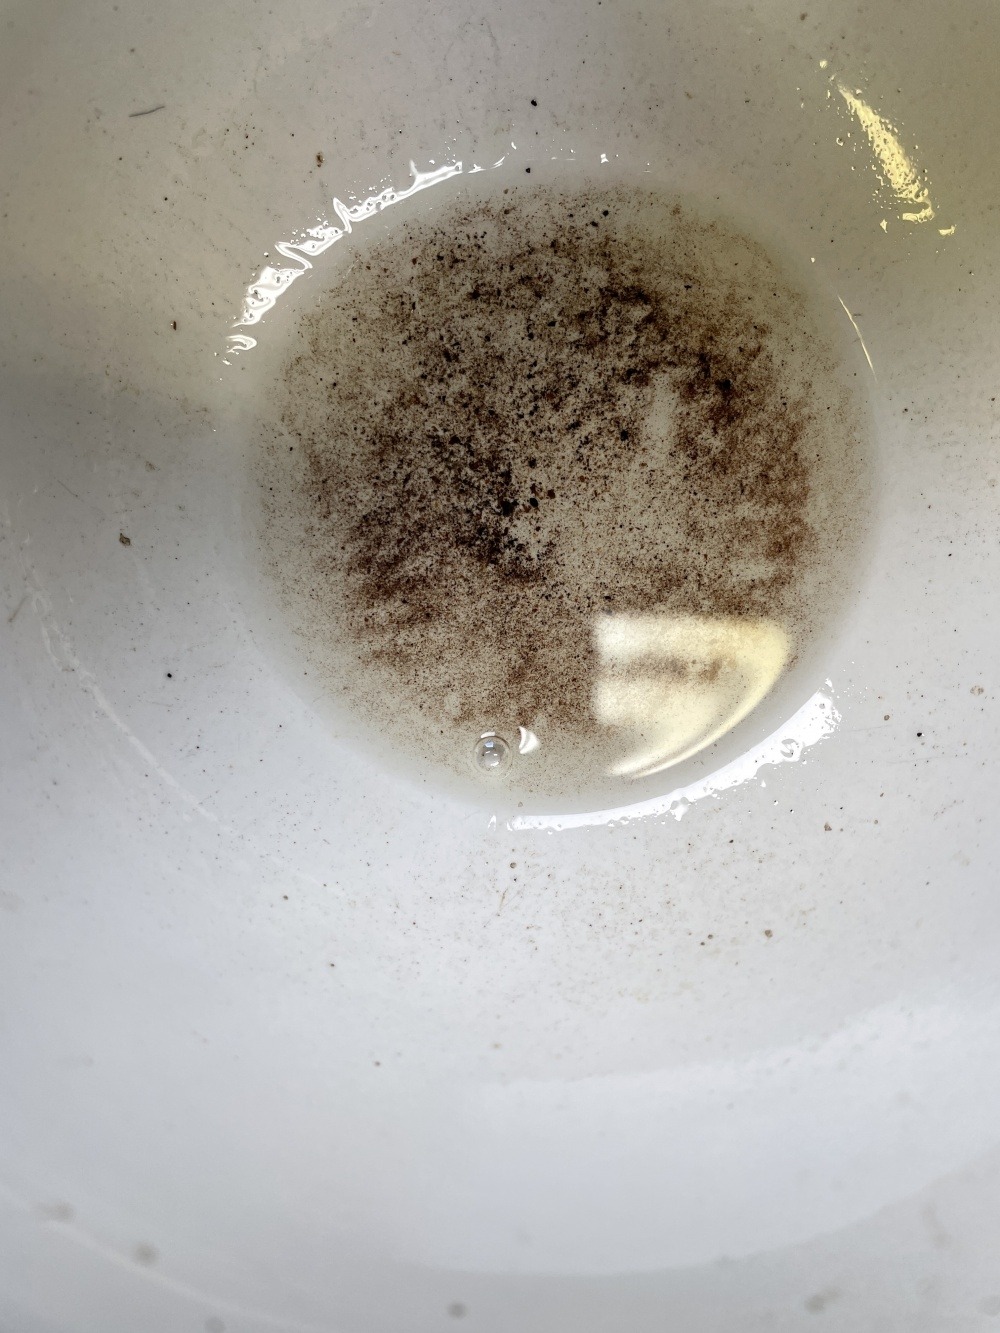
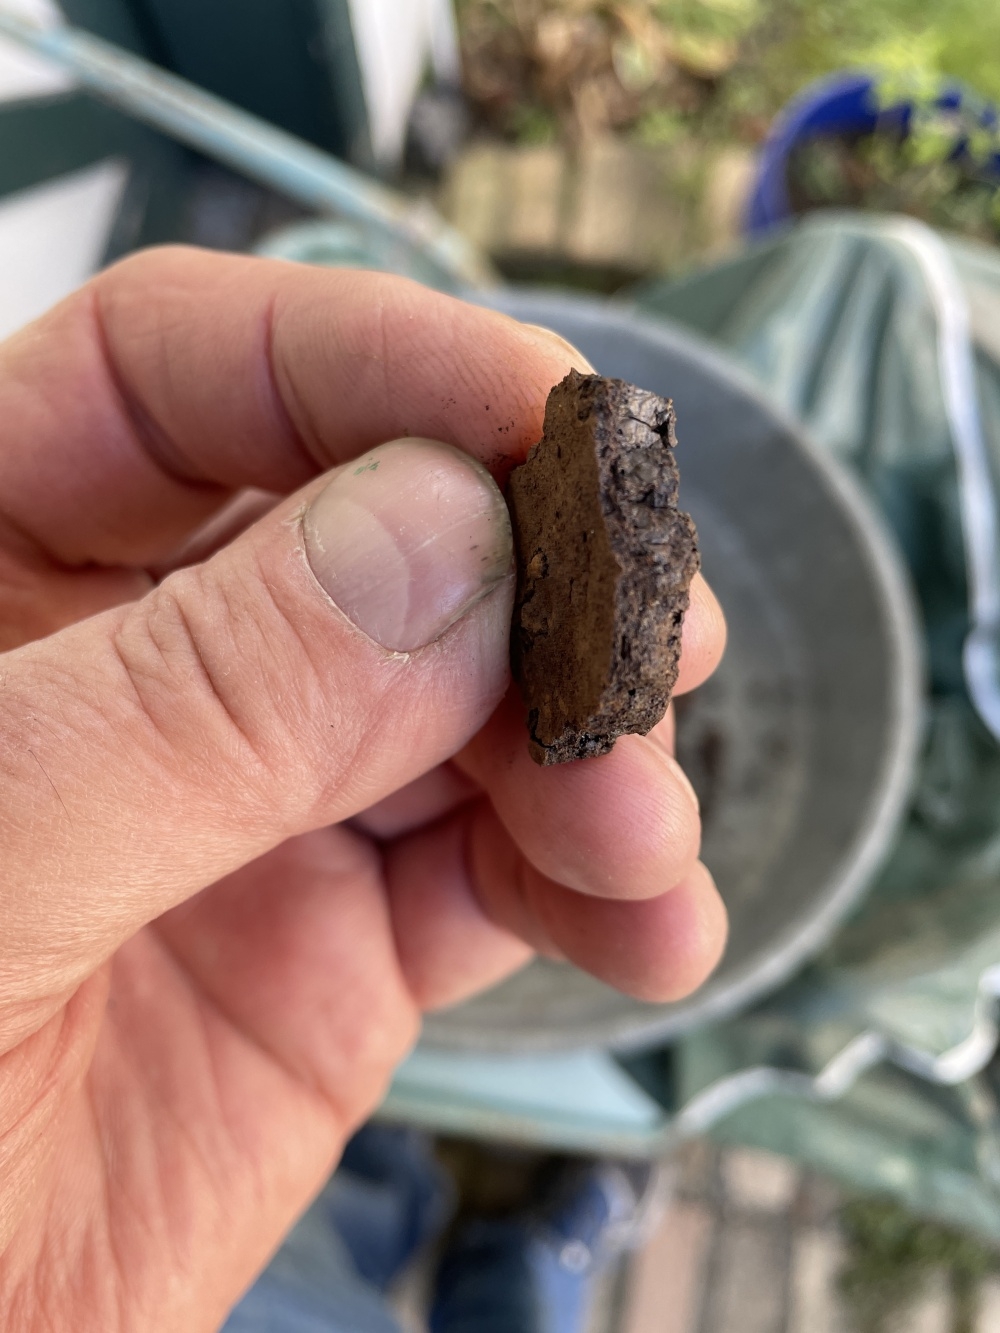
Tried to get the car started to warm it up to do a compression test. Cranked over well but only sputtered and wouldn’t run hardly at all. Removed the inline fuel filter just before the pump and drained it into a bowl. The attached pic shows the fine grit that came out of the inlet end of the filter while blowing into the exit end. Guess I have a new project to clean the crud out of the tank. Local guy who has restored many cars tells me he has used “Red-Coat” to seal tanks and has never had a problem.
Got a new inline filter and a length of fuel line. Ran the hose into a 2 gal tank with fresh 90 octane alcohol free gas. Still sputtered and wouldn’t run hardly at all. Started to smell raw gas. Figured the float valve had debris in it. When I removed the carb, which I had Daytona Carb rebuild over last winter, from manifold there was raw gas sitting in the bottom of the manifold. See attached pic. Removed all the plugs and they are black and sooty but dry. Removed the float bowl cover from the carb. The cover had two gaskets between the cover and flat chamber. The float chamber was clean with no debris in it. Check the float valve which was clean. I’d read the section in the manual about setting the float height to 3/8”. Attached pic shows it was set to 1/2”. They may have done that due to the two gaskets. The J-818-2 in the second pic is 0.375.
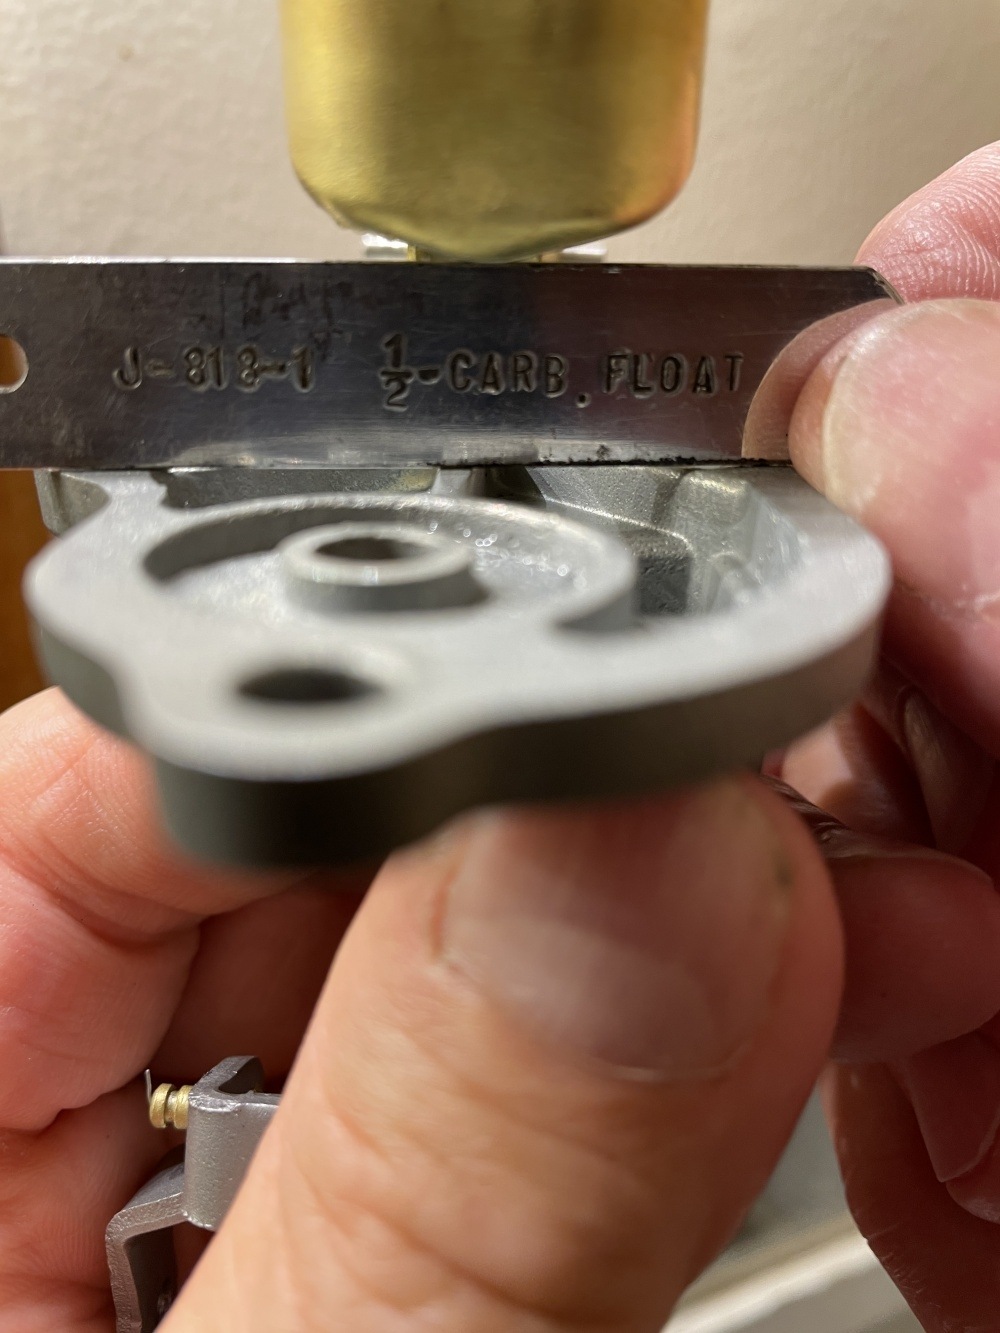
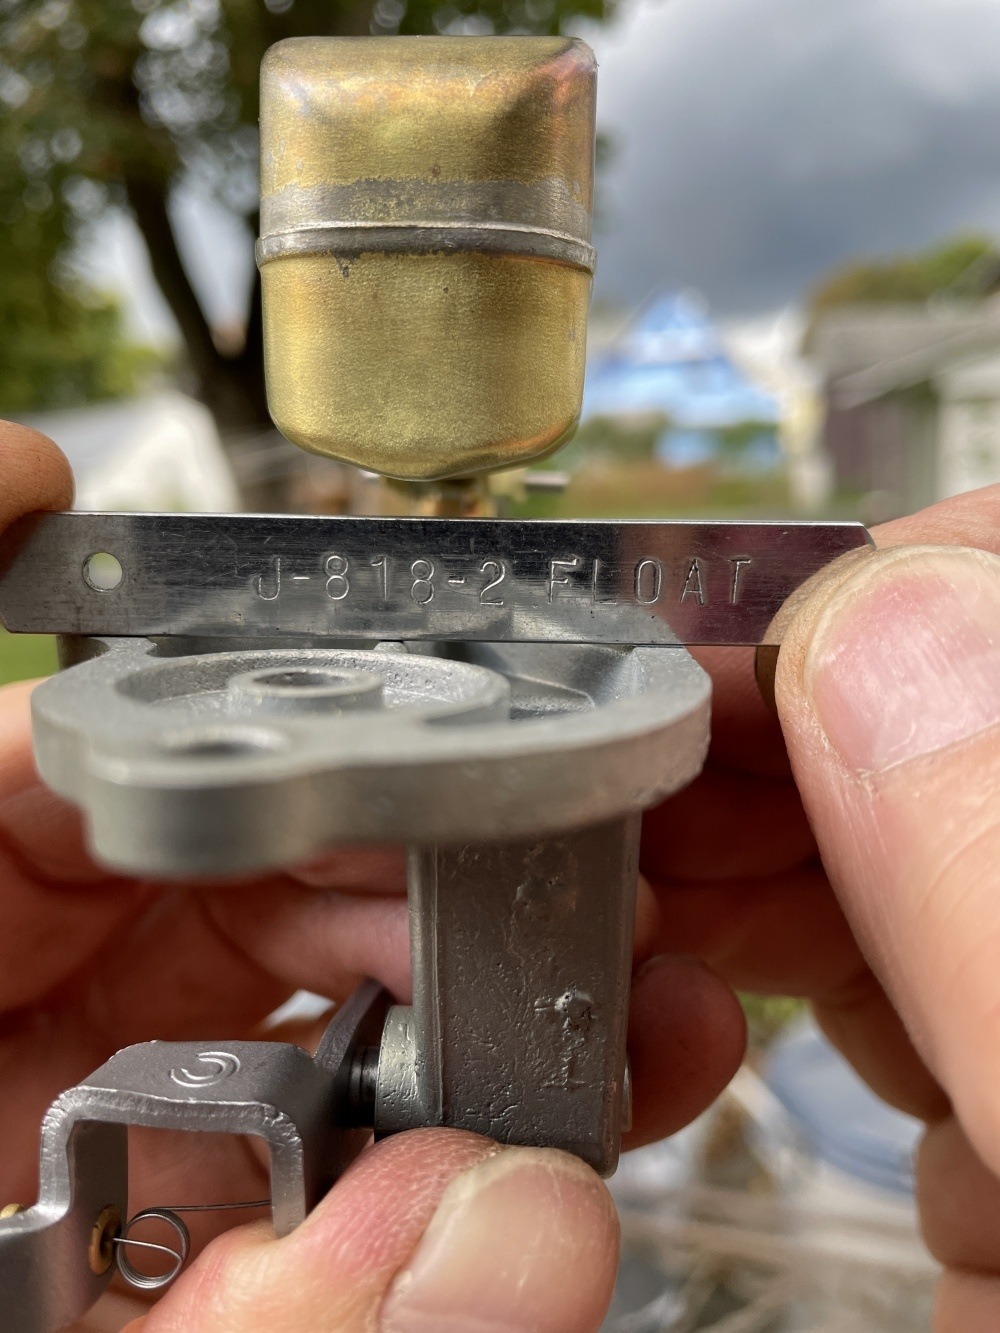
Checked the height of the metering rod with tool T 109-25 and it appears to be good.
Checked the fuel pump pressure and it read a steady 3 1/2 PSI.
Decided to check the compression with the engine cold while the carb was removed.
#1-80, #2-80, #3-89, #4-85, #5-85 #6-89. I cranked the engine and watched the needle until it got to the highest number then let it crank a few more times.
I haven’t checked the tappet clearance yet.
A question about the raw gas in the manifold. Can the raw gas get into the oil pan or upper dipper tray from the intake manifold? assuming all gasket are tight.
Any comments and/or suggestions on the float setting would be appreciated.
Tom
0 -
Compression looks good
 I don’t remember if this car was running ok before so:Yes you do need to correct the float height and check your needle seat. It should only need one gasket for the bowl unless there’s an defect issue with the bowl or cover. When you did your carb rebuild did you pull the various jets out and clean them and replace the copper or fiber glands? There’s also a number of passages in the casting that need to checked too. Do you have a set of numbered drills to check the jets and passages? Did you replace the leather on both the accelerometer pump and dash pot pistons? Is the metering rod correctly seated?I have a Carter 281s on my ‘34 Terraplane and i have rebuilt a couple of them. The ‘35’s both 6s and 8s use a similar Carter one-barrel.
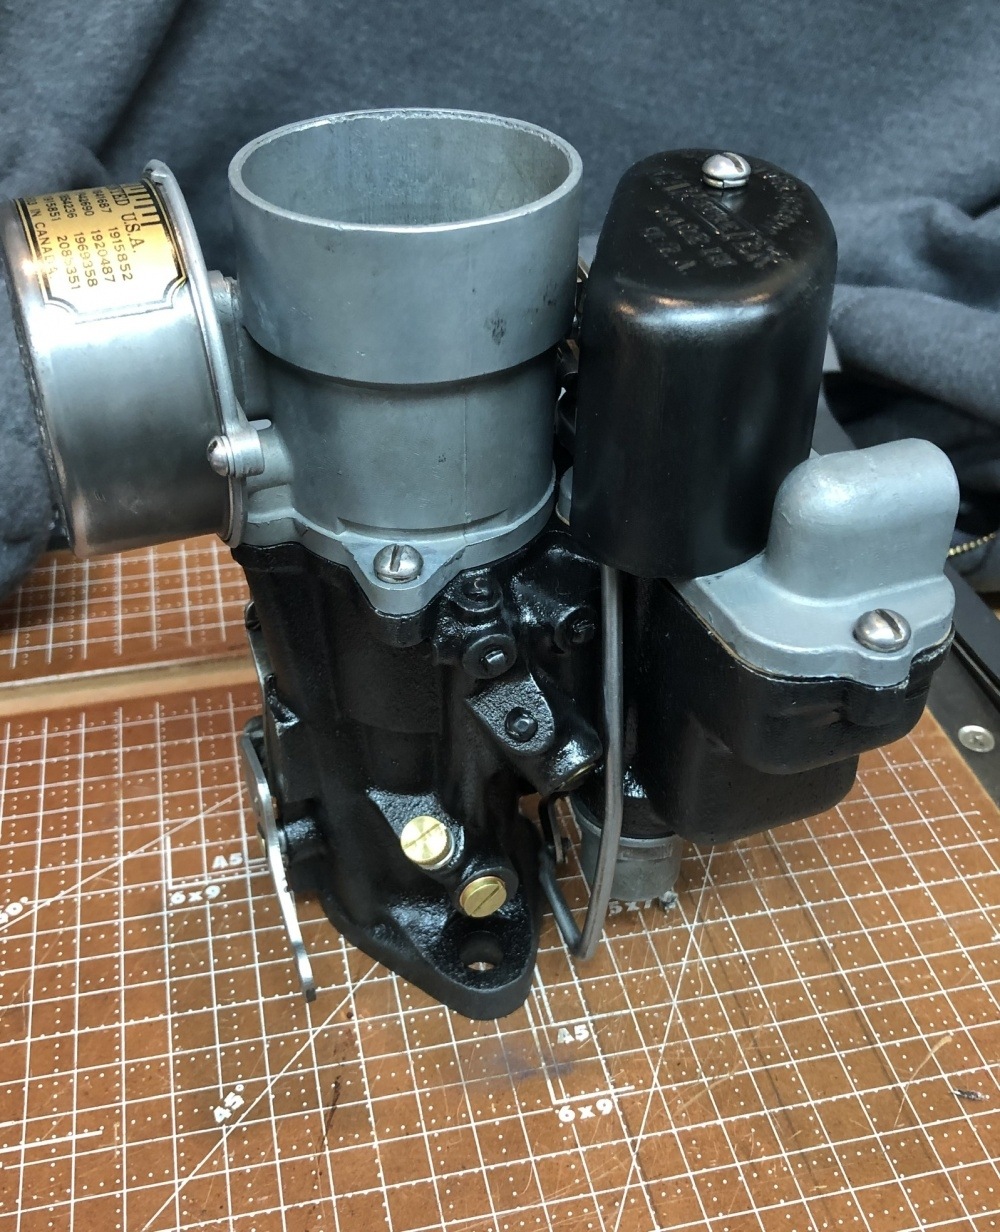
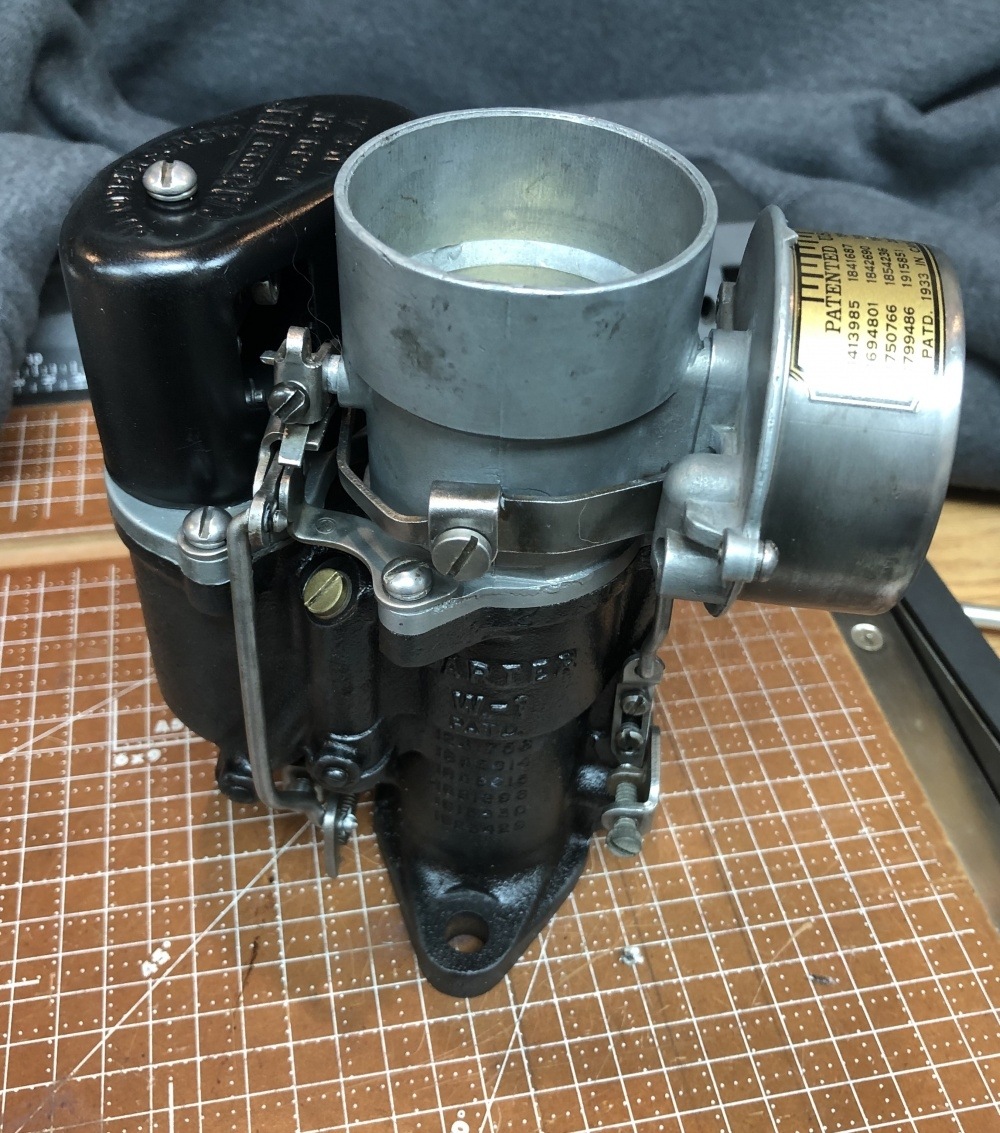 0
0 -
I'd had the carb rebuilt by Daytona Carb last winter. I assume they cleaned all internal passages and installed the correct jets. As mentioned above I checked the metering rod height with tool T 109-25. Data I've found says my 35 Special G was originally shipped with a Carter W-1 311 S. Does anyone have data on the correct jets, metering rod etc for this unit?0
-
If you don’t have a tag, you can verify it by checking the bottom flange casting. You should see “256” or “56” stamped there. Here’s Carter sheet on it:
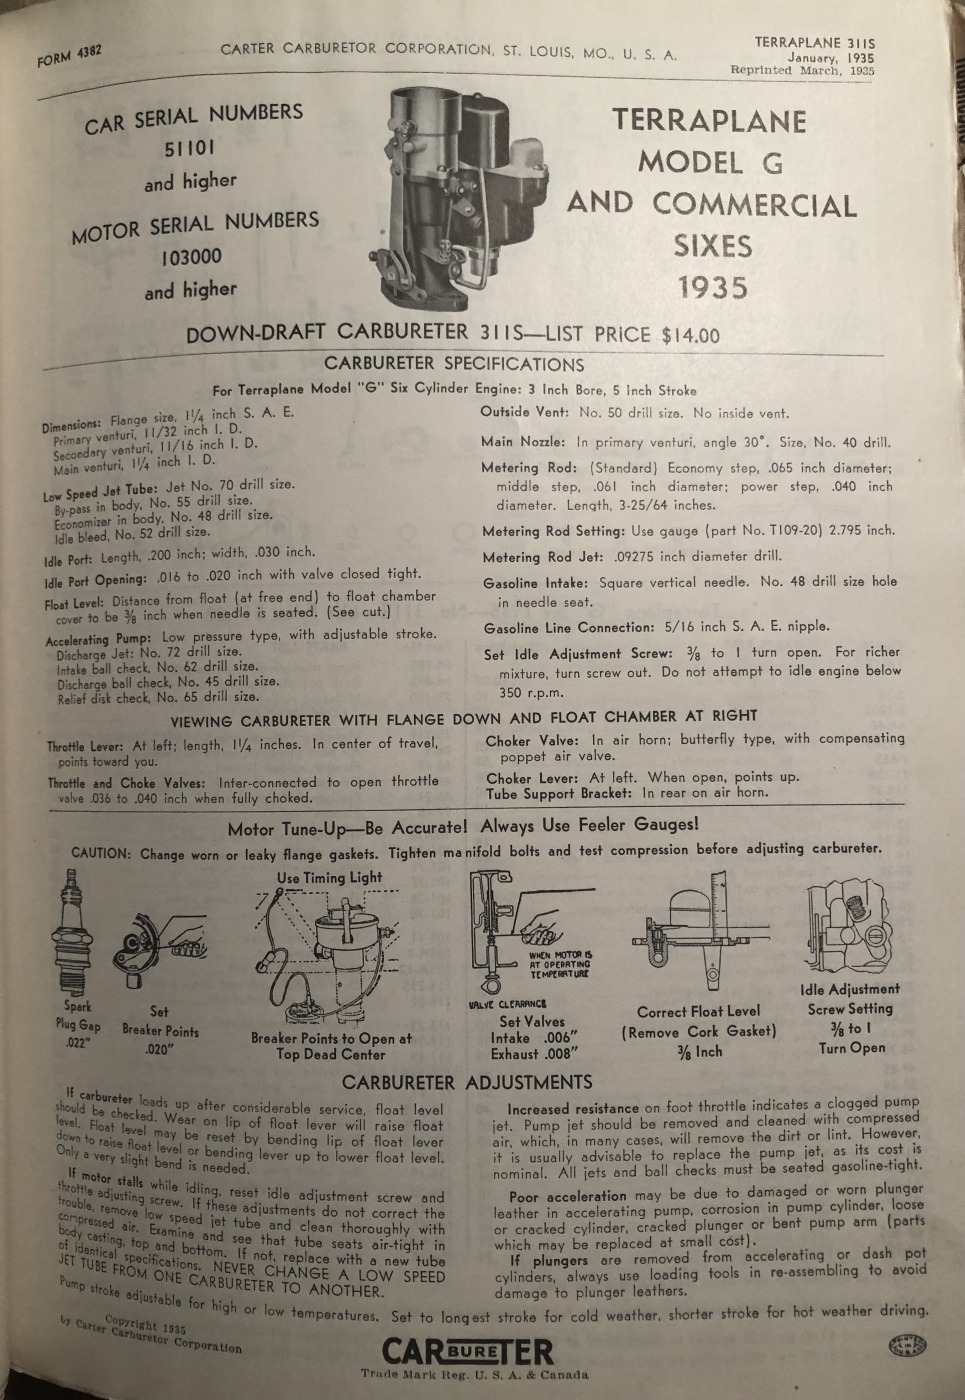
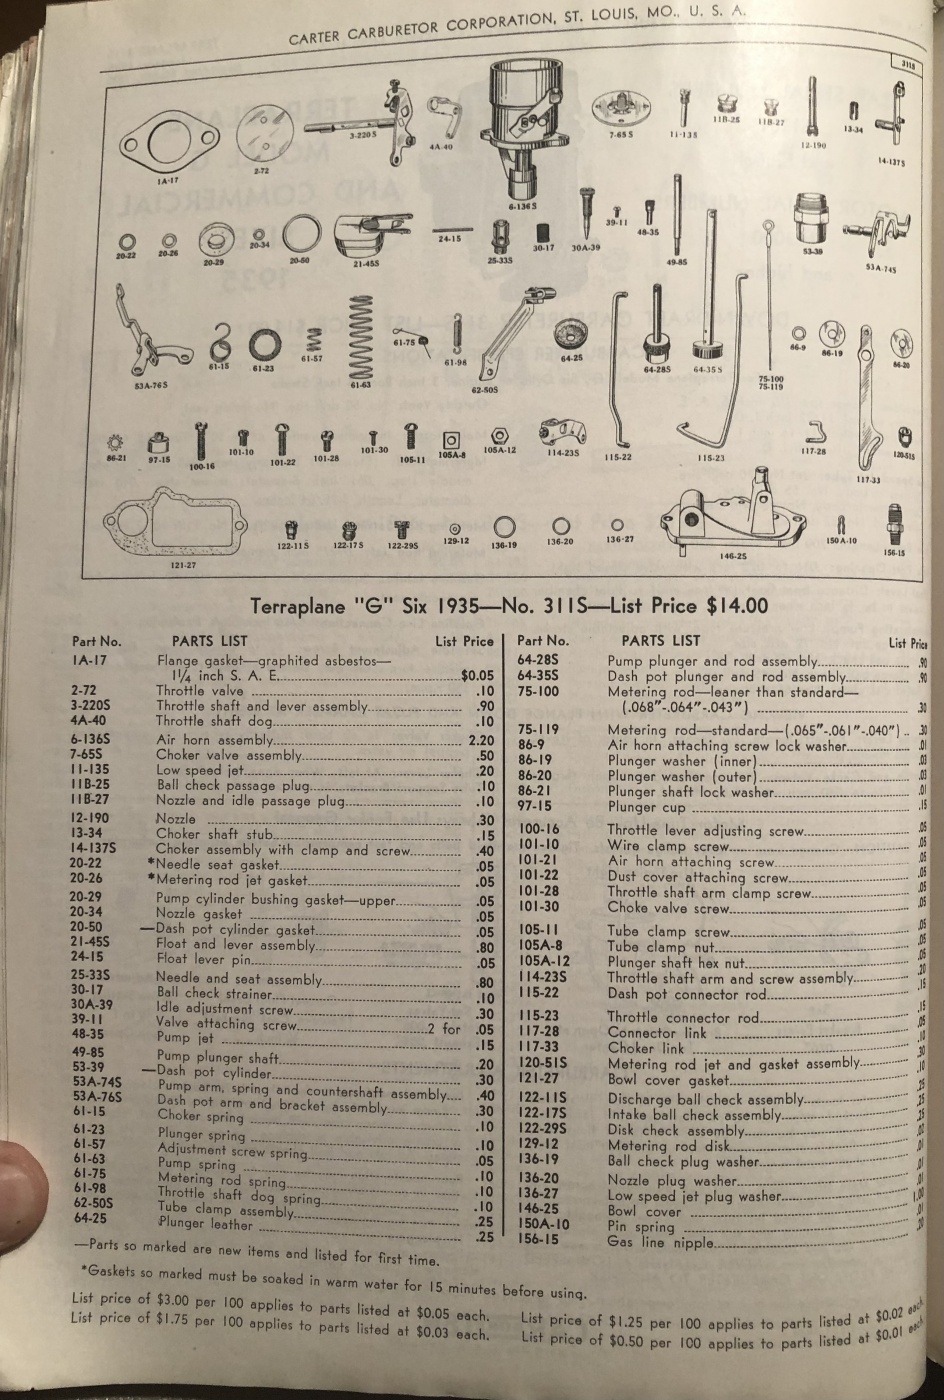
0 -
Also make sure you have the correct metering rod. 75-119.0
-
Toddh, Thanks for the 311 S break down sheet. I confirmed the metering rod is a 75-119. With that I feel sure that Daytona has all the correct parts in the carb.
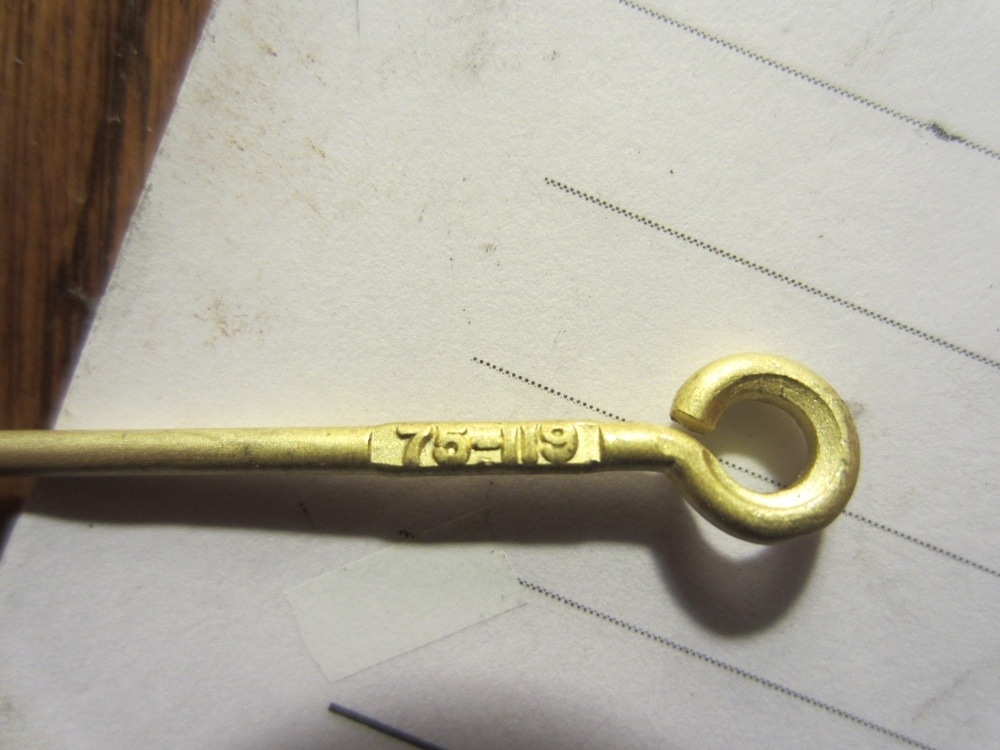
0 -
Good deal. Now you’ll just need to go through it and see why it’s acting up.0
-
Superb carburetor. I am looking for the tool for the dosing needle and the label on the bowl of the choke. The meins is to be redone on my 34. CARTER 282S merci
0 -
Go to this guy. That’s where I got many Carter parts and the Climatic Control housing decal: https://www.thecarburetorshop.com/PartsCarter.htmJACK356 said:Superb carburetor. I am looking for the tool for the dosing needle and the label on the bowl of the choke. The meins is to be redone on my 34. CARTER 282S merci0 -
Great thanks. I go to see because I live in Belgium and excessive customs import fees
0 -
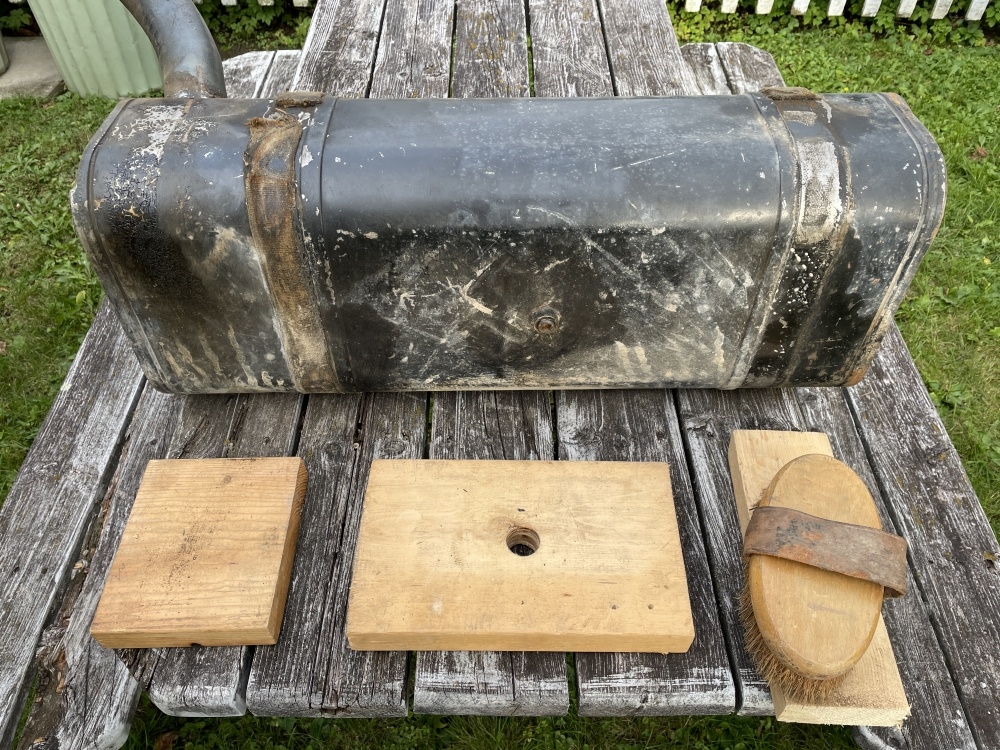
Got the tank out of the car. At first glance the outside looks decent.
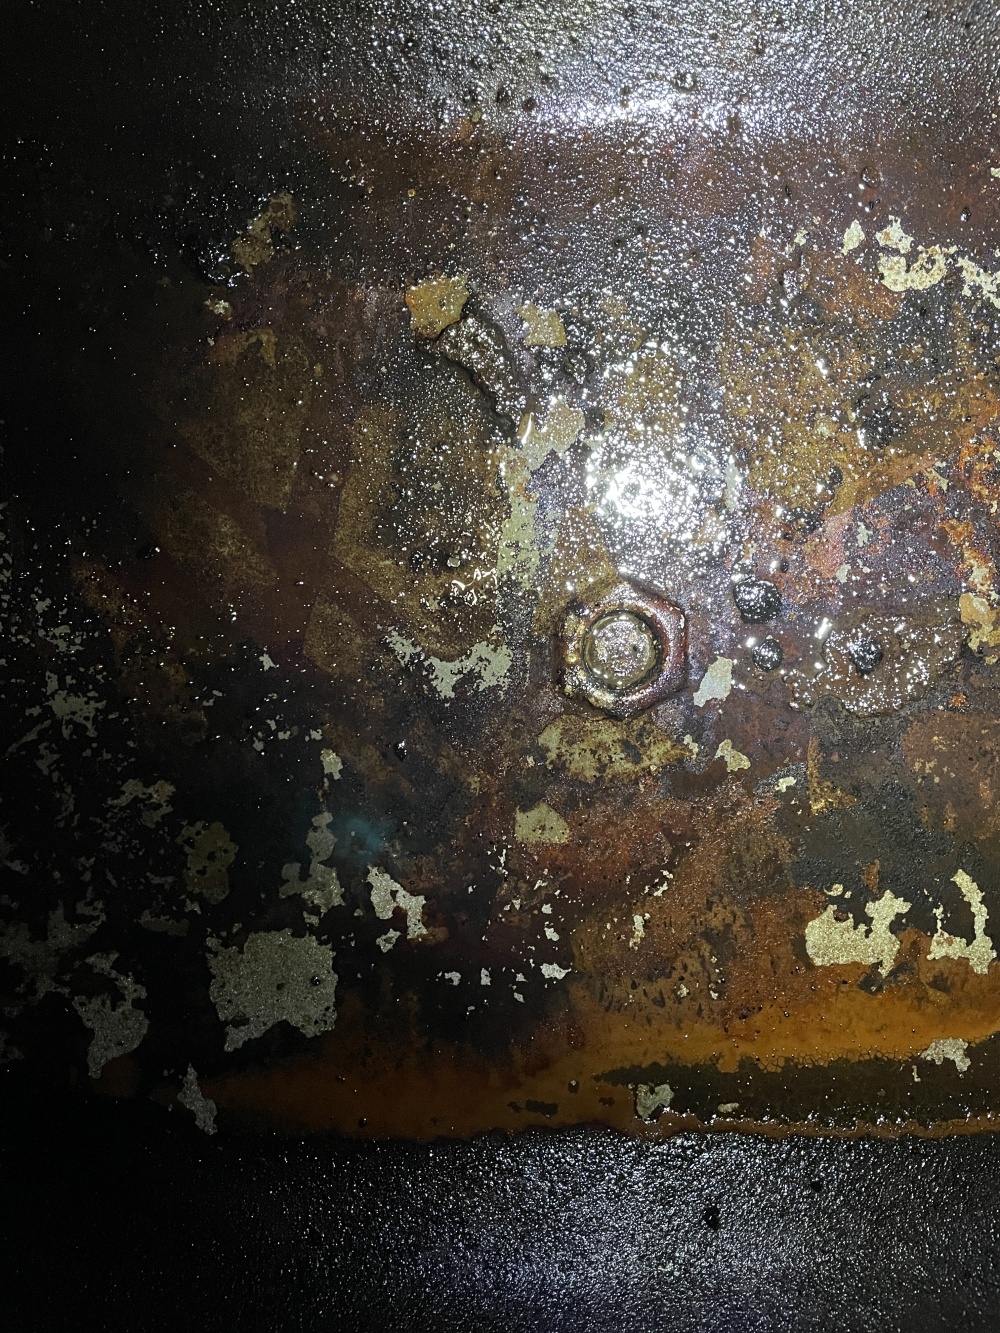
The filler neck had some sort of black sticky stuff around it where it passes thru the truck floor. After cleaning it appears to have a crack around the inboard side of the neck at the tank connection. Poured some of the gas I removed from the tank back in it, tapped the bottom of the tank with my hand, shock the tank around a bit and poured out a bunch of something that looked like sediment from the last 86 years. Poured more gas back in the tank and tipped it up toward the corner of the filler neck with the cap on and taped. I didn’t see any weeping from the crack but not sure that means the crack doesn’t penetrant clear thru. Making up a rig so I can rotate the tank with kerosine in it.
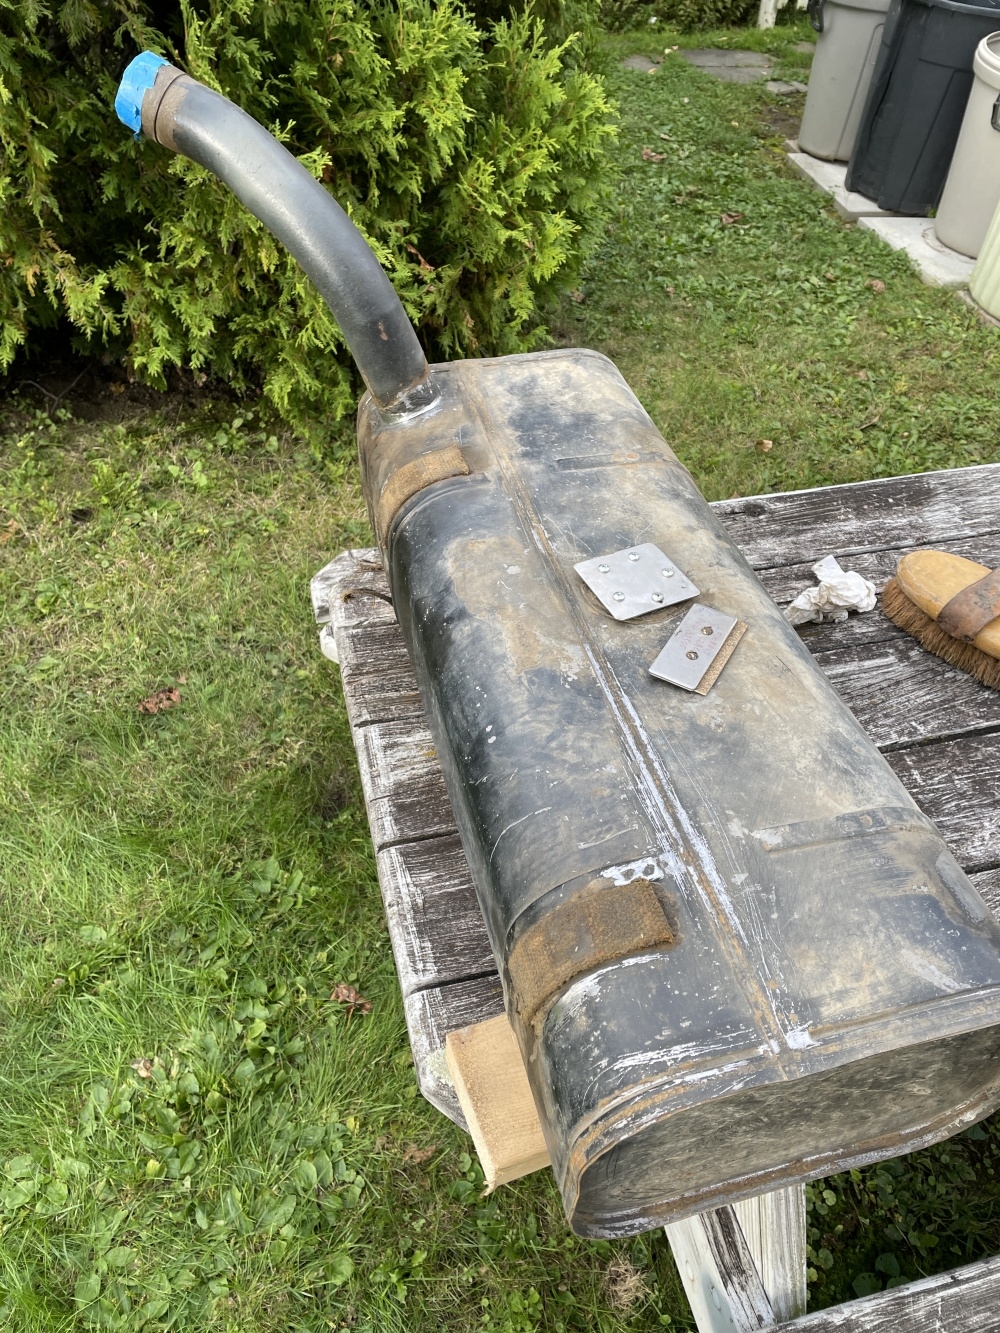
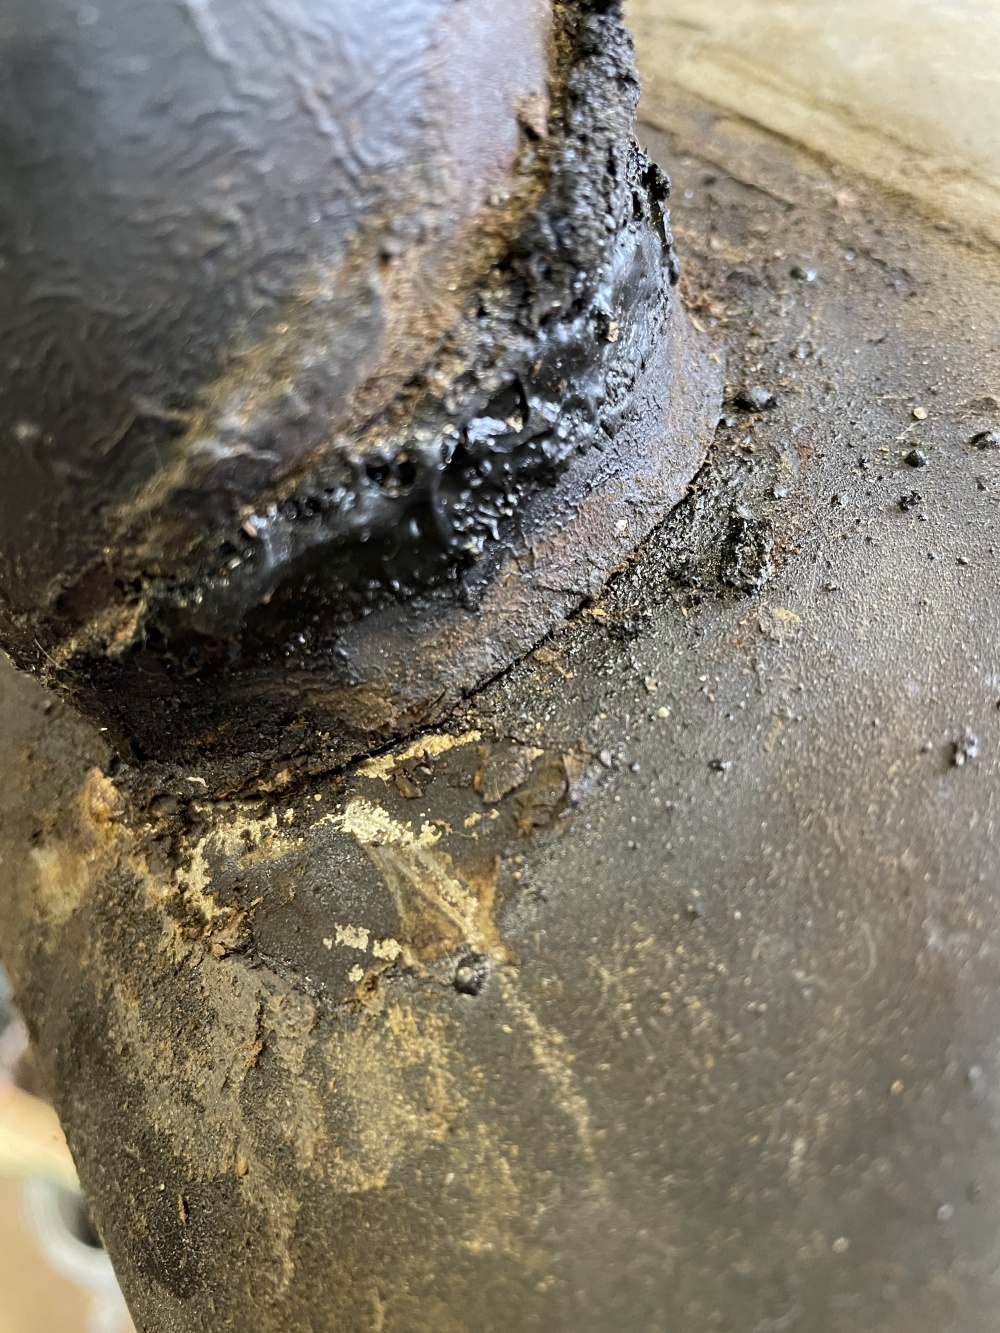
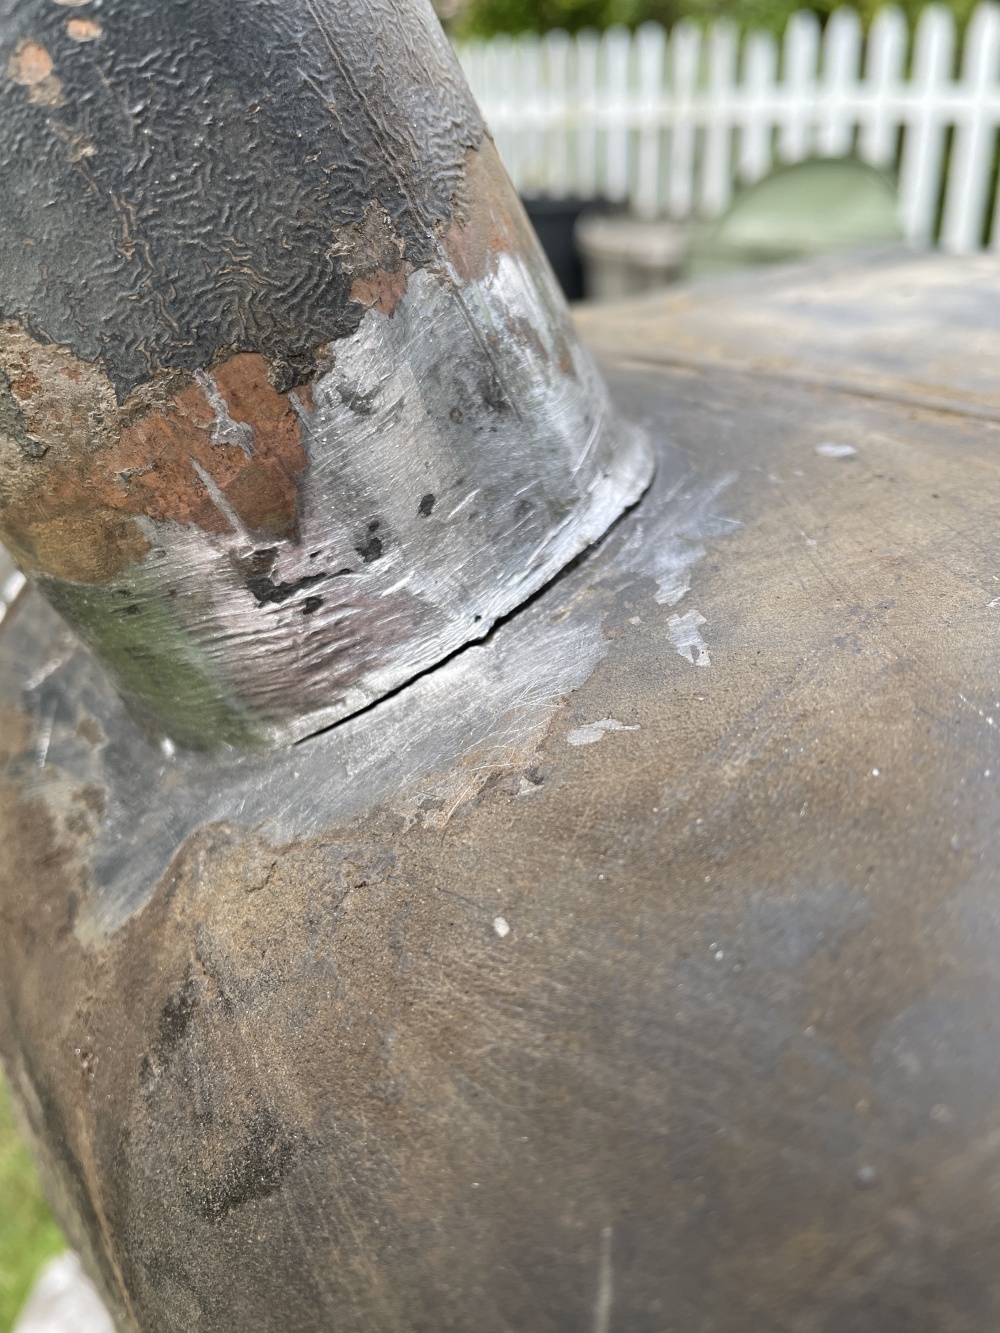
Looking down the filler neck.
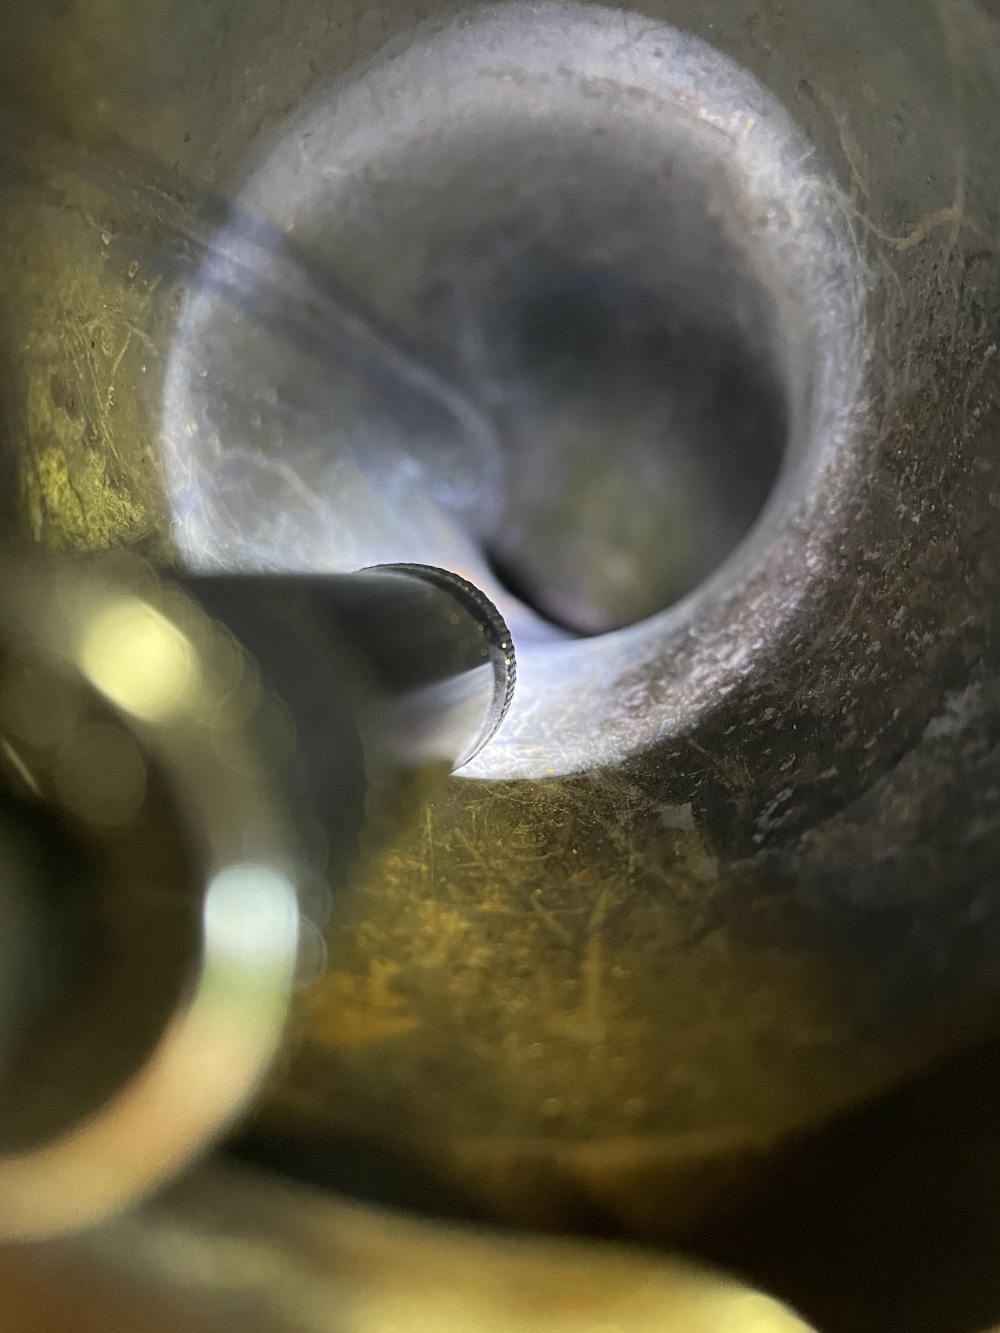
After three dumps and sitting in the sun all day to off gas.

Looks to thick to be rusted material from the tank, but maybe on one surface
Looking in the level gauge connection before starting flushing with gas. Surprised that the drain coupling is proud of the bottom of the tank.
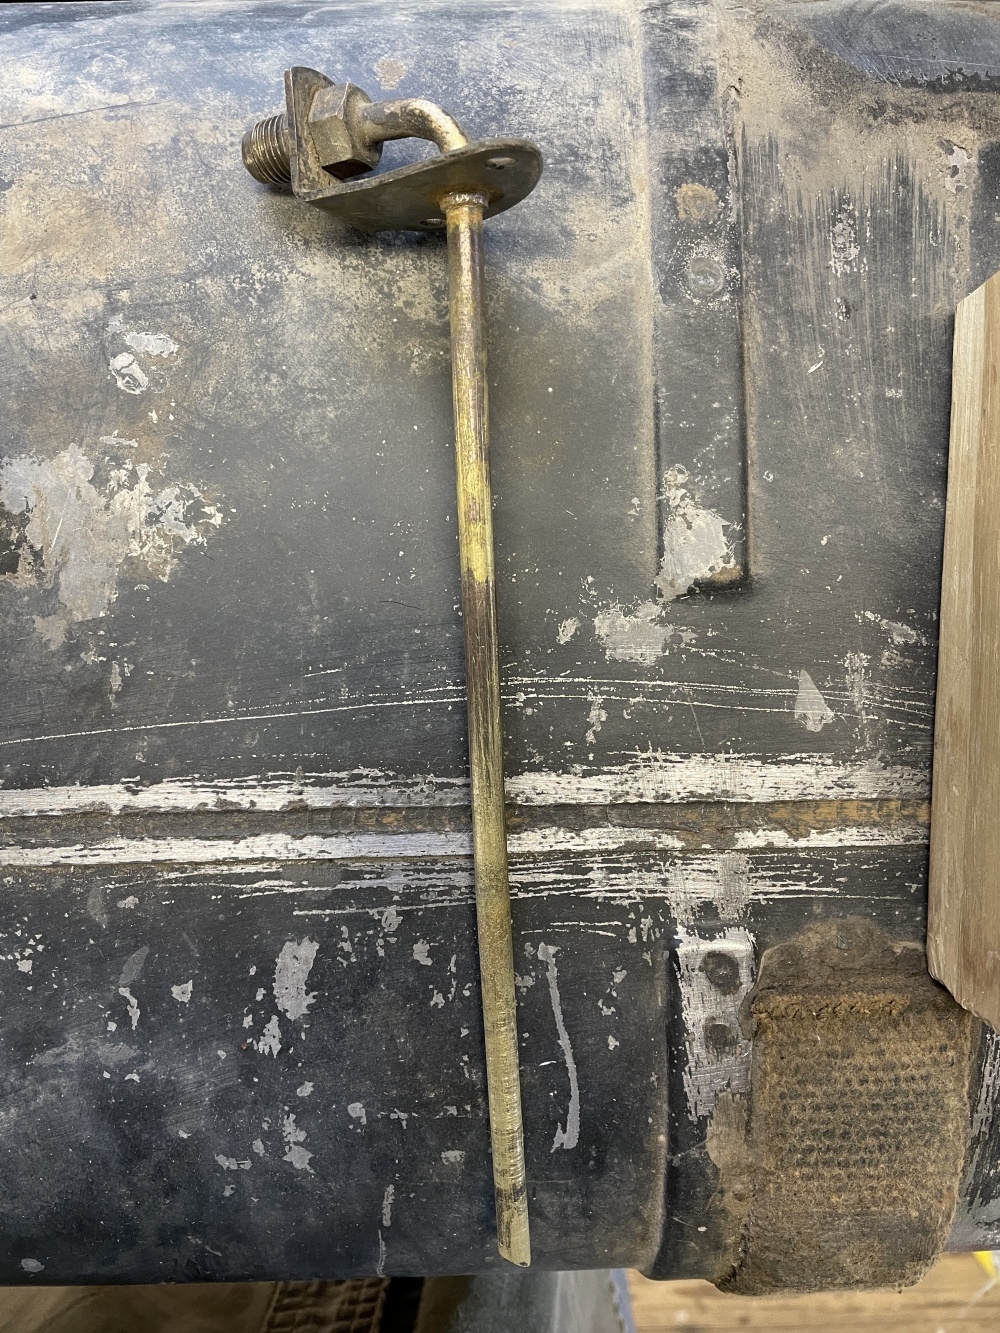
Pickup tube assembly.
 0
0 -
“Black sticky stuff” is likely the remnants of the foam rubber weather seal between the filler neck and hole in the floor. Most competent old-school radiator shops can repair the cracked solder on the bottom of your filler tube. They may also be able to seal the tank too. There’s some good videos on YouTube. I’ve done a few myself and used Red Kote as a sealer0
-
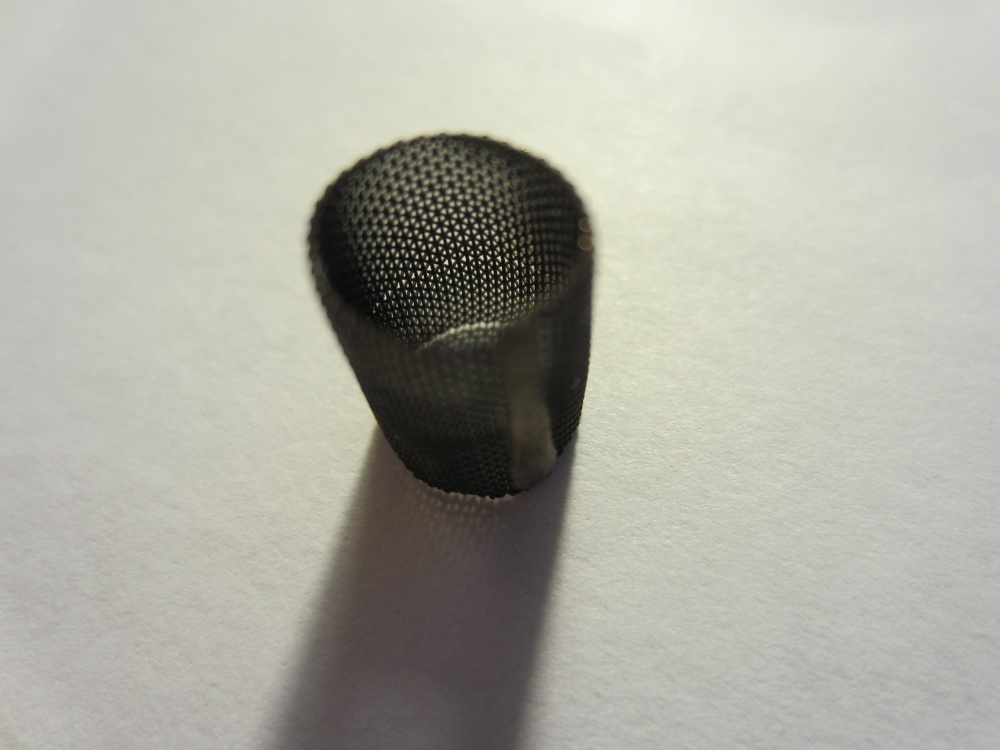
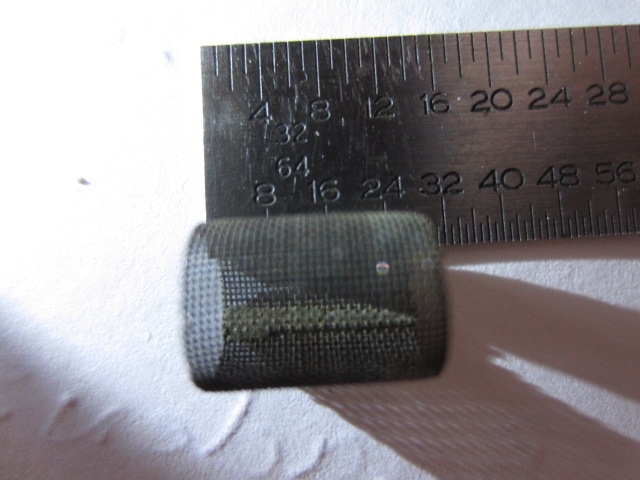
I'm looking for a Carter W1 fuel inlet strainer. I have a second W1 311S but upon disassembly this strainer was missing. I don't see it listed on the parts break down. Called a few different carb shops and the ones they list are not the same diameter as the one in the attached pics. I measure this on at 0.3125 OD x 0.4075 LG x 0.012 thick. Any help would greatly appreciated.
0 -
I have a bin full of W1s. If you cant find in the USA, in a few weeks contact me. ozhudsonatgmail.com0
Categories
- 37K All Categories
- 116 Hudson 1916 - 1929
- 21 Upcoming Events
- 96 Essex Super 6
- 28.6K HUDSON
- 576 "How To" - Skills, mechanical and other wise
- 995 Street Rods
- 151 American Motors
- 181 The Flathead Forum
- 49 Manuals, etc,.
- 78 Hudson 8
- 44 FORUM - Instructions and Tips on using the forum
- 2.8K CLASSIFIEDS
- 609 Vehicles
- 2.2K Parts & Pieces
- 78 Literature & Memorabilia
- Hudson 1916 - 1929 Yahoo Groups Archived Photos

