35 T running rough
Comments
-
Gotcha.0
-
Hi Tom,Some people prefer the vacuum gauge for timing ... it is believed to tune to the present condition of the engine rather than when all was new. Easy and fun to try !Geoff might fine tune this a bit !Good luck Bill
0 -
Thank you Bill. I didn’t have much luck searching the forum on this topic. I’m on it0
-
There are many things to consider when "tuning" an engine, or setting the timing. The main one is that Murphy's law states that : All instructions will be either a. Incorrect, b. unavailable, or c. unreliable. In the case of the page that is referred to in Bill's post, it states that to advance you turn the distributor clockwise to advance. This only applies to '41 and later Hudson 6's. All others the rotor turns clockwise, hence you must turn the distributor counter-clockwise to advance. Also, you will have to have the timing so far advanced to get any trace of a "ping" on modern fuels that it will kick back on the starter and run very rough. The state of the carburetor, the high tension wires, the points, the bushings in the distributor, (and in later models, the condition of the vacuum diaphragm,) the counterweights and springs, the voltage at the coil, coil polarity, all have a bearing. However, I have found the best method is for the cars without vacuum advance as the '35 Terraplane is, is to do the basic static timing with the points just opening at t.d.c. With the engine thoroughly warmed up, set the idling jet to it's smoothest point. If you don't have a timing light, turn the distributor anti-clockwise until the exhaust starts to "fluff" , and then retard until it just runs evenly. This is more difficult to do on an 8 cylinder. The best method is to use a timing light, and these are not too expensive, and I would recommend buying one. With the engine idling, set the distributor so the light flashes on the long mark about half an inch before the T.D.C. mark. If you have vacuum advance this should kick in immediately you speed the engine up slightly and you should see the mark disappear out of sight. To check the mechanical advance, disconnect the vacuum pipe and block the port, then start the engine and speed the engine up slowly. This should show a gradual advancement of the timing. if it jumps aorund and jerky, or flicks up fast, then springs are defective, or you have sticky or worn flyweight slots or pins.0
-
I forgot to mention, if you have uneven compressions, this will also of course affect the vacuum reading, and sound of the exhaust beat.0
-
Thank you Geoff. I have a few more things to look at. Hoping to have an answer from the Snap On guy this Tuesday on my compression gauge.0
-
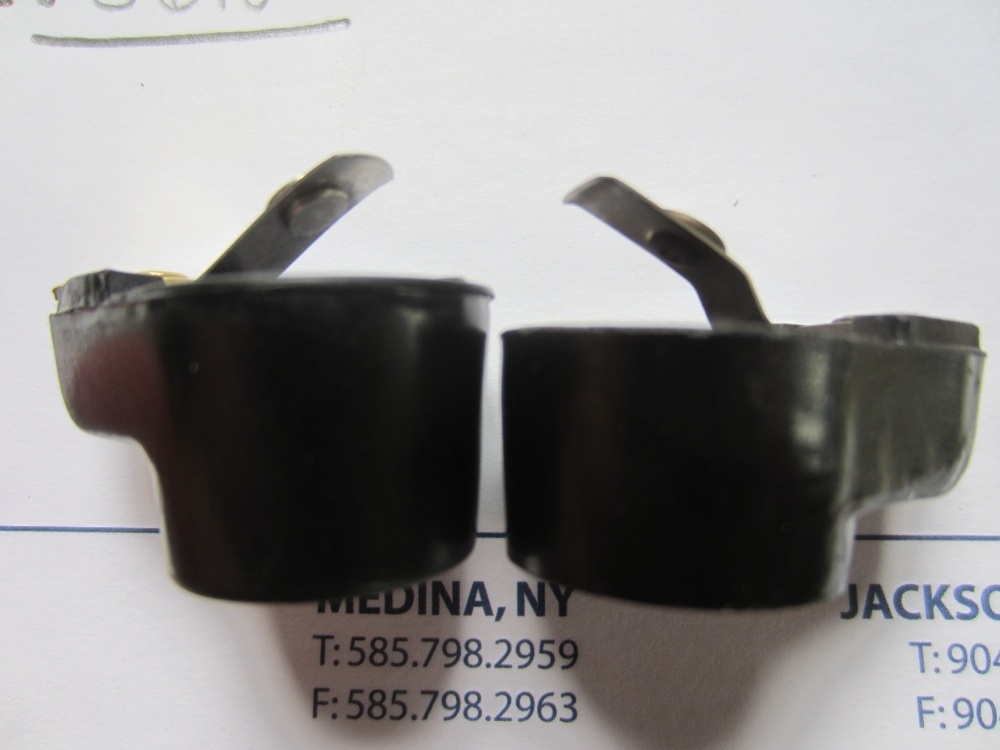
In one of the earlier post Geoff had mentioned "It is not normal for the spring arm contact to be burnt in this manner. I think you will find the center button eroded away, and will need a new distributor cap".
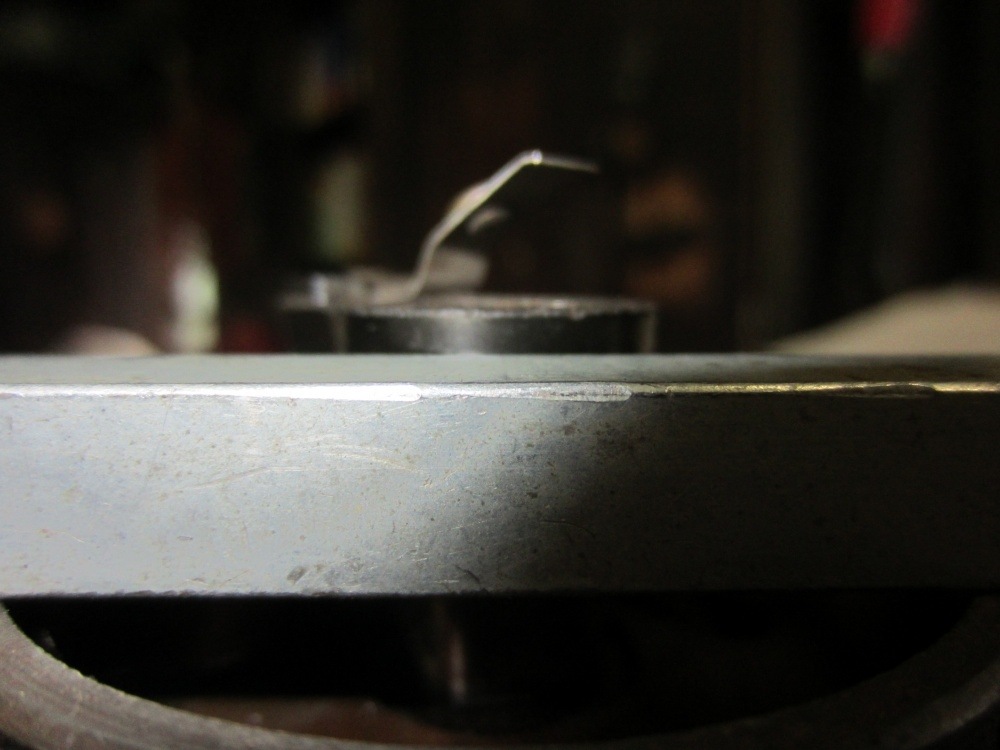
I removed the distributor to check the fit of the new cap and rotor and make some rudimentary measurements to see if the spring contact arm on the rotor would be in contact with the carbon button in the center of the cap. In doing so I see that the original rotor was 0.125 shorter than the replacement I bought. When I put either the old or new cap on with the old short rotor I didn't feel any tension from the spring arm contact. When put the cap on with the new taller rotor I did feel tension from the spring arm contact. Had to push the cap down slight to engage the spring clips that hold the cap in place. Another thing was the old rotor would rock slightly on the dizzy shaft where the new one was a good snag fit with no movement at all.
The caps measured slightly different in height as well. The old cap 1.914, the new cap 1.868. Only 0.046 difference but combined with the 0.125 additional height of the rotor a total of 0.171. So with the new taller rotor and new slightly shorter cap shouldn't have an issue there. Laid a piece of key stock across the distributor housing to show the difference in the rotor heights.
And as far as life time warranty on Snap On tools, ie my compression gauge, that only applies unless they deem the part obsolete in which case it is no longer covered under life time warranty. Not sure how that applies as they still sell compression gauges.
Making small steps as I'm working on a few home projects for the bride.0 -
As a recently retired lawyer, I'm afraid I smiled a little when I read what the Snap On guy said. It's what the legal profession calls a "weasel clause" - the get out clause that lawyers put in a contract that makes a guarantee or warranty meaningless.
There's small wonder nobody loves us !0 -
With some exceptions, of course.
0 -
Park_W said:With some exceptions, of course.0
-
And as far as life time warranty on Snap On tools, ie my compression gauge, that only applies unless they deem the part obsolete in which case it is no longer covered under life time warranty. Not sure how that applies as they still sell compression gauges.If the Snap-On is like most, You might try replacing the schraeder valve in the compression tester with a similar one from an old tire valve stem.0 -
I took the Schraeder valves out of each fitting but the are slightly different than ones I have. I’ll check to see if Snap On had their own version0
Categories
- 36.8K All Categories
- 97 Hudson 1916 - 1929
- 14 Upcoming Events
- 82 Essex Super 6
- 28.5K HUDSON
- 537 "How To" - Skills, mechanical and other wise
- 992 Street Rods
- 150 American Motors
- 171 The Flathead Forum
- 49 Manuals, etc,.
- 72 Hudson 8
- 43 FORUM - Instructions and Tips on using the forum
- 2.8K CLASSIFIEDS
- 597 Vehicles
- 2.1K Parts & Pieces
- 76 Literature & Memorabilia
- Hudson 1916 - 1929 Yahoo Groups Archived Photos