Roof Decking Repair and Water Pump, other solutions
Comments
-
Yeah I was gonna use heat shrink.Toddh said:Splicing stranded wire is the same whether cloth covered or not. Use rubber tubing or shrink tubing to cover the splice
I have my technician license only. I do more listening to SW on one of the several boat anchors I have. Most are old National receivers.
I only have my Tech as well. I have an ICOM 756 pro II I picked up used and it’s really cool. Got everything else ran just need to finish antenna install. I got an ICOM 5100a in my truck; but unfortunately here VHF/UHF is dead. A Google search will probably explain why. 🥺0 -
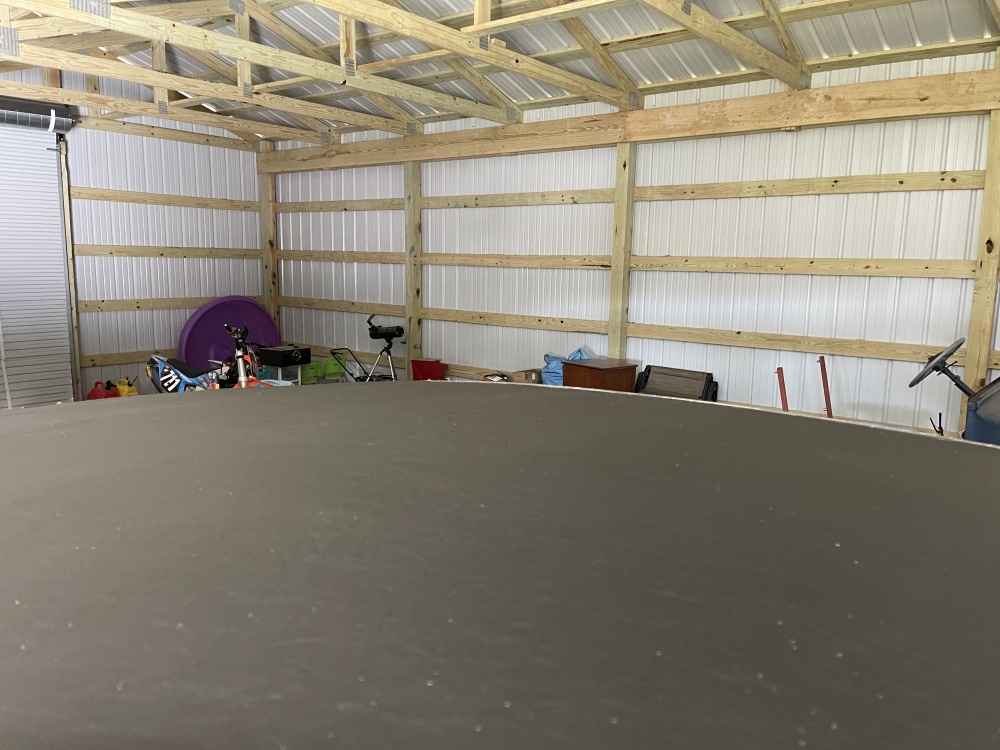
Should I make separate threads for updates on these projects? Now I’m torn cause if someone googles they’ll find the info in the thread.
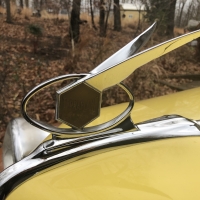
contacted local metal fab places, sent out pics etc waiting on calls back. Reached out to some ford vendors, don’t know what will work perhaps I can take that trim and use it upside down and not use the top that snaps. Iron/aluminum worker place around corner wants me to come by so ima go by this afternoon!0 -
I would just continue with the same thread and keep the subject matter to the 34 restoration only.0
-
Any progress on the 34 ?0
-
Not much honestly. It’s been an incredibly busy week; my youngest was sick, I was on nights. Spent time with family this weekend and now for my 4 day stretch. BUT I’m off 7 days after Thursday so I’ll be finishing it for sure, unless I can start tacking this afternoon. I got all the material and sealant out, it’s ready. Oh I forgot I do need to go by some wire to repair antenna, but that’s incredibly easy.32huson said:Any progress on the 34 ?I did get with that guy who restores shades and will be sending him mine. Really good price imo for what he does.I also got the “Ford” roof trim in today, I honestly don’t know if it’ll work. Worst comes to worse I really don’t think it’ll matter after looking at how it was done originally. The fabric and everything was tacked with some larger tacks with bigger heads, so the trim I feel is more of a reinforcement with its tiny tacks. I may just use the trim piece I have and reinforce that one corner. I mean ima be filling it up with sealant anyways and tacking the shit out of it lol
STILL haven’t gotten around to adding some packing to water pump. Just hard to do anything when I got a baby home sick! I filled up an entire small cup tho from it leaking over the past couple weeks. Just gonna drain the top radiator tank over time I guess lol really hoping adding a couple rings will do the trick without digging out the old stuff seems like a complete pain with no room to work. At least if it’ll slow it down significantly until I can get one from Jeremy.0 -
Family comes first for sure. Could you post a picture of the Ford roof trim piece ?0
-
Absolutely I’ll post this afternoon32huson said:Family comes first for sure. Could you post a picture of the Ford roof trim piece ?0 -
Well it’ll be in the morning I forgot lol. Since it’s been sitting what seems like a month now, the battery has been on a battery tender, should I do anything before starting it up to let it run for a bit? Don’t wanna mess it up at all maybe I’m just being overly cautious. I’m really upset with myself it’s taking so long to get the roof done with my limited time, I do have a guy that can finish it next Tuesday if I so desired but I’m really trying to save money. What I MAY do is get the cotton layer in and tacked, then bring it to him for JUST the vinyl being tacked…cause I really don’t know if tacking it in the front then stretching it and tacking in back and working around corners is gonna keep it from bubbling up like a balloon in the summer.0
-
You must do this out in the sun, otherwise it will not stretch enough and will wrinkle.0
-
FYI: Starter solenoids for the big Austin Healeys have the push button on the bottom.0
-
Are you familiar with the method of building a wooden frame work larger then the roof of the car for pre stretching the material. The material is laid out in the sun then stretched over the framework tacked in place. The frame work is placed on the roof of and then material tacked working from middle of the roof sides forward and back . Excess material trimed off after.0
-
Should not be an issues / prerequisites required in starting the car after a month on a batter tender.Guardian1fox2 said:Well it’ll be in the morning I forgot lol. Since it’s been sitting what seems like a month now, the battery has been on a battery tender, should I do anything before starting it up to let it run for a bit? Don’t wanna mess it up at all maybe I’m just being overly cautious. I’m really upset with myself it’s taking so long to get the roof done with my limited time, I do have a guy that can finish it next Tuesday if I so desired but I’m really trying to save money. What I MAY do is get the cotton layer in and tacked, then bring it to him for JUST the vinyl being tacked…cause I really don’t know if tacking it in the front then stretching it and tacking in back and working around corners is gonna keep it from bubbling up like a balloon in the summer.0 -
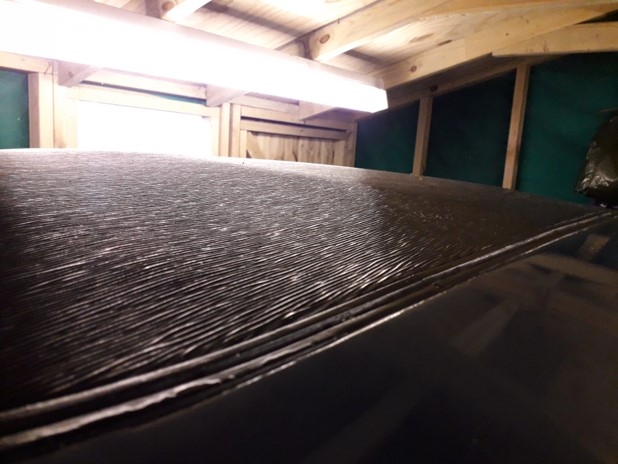
Ima try to grab some boards and do this tomorrow. Also, here is the trim. Sorry I kept forgetting to take a pic. In comparison pic, I do have the ford trim upside down than the way it would be normally used on a ford. At the end of the day it could work, I’d just need to bend it. But I think ima try to use what I got rust be damned. Lol32huson said:Are you familiar with the method of building a wooden frame work larger then the roof of the car for pre stretching the material. The material is laid out in the sun then stretched over the framework tacked in place. The frame work is placed on the roof of and then material tacked working from middle of the roof sides forward and back . Excess material trimed off after.0 -
Oops forgot pics
 0
0 -
Ok so you would fill that with some kind of sealer after it is installed and tacked down ?0
-
Water pump packing was a fruitless endeavor. I’ll just have to get one from Jeremy. Figured I’d give an update on that lol got door panel all back together with lubricated tracks etc, new vent glass installed.Got a guy that’s gonna stretch and tack the vinyl either today or tomorrow. So at least that will be done, then I can focus on sealing and trim.So much to do so little time0
-
The water pump shaft may be badly corroded and tearing up the packing leading to continued leaks. If that is the case shaft made of stainless steel would be advisable.0
-
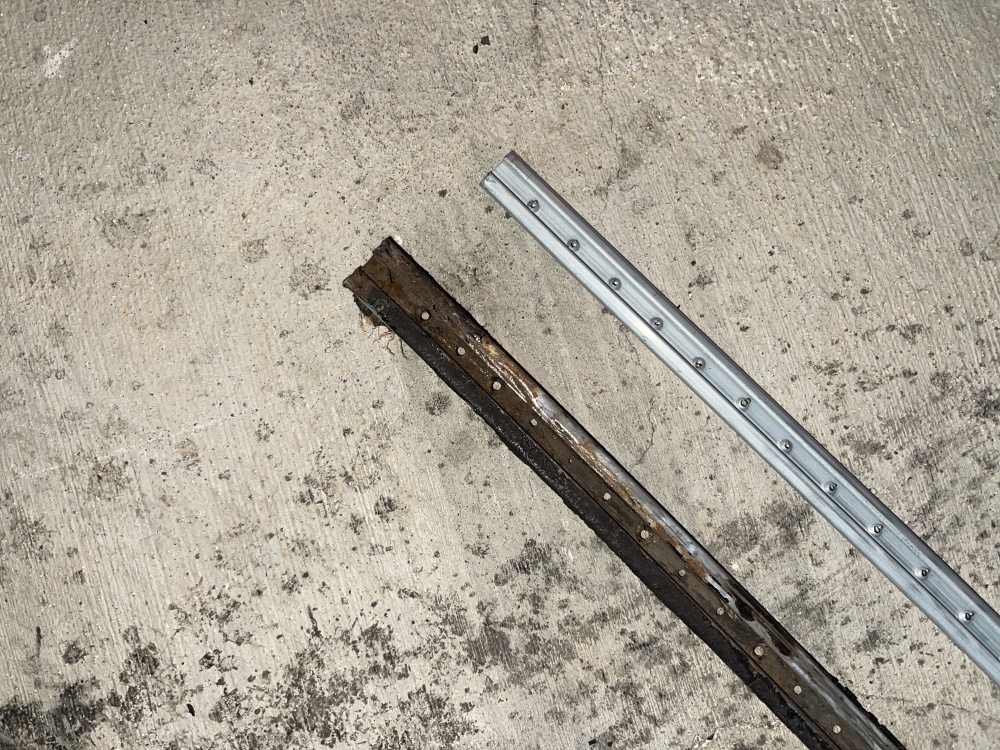
Yeah I’ve already talked to Mr. Burris ima get one from him when I got some money saved up. Finished cleaning the tacking strip, BOY that was an incredibly tedious job and I hated every minute of it. Fighting the dried sealant, old material, trying not to make holes in the tacking strip…AND trying not to scratch the paint any more than it already was lol. I see why people just weld a metal roof in. I dropped it off to the guy a little while ago, it drove beautifully. The ticking of the ignition is something ima have to get used to as I always think it’s something wrong 😂.Courtesy Man said:The water pump shaft may be badly corroded and tearing up the packing leading to continued leaks. If that is the case shaft made of stainless steel would be advisable.When stopping I take it out of 3rd into neutral and after stopping I put it into 2nd to take off, once RPMs come down i find it’s easier to put into gear. Earlier tho I had some trouble getting it out of second but jiggled it a bit and it came out. It’s all rebuilt so I’m just gonna figure it’s the nature of the beast and I’m just new to it lol. Boy I love driving it and there’s something about just going slow and enjoying the drive rather than getting somewhere as fast as possible. Loved it and can’t wait to get that water pump done and that’ll be a wrap for a while; I need to recover lol0 -
Better check your transmission interlock linkage and make sure it’s set correctly. It’s on the left side of the trans.Gear changing is not the same as later cars. I start in first and am in third by 20mph.0
-
How does that work?Toddh said:Better check your transmission interlock linkage and make sure it’s set correctly. It’s on the left side of the trans.Gear changing is not the same as later cars. I start in first and am in third by 20mph.Yeah I do the same. Shifting up and into neutral is never a problem. Just when at stop light and going from neutral to 2nd depends on RPMs if it goes in smooth or with a little slight grind. Not much at all, it would be barely.0 -
Picked up the ‘34 from guy today the top looks great IMO. I’ll take pics soon. He heated up the vinyl and stretched it as he secured it.Man going into second from 3rd on the way home twice it was a big CLUNK! not sure why. I tried double clutching, clutch into neutral from third, then clutch into second, little better but idk. Just odd. Ima have to read the service manual tonight I’m sure it’s just an adjustment.Water pump has GOT TO GO. lol glad I put the cup under it while it was there cause it filled up bottom from leaking. I need to convince wife to let me have $400 of her yearly bonus so I can buy a spare and have it rebuilt while I drive around with the one I got! 😂
OH! I test fit one of the tacking strips make sure it’ll fit well, indeed it will. So that’ll be the next adventure. I’m working on a model T as well; I basically got it for free. It’s basically a frame and motor etc, no body. Been sitting for about 6 years after motor rebuild…so we’ll see what happens; maybe I’ll have it running tomorrow! Long term goal is a period racer/speedster. On a budget so that’s gonna take backseat until I get the Hudson where I want it. Although I got a model A Ford truck bed that came with it I need to get rid of in great shape. 🤷♂️0 -
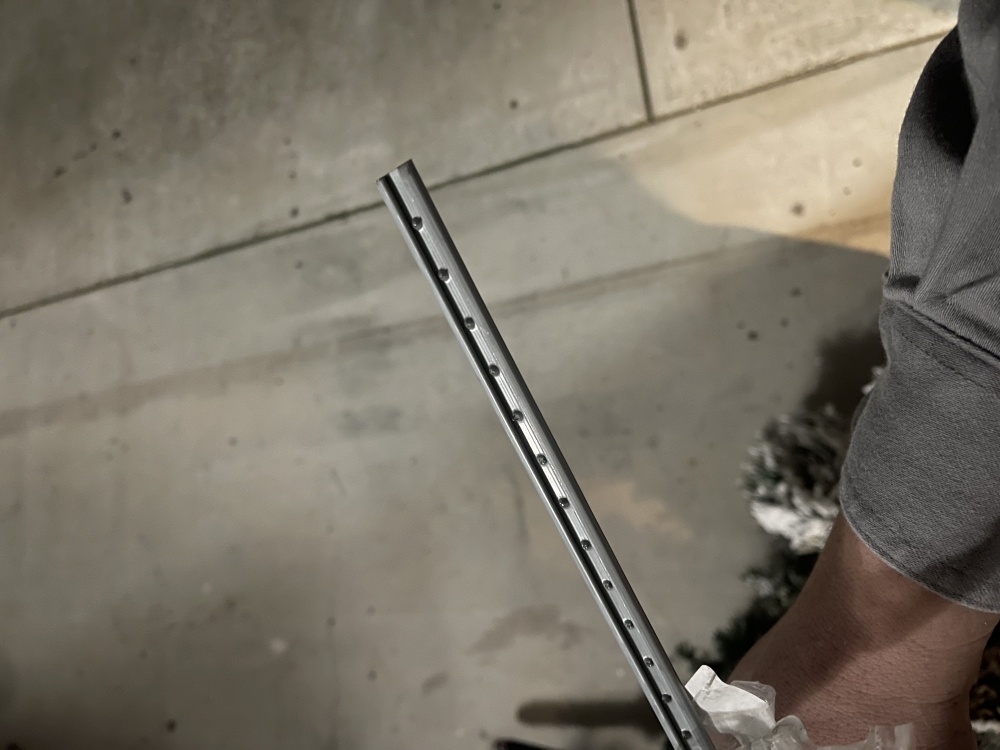
Forgot to post pics, here are some! Think it came out GREAT! The trim fits perfectly where it’s supposed to so this week I’ll seal it, tack trim in, and then silicone the top of trim; then this era will finally be over. Don’t mind the shop junk in the background, I still need to clean and get rid of a bunch of stuff since the hurricane…it’s been down on my list


 0
0 -
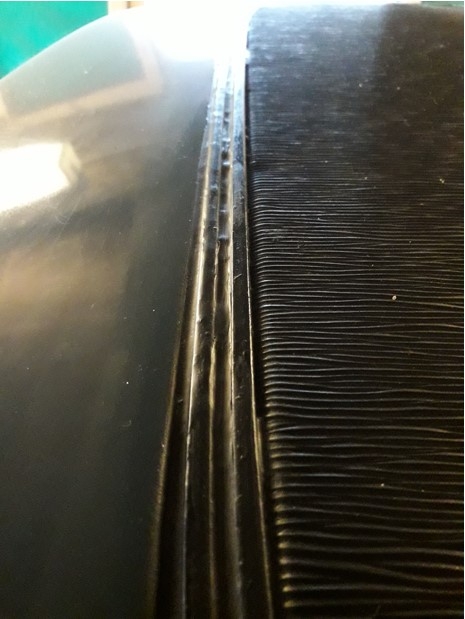
Looks good in this view. I don't understand what the trim is tacked to. How about some close ups of what your guy tacked the vinyl too and the trim piece you are tacking down and the sealer being applied,0
-
So in the channel where the trim was, there is a fibre tacking strip that’s laid in there. Not sure what it’s made of but that’s what it’s called. I know on other makes it’s usually wood that’s a part of the roof that you’re tacking into, this seems pretty thin and lid in there in sections. The material is all stapled in the channel to the strip, then, sealant will be applied on top of these staples and materials, and the trim will be pushed down into the sealant, and tacked in the channel. Then I’ll most likely if possible cover the tack heads with the sealant in the middle of the channel and allow to dry. Once this is all complete, then will do finally application of black silicone. I forgot to mention I’ll be soaking the trim pieces in evaporust tomorrow, clean, and paint black with rust inhibiting paint. You’re not gonna see the trim exposed but just wanna be safe.32huson said:Looks good in this view. I don't understand what the trim is tacked to. How about some close ups of what your guy tacked the vinyl too and the trim piece you are tacking down and the sealer being applied,0 -
Courtesy of Fogey, I’m hoping to have similar results here:
 0
0 -
Now I am understanding better thanks. Who or where is the fiber strip available from ?0
-
Man don’t get me lying. I used the original one, but it probably won’t last another re-roof. You could possibly use wood…someone else may be able to answer that; as I’m not exactly sure how thick the strip is. I believe the strip is tacked itself into some wood. I didn’t go any further than I needed to. Perhaps something can be mixed and poured in that’ll harden to attach to?32huson said:Now I am understanding better thanks. Who or where is the fiber strip available from ?0 -
Thats cool. I am using wood on mine.0
-
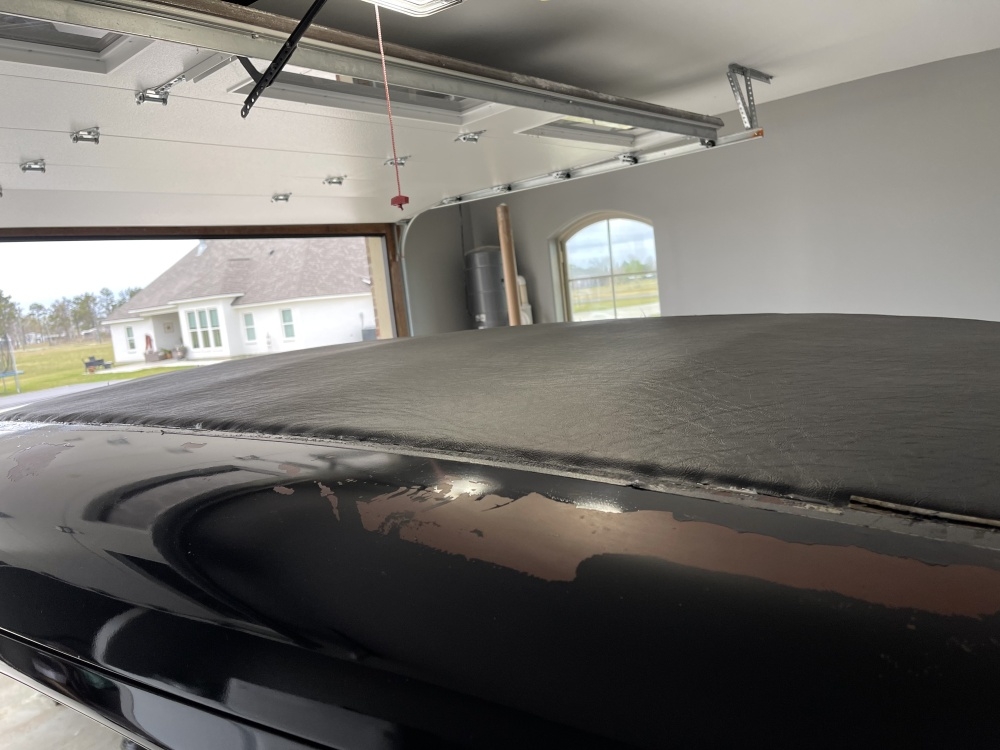
We are finally getting extremely close to closing this thread on roof fabric forever lol.Got the front trim tacked back…boy…I learned a lot and what a pain in the A$$ it was.First, the sealant I used is by all means great, and I would say is probably the closest equivalent to what they used back then but better. It’s more runny, fills in any gaps etc, and it takes over night to set…WHICH was very important lol
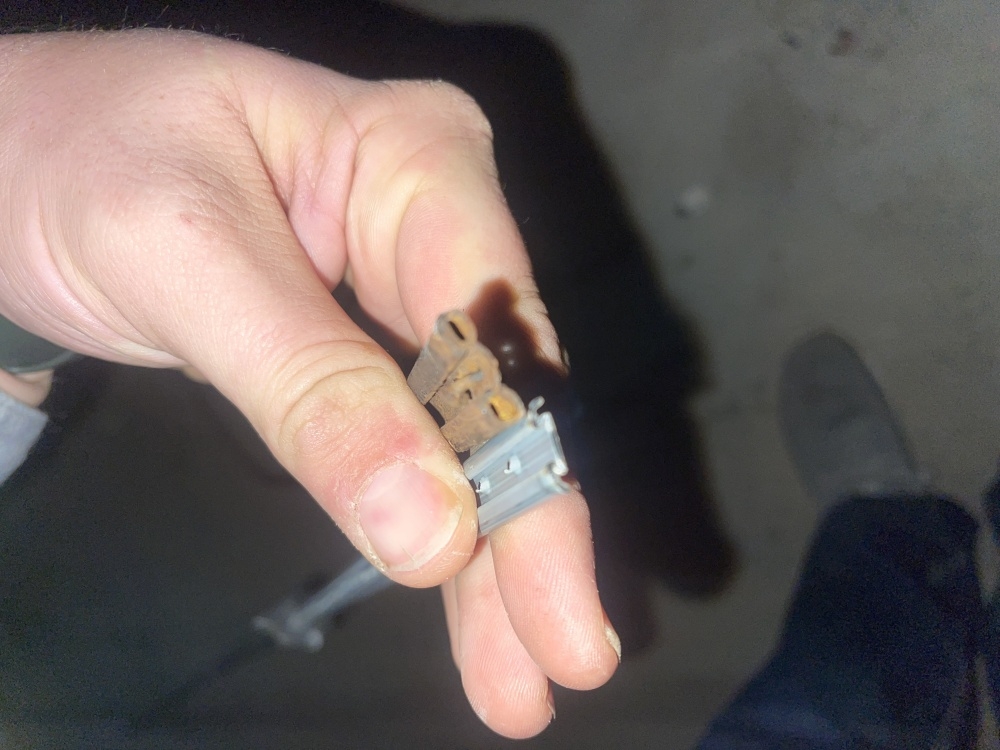
I placed sealant, it filled the gap, then I took the front tacking strip and put in place. 1st mistake, I didn’t try it before hand cause I was as in a hurry…and didn’t realize that removing the rust and cleaning it up resulted in it bending a bit. This caused massive sealant covered headache. Then…the tacks I used had slightly larger heads than factory. So I basically had to use a small punch and use a larger hammer to tack it into place. After finally getting a rhythm and figuring out how to tack it, started on one end, put about 4-5, then about every 1.5 inch or so. Then in corners I pretty much put one in every hole then again 1.5” along the straight run.Unfortunately with the rusted out corner sections it proved to be a big pain. LUCKILY the larger tack heads helped me here by grabbing more of the trim. Once I got it going on the bad ends, I used my larger hammer and tapped the trim in since it was being difficult and it got back in shape and filled the gap and as I would tap I would add a tack in the corner. Inside the center of the trim my tacking job looks a little rough, but the trim looks decent considering it’s shape!I took a break I’ll do other two pieces next weekend. I’ll fill the center of the trim with the sealant then silicone like Fogey did…and FINALLY I can move on lol. I’ll take pics soon.0 -
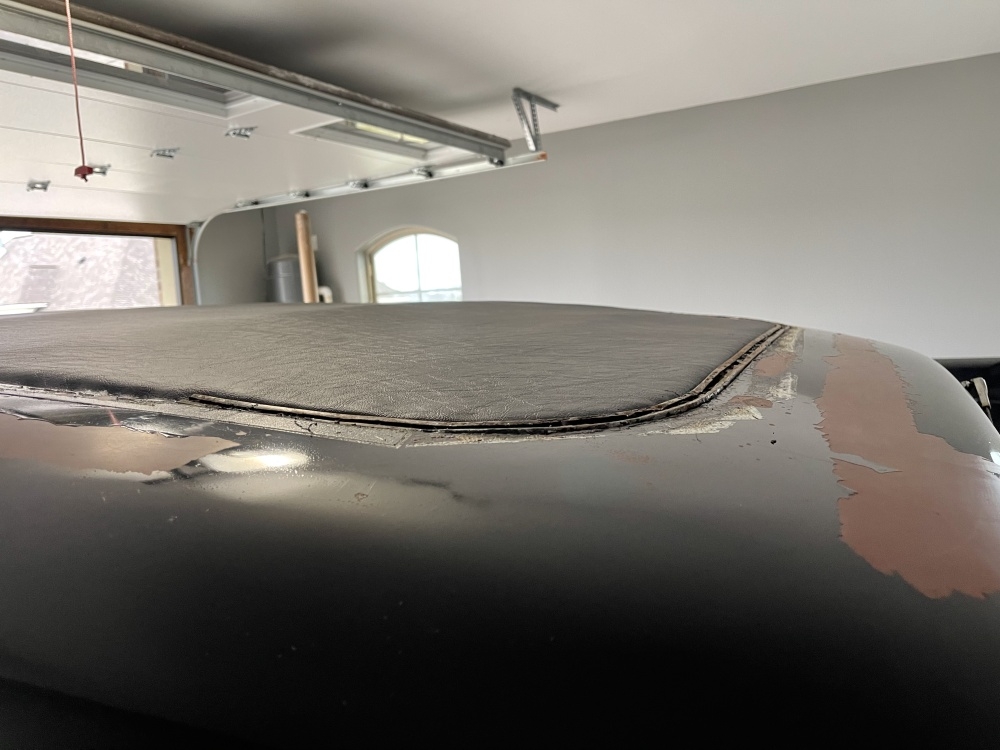
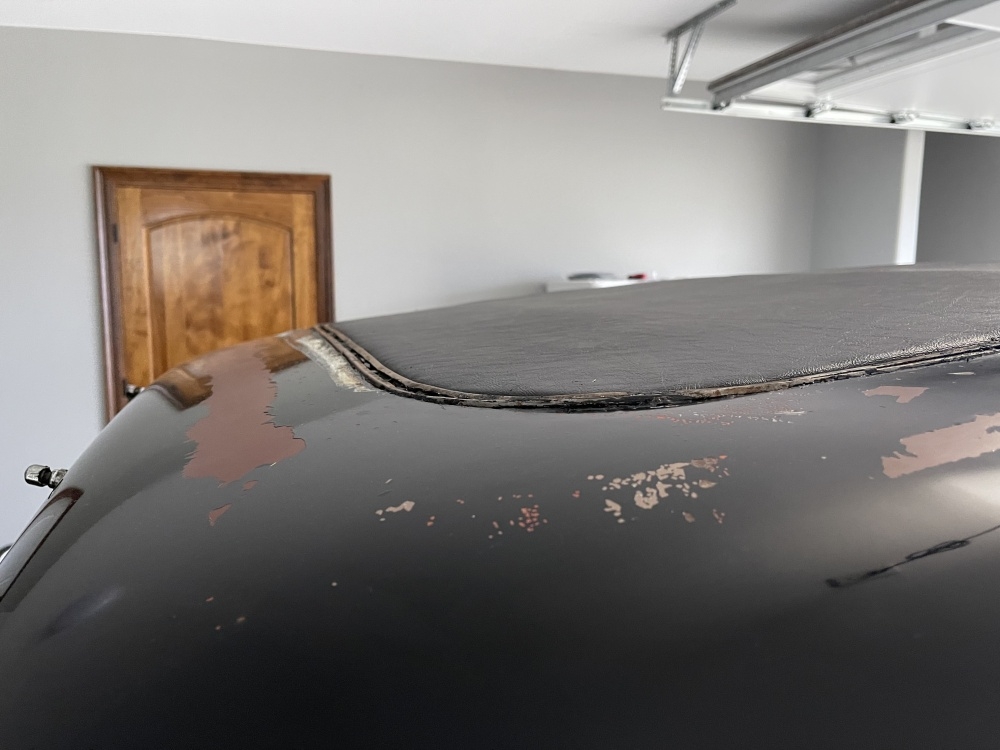
Okay here are some pics of the front trim tacked and sealed underneath in place. Still have to seal tack heads then silicone. I’m not completely happy with how it turned out, but I’m not sure how else it would’ve turned out with the trim in such bad shape. After rust removal, there wasn’t much left in either corner. The other 2 pieces are still in amazing shape. I used tacks that resembled the original with larger tack heads. This posed a problem with my hammer, so I had to use a small punch to drive each one and BOY it was a frustrating endeavor. In the end, there’s a ton of tacks in it and the sealant set and it’s definitely not going anywhere but the corners especially on the driver side isn’t flush like I wanted. After getting coated black maybe it won’t be as bad but it just got me a little frustrated and upset as I’m kind of OCD with this stuff. To fix it will prolly be more expensive and time consuming…so perhaps i should just leave it? Or maybe I’m being too critical. Still gotta do the backs.

 0
0


Categories
- 37K All Categories
- 119 Hudson 1916 - 1929
- 21 Upcoming Events
- 100 Essex Super 6
- 28.7K HUDSON
- 595 "How To" - Skills, mechanical and other wise
- 995 Street Rods
- 151 American Motors
- 185 The Flathead Forum
- 49 Manuals, etc,.
- 79 Hudson 8
- 45 FORUM - Instructions and Tips on using the forum
- 2.9K CLASSIFIEDS
- 612 Vehicles
- 2.2K Parts & Pieces
- 78 Literature & Memorabilia
- Hudson 1916 - 1929 Yahoo Groups Archived Photos