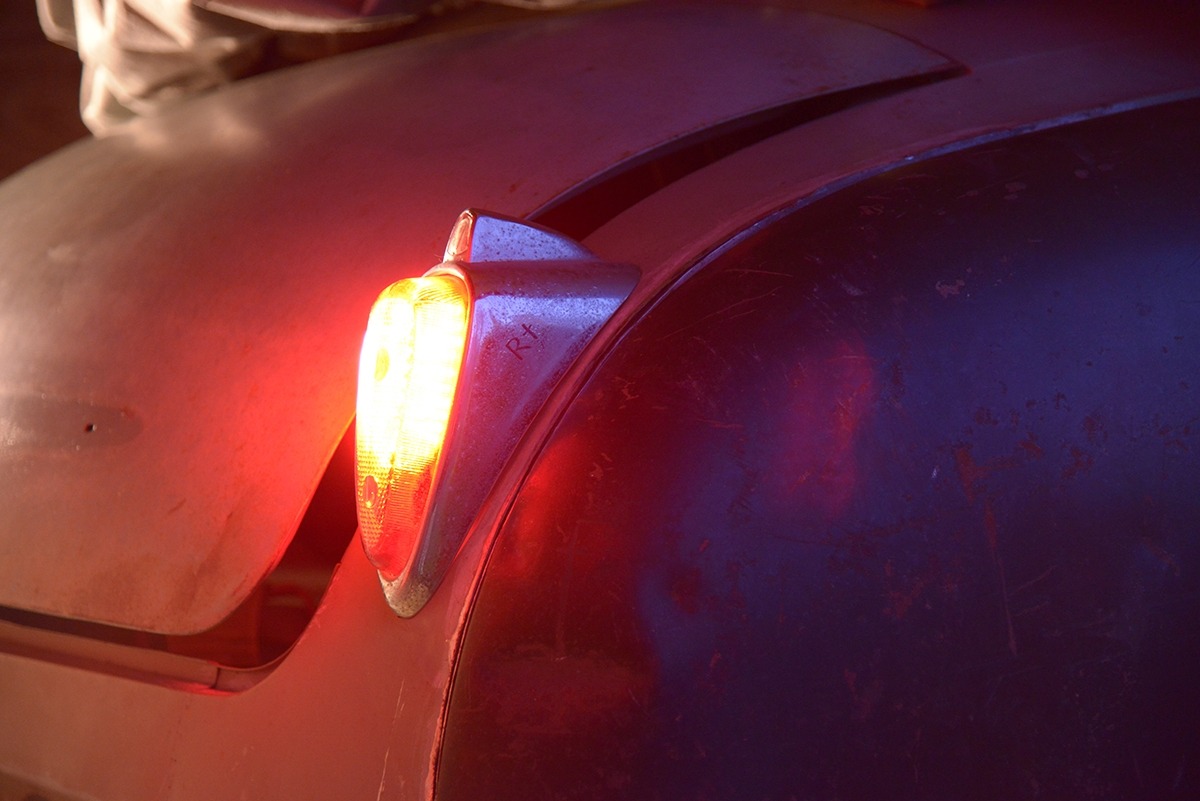
A little update on the "Sleeper"! Uh, I mean Lola!
Comments
-
I'm sorry Dan, I had just made the one panel!
Ken, Yes, I used a shrinker/stretcher but I first made the pattern and started the fold over for the curves with a crease using a bead roller, then shrunk the outer edges to match. The crease made it much easier to get the results I wanted. The metal is 19ga. See photo above.
Peace,
Chaz0 -
Fantastic work my friend. I only aspire to do work like that! Keep it up.
0 -
You've done some fantastic work on this car Chaz. I'm looking forward to seeing more progress. It's always interesting to see. ...By the way, where are you getting 19ga.? I lost my source here in Southern California. It's become too hard to get here.0
-
Thanks for the compliment. I had purchased a couple of sheets of 19ga. while I was attending the annual MetalMeet in Oblong Illinois back in 2007. Since then I have not been able to track down any more. Another way to find something suitable is using large flat panels from earlier cars. My fenders skirts for my '47 was made from a hood of a Chevy Suburban. I'll check around again though. As a side note, there are "metal shaping meets" held in Calif, Oregon and Washington throughout the year. By contacting some of them, you may be able to find some 19ga.
Peace,
Chaz0 -
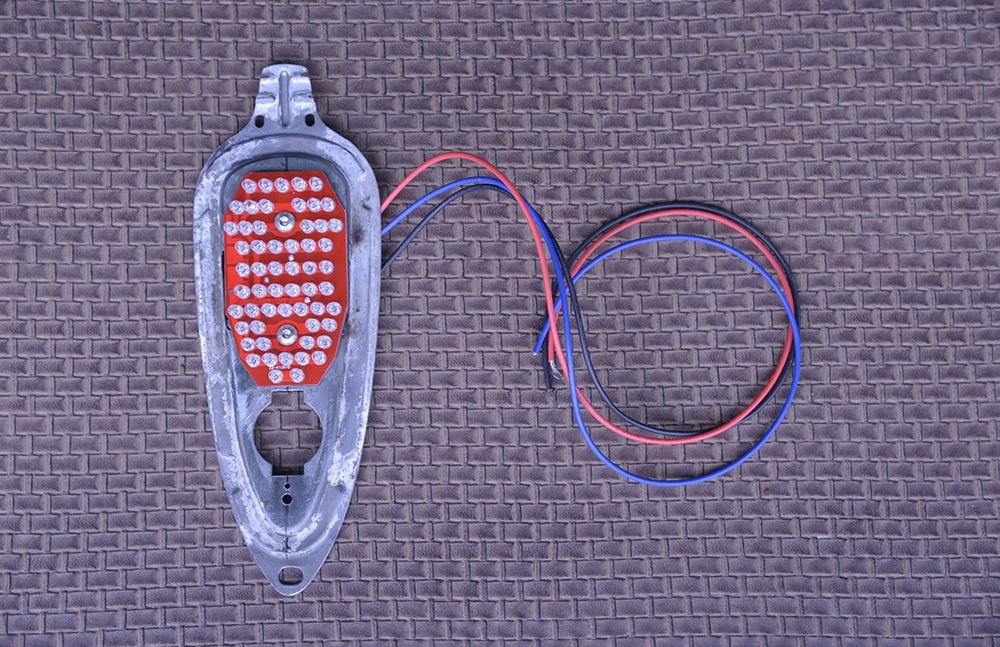
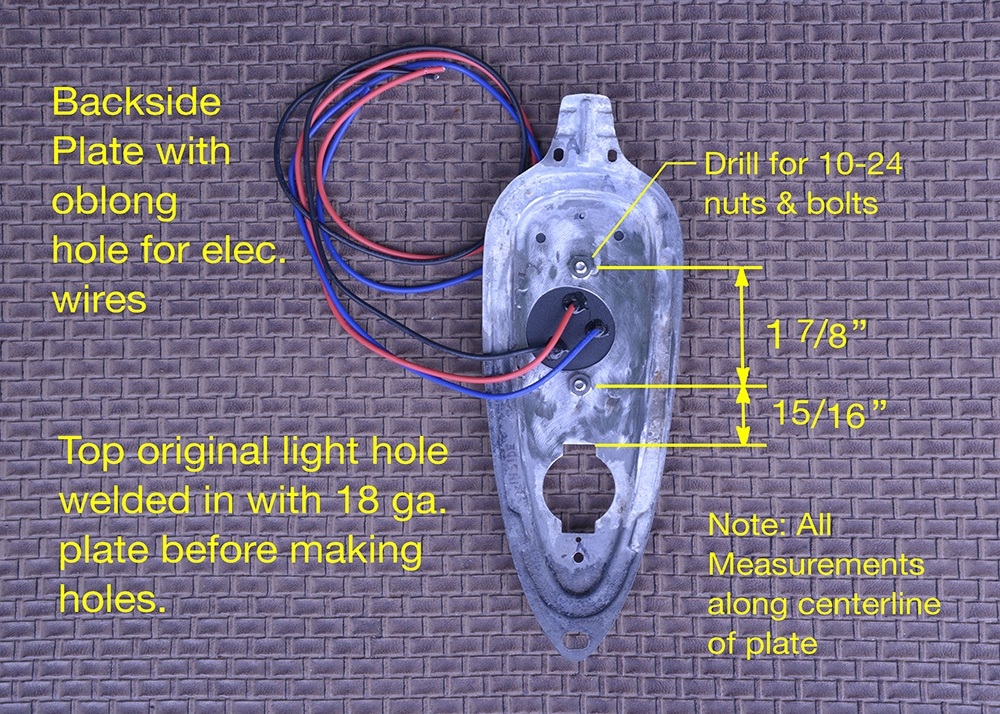
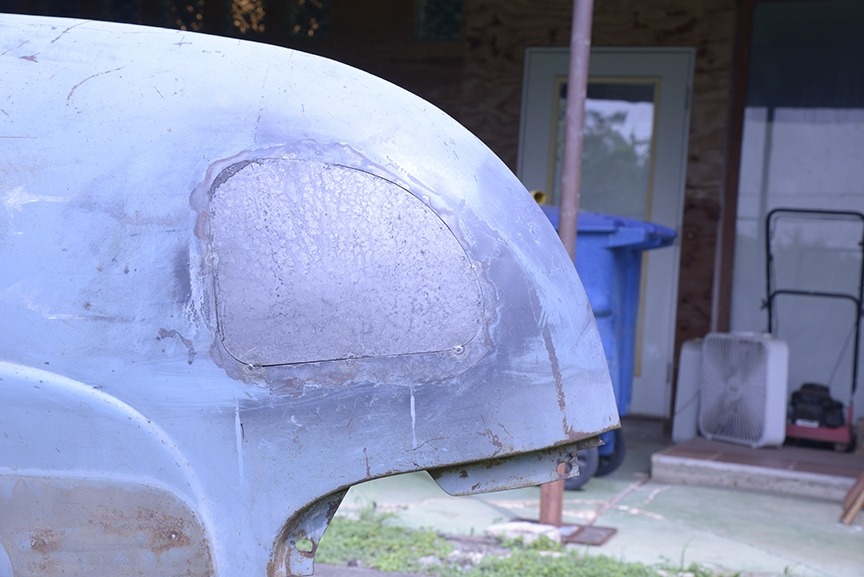
Oh my, I'm back! I did a little work on my tail light while we are having to stay in place by the coronavirus. I found out that the LED light kit for the Jaguar 150 fit perfectly in the same area on my 51 Hudson. I had to do a little welding of a flat plate but that was all. Nothing an old guy like myself couldn't do.
0 -
-
Great to see an update on this awesome build!

0 -
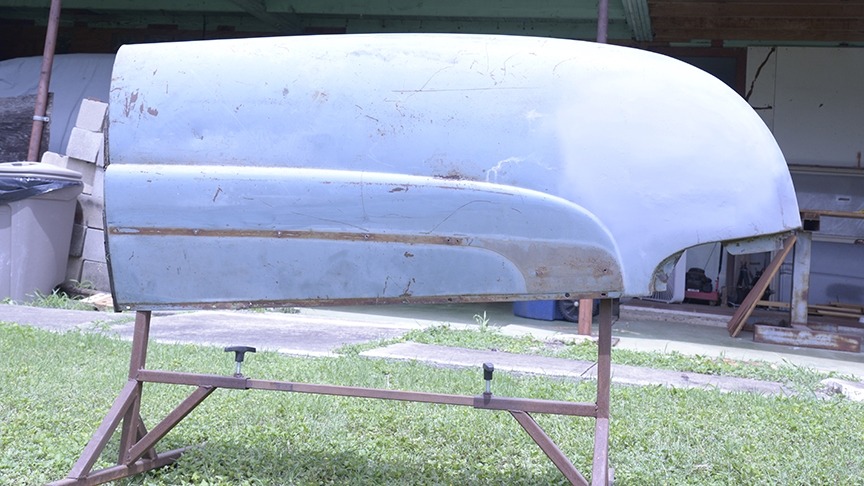
I did a little work last week with my English wheel. Can't go much further due to not being able to get out and visit my favorite junk yard on the Southside. But here's a sneak peek of part of my latest project on Lola! Oh, and my English wheel is also hand made by me.
Peace, Chaz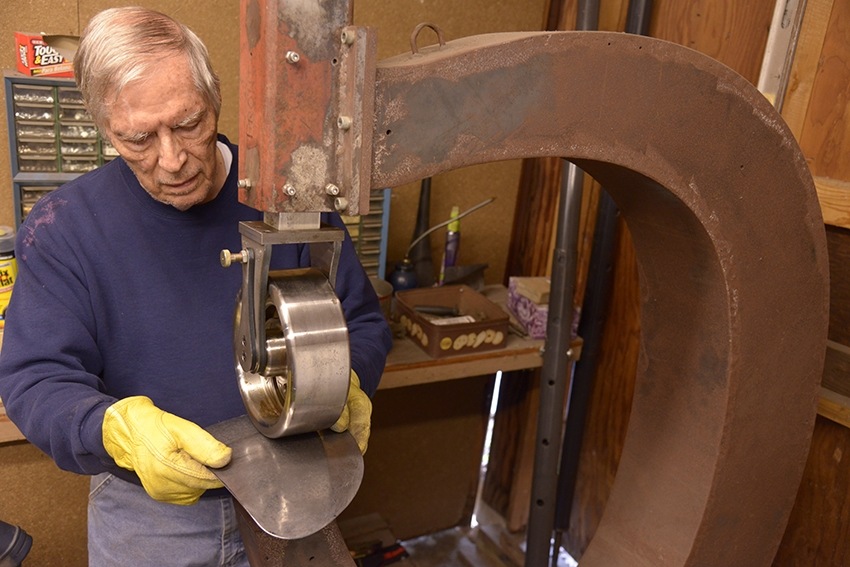 0
0 -
Very nice looking wheel!!!
0 -
It gets the job done. It takes an engine hoist just to move it, it's so heavy. Here is an example of the finished piece in place. The LR tail light will rotate upwards to allow filling the gas tank. Can't finish that until I can safely go out and get what I need.
0 -
0 -
Have you done the tail light mechanism yet? I'm curious to know if it will be manual or electric? Where would I find electrically actuated thingys like that, should I want to have an automatic door open up somewhere?
0 -
It will be mechanical! One less thing to go wrong at the most inopportune time.0
-
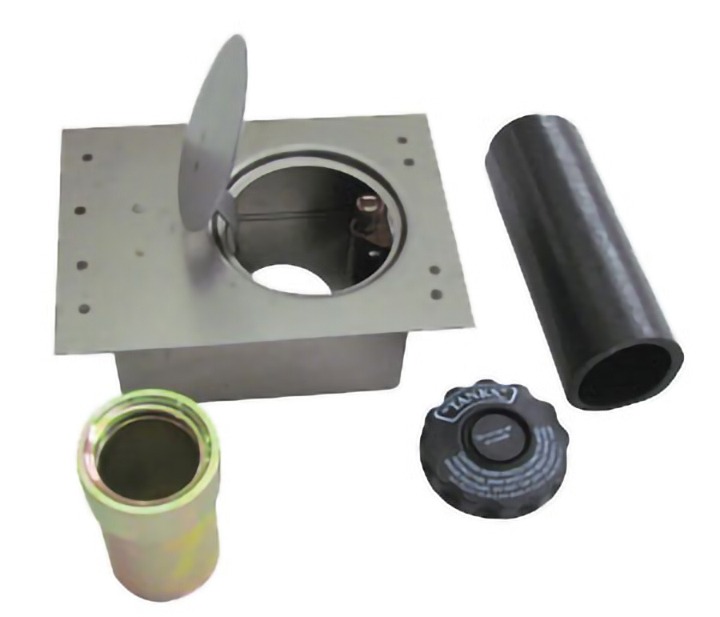
I had another one of my wild and crazy ideas. Who knows? It just might work. I ordered this gas cap cover from Tanks Inc. I'm thinking that I can mount my tail light/bezel to it so it is hinged and moves up and down in place. The box below connects to the filler tube to the gas tank. (see previous LED tail light entries above, left tail light of course) Stay tuned for further developments! No guts, no glory!
0 -
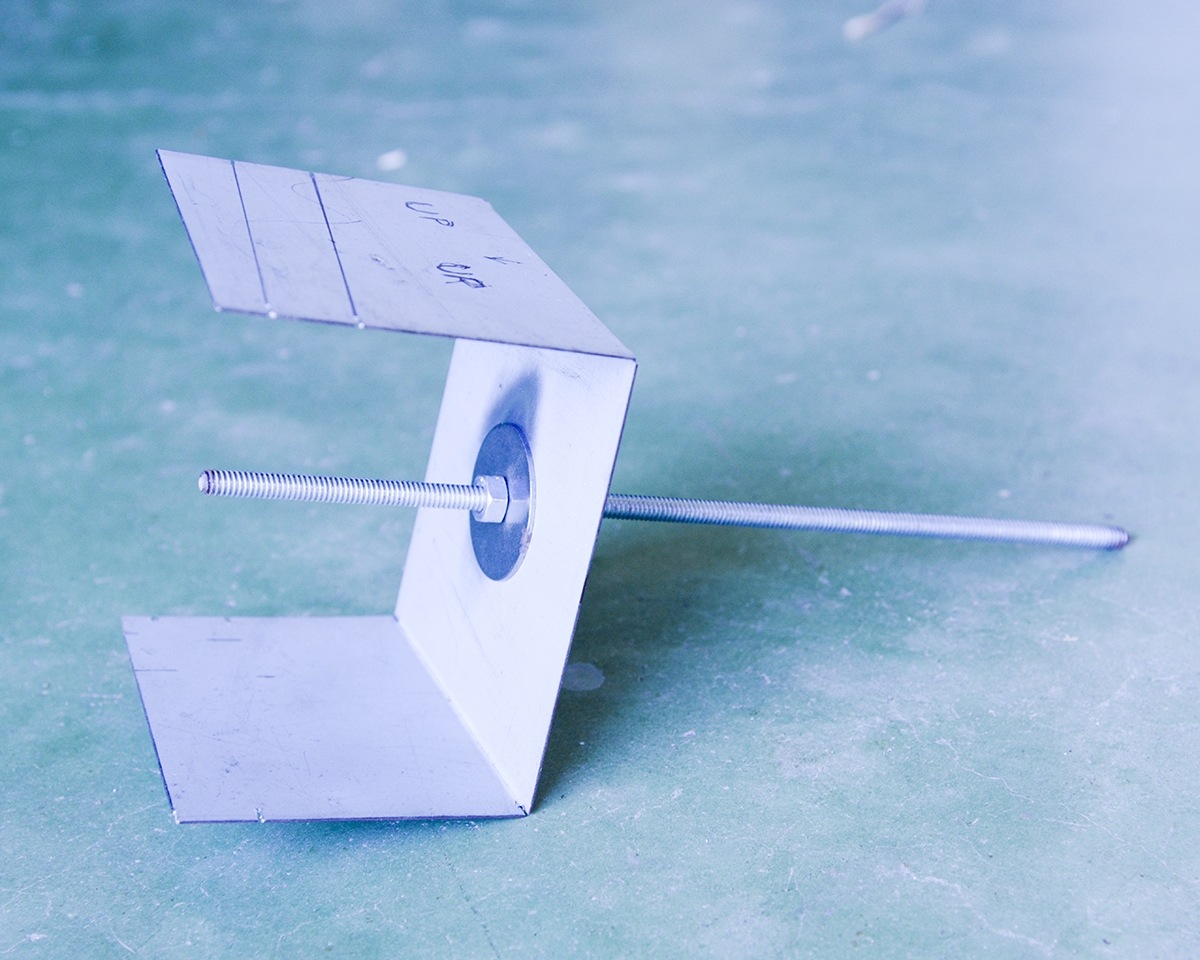
Hey Guys, a little progress this weekend. After spending all that money on that part from Tanks Inc., I cut it in half, taking the top off from the lower box that carries the filler tube and cap. Yikes! I then made me a simple alignment jig to figure out how everything would fit correctly. Better to make the adjustments now rather than later after everything is welded in place and have to redo it. Once I was satisfied with where the projections aligned with the tank hose, I started cutting and welding my box to fit the curvature of the back side of the body. I made and tack welded some L-brackets to the box and assembled it all. It fit well within tolerances. I'll make some support brackets to hold the elevated filler hose steady later. Peace, Chaz
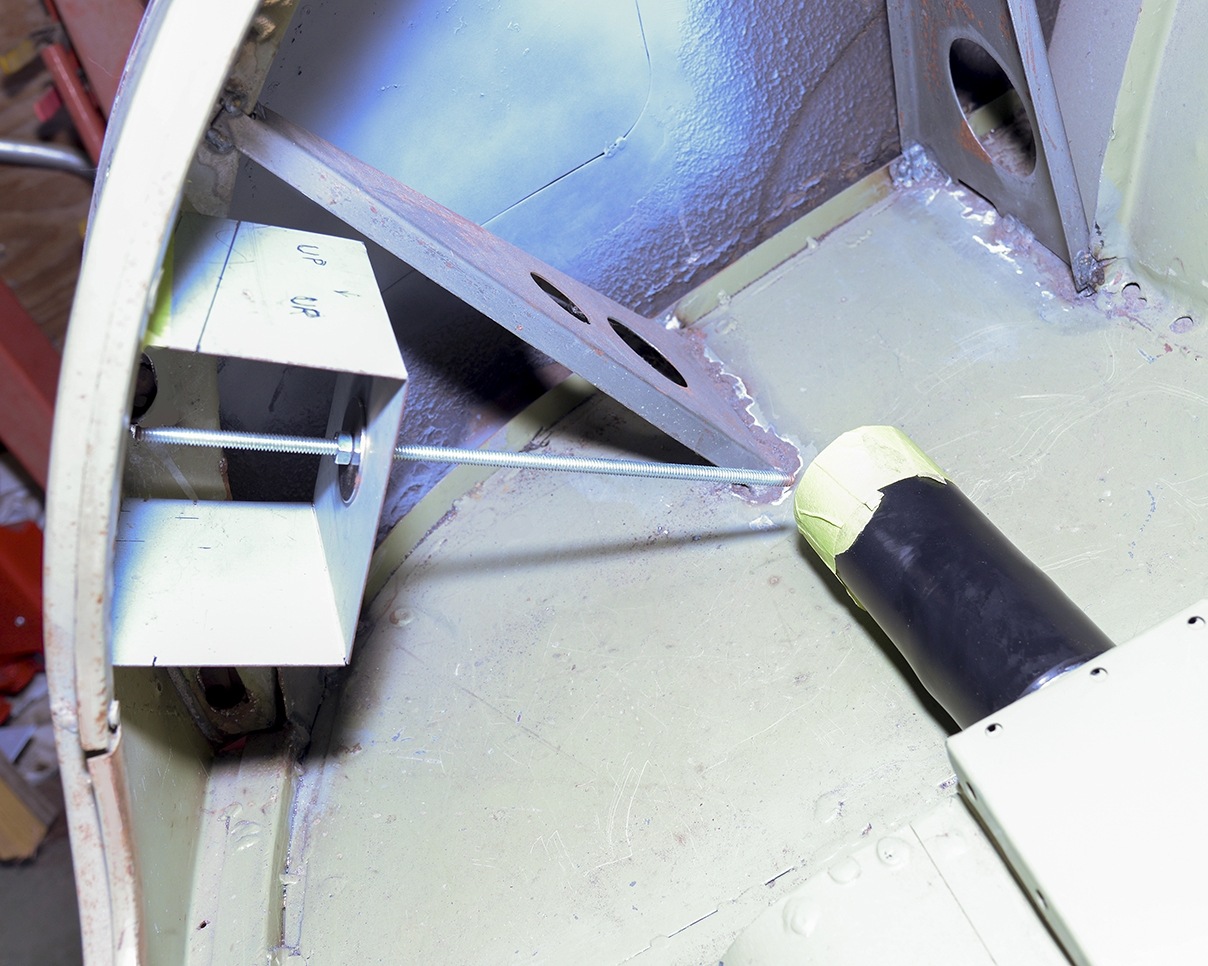
Ta DAA.....! The filler cap is already secured inside the box. Of course I'll need a drain hose at the bottom of the box and hose clamps but that'll come later. Right now I'm going to be working on the hinge to operate the tail light.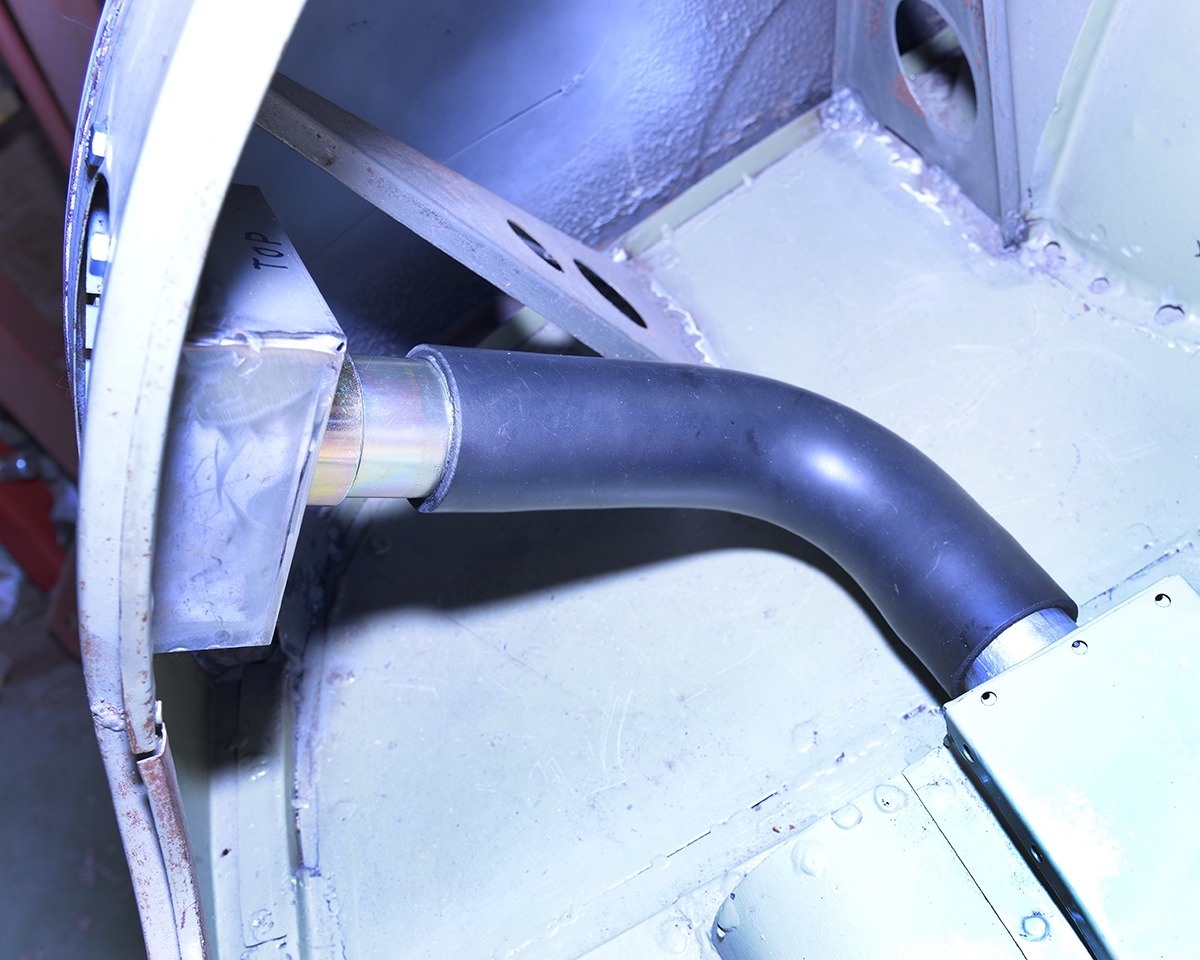
0 -
Fantastic!!

0 -
Did it occur to you that mixing gas fumes and electricity may not be the thing to do?0
-
I believe 1956 Chev had the tail light swing out to access the gas filler pipe?
Ivan L.0 -
Also the 1958 Oldsmobile supper 880
-
Nice idea, well executed. Would love to see more of it's specifics.0
-
As ever some fantastic work Chaz0
-
A little more designing before the real thing. This cardboard mock-up saves a lot of problems down the road. Obviously, the hinged u-shape part will be connected to a flat plate inside the tail light bezel. After this I'll figure out how I'll raise and lower it. Thinking probably some sort of screw jack. Don't know yet!
Just for the record for you naysayers out there, I headed up an automotive engineering drafting department some years ago so I do have an idea as to how things go together.
Tail Light Down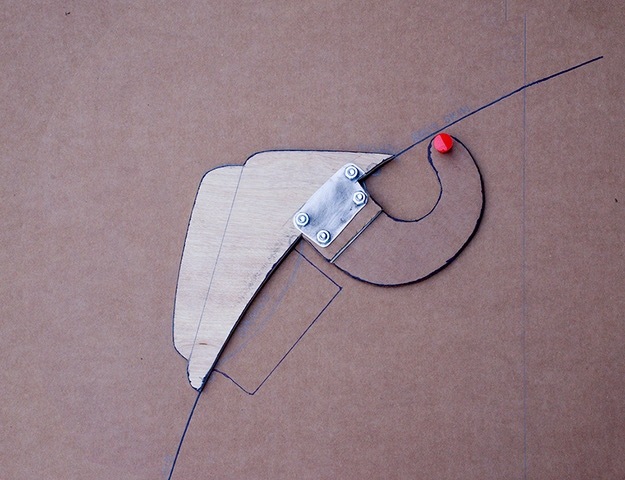
Tail Light Up. As per previous photos, the box is where the gas filler is located.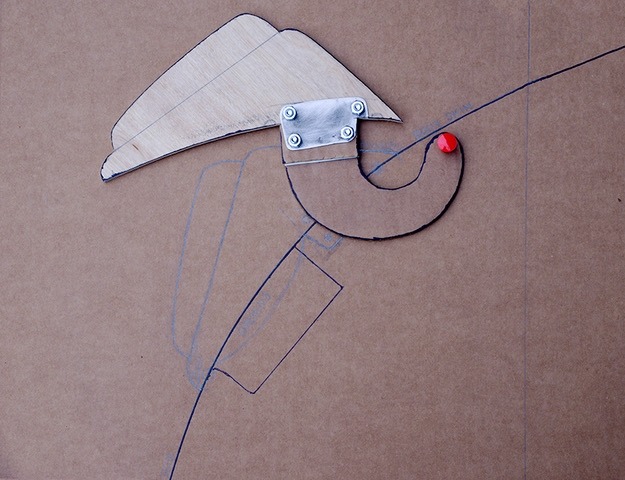
0 -
That is Awesome.
0 -
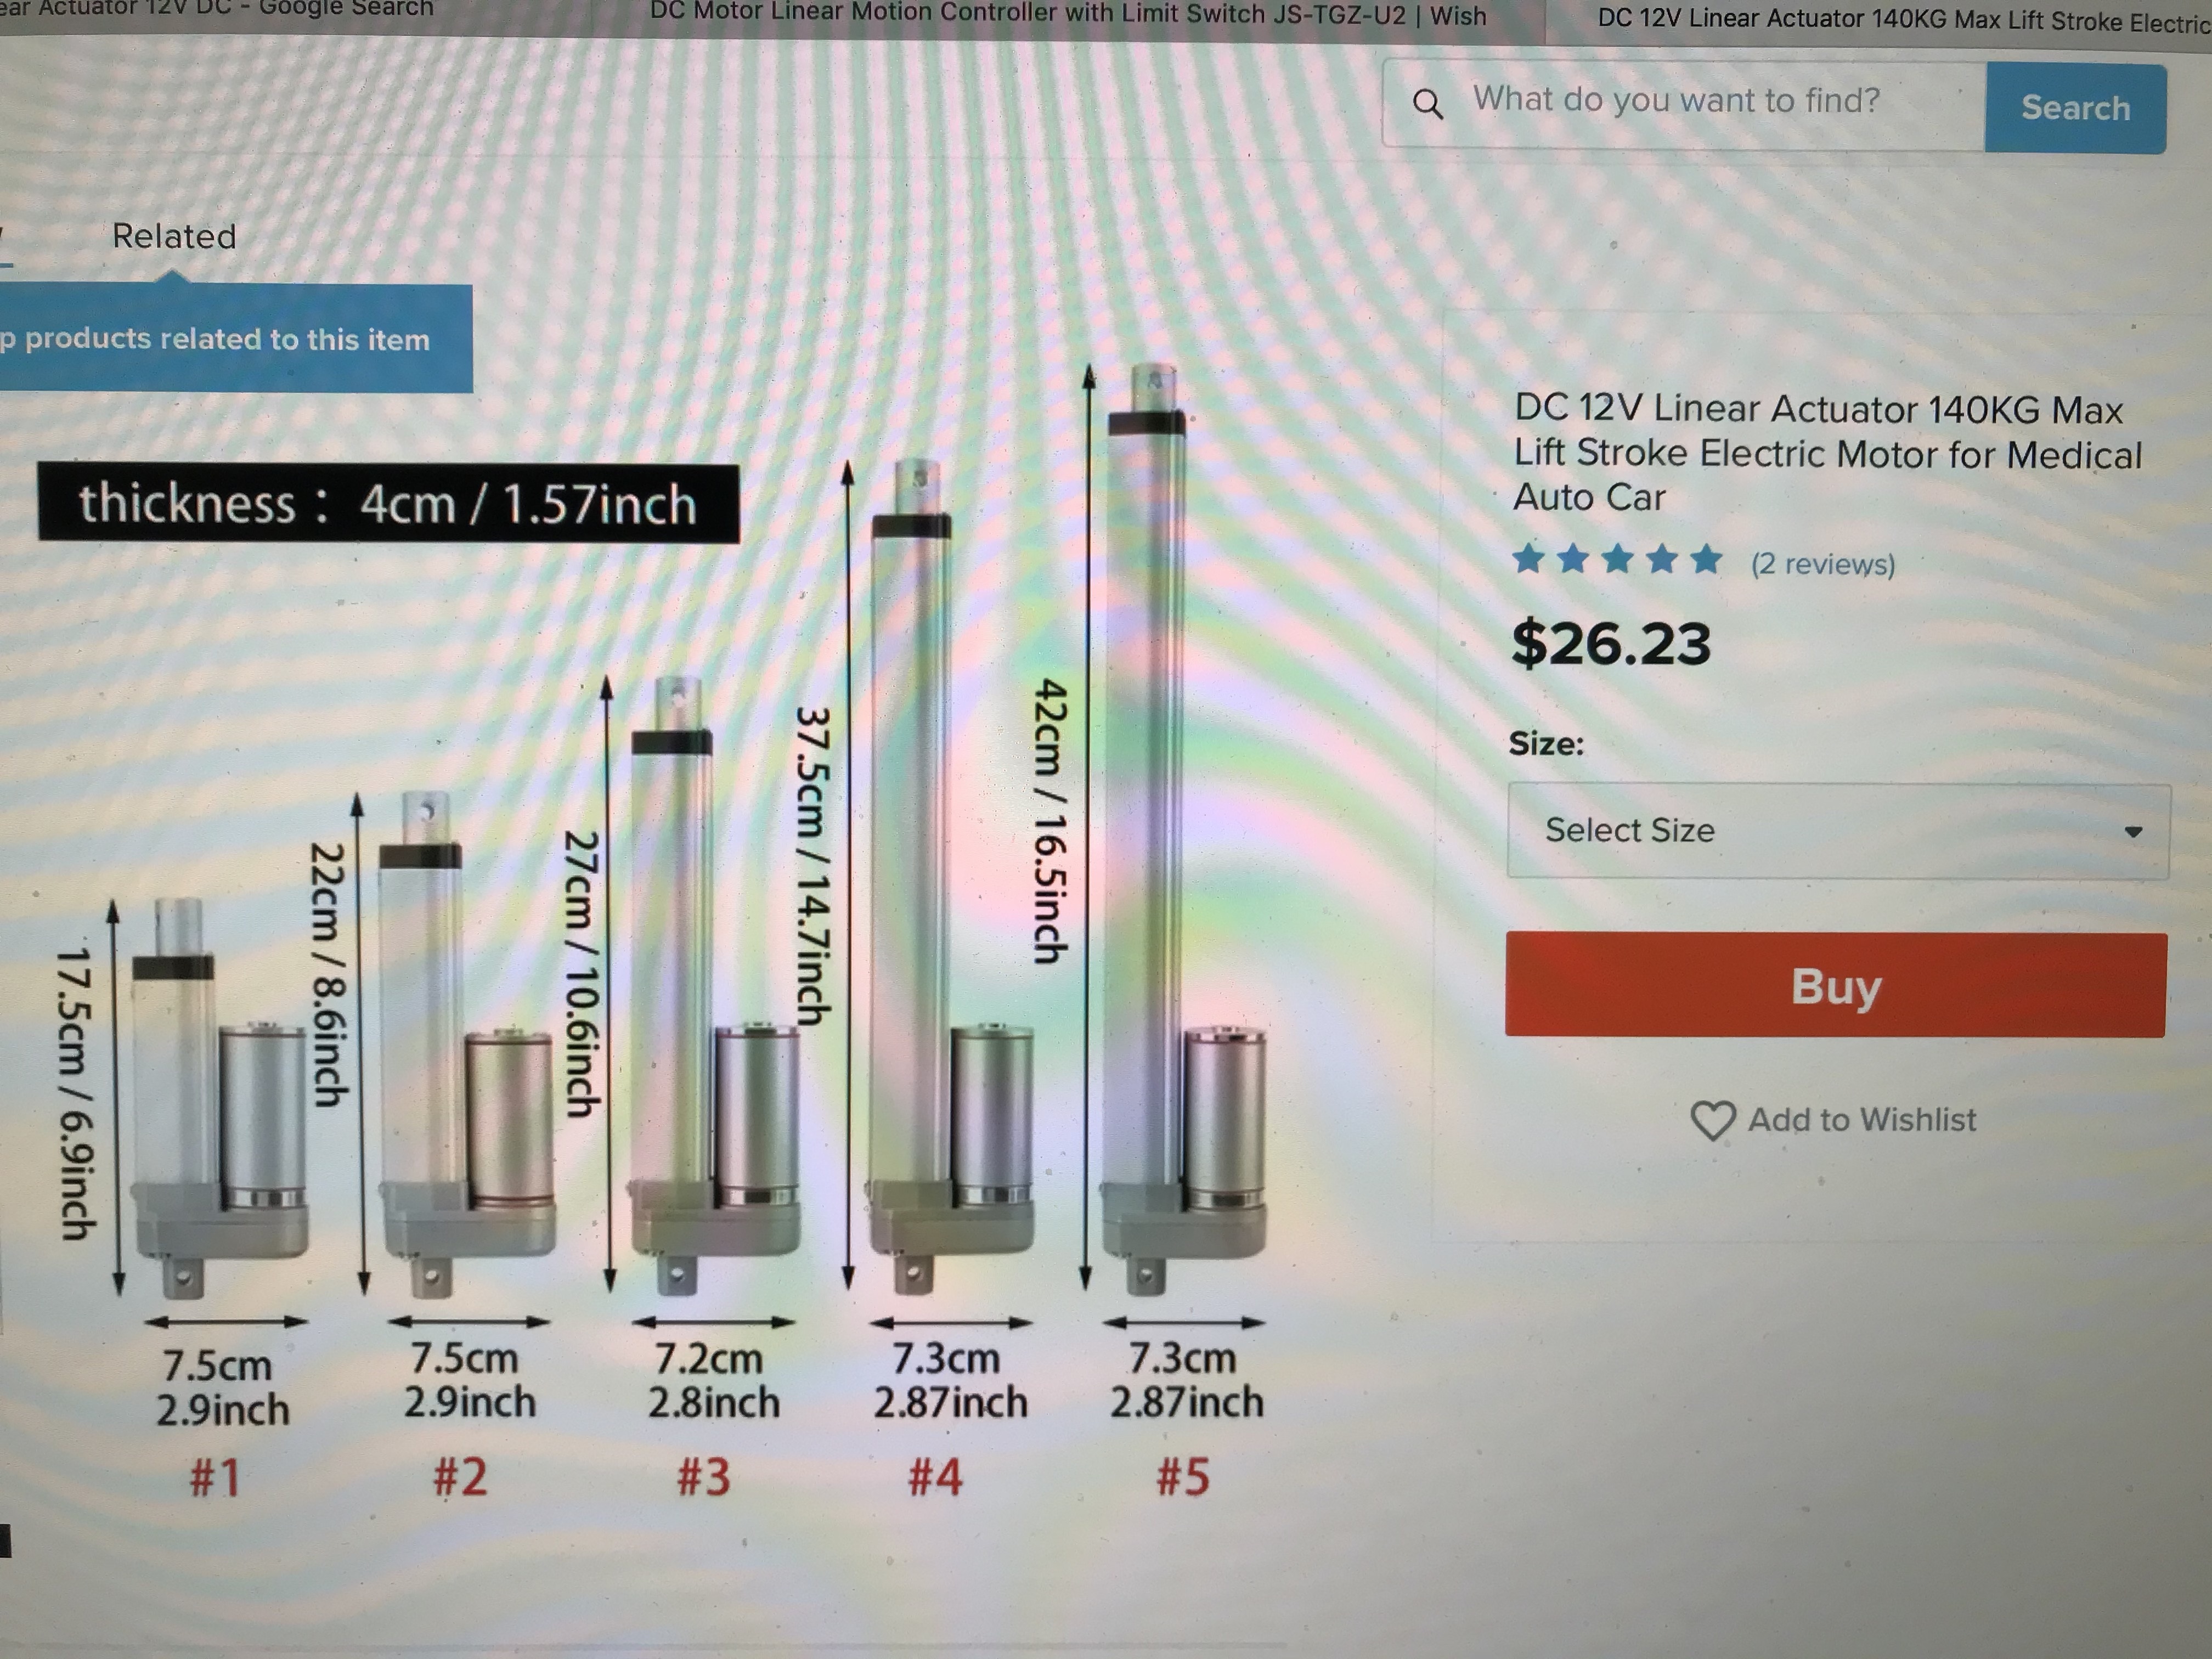
Something like this may work. Could mount a switch in the cab. Used similar units back in the working days to actuate manway hatches on pressure vessel.
 0
0 -
I'm looking at those too!0
-
Any concerns about water getting into the tail light?0
-
Yes, this will be addressed too. It will depend on the density of the gasket material, how well the bezel fits to the body and how tight it lays down against the body. Also, the electrical's will be well insulated. Heat is not a problem since I am using LED's Drainage ports will be included.0
Categories
- 37K All Categories
- 115 Hudson 1916 - 1929
- 21 Upcoming Events
- 94 Essex Super 6
- 28.6K HUDSON
- 576 "How To" - Skills, mechanical and other wise
- 995 Street Rods
- 151 American Motors
- 180 The Flathead Forum
- 49 Manuals, etc,.
- 78 Hudson 8
- 44 FORUM - Instructions and Tips on using the forum
- 2.8K CLASSIFIEDS
- 609 Vehicles
- 2.2K Parts & Pieces
- 77 Literature & Memorabilia
- Hudson 1916 - 1929 Yahoo Groups Archived Photos

